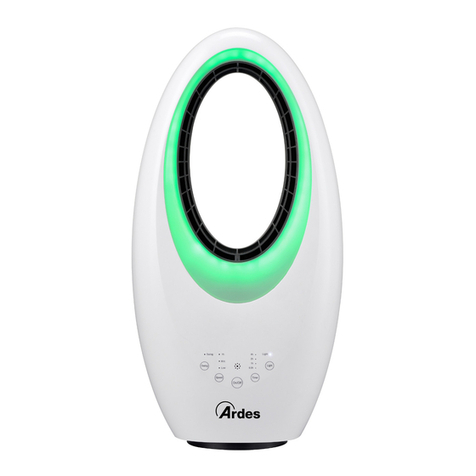
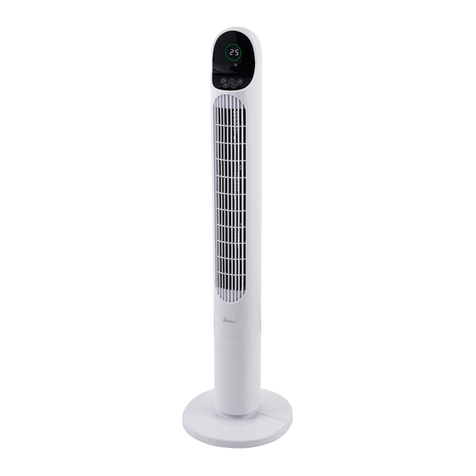
ARDES AR5T128R User manual

ISTRUZIONI PER L’USO
INSTRUCTIONS FOR USE
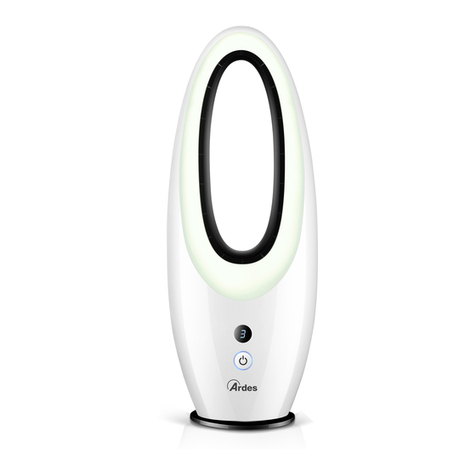
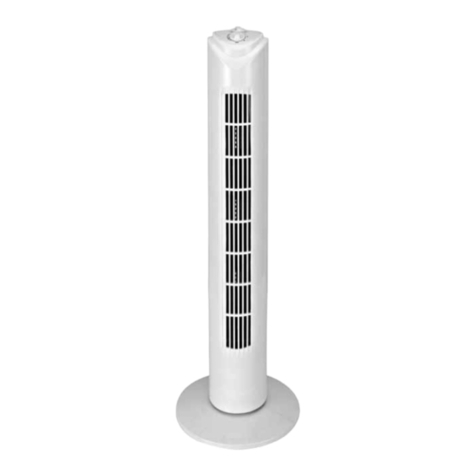
VENTILATORE A TORRE
TOWER FAN
Il presente apparecchio può essere
utilizzato dai bambini a partire da
8 anni in su e da persone dalle
ridotte capacità siche, sensoriali o
mentali, oppure con mancanza di
esperienza e di conoscenza se a
loro è stata assicurata un’adeguata
sorveglianza, oppure se hanno
ricevuto istruzioni circa l’uso in
sicurezza dell’apparecchio e hanno
compreso i pericoli correlati.
I bambini non devono giocare con
l’apparecchio.Leoperazioni dipulizia
e di manutenzione non devono
essere effettuate dai bambini senza
sorveglianza.
Utilizzare solo con l’unità di
alimentazione fornita con
l’apparecchio.
AR5T128R

2

3
ATTENZIONE: leggere attentamente il presente libretto in quanto
contiene importanti istruzioni per la sicurezza di installazione, uso
e manutenzione.
Istruzioni importanti da conservare per riferimenti futuri.
Questo apparecchio deve essere utilizzato esclusivamente per lo scopo
per il quale è stato fabbricato, ossia come ventilatore. Il produttore non è
responsabile per eventuali danni causati da un uso improprio o scorretto.
Non inserire mai all’interno della griglia oggetti (come penne) e dita
Prima di pulire o effettuare interventi di manutenzione sull’apparecchio,
scollegarlo dalla rete elettrica togliendo la spina dalla presa di corrente
o spegnendo l’interruttore del sistema.
Questo ventilatore deve sempre essere posizionato su una supercie
piana, asciutta e stabile
Non spostare o sollevare il ventilatore mentre è in funzione o quando
è collegato a una presa elettrica. È vietato l’uso del ventilatore vicino a
una nestra: in caso di pioggia il ventilatore potrebbe bagnarsi. Questo
potrebbe essere pericoloso. Questo ventilatore deve essere utilizzato
solo in ambienti interni.
Se l’apparecchio è difettoso e / o funziona in modo non corretto,
spegnerlo senza manometterlo. Se quanto sopra viene ignorato, la
sicurezza dell’apparecchio potrebbe essere compromessa.
Se danneggiato, il cavo deve essere sostituito dal produttore, da un suo
addetto all’assistenza o da personale parimenti qualicato, al ne di
evitare pericoli.
Non posizionare mai il ventilatore o il cavo di alimentazione sopra o in
prossimità di fonti di calore. Non utilizzare il ventilatore vicino a materiali
combustibili né posizionarlo in prossimità di amme libere o altre
apparecchiature di riscaldamento
Spegnere l’apparecchio e staccare la spina dalla presa di corrente
oppure spegnere l’interruttore del sistema quando non viene utilizzato.
Non avvolgere il cavo di alimentazione attorno al corpo del ventilatore.
Non far passare il cavo di alimentazione sotto la moquette.
Non coprire il cavo di alimentazione con tappeti, guide o qualsiasi altro
rivestimento simile.
Non far passare il cavo di alimentazione sotto mobili o elettrodomestici
L’uso di qualsiasi apparecchio elettrico richiede la conoscenza di alcune
regole di base, come ad esempio: non toccare l’apparecchio con mani
o piedi bagnati o umidi, non lasciare l’apparecchio esposto ad agenti
atmosferici.
Avvertenze
4
Non utilizzare l’apparecchio in presenza di liquidi o gas potenzialmente
inammabili o esplosivi.
Questo prodotto è destinato al SOLO uso domestico e non all’uso
commerciale / industriale o all’aperto.
Informazioni tecniche
1
- Telecomando e pannello di controllo
2 - Display a LED
3 - Corpo principale
4 - Uscita aria
5 - Base
6 - Viti di base (Ø 4mm x4 pz)
7 - Adattatore
8 - Jack c.c. A
9 - Jack c.c. B
10 - Protezioni posteriori staccabili

5
Istruzioni d’uso
Assemblare la base anteriore e quella posteriore. (Fig.A)
2. Inserire il corpo principale nella base utilizzando le viti in dotazione.
(Fig.B)
3. Inserire il cavo del jack c.c. A nella base. (Fig.C)
4. Collegare il cavo del jack c.c. B al cavo del jack c.c. A. (Fig.D)
Il telecomando si trova nella parte superiore del corpo del ventilatore.
Premere il telecomando dal lato del logo (vedi g. E) per sbloccarlo dal
relativo supporto.
Prima di iniziare ad usare il telecomando, rimuovere la protezione di
plastica dalla batteria (vedi Fig. F). Quando la batteria del telecomando
è esaurita, si prega di sostituirla come mostrato in g. F (tipo di batteria
CR2025).
Fig.A Fig.B Fig.C
Fig.E Fig.F
Inserire la spina in una presa di corrente e selezionare la funzione:
Fig.D

Tasto ON/OFF ventilatore
Tasto di selezione della velocità: 1 / 2 / 3 / 4 / 5
Tasto ON/OFF oscillazione
Tasto di mandata aria selezionabile e modalità naturale
Tasto di impostazione timer: 2 / 4 / 8 ore.
Premere il tasto ON / OFF per accendere o spegnere il
ventilatore.
Premere il tasto Velocità per selezionare la velocità dell’aria
desiderata (5 livelli disponibili). La velocità selezionata
viene visualizzata sul display.
Premere il tasto Oscillazione per accendere o spegnere
l’oscillazione.
Premere il tasto NATURAL MODE per selezionare diversi
blocchi di ventole (la velocità del ventilatore sarà l’ultima
selezionata) o la modalità naturale.
-premere una volta per selezionare il ventilatore 1 e 2
-premere nuovamente per selezionare il ventilatore 2 e 3
-premere nuovamente per selezionare il ventilatore 3 e 4
-premere nuovamente per selezionare la modalità Vento
naturale (vengono selezionati tutti i ventilatori e la velocità
dell’aria cambia ogni 10 secondi. Sequenza di velocità:
1,2,3,4,5,4,3,2,1 e così via).
-premere nuovamente per tornare al ventilatore 1 e 2
Il gruppo di ventilatori selezionato viene mostrato
dall’indicatore di velocità, mentre in modalità naturale
l’indicatore di velocità mostra la velocità dell’aria corrente.
Premere il tasto Velocità per tornare alla modalità di
funzionamento normale.
Premere il tasto TIMER per impostare il timer a 2/4/8 ore/
OFF. Quando il timer è attivo, viene visualizzata l’icona
del timer sul display. Allo scadere del timer, il ventilatore
si spegne automaticamente (ritorna in modalità stand-by).
Premere a lungo il tasto TIMER sul pannello di controllo per
abbassare la retroilluminazione del display tra il 100% e il
50% (NIGHT MODE).

7
Manutenzione
Prima di effettuare la pulizia ordinaria, spegnere il ventilatore e scollegare
l’alimentazione di rete. Usare un panno morbido e umido, non utilizzare
sostanze abrasive.
Non immergere alcuna parte del ventilatore in acqua.
Attenzione: Per evitare lesioni, pericoli e danni, ricordarsi di staccare la
spina prima di pulire e di rimontare le protezioni posteriori dopo la pulizia
e prima dell’uso. Se il ventilatore è molto sporco, è possibile staccare le
protezioni posteriori e pulire all’interno del ventilatore.
Svitare le protezioni posteriori con un cacciavite delle dimensioni
opportune; girare le protezioni posteriori in senso antiorario ed estrarle.
Utilizzare un aspirapolvere o usare un panno umido per rimuovere la
polvere del ventilatore, ma quest’ultimo non è staccabile dall’albero
motore, non utilizzare acqua per pulirlo; dopo la pulizia, chiudere le
protezioni posteriori girandole in senso orario ed avvitarle prima dell’uso.

8
Warnings
ATTENTION : read this booklet carefully it contains important
instructions for a safe installation, use and maintenance.
Important instructions to be kept for future reference.
This appliance must only be used for the purpose for which it has been
manufactured, as a fan. The manufacturer is not responsible for any
damage caused by improper or incorrect use.
Never insert inside of the grid objects (like pen) and nger
Before cleaning or carrying out maintenance on the appliance, disconnect
it from the electrical mains by removing the plug from the electrical outlet
or by switching off the system switch.
This fan must always be placed on a at, dry and stable surface
Do not move or lift the fan while it is operating or while it is connected to
an electrical socket
This appliance may be used by children
8 years of age and older and people
with reduced physical, sensory or mental
capacities or with a lack of experience
and knowledge if they are adequately
supervised or have been instructed on the
safe use of the appliance and are aware
of the related dangers.
Children must not play with the appliance.
Cleaning and maintenance must not be
performed by children unless they are
under supervision.
Cleaning and maintenance operations
must not be performed by children without
supervision.
The appliance is only to be used with
the power supply unit provided with the
appliance.

9
Technical informations
1 - Remote & control panel
2 - LED Display
3 - Main body
4 - Air outlet
5 - Base
6 - Screws for base (Ø 4mm x4 pcs)
7 - Adaptor
8 - DC Jack A
9 - DC Jack B
10 - Detachable rear guards
It’s forbidden use the fan close to the window: in case of rain the fan
could be wet. This could be dangerous. This fan must be used in indoor
place only.
If the appliance is faulty and/or operating incorrectly, switch it off without
tampering with it. If the above is disregarded, the safety of the appliance
may be compromised. If the supply cord is damaged, it must be replaced
by the manufacturer, its service agent or similarly qualied persons in
order to avoid a hazard.
Never place the fan or power cord on or close to sources of heat
Do not operate the fan close of combustible materials or place near an
open ame or other heating appliances
Switch off the appliance and remove the plug from the electrical outlet or
switch off the system switch when not in use.
Do not wrap the power cord around the body of the fan.
Do not run power cord underneath carpeting.
Do not cover the power cord with throw rugs, runners, or any other similar
coverings
Do not route power cord under furniture or appliances
The use of any electrical appliance calls for the awareness of some basic
rules, such as: do not touch the appliance with wet or damp hands or
feet, do not leave the appliance exposed to atmospheric agents
Max. ambient temperature 40°C.
Do not use the appliance in the presence of potentially ammable or
explosive liquids or gases.
This product is intended for household use ONLY and not for commercial
/ industrial or outdoor use.

10
Instructions for use
Assemble the front base and the rear base.(Fig.A)
2.Insert the main body into the base using the screws supplied .(Fig.B)
3.Inset DC Jack A cord to the base .(Fig.C)
4.Connect the DC Jack B cord to the DC Jack A cord.(Fig.D)
Remote control is in the top of the fan body. Press the logo side of the
remote control (see Fig. E) to release it from remote control holder.
Before starting to use the remote control, remove the plastic protection
from the battery (see Fig. F). When remote control battery is expired,
please replace it following Fig. F (battery type CR2025).
Fig.A Fig.B Fig.C
Fig.E Fig.F
Insert the plug into a power outlet and select the function:
Fan ON/OFF button
Speed selection button: 1 / 2 / 3 / 4 / 5
Oscillation ON/OFF button
Selectable air delivery & Natural Mode button
Timer Setting button: 2 / 4 / 8 hours.
Fig.D

Press the ON/OFF button to switch ON or OFF the fan.
Press the Speed button to select the desired air speed (5
levels available). The selected speed will be shown on the
display.
Press the Oscillation push button to turn ON or OFF the
Oscillation
Press the NATURAL MODE button to select different blocks
of fans (the fan speed will be the last one selected) or the
Natural Mode.
-press once to select fan 1 and 2
-press again to select fan 2 and 3
-press again to select fan 3 and 4
-press again to select the Natural Wind mode (all fans will
be selected and the air speed will change every 10 seconds.
Speed sequence: 1,2,3,4,5,4,3,2,1, and so on.)
-press again to return to fan 1 and 2
The select group of fans will be indicated using the speed
indicator, while in the Natural mode the speed indicator will
show the current air speed. Press the Speed button to come
back to the normal operating mode.
Press the TIMER button to set 2/4/8/OFF hours timer off
setting. When the timer is ON, the timer icon will be shown
on the display. When the timer expires, the fan will switch off
automatically (returns standby mode). Long press on
TIMER
button on the control panel to dim the display backlight
between 100% and 50% (NIGHT MODE).
11

12
Maintenance
Before carrying out routine cleaning, switch off the fan and disconnect
mains power. Use a soft, damp cloth only and do not use abrasive
substances.
Do not submerge any part of the fan in the water.
Attention: To avoid injured, dangerous and damage, please remember to
disconnect the plug before cleaning and remount the rear guards after
cleaning and before use. If the fan is really dirty, you can detach rear
guards and clean inside of the fan.
Screws of the rear guards by a sized screw driver;
Turn the rear guards counterclockwise and take it out;
Use vacuum cleaner to clean the dust or use a damp cloth to remove the
dust on fan, but fan is not detachable from motor shaft and do not uses
water to clean it; After cleaning, close the rear guards by turn it clockwise
and screwed before use.

Condizioni
La garanzia ha validità 24 mesi dalla data d’acquisto.
La presente garanzia è valida solo se viene correttamente compilata ed accompagnata
dallo scontrino scale che ne prova la data di acquisto.
L’apparecchio deve essere consegnato esclusivamente presso un nostro Centro
Assistenza autorizzato.
Per garanzia si intende la sostituzione o la riparazione dei componenti dell’apparecchio
che risultano difettosi all’origine per vizi di fabbricazione.
Viene comunque garantita l’assistenza (a pagamento) anche a prodotti fuori garanzia.
Il consumatore è titolare dei diritti applicabili dalla legislazione nazionale disciplinante la
vendita dei beni di consumo; questa garanzia lascia inpregiudicati tali diritti.
La Casa costruttrice declina ogni responsabilità per eventuali danni a persone, animali
o cose, conseguenti ad uso improprio dell’apparecchio e alla mancata osservanza delle
prescrizioni indicate nell’apposito libretto istruzioni.
Limitazioni
Ogni diritto di garanzia e ogni nostra responsabilità decadono se l’apparecchio è stato:
- Manomesso da parte di personale non autorizzato.
-Impiegato, conservato o trasportato in modo improprio.
Sono comunque escluse dalla garanzia le perdite di prestazioni estetiche o tali da non
compromettere la sostanza delle funzioni.
Se nonostante la cura nella selezione dei materiali e l’impegno nella realizzazione del
prodotto che Lei ha appena acquistato si dovessero riscontrare dei difetti, o qualora
avesse bisogno di informazioni, Vi consigliamo di telefonare al rivenditore di zona.
GARANZIA
INFORMAZIONE AGLI UTENTI
ai sensi dell’art. 26 del Decreto Legislativo 2 Aprile 2014, n. 49 “Attuazione
della Direttiva RAEE 2012/19/EU , relativa alla riduzione dell’uso di sostanze
pericolose nelle apparecchiature elettriche ed elettroniche, nonché allo
smaltimento dei riuti”.
Il simbolo del cassonetto barrato riportato sull’apparecchiatura o sulla sua
confezione indica che il prodotto alla ne della propria vita utile deve essere
raccolto separatamente dagli altri riuti.
L’utente dovrà, pertanto, conferire l’apparecchiatura giunta a ne vita agli idonei
centri di raccolta differenziata dei riuti elettronici ed elettrotecnici, oppure
riconsegnarla al rivenditore al momento dell’acquisto di una nuova apparecchiatura
di tipo equivalente, in ragione di uno a uno.
L’adeguata raccolta differenziata per l’avvio successivo dell’apparecchiatura
dismessa al riciclaggio, al trattamento e allo smaltimento ambientalmente
compatibile contribuisce ad evitare possibili effetti negativi sull’ambiente e
sulla salute e favorisce il reimpiego e/o riciclo dei materiali di cui è composta
l’apparecchiatura.
Lo smaltimento abusivo del prodotto da parte dell’utente comporta l’applicazione
delle sanzioni amministrative previste dalla normativa vigente. 13

14
USER INFORMATION
pursuant to art. 26 of Italian Legislative Decree no. 49 of 2 April 2014
“Implementation of Directive 2012/19/EU on Waste Electrical and Electronic
Equipment (WEEE)”, pertaining to reduced use of hazardous substances in
electrical and electronic equipment, as well as to waste disposal”.
The symbol of the crossed-out wheelie bin on the equipment or on its packaging
indicates that the product must be disposed of separately from other waste at the
end of its service life.
The user must therefore take the dismissed equipment to suitable separate
collection centres for electrical and electronic waste, or return it to the dealer in
case they purchase a new device of equivalent type, at a one-to-one-ratio.
Suitable segregated collection of the equipment for subsequent recycling, treatment
or environmentally-friendly disposal helps prevent damage to the environment and
to human health, and encourages the re-use and/or recycling of the materials that
make up the equipment.
Abusive disposal of the product by the user shall result in the application of
administrative nes in accordance with the laws in force.
GUARANTEE
Terms and Conditions
The guarantee is valid for 24 months.
This guarantee applies only if it has been duly lled in and is submitted with the
receipt showing the date of purchase.
The guarantee covers the replacement or repair of parts making up the appliance
which were faulty at source due to manufacturing faults.
After the guarantee has expired, the appliance will be repaired against payment.
The manufacturer declines any responsibility for damage to persons, animals
or property due to misuse of the appliance and failure to observe the directions
contained in the instructions.
Limits
All rights under this guarantee and any responsibility on our part will be voided if
the appliance has been:
- mishandled by unauthorized persons
- improperly used, stored or transported.
The guarantee does not cover damage to the outward appearance or any other that
does not prevent regular operation.
If any faults should be found despite the care taken in selecting the materials and
in creating the product, or if any information or advice are required, please contact
your local dealer.


Prodotto importato da:
Poly Pool S.p.A. Via Sottocorna, 21/B
24020 Parre (Bergamo) - Italy
Tel. 035703244 r.a. - Fax 035702716
http://www.ardes.it - e-mail:[email protected]
MADE IN CHINA
AT128R.271016CH_rev.01
Table of contents
Languages:
Other ARDES Fan manuals

ARDES
ARDES AR5EA40PW User manual

ARDES
ARDES AR5C45B User manual

ARDES
ARDES AR5M41 User manual

ARDES
ARDES AR5A35 User manual

ARDES
ARDES AR5W40 User manual

ARDES
ARDES AR5W40R User manual

ARDES
ARDES AR5EA41PB User manual

ARDES
ARDES AR5B24 User manual

ARDES
ARDES AR5F04WC User manual

ARDES
ARDES AR5BL1M User manual
Popular Fan manuals by other brands

Home Decorators Collection
Home Decorators Collection NORTHAMPTON AM592-EB Use and care guide

Quorum
Quorum KRESS installation instructions

Warbirds
Warbirds WB448MA installation instructions

Trotec
Trotec TVM 11 operating manual

KDK
KDK R48SP Operating and installation instructions

point
point POFS6016 user manual