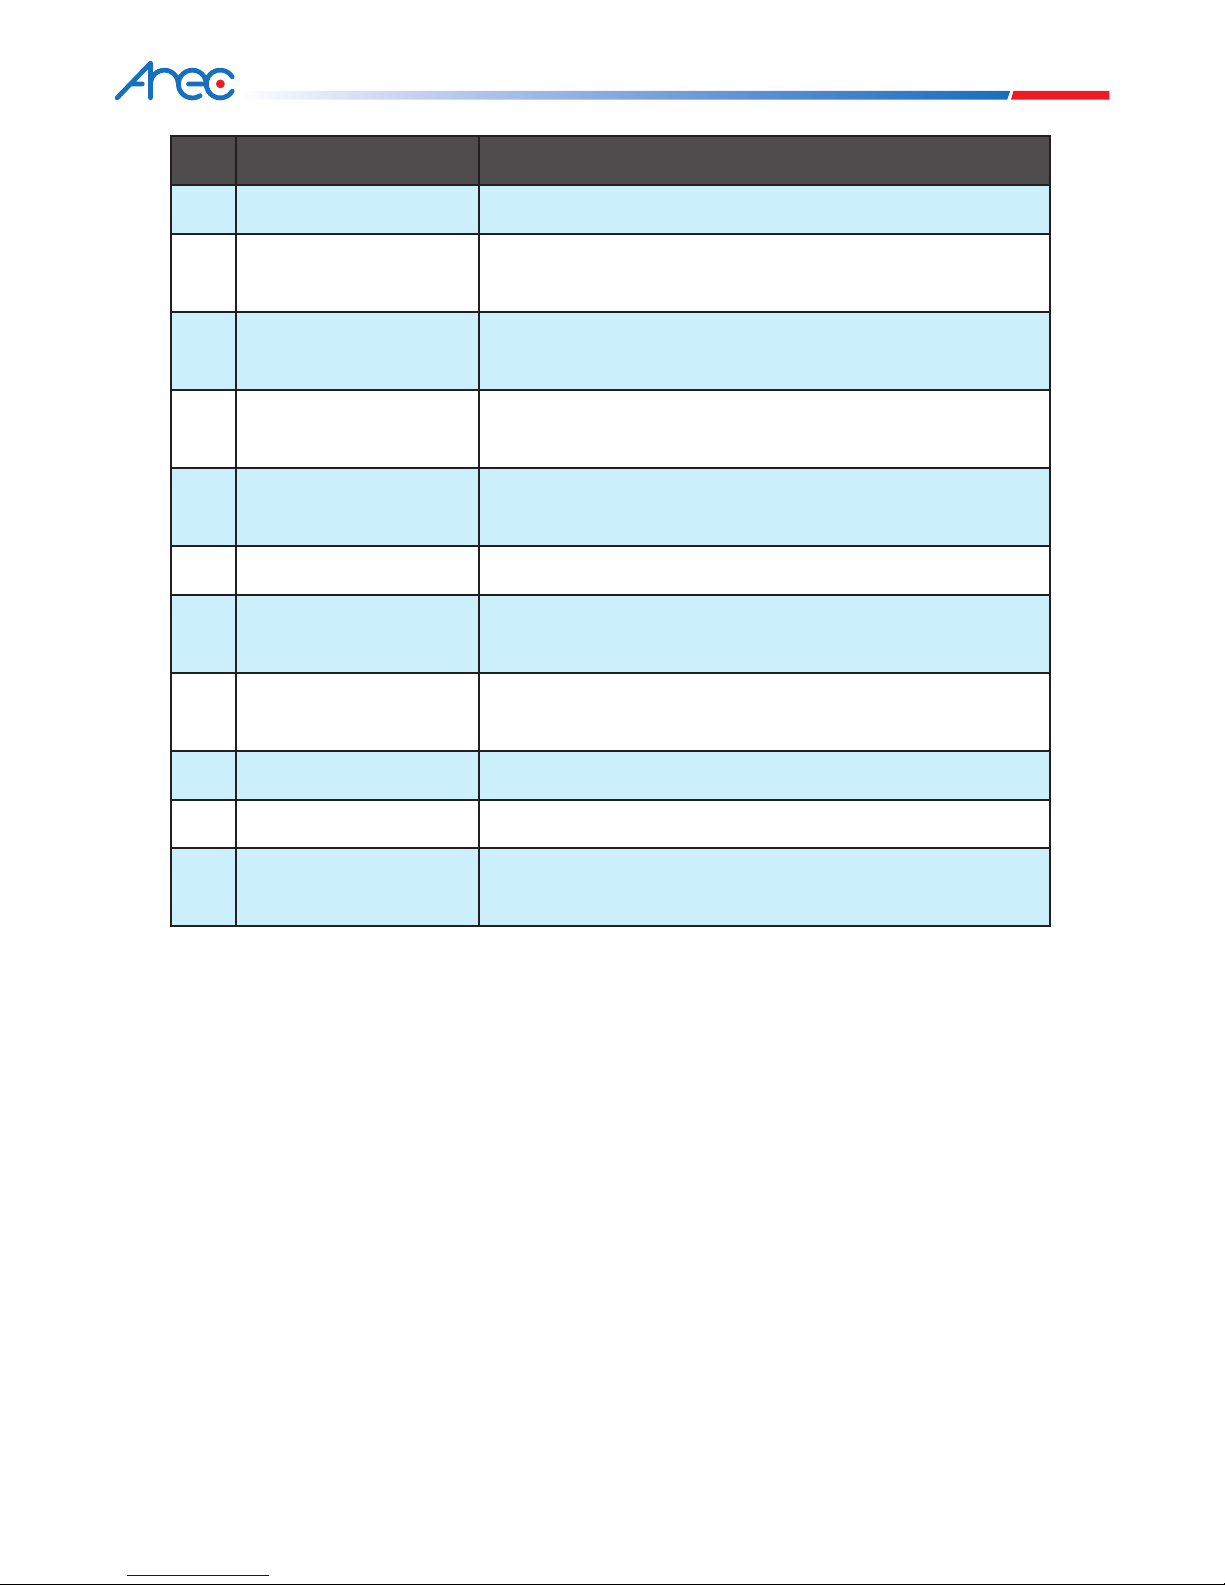
blue light orange light red/green dual-color light
Indicators Product Status Display Method of Indicator
blue light Wireless microphone (AM-500) match
completed
Blue light glows continuously
orange light Recording Orange light glows continuously
red/green dual-color
light
Standby mode Red light glows continuously
Booting up Red/green lights flicker alternately
Boot up completed Green light glows continuously
Fan anomaly Red light flickers rapidly
Firmware updating Red /green /orange lights flicker alternately
Receiving command from remote control Green light flickers once
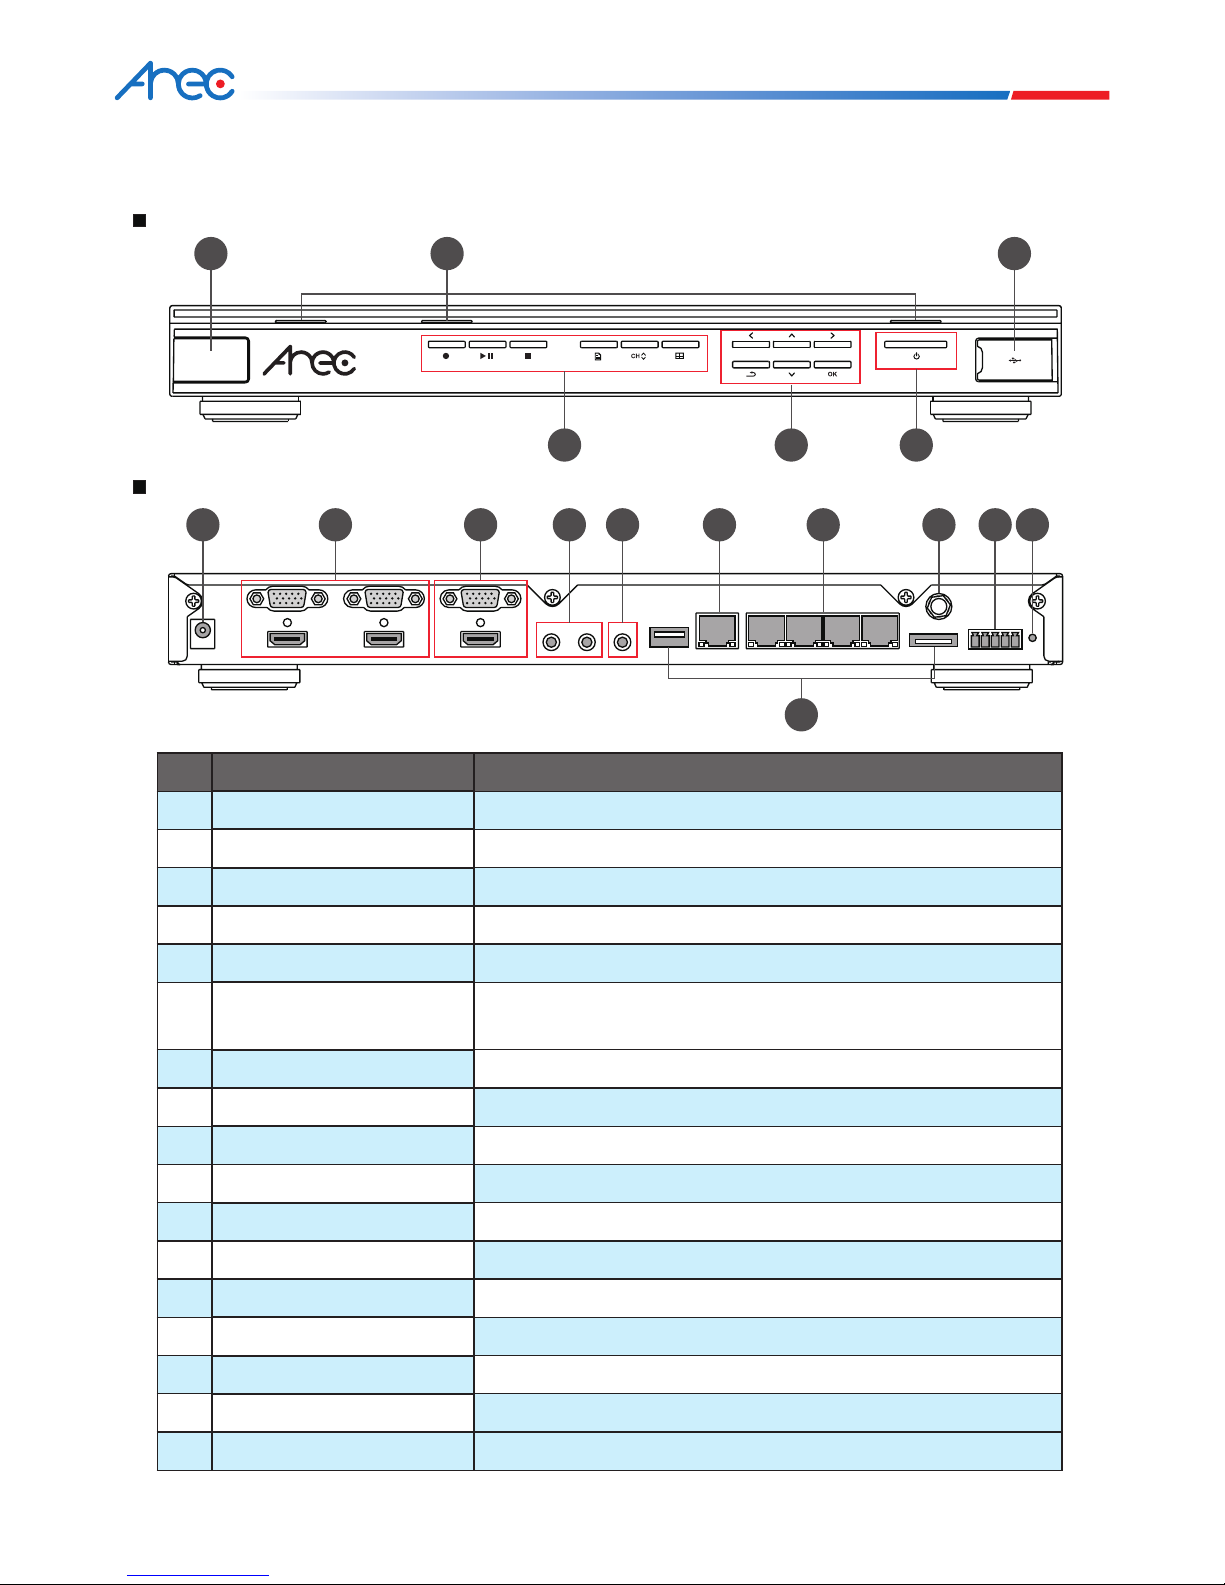
2.2 Remote Control Receiver
2.3 Control Panel
2.3.1 Indicators
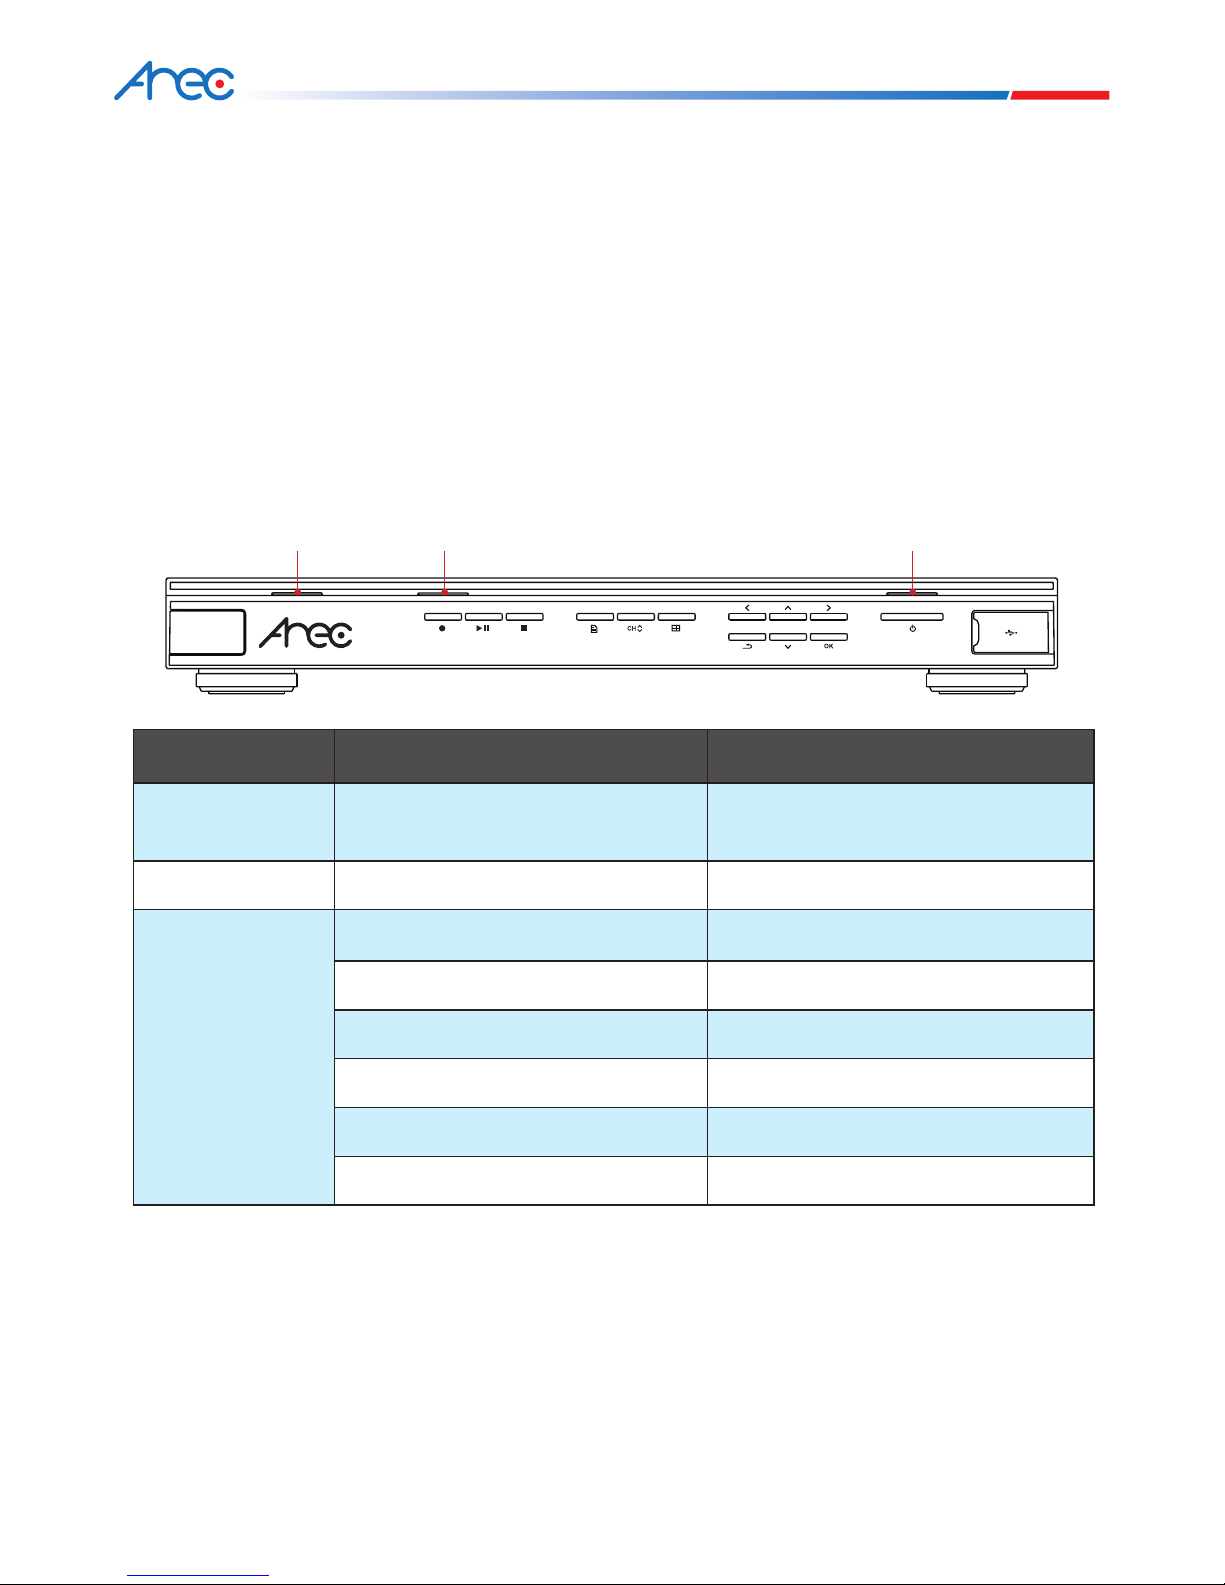
Please point the remote control to the infrared receiver at the front panel of the product to ensure proper signal
reception. The applicable range is between +/- 30 degrees, and the maximum vertical distance is within 10 meters.
The control panel is used to operate this product and enter menu.
The control panel’s power indicator displays the product’s status. There are three types of indicators on this product:
blue light, orange light and red/green dual-color light. The illumination and flickering of these three lights indicate
different statuses of this product, described below.