LS-410 User Manual
5www.arec.com
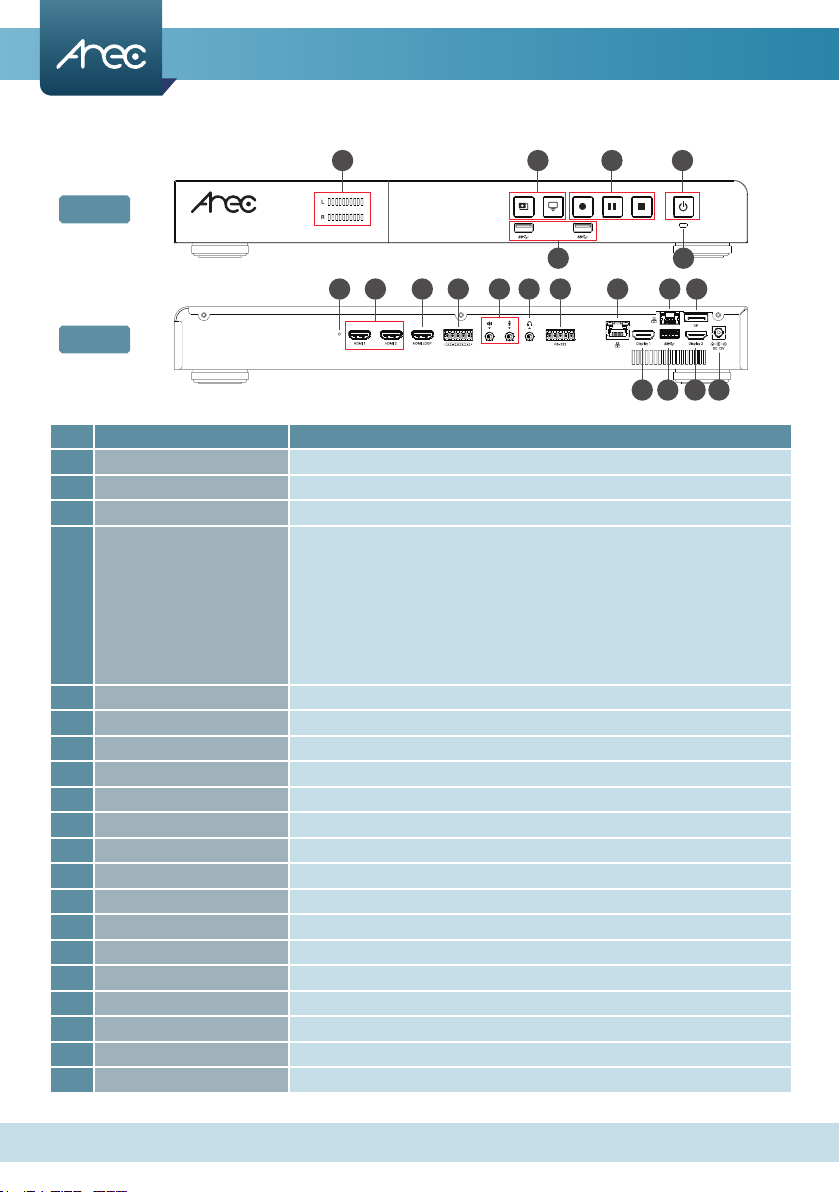
Product Appearance
No. Name Brief introduction
1Audio meter Audio volume bar
2Layout function keys Control the Layout functions
3Record function keys Control the Record, Pause, Stop functions
4Front USB ports
1. For external USB storage device*
2. Firmware update via USB disk
3. Available for USB mouse, keyboard
4. Available for USB video/audio input (Note: Connecting an USB AV device
via an USB hub is not recommended. It may cause compatibility issues.)
NOTE: Can detect and record to USB storage devices using FAT32, NTFS,
Ext3, Ext4, exFAT le systems.
5Power Power on/off the device
6Indicator Red/Green dual color to show device status
7Reset button Long push to reset to default settings
8HDMI inputs HDMI input source for PC, Cameras
9HDMI loop out HDMI loop through from adjacent input port
10 Audio input Balanced audio-in with a 5-pin Phoenix connector
11 Audio input Line audio input / Mic audio input
12 Audio output Line audio output
13 RS-232 Captive screw connector for control over RS-232
14 Ethernet port RJ-45 Ethernet connector for WAN connection
15 Video output HDMI output (preview recording with on-screen GUI)
16 Ethernet port RJ-45 Ethernet connector for LAN connection
17 Back USB port Function same as front ports
18 Video output DisplayPort output (inputs monitoring or multi-source display)
19 Video output HDMI output (inputs monitoring or multi-source display)
20 Power port 12V/ 3.34A
Front
Back
1 2
4 6
3 5
7 16
15 17 19 20
8 10 13 1411 129 18