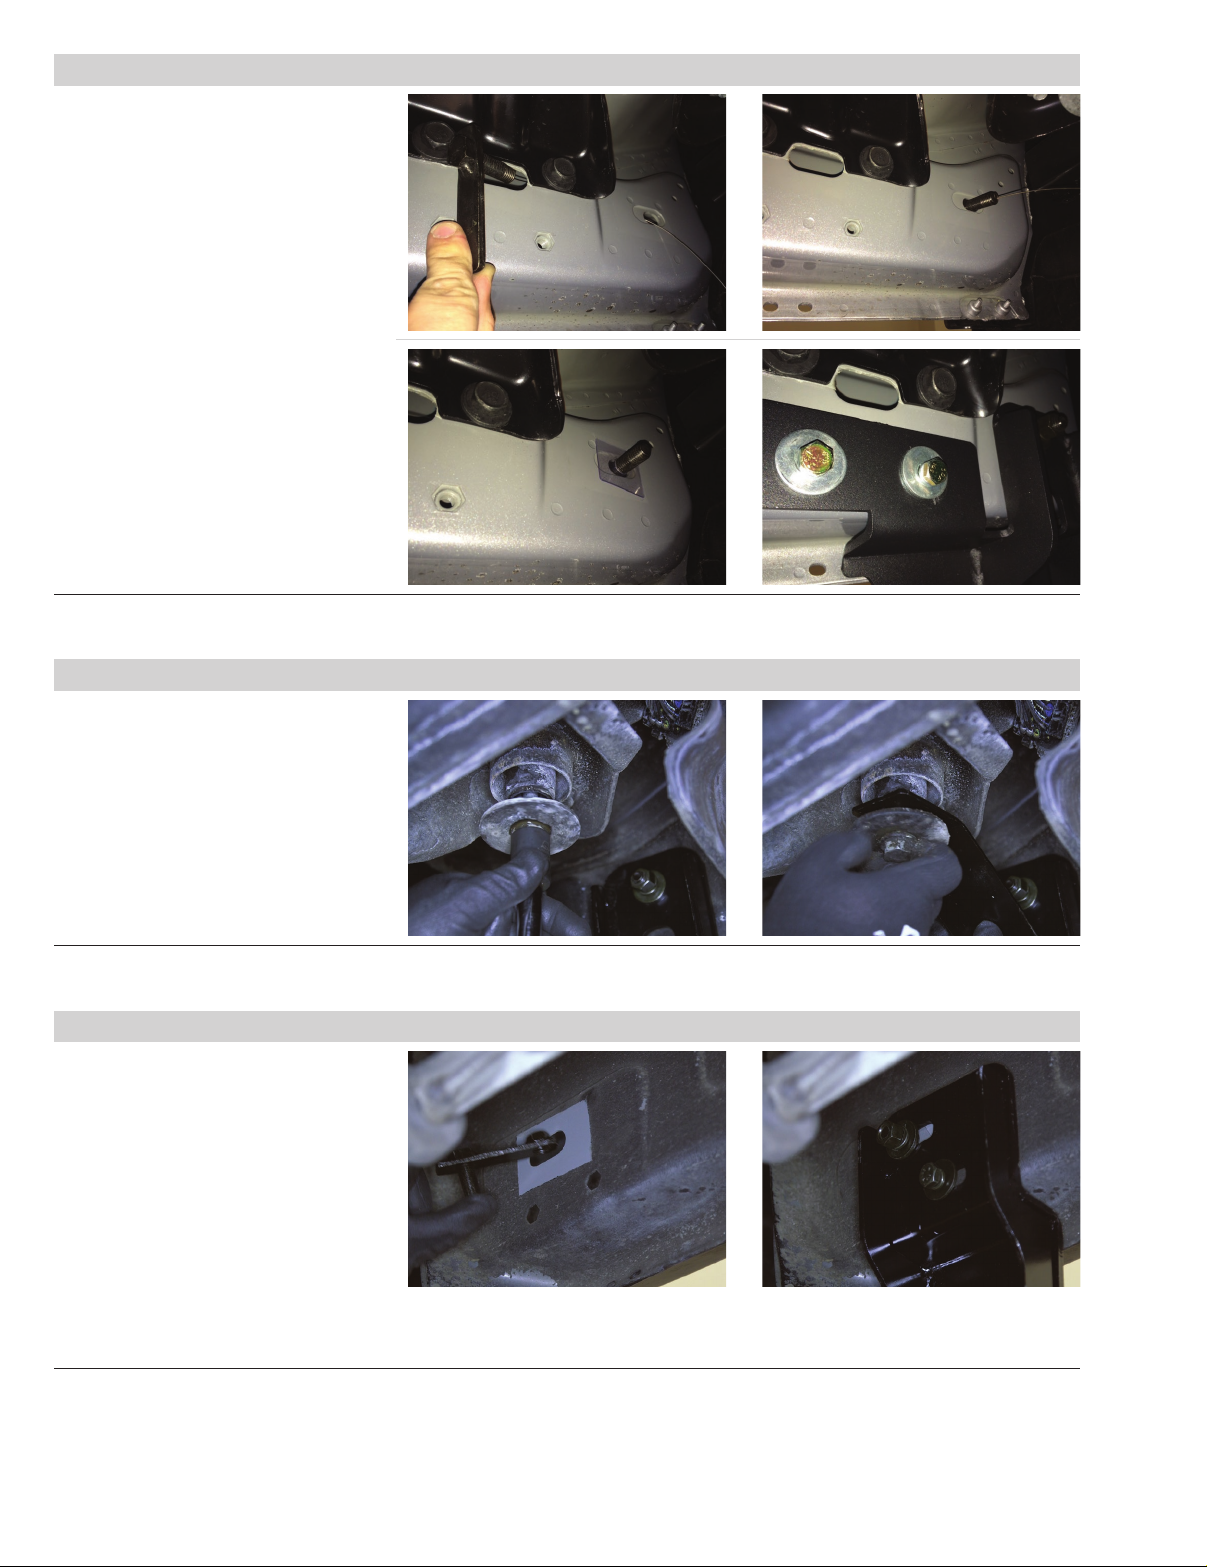
Step 9 - If vehicle has factory-threaded mounting holes (2015 or newer)
Skip to step 10 if the vehicle does not
have factory-threaded mounting holes
(2014 or older).
Using the provided 12mm fish wire, thread
the 12mm x 40mm bolt plate onto the
fish wire. Feed the fish wire through the
large oval opening and out through the
mounting slot, as shown.
Use a plastic retainer to hold the bolt plate
in place. Remove the fish wire from the
thread of the bolt plate.
Place the bracket onto the vehicle.
Secure the bracket to the vehicle using a
12mm flat washer, lock washer and hex nut.
Finish securing the mounting bracket
using an 8mm flat washer, 8mm lock
washer and 8mm hex bolt for both
of the remaining mounting slots.
Step 10
To install the front support bracket, locate
and remove the front body mount bolt.
Lift the support bracket into place, and
reattach the factory body mount bolt.
Leave the base mount free at this time.
Note: Installation of the support
bracket is not required for 2011
and newer vehicles.
Snug the hardware,
but do not fully tighten.
Step 11
To install the rear bracket, insert the
bolt and nut plate by repeating steps 3
and 4. Secure the top of the bracket to
the 12mm stud with a flat washer, lock
washer and nut.
Rotate the bolt plate to position the nut
behind the lower mounting position and
secure with a 10mm hex bolt, flat washer
and lock washer.
Note: 2015 and newer trucks come with
8mm factory threads in the bottom mounting
locations. For factory threads, secure the
bottom of the bracket with one 8mm hex
bolt, lock washer and flat washer.
ARIESAUTOMOTIVE.COM • NEED ASSISTANCE? • 800.798.0813 • AL235033-INS-RA • PAGE 4