ARIS LINEARIS User manual

Operating instructions for
ARIS Damper Actuator
LINEARIS
LI1437EN01
Stellantriebe

Inhaltsverzeichnis
Identication.......................................................................................................................................... 3
Nameplate ............................................................................................................................................. 3
Guidelines and standards........................................................................................................................ 4
Safety information.................................................................................................................................. 4
Warnings................................................................................................................................................ 4
General safety advices............................................................................................................................ 4
Technical specication............................................................................................................................. 5
Function and application areas (Intended use) ......................................................................................... 5
Safe and accurate use............................................................................................................................. 5
Dimensions............................................................................................................................................. 6
Performance data................................................................................................................................... 7
Expected lifespan and intended disposal.................................................................................................. 7
Actuator setup for use............................................................................................................................. 7
Transport and (temporary) storage.......................................................................................................... 7
Packaging.............................................................................................................................................. 8
Safe disposal of packaging...................................................................................................................... 8
Installation and mounting ....................................................................................................................... 8
Initial operation...................................................................................................................................... 9
Electrical connection................................................................................................................................ 9
Wiring diagram .................................................................................................................................... 10
Operation of the actuators .................................................................................................................... 10
Set up rotation direction........................................................................................................................ 10
Set up limit switches.............................................................................................................................. 11
Optional modules and extra features..................................................................................................... 11
Potentiometer....................................................................................................................................... 11
2-wire-current output 4-20 mA.............................................................................................................. 12
Gear disengagement............................................................................................................................. 12
Hand wheel (option)............................................................................................................................. 12
Required customer information ............................................................................................................. 13
Extraordinary situations........................................................................................................................ 13
Troubleshooting and repair ................................................................................................................... 13
Maintenance......................................................................................................................................... 14
Service................................................................................................................................................. 14
Accessories ........................................................................................................................................... 14
Spare parts........................................................................................................................................... 14
ARIS Stellantriebe GmbH
53842 Troisdorf Fax: 02241 25186-99 www.stellantriebe.de
3
LINEARIS
1. Identication
This manual is valid for:
Description: Electric actuator
Type: LINEARIS
Serial no.: 1439-xxxxx-01001 ff
1.1 Nameplate
FNr: 1439-xxxxx-01001 ff.
Typ: LINEARIS 12-17 300
230V, 50(60)Hz 35VA
1,7(2)mm/s 1200N H300
IP65 UT-15/+60°C
2ZW, GA, HR
ARIS Stellantriebe GmbH
Rotter Viehtrift 9
D-53842 Troisdorf
www.stellantriebe.de
SNr: 1419-XXXXX-01001
Typ: Nano S
230V, 50(60)Hz 7VA
60(50)s/90° 15 Nm
UT -15°C/+60°C IP54
1ZW
Made in
Germany
Stellantriebe
Serial number
Actuator type
Voltage/Frequency/Power consumption
Actuating time/Torque
Ambient temperature/Protection class
Additional built-in parts

4LINEARIS
1.2 Guidelines and standards
ARIS actuators are partly completed machinery according to directive 2006/42/EC. This is certied by a declaration of incorporati-
on (see page 14).
Further applicable EC directives: EMC Directive 2004/108/EC
Applied harmonized standards: LVD (electrical safety) DIN EN 61010-1:2011-07
MachDir DIN EN 12100:2011-03
2. Safety information
2.1 Warnings
Observe the signicance of the following symbol and note explanations. They are subdevided in security levels and classied
according to ISO 3864-2.
DANGER indicates a hazard with a high risk degree, which, if not avoided, causes death or
heavy injuries.
WARNING indicates a hazard with a medium risk degree, which, if not avoided, can cause
death or heavy injuries.
CAUTION indicates a hazard with a low risk degree, which, if not avoided, can cause slight
or moderate injuries.
Indicates general advices, useful hints and work recommendations, which don´t have
inuence on the safety and health of the staff.
2.2 General safety advices
The actuator components are conform to the state of the art and apply as generally safe at the time they are shipped.
This manual serves as basis to install and operate ARIS actuators safety conform. All persons working with or on ARIS actuators
must observe this manual and especially its safety advices.
• This manual has to be kept at the operating place at any time.
• Read the manual carefully prior to installation and initial operation.
Certain parts of active electric appliances are obligatory under voltage.
DANGER
ADVICE
!
CAUTION
WARNING
ADVICE
!
WARNING

5
LINEARIS
• Working on electric appliances or equipment is only allowed for electrically qualied persons or other instructed persons
under guidance and custody of an electrically qualied person according to the electro-technical regulations.
• Observe all safety and accident prevention regulations while installing, operating and testing any electrical appliances or
machinery.
• Prior to all installation or regular work on the actuator make sure to switch off all connected machinery/appliances.
3. Technical specication
3.1 Function and application areas (Intended use)
ARIS actuators are exclusively designed for industrial use. ARIS actuators are utilized for operating regulating and shut-off applian-
ces (valves, ball valves, slide valves, dosing pumps, etc.).
ARIS actuators may not be used for:
• Potentially explosive atmospheres
• Temperatures below -15 °C or over 60 °C (optional +80 °C)
• Underground environments
• Near open res
• Under water
• Operating elevators
3.2 Safe and accurate use
ARIS actuators are factory checked prior to delivery. The nal functional testing must be performed within the total system by
qualied technical personnel.
The ARIS company assumes no liability for possible manufacturing errors and resulting damages or subsequent damages after the
actuator has been tested, installed and declared functional correct. The ARIS company especially assumes no liability for possible
manufacturing errors and resulting damages or subsequent damages when the actuator was operated inappropriate, has not
sufciently been tested within the total system, or has not been put out of operation after a failure has determined during testing.
Installation and initial operation only by qualied experts.
• Valves, levers and connecting rods are moving during actuator operation;
• Check for proper function of all emergency equipment on your machinery;
• Check for proper function of the actuator and operated valves after completion of all installation work;
• Never work with or operate a faulty actuator.
CAUTION

6LINEARIS
3.3 Dimensions
80
125
91
13 65 a 35
13
100
c
½Hub b
13
6 40
50
16
e
150
7
10
50
Hub
45 x
30
56
38Hub
d
68
X (Cover height) depending on options: 98−178 mm
Stroke a b c d e
150 201 341 106 85 278
300 351 491 212 170 428
stroke
stroke
stroke

7
LINEARIS
3.4 Performance data
• Protection class: According DIN EN 60529, IP65, IP66 (option)
• Motor: 230V ±10%, 50/60Hz ±5%, 100% ED (standard)
» Special voltage /-frequency see nameplate (option)
» Insulation class B acc. VDE 0530 (standard motor)
• Connection: 3 cable glands M20x1.5 (customer provided)
• Path cut-off: Changeover switch (Opener/Closer)
» Switching capacity max. 10(3)A, 250V AC;
» Closer, plug connections 6.3 x 0.8 mm; Option: Switch with gold contacts, Switching capacity 0.1 (0.05) A, 250 V AC
• Ambient temperature
» -15 °C bis +60 °C (upto -40 °C with heating (option), upto +80 °C (option))
• Installation position: Arbitrary
• Potentiometer (option)
» Recommended wiper current: <0.02 mA (RP 19)/<2 μA (MP21)
» Capacity at +70 °C: 0.5 W (RP19)/1W (MP21)
• Stroke: 150 mm or 300 mm
3.5 Expected lifespan and intended disposal
ARIS actuators have an expected lifespan of several years, depending on their utilization and application. No longer usable actu-
ators must not be dismantled as a whole, but seperately recycled in parts divided by their materials. Non-recyclable components
must be disposed according to national disposal regulations.
4. Actuator setup for use
4.1 Transport and (temporary) storage
Use the factory packaging for transport to the installation point.
Replace a damaged original packaging by a new solid packaging.
Suspended load
Unsachgemäßer Einsatz von Transportmitteln (Flurförderzeuge, Hallenkran, Hilfsmittel, Anschlagmittel etc.) kann zu Quetschungen
und anderen Verletzungen führen. Gefordertes Verhalten:
• Transportmittel sachgemäß einsetzen;
• NICHT unter schwebender Last aufhalten;
• Stellantriebe mit angebauter Armatur: Hebezeug nur an der Armatur befestigen und NICHT am Stellantrieb;
• ARIS Antriebe dürfen nicht als Steig- oder Abstützhilfe benutzt werden;
Damage by wrong storage
• Store in well-ventilated rooms;
• Protection against possible ground humidity (shelf storage).
WARNING
ADVICE
!

8LINEARIS
4.2 Packaging
ARIS actuators are protected by special cardboard packaging at delivery.
4.3 Safe disposal of packaging
Additionally necessary packaging is made by easily separable packaging materials and can be recycled individually:
• Wood
• Cardboard
• Paper
• Plastics
4.4 Installation and mounting
• Inspect the actuator for damages prior to installation;
• check leak tightness of cable glands and blank plugs prior to initial operation;
• tighten the cover screws evenly (max. 1.2 Nm);
• do not operate before limit switches have been adjusted;
• protect the actuator against climatic inuences (e.g. by a protective cover);
• do not expose the actuator to hard shocks (e.g. by dropping);
• do not attach ropes, hooks or the like to the actuator;
• permanent overload and blocking leads to actuator damages;
• spark suppressor capacitor can effect the rotation stability of the actuators and may cause damages;
• use only ARIS original spare parts.
Consider prior to attachment of couplings:
• Do not turn the lead screw by force;
• the connection to an actuator or solid underground is made by pre-assembled mounting brackets.
Driver connection
1. The con rods (A) are connected to the valve by a bolt (B).
2. Lubricate moving parts (OKS 416 or similar).
3. Insert the bolt (B) into the bores of the con rods attach the cotter pin (C).
4. Finally bend the cotter pin ends apart.
Installation position: The actuators can be installed position independendly.
Protection class IP65 (standard), IP66 (option)
For all actuators observe the following advices:
The initial operation of the actuator is only permitted with orderly closed cover and closed cable entries. Use only cable glands
which are appropriate for the respective protection class.
• Cable entries
Ensure that all cable entries are closed properly during storage, installation and initial operation.
ADVICE
!
A
B
C

9
LINEARIS
Use only cables which are suitable for the diameter of the cable entries.
Cover assembly
During the cover assembly make sure that the cover ts correctly.
The cover must not show any damages on the joint surface.
Tighten cover screws evenly (max. 1.2 Nm).
• Housing/Cover
No additional bores are allowed in the housing and the cover.
4.5 Initial operation
4.5.1 Electrical connection
Hazardous voltage: Possible stroke!
• The initial operation must be carried out only by experts!
• De-energize the actuator before opening.
• Observe the appropriate regulations during electrical installation and initial
operation.
Connect the actuator as follows:
• Connect the ground wire of the electric supply to the appropriate protective earth terminal.
• Connect the neutral N to terminal 1.
• Follow the steps under „Set up rotation direction“ (S. 10) during connection of the actuator.
• Always refer to the wiring diagram located inside the actuator.
Check before you close the circuit for the rst time:
• Is the actuator undamaged on the outside?
• Is the mechanical connection correct?
• Has the electrical connection been made regularly?
• Check if current type, voltage and frequency match with the motor data (see nameplate on cover and inside the actuator).
• Insert suitable cable glands for the connection line.
• Observe the wiring diagram inside the cover.
• Use separate (shielded) wires for low voltages (e.g. potentiometer).
• Set up limit switches prior to initial operation (see page 11).
All elements, such as switches, potentiomer etc., are factory-wired.
Never change the internal wiring.
CAUTION
WARNING
ADVICE
!

10 LINEARIS
4.5.2 Wiring diagram
S1L Limit switch, CCW
S2R Limit switch, CW
S3 Auxiliary switch 1 (Option)
S4 Auxiliary switch 2 (Option)
S5 Auxiliary switch 3 (Option)
S6 Auxiliary switch 4 (Option)
R1 Potentiometer 1
R2 Potentiometer 2 (Option)
HZ Heating
M Current output (Option)
K1 Relais for parallel operation
(Option)
All auxiliary switches must be operated within the same voltage range. Do not mix line
voltage with low voltage.
For options follow the wiring diagrams inside the actuator.
5. Operation of the actuators
5.1 Set up rotation direction
Due to the internal wiring, the rotation direction (viewing direction is through the actuator towards the shaft) and the limit switches
assign as follows:
1. With line voltage on terminal 1 and 2, the actuator shaft rotates counter-clockwise and results in a pushing stroke.
Limitation of this stroke with lower switch S1L. When the switch is activated, line voltage is on terminal 4.
2. With line voltage on terminal 1 and 3, the actuator shaft rotates clockwise and results in a pulling stroke. Limitation of this
stroke with lower switch S2L. When the switch is activated, line voltage is on terminal 5.
3. If the actuator runs counterrotating to the commands, change the external connection of terminal 2 and 3 .
Depending on the model, limit switches may be arranged different than drawn in the wiring
diagram (see wiring diagram inside the actuator).
ADVICE
!
ADVICE
!
SP AC + 2ZW + P + Hz 1001.34
Datum:
31.03.2007
S4S3
678910 11
R1
18 19 20
HZ
N L
27 28
1
N
M
S2R
S1L
2345
CB
A B
N
PE L
Anschlussvariante / Alternative connection
L 0 R
AGS-Stellantriebe GmbH
Görlitzer Str. 2
D - 33758 Schloß Holte

11
LINEARIS
S1L
S2R
S1L
S2R
S3
S4
S2R
CL-S
CL-M
CL-H
CL-L
S1L
CL-S
CL-M
CL-H
CL-L
Rechtslauf
CW run
Linkslauf
CCW run
JNO (2er)
Justierschrauben „J“
Adj. screw „J“
JNO (4er)
Justierschrauben „J“
Adj. screw „J“
5.2 Set up limit switches
Depending on the model, the cams may be factory pre-adjusted to a switching position.
1. Apply voltage for CCW run (pushing stroke). The
actuator moves towards the preset direction.
2. Depending on the model, the shaft rotates with or
against the rotation direction of the lead screw. Switch
off voltage when the desired end position has reached
(avoid blocking of the gear!).
3. Turn the switch cam „S1L“ via the adjustment screw
„J“ in rotating direction of the shaft until the appropri-
ate switch „S1L“ clicks.
4. Check setup by moving the actuator again electrically
and adjust if necessary.
5. Adjust all other switches accordingly.
5.3 Optional modules and extra features
5.3.1 Potentiometer
Electrical connection
Connect terminals 18, 19 and 20 according to the desired requirements (voltage ≤ 50V); (see
page 10). Use only separate (shielded) wires.
Adjustment
Set up limit switch before adjusting the potentiometer P. Approach both end positions electrical-
ly (see chapter 5.2). Observe travel and potentiometer solution.
Do not overrun the ordered travel to avoid damage to the friction clutch R by permanent
override. Potentiometer P adjusts roughly automatically.
The travel of the valve is transferred to the rotating angle of the potentiometer by the friction clutch R. Approach both end positions
again electrically and adjust potentiometer P with the friction clutch R.
All potis must generally run under a potential divider circuit.
S1L
S2R
S1L
S2R
S3
S4
S2R
CL-S
CL-M
CL-H
CL-L
S1L
CL-S
CL-M
CL-H
CL-L
Rechtslauf
CW run
Linkslauf
CCW run
JNO (2er)
Justierschrauben „J“
Adj. screw „J“
JNO (4er)
Justierschrauben „J“
Adj. screw „J“
S2R
S1L
P
R
18
19
20 U+
U–
UM
ADVICE
!

12 LINEARIS
5.3.2 2-wire-current output 4-20 mA
Electrical connection
Connect terminal 54 and 55 according to the wiring diagram (see page 10). Use separate (shielded) wire with minimum diameter
of 0.5 mm² and a max. length of 1000 m.
Setup
Operate the current output via buttons „4“ and „20“. Assigning arbitrary positions for 4 mA and 20 mA is possible at any time. The
lower and upper current limit (4/20 mA) is programmed steady.
a) Assignment of end position 4 mA:
• Approach end position;
• press button „4“ more than 2 sec.;
• release button „4“;
• the end position is programmed and active at once.
b) Assignment of end position 20 mA:
• Approach end position;
• press button „20“ more than 2 sec.;
• release button „20“;
• the end position is programmed and active at once.
5.3.3 Gear disengagement
Vor Betätigen der Getriebeausrastung muss die Gewindespindel gegen selbstständiges
Verdrehen gesichert werden.
1. Switch off operating voltage of actuator.
2. Move lever (Auto/Manual) to position »Manual«. Flow of power between motor and
output shaft is interrupted.
3. This position serves for quick adjustments of the output shaft during adjustment work.
4. Turn the tting to the desired position (no need to disengage output and ttingshafts).
(Control cams of the position limit/auxiliary position switches and potentiometer turn
with it. Set positions are retained.)
5. Move lever (Auto/Manual) back to position »Auto«. Power ow between motor and
tting is restored.
6. Switch-on operating voltage of actuator.
To avoid the risk of overrunning the limit stop switches during manual operation, set the
limit positions of the tting mechanically. The actuator must not be electrically activated
when disengaged!
5.3.4 Hand wheel (option)
In the event of a power failure the actuator can be operated with the help of a hand wheel.
24V +
4....20mA
55
54
–
AUTO HAND
ADVICE
!
CAUTION

13
LINEARIS
The hand wheel may be operated only in power-off condition.
1. Switch off operating voltage of the actuator and if equipped with gear disengagement,
move this to „Manual“ position.
2. Push hand wheel H into position V and turn in the desired direction. (Control cams
of position switches and potentiometers are also turned with it. Set positions are
retained).
3. After reaching the desired position let the hand wheel H go (it returns automatically to
its initial position R).
To avoid overrunning position switches and the potentiometer during manual operation, set
the limit positions of the actuator mechanically.
6. Required customer information
6.1 Extraordinary situations
Run frequent testings during operation. Observe especially:
• Intended use of the actuator (chapter 3.1);
• unusual noise, heavy vibration or high temperatures;
• check screws for tight seat;
• check cable entries, cable glands and blank plugs for tight seat and possible leakness;
• condition of electric wires.
If failure appear, set the actuator out of order and correct the error.
If you can not correct the error, contact an ARIS service person.
More information under: www.stellantriebe.de
6.2 Troubleshooting and repair
Hazardous voltage: Possible stroke!
• Troubleshooting and repair only by experts!
• Cut off voltage before opening the actuator.
Moving parts at built-on valves: Possible bruise!
• Troubleshooting and repair only by experts!
We recommend a repair at the ARIS factory.
More information under: www.stellantriebe.de
ADVICE
!
CAUTION
WARNING
ADVICE
!
H
Y
RV
ADVICE
!
ADVICE
!

14 LINEARIS
7. Maintenance
7.1 Service
Actuator
ARIS actuators of type Nano have a lifetime lubrication and are generally maintenance-free.
The drive head ist exchangeable separately.
Dismount all additional parts (valve or rods) before exchanging the drive head! Dismount
the drive head only under a load-free condition.
Linear unit
Maintenance-free by dry-run, no lubrication necessary.
We recommend a visible and functional actuator check during plant service work, but at
least once a year. (s. Kapitel 4.5.1)
7.2 Accessories
No special tools are required for installation.
7.3 Spare parts
Please always state the serial number of the actuator.
ADVICE
!
ADVICE
!
CAUTION

15
LINEARIS
ARIS Antriebe und Steuerungen GmbH 0-68152-1422)0(94+nofeleT9tfirtheiVrettoR
99-68152-1422)0(94+xafeleTfrodsiorT24835-Ded.ebeirtnallets.www
Declaration of Incorporation
of partly completed machinery
according
EU directive 2006/42/EC Annex II B „Machinery Directive“
__________________________________________________________________
Herewith we declare, that the below mentioned incomplete machinery
Product description: Elektrische Schwenk-, Dreh- und Linearantriebe
Product Types
:
CL-S, CL-M, CL-L, CL H and identical
Fulfills the basic requirements of the annex I of the directice 2006/42/EC, if it applies to the appropriate
order:
1.1.2; 1.1.3; 1.1.5; 1.3.4; 1.4.1; 1.4.2.1; 1.5.1; 1.5.2; 1.5.4; 1.5.6; 1.5.8; 1.5.9; 1.5.11; 1.6.4; 1.7.3; 1.7.4
The following harmonized standards were applied: DIN EN ISO 12100:2011-03 („Safety of machinery“)
The product is a partly completed machinery in accordance with Article 2 letter g of the Directive
2006/42/EG. The special technical documents according to annex VII part B have been created. For
reasonable requests these documents can be sent electronically to the responsible authorities.
Regarding the outgoing electrical hazards of the partly completed machinery, the safety objectives of
directive 2006/95/EC ("Low Voltage Directive") are complied in accordance with Annex I No. 1.5.1 of
Directive 2006/42/EC. Applied harmonized standard:
DIN EN 61010-1:2011-07 (“Safety requirements for electrical equipment for measurement, control,
Control and laboratory use ")
The initial operation of this incomplete machinery is only permitted, if it is approved that the facility or
machinery in which it will be installed corresponds to the EC directive 2006/42/EC, if it applies.
Authorized representative for collection of relevant technical documents:
Claudio Usai
Quality and product safety
ARIS Antriebe und Steuerungen GmbH
Rotter Viehtrift 9
D-53842 Troisdorf
This declaration is invalid if the machinery is changed or rebuilt in a manner it was not designed for.
Troisdorf, 02. January 2014
___________________________________
C. Usai (Quality and product safety)

Subject to technical changes.
ARIS Stellantriebe GmbH Tel.: +49 2241 25186-0
Rotter Viehtrift 9 Fax: +49 2241 25186-99
www.stellantriebe.de Stellantriebe
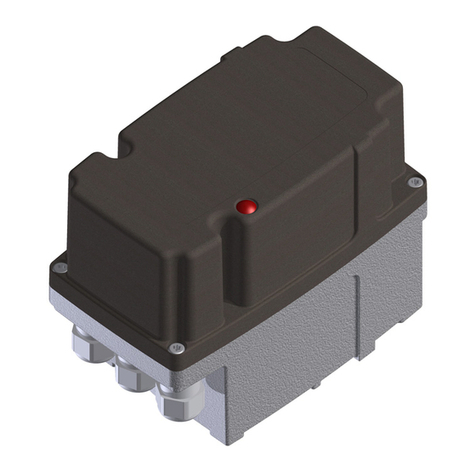
This manual suits for next models
1
Table of contents
Other ARIS Controllers manuals

ARIS
ARIS Nano+ User manual

ARIS
ARIS TENSOR Installation guide

ARIS
ARIS SCU5 User manual

ARIS
ARIS Tensor Zone 2/22 User manual

ARIS
ARIS PD Technical document

ARIS
ARIS Tensor2 User manual

ARIS
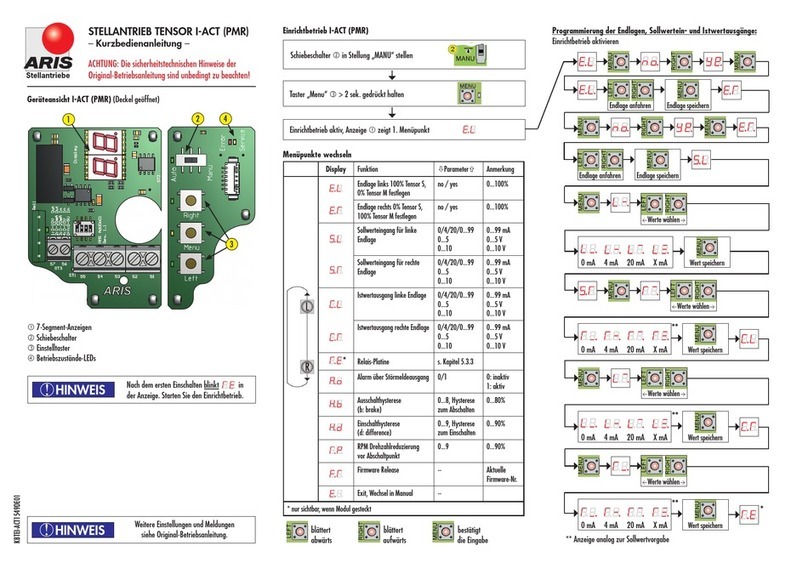
ARIS TENSOR I-ACT (PMR) Installation guide

ARIS
ARIS Linearis N+ User manual

ARIS
ARIS TENSOR User manual

ARIS
ARIS Classic Series User manual