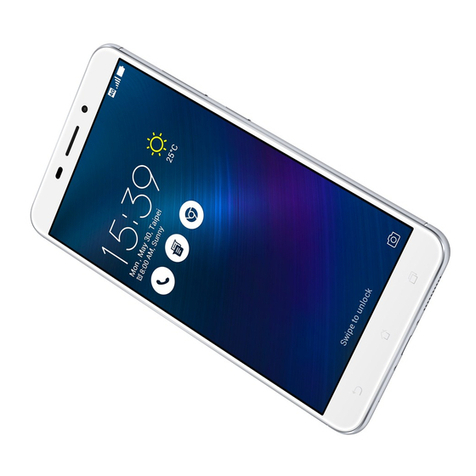
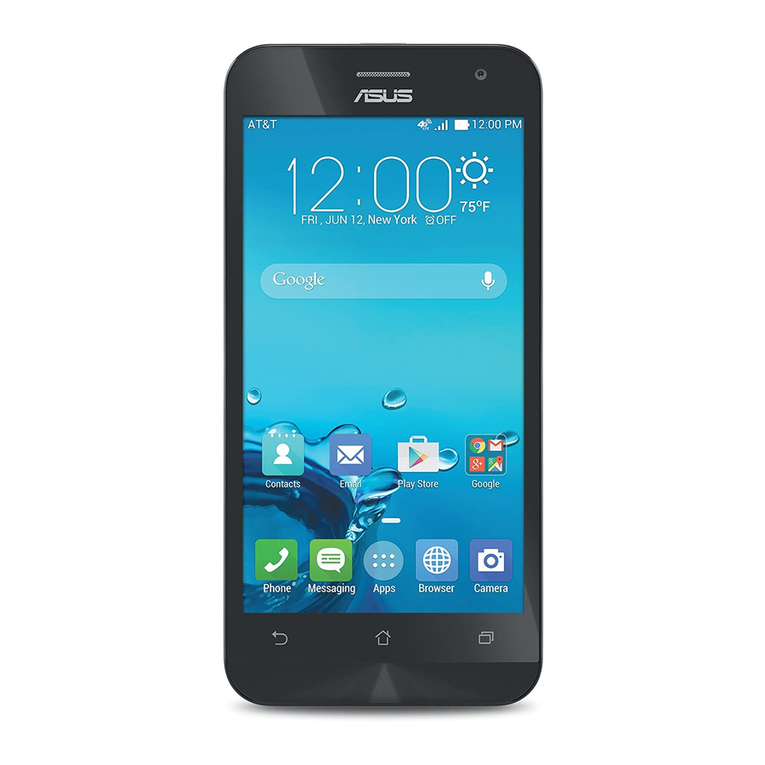
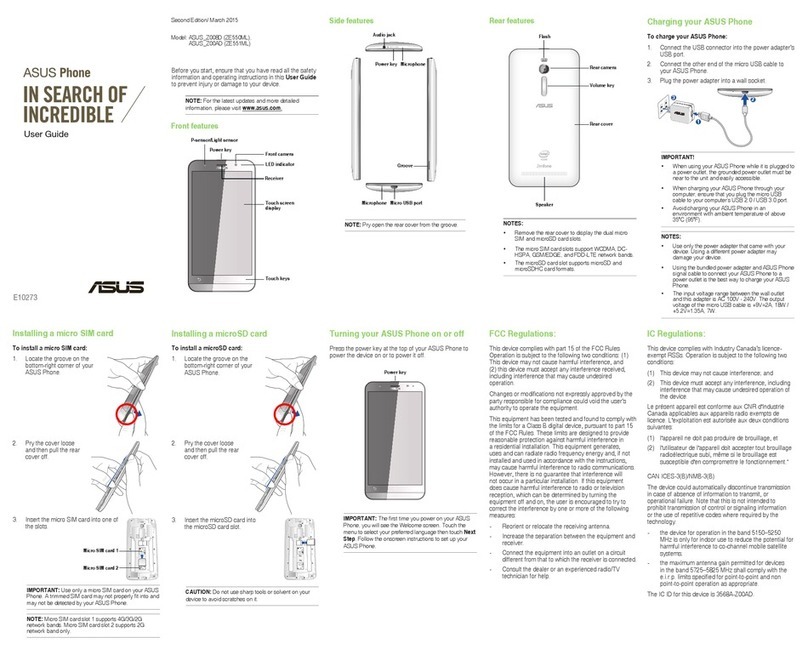
Asus Zenfone Go User manual

U11349-1
User Guide
U11349-1_ZB500KL_UM_(EU)_Booklet.indb 1 2016/7/28 14:52:10

First Edition / April 2016
Model: ASUS_X00AD (ZB500KL)
ASUS_X00ADC (ZB500KL)
ASUS_X00ADA (ZB500KL)
Before you start, ensure that you have read all the safety
information and operating instructions in this User
Guide to prevent injury or damage to your device.
NOTE: For the latest updates and more detailed
information, please visit www.asus.com.
Front features
Touch screen
display
Receiver
LED indicator
Touch keys
Sensor
Front camera
U11349-1_ZB500KL_UM_(EU)_Booklet.indb 2 2016/7/28 14:52:10

Side features
NOTE: Pry open the rear cover from the groove.
Power Key
Audio jack
Micro USB port
Groove
U11349-1_ZB500KL_UM_(EU)_Booklet.indb 3 2016/7/28 14:52:11

Rear features
NOTES:
• Removetherearcovertodisplaythedualmicro
SIM and microSD card slots.
• ThemicroSIMcardslotssupportLTE,WCDMA,
and GSM/EDGE network bands.
• ThemicroSDcardslotsupportsmicroSDand
microSDHC card formats.
Rear camera
Camera ash
Rear cover
Speaker
NOTES:
• Useonlythepoweradapterthatcamewithyour
device. Using a different power adapter may damage
your device.
• UsingthebundledpoweradapterandASUSPhone
signal cable to connect your ASUS Phone to a power
outlet is the best way to charge your ASUS Phone.
• Theinputvoltagerangebetweenthewalloutletand
thisadapterisAC100V-240V.Theoutputvoltageof
the micro USB cable is +5.2V, 1A/1.35A.
IMPORTANT!
• YourASUSPhonecomespartiallychargedbutyoumust
chargeitfullybeforeusingitforthersttime.Readthe
important notices and cautions before charging your
device.
• WhenusingyourASUSPhonewhileitispluggedtoa
power outlet, the grounded power outlet must be near
to the unit and easily accessible.
• WhenchargingyourASUSPhonethroughyour
computer, ensure that you plug the micro USB cable to
your computer’s USB 2.0 / USB 3.0 port.
• AvoidchargingyourASUSPhoneinanenvironment
with ambient temperature of above 35oC (95oF).
Volume key
Microphone
U11349-1_ZB500KL_UM_(EU)_Booklet.indb 4 2016/7/28 14:52:11

Rear features
Charging your ASUS Phone
To charge your ASUS Phone:
1. Connect the USB connector into the power
adapter’s USB port.
2. Connect the other end of the micro USB cable to
your ASUS Phone.
3. Plug the power adapter into a wall socket.
NOTES:
• Useonlythepoweradapterthatcamewithyour
device. Using a different power adapter may damage
your device.
• UsingthebundledpoweradapterandASUSPhone
signal cable to connect your ASUS Phone to a power
outlet is the best way to charge your ASUS Phone.
• Theinputvoltagerangebetweenthewalloutletand
thisadapterisAC100V-240V.Theoutputvoltageof
the micro USB cable is +5.2V, 1A/1.35A.
IMPORTANT!
• YourASUSPhonecomespartiallychargedbutyoumust
chargeitfullybeforeusingitforthersttime.Readthe
important notices and cautions before charging your
device.
• WhenusingyourASUSPhonewhileitispluggedtoa
power outlet, the grounded power outlet must be near
to the unit and easily accessible.
• WhenchargingyourASUSPhonethroughyour
computer, ensure that you plug the micro USB cable to
your computer’s USB 2.0 / USB 3.0 port.
• AvoidchargingyourASUSPhoneinanenvironment
with ambient temperature of above 35oC (95oF).
3
1
2
U11349-1_ZB500KL_UM_(EU)_Booklet.indb 5 2016/7/28 14:52:11

1. Locate the groove
on the bottom-right
corner of your ASUS
Phone.
Installing a micro SIM card
To install a micro SIM card:
2. Pry the cover loose and
then pull the rear cover
off.
4. Insert the micro SIM card into one of the micro SIM
card slots.
3. Removethebattery.
U11349-1_ZB500KL_UM_(EU)_Booklet.indb 6 2016/7/28 14:52:12

NOTES:
• ThemicroSIMcardslot2isatthelowerpartof
the micro SIM / micro SD combo card slot.
• BothMicroSIMcardslotssupport2G/3G
WCDMA/4GLTEnetworkbands.Butonlyone
microSIMcardcanconnectto2G/4GLTEservice
at a time.
CAUTION!
• Donotusesharptoolsorsolventonyourdevice
to avoid scratches on it.
• UseonlyastandardmicroSIMcardonyour
ASUS Phone. A nano to micro SIM adapter or a
trimmed SIM card may not properly fit into and
may not be detected by your ASUS Phone.
• DO NOT install an empty nano to micro SIM
adapter into the micro SIM card slot to avoid
irreversible damage.
Micro SIM card
2/microSD card
combo card slot
Micro SIM card 1
1. Locate the groove on
the bottom-right corner
of your ASUS Phone.
Installing a microSD card
To install a microSD card:
U11349-1_ZB500KL_UM_(EU)_Booklet.indb 7 2016/7/28 14:52:12

2. Pry the cover loose
and then pull the rear
cover off.
4. Insert the microSD card into the microSD card slot.
Micro SIM card 2/
microSD card combo
card slot
3. Removethebattery.
U11349-1_ZB500KL_UM_(EU)_Booklet.indb 8 2016/7/28 14:52:13

CE RF Exposure Compliance
ThisdevicemeetstheEUrequirements(1999/519/EC)
on the limitation of exposure of the general public to
electromagnetic fields by way of health protection.
For body-worn operation, this device has been
testedandmeetstheICNIRPguidelinesandthe
European Standard EN 62209-2, for use with dedicated
accessories.SARismeasuredwiththisdeviceata
separation of 0.5 cm to the body, while transmitting at
thehighestcertiedoutputpowerlevelinallfrequency
bands of this device. Use of other accessories which
containmetalsmaynotensurecompliancewithICNIRP
exposure guidelines.
CE Mark Warning
CE marking for devices with wireless LAN/
Bluetooth
Thisequipmentcomplieswiththerequirementsof
Directive 1999/5/EC of the European Parliament and
Commissionfrom9March,1999governingRadio
andTelecommunicationsEquipmentandmutual
recognitionofconformity.ThehighestCESARvaluesfor
the device are as follows:
• 0.484W/Kg(Head)
• 1.020W/Kg(Body)
CLASS1LASERPRODUCT
Laser safety information
U11349-1_ZB500KL_UM_(EU)_Booklet.indb 9 2016/7/28 14:52:13

Prevention of Hearing Loss
Topreventpossiblehearingdamage,donotlistenat
high volume levels for long periods.
Using GPS (Global Positioning
System) on your ASUS Phone
TousetheGPSpositioningfeatureonyourASUSPhone:
• Ensure that your device is connected to the
Internet before using Google Map or any GPS-
enabled apps.
• For first-time use of a GPS-enabled app on your
device, ensure that you are outdoors to get the
best positioning data.
• WhenusingaGPS-enabledapponyourdevice
inside a vehicle, the metallic component of the
car window and other electronic devices might
affect the GPS performance.
For France, headphones/earphones for this device are
compliantwiththesoundpressurelevelrequirement
laid down in the applicable EN 50332-1:2013 and/or
EN50332-2:2013standardrequiredbyFrenchArticle
L.5232-1.
U11349-1_ZB500KL_UM_(EU)_Booklet.indb 10 2016/7/28 14:52:13

Safety information
ASUS Phone care
• UseyourASUSPhoneinanenvironmentwith
ambient temperatures between 0 °C (32 °F) and 35
°C (95 °F).
Thebattery
YourASUSPhoneisequippedwithahighperformance
detachableLi-polymerbattery.Observethe
maintenance guidelines for a longer battery life.
• Avoidcharginginextremelyhighorlow
temperature.Thebatteryperformsoptimallyinan
ambient temperature of +5 °C to +35 °C.
• UseonlyASUSbattery.Usingadierentbattery
may cause physical harm/injury and may damage
your device.
• Donotremoveandsoakthebatteryinwateror
anyotherliquid.
• Nevertrytoopenthebatteryasitcontains
substances that might be harmful if swallowed or
allowed to come into contact with unprotected
skin.
• Donotremoveandshort-circuitthebattery,asit
may overheat and cause a fire. Keep it away from
jewelry or metal objects.
• Donotremoveanddisposeofthebatteryinre.
It could explode and release harmful substances
into the environment.
• Donotremoveanddisposeofthebattery
withyourregularhouseholdwaste.Takeittoa
hazardous material collection point.
• Donottouchthebatteryterminals.
• Toavoidreorburns,donotdisassemble,bend,
crush, or puncture the battery.
U11349-1_ZB500KL_UM_(EU)_Booklet.indb 11 2016/7/28 14:52:13

NOTES:
• Riskofexplosionifbatteryisreplacedbyan
incorrect type.
• Disposeofusedbatteryaccordingtothe
instructions.
Thecharger
• UseonlythechargersuppliedwithyourASUS
Phone.
• Neverpullthechargercordtodisconnectitfrom
the power socket. Pull the charger itself.
Caution
YourASUSPhoneisahighqualitypieceofequipment.
Before operating, read all instructions and cautionary
markings on the (1) AC Adapter.
• DonotusetheASUSPhoneinanextreme
environment where high temperature or high
humidityexists.TheASUSPhoneperforms
optimally in an ambient temperature between 0
°C (32 °F) and 35 °C (95 °F).
• DonotdisassembletheASUSPhoneorits
accessories.Ifserviceorrepairisrequired,return
the unit to an authorized service center. If the unit
is disassembled, a risk of electric shock or fire may
result.
• Donotshort-circuitthebatteryterminalswith
metal items.
Operator access with a tool
IfaTOOLisnecessarytogainaccesstoanOPERATOR
ACCESSAREA,eitherallothercompartmentswithin
that area containing a hazard shall be inaccessible
totheOPERATORbytheuseofthesameTOOL,or
such compartments shall be marked to discourage
OPERATORaccess.
U11349-1_ZB500KL_UM_(EU)_Booklet.indb 12 2016/7/28 14:52:13

Proper disposal
Riskofexplosionifbatteryisreplacedby
an incorrect type. Dispose of used batteries
according to the instructions.
DONOTthrowthebatteryinmunicipalwaste.
Thesymbolofthecrossedoutwheeledbin
indicates that the battery should not be placed
in municipal waste.
DONOTthrowthisproductinmunicipal
waste.Thisproducthasbeendesignedto
enable proper reuse of parts and recycling.
Thesymbolofthecrossedoutwheeled
bin indicates that the product (electrical,
electronicequipmentandmercury-containing
button cell battery) should not be placed in
municipal waste. Check local regulations for
disposal of electronic products.
DONOTthrowthisproductinre.DONOT
shortcircuitthecontacts.DONOTdisassemble
this product.
ASUS Recycling/Takeback Services
ASUS recycling and takeback programs come from our
commitment to the highest standards for protecting our
environment.Webelieveinprovidingsolutionsforyouto
be able to responsibly recycle our products, batteries, other
components as well as the packaging materials. Please go
to http://csr.asus.com/english/Takeback.htm for detailed
recycling information in different regions.
Regional notice for Singapore
ThisASUSPhonecomplieswith
IDA Standards.
WARNING! Thisproductmaycontainchemicals
known to the State of California to cause cancer, birth
defects,orotherreproductiveharm.Washhands
after handling.
U11349-1_ZB500KL_UM_(EU)_Booklet.indb 13 2016/7/28 14:52:14

Copyright©2016ASUSTeKCOMPUTERINC.
AllRightsReserved.
YouacknowledgethatallrightsofthisManualremainwithASUS.Any
and all rights, including without limitation, in the Manual or website,
and shall remain the exclusive property of ASUS and/or its licensors.
Nothing in this Manual intends to transfer any such rights, or to vest any
such rights to you.
ASUSPROVIDESTHISMANUAL“ASIS”WITHOUTWARRANTYOFANY
KIND.SPECIFICATIONSANDINFORMATIONCONTAINEDINTHISMANUAL
AREFURNISHEDFORINFORMATIONALUSEONLY,ANDARESUBJECT
TOCHANGEATANYTIMEWITHOUTNOTICE,ANDSHOULDNOTBE
CONSTRUEDASACOMMITMENTBYASUS.
ASUS
Address: 4F, 150 Li-Te Road, Peitou, Taipei,
Taiwan
Tel: 886228943447
Fax: 886228907698
Declaration
WedeclarethattheIMEIcodesforthisproduct,ASUS
Phone,areuniquetoeachunitandonlyassignedtothis
model.TheIMEIofeachunitisfactorysetandcannotbe
altered by the user and that it complies with the relevant
IMEIintegrityrelatedrequirementsexpressedintheGSM
standards.
Shouldyouhaveanyquestionsorcommentsregarding
this matter, please contact us.
Sincerely yours,
ASUSTeK COMPUTER INC.
Tel:886228943447
Fax:886228907698
Support: http://vip.asus.com/eservice/techserv.aspx
ZenTalk Fans Forum
(http://www.asus.com/zentalk/global_forward.php)
U11349-1_ZB500KL_UM_(EU)_Booklet.indb 14 2016/7/28 14:52:14

Първо издание / Май 2016
Модел: ASUS_X00AD (ZB500KL)
ASUS_X00ADC (ZB500KL)
ASUS_X00ADA (ZB500KL)
Преди да започнете, уверете се, че сте прочели
цялата информация за безопасност и всички
инструкции за работа в това Ръководство на
потребителя, за да предотвратите нараняване или
повреда на Вашето устройство.
ЗАБЕЛЕЖКА: За последни актуализации и повече
подробна информация, посетете www.asus.com.
Отпред
Сензорен екран
Слушалка
LED индикатор
Сензорни
бутони
Сензор
Камера отпред
U11349-1_ZB500KL_UM_(EU)_Booklet.indb 15 2016/7/28 14:52:14

Страничен изглед
ЗАБЕЛЕЖКА: Отворете задният капак, чрез жлеба.
Бутон за включване и
изключване
Аудио букса
micro USB port
Жлеб
U11349-1_ZB500KL_UM_(EU)_Booklet.indb 16 2016/7/28 14:52:14

Отзад
ЗАБЕЛЕЖКА:
• Отстранетезаднияткапак,зададостигнете
гнездатазаmicroSIMиmicroSDкартите.
• ГнездатазаmicroSIMкартитеподдържатLTE,
WCDMA,иGSM/EDGEмрежовиленти.
• ГнездотозаmicroSDкартатаподдържа
форматиmicroSDиmicroSDHC.
Камера отзад
флаш
Заден
капак
Високоговорител
Бутон за силата
на звука
Микрофон
U11349-1_ZB500KL_UM_(EU)_Booklet.indb 17 2016/7/28 14:52:15

Зареждане на ASUS Phone
Зареждане на Вашия ASUS Phone:
1. Включете USB конектора в USB порта на
захранващия адаптер.
2. СвържетедругиякрайнаUSBкабелакъмASUS
Phone
3. Включете захранващия адаптер в стенен
контакт.
ВАЖНО!
• ВашияттелефонASUSечастичнозареден,но
трябвадагозаредитенапълнопредидаго
използвате за пръв път.Прочетете важните
бележки и бележките“Внимание”преди
зареждане на Вашето устройство.
• КогатоизползватесвояASUSPhoneврежим
на зареждане от адаптера, заземеният контакт
трябва да бъде лесно достъпен и максимално
близо до устройството.
• КогатозареждатесвояASUSPhone,чрез
компютър, убедете се че сте включили
microUSBкабелавUSB2.0/USB3.0портана
компютъра.
• ИзбягвайтезарежданетонасвояASUSPhone
при среда с околна температура по-висока от
35°C (95°F).
3
1
2
U11349-1_ZB500KL_UM_(EU)_Booklet.indb 18 2016/7/28 14:52:15

1. Открийте жлеба в
долниядесенъгълна
Вашия телефон ASUS.
Поставяне на Micro-SIM карта
Поставяне на Micro-SIM карта:
2. Отлепете капака и
издърпайте задния
капак.
ЗАБЕЛЕЖКИ:
• Използвайтесамозахранващияадаптер,
предоставен с Вашето устройство.
Използванетонадругзахранващадаптер
може да повреди Вашето устройство.
• Използванетонавключениязахранващ
адаптерисигналниякабелнаASUSPhoneза
свързваненаВашияASUSPhoneкъмстенен
контакт е най-добрият начин да заредите своя
ASUSPhone.
• Диапазонътнавходнотонапрежениемежду
между стенния контакт и този адаптер е AC
100V-240V.Изходнотонапрежениенаmicro
USB кабела е DC +5.2V, 1A/1.35A.
U11349-1_ZB500KL_UM_(EU)_Booklet.indb 19 2016/7/28 14:52:15

3. Отстранете батерията.
4. ПоставетеMicro-SIMкартаведноотгнездата.
ЗАБЕЛЕЖКА:
• Гнездо2заmicroSIMкартасенамирав
долнатачастнакомбиниранотогнездоза
microSIM/microSDкарта.
• ИдветегнездазаmicroSIMкартиподдържат
мрежовалента2G/3GWCDMA/4GLTE.Към
2G/4GLTEуслугатанемогатдасесвързвати
дветеmicroSIMкартиедновременно.
Комбинирано гнездо
за Micro SIM карта 2/
microSD карта
Micro SIM карта 1
U11349-1_ZB500KL_UM_(EU)_Booklet.indb 20 2016/7/28 14:52:16
Other manuals for Zenfone Go
1
This manual suits for next models
4
Table of contents
Languages:
Other Asus Cell Phone manuals

Asus
Asus P526 User manual

Asus
Asus ZE553KL User manual

Asus
Asus J102 Assembly instructions

Asus
Asus ZB501KL User manual

Asus
Asus Z801 User manual

Asus
Asus Castor User manual

Asus
Asus Zenfone A500CG User manual

Asus
Asus X009DD User manual

Asus
Asus Zenfone 2 ZE550ML User manual

Asus
Asus ROG Phone 5 User manual