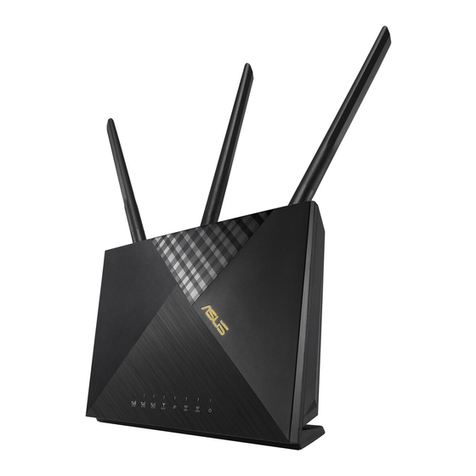
Asus 4G-AC55U User manual

Quick Start Guide
4G-AC55U
Dual-Band Wireless-AC1200 LTE
Modem Router
E10632 / Second Edition / June 2015
APAC10632_4G-AC55U_QSG_v2.indb 1 2015-07-31 15:03:52

Table of contents
English.............................................................................................3
繁體中文 ........................................................................................9
簡體中文 ........................................................................................15
Bahasa Indonesia.........................................................................21
Bahasa Malaysia...........................................................................27
ไทย
...................................................................................................33
ىسراف...............................................................................................................................27
Tiếng Việt
.......................................................................................33
APAC10632_4G-AC55U_QSG_v2.indb 2 2015-07-31 15:03:52

3
English
A quick look
3G/4G signal
strength LED Mobile Broadband
LED Power (DC-In) port
USB 2.0 LED Power LED USB 2.0 port
LAN LED SIM card slot WAN port
2.4GHz Wi-Fi LED 3G/4G signal button Wi-Fi On/O button
5GHz Wi-Fi LED WPS button LAN ports
WAN LED Power switch Reset button
Package contents
NOTE: If any of the items is damaged or missing, contact your retailer.
4G-AC55U Wireless Router Network cable (RJ-45)
Power adapter Quick Start Guide
Support CD (User Manual) SIM adapter
2 x 3G/4G antennas
13 14 15 16 17
121 2 3 4 5 6 7 8 9 10 11
18
3G/4G antenna
3G/4G antenna
Wi-Fi antenna
APAC10632_4G-AC55U_QSG_v2.indb 3 2015-07-31 15:03:54

4
English
Installing your router
1. Prepare the setup requirements.
To set up your wireless network, you need to meet the following requirements:
• AminiSIM/USIMcardwithWCDMAandLTEsubscription
IMPORTANT! Ensure that your SIM/USIM card is subscribed to WCD-
MA and LTE services. Contact your mobile service provider about these
services.
CAUTION! Use only a standard SIM/USIM card on your router. Using a
dierent form of SIM card, such a micro or nano SIM card, may damage
your router.
• AnADSL/cablemodemwithInternetsubscription
• AcomputerwithEthernetRJ-45(LAN)port(10/100/1000Base-TX)ora
Wi-Fi-enabled device with a 2.4 GHz and 5 GHz 802.11 a/b/g/n/ac wireless
interface
• WebbrowsersuchasInternetExplorer,Firefox,Safari,orGoogleChrome
APAC10632_4G-AC55U_QSG_v2.indb 4 2015-07-31 15:03:54

5
English
2. Set up your LTE wireless router.
a. Install the two 3G/4G antennas.
b. Insert the SIM/USIM card into the USIM card slot. When the SIM/USIM card is
properly installed, the Mobile Broadband LED lights up and ashes slowly.
c. Insert the AC adapter of your router to the DC-IN port and plug it to a power
outlet.
d. Turn on your router.
e. Using a network cable, connect your modem to the WAN port of your router.
When the network cable is properly connected, the WAN LED lights up.
f. Insert the AC adapter of your modem to the DC-IN port and plug it to a pow-
er outlet.
NOTE: You can use either 3G/4G or wired connection for Internet
access.
g. Using the bundled network cable, connect your computer to the LAN port of
your router.
Computer
Wall Power Outlet
Modem
Power
WAN
c
e
d
f
b
LAN
g
aa
APAC10632_4G-AC55U_QSG_v2.indb 5 2015-07-31 15:03:54

6
English
3. Install the SIM/USIM card into your router.
a. Find the SIM card tray at the side of the router. b. Pull out the tray.
c. Place the SIM/USIM card on the tray and push the tray all the way into the slot.
PIN hole Paper clip
To manually connect to a wireless network:
1. Enable the Wi-Fi function on your wireless client for it to automatically scan
for wireless networks.
2. Select the wireless network named“ASUS” or“ASUS_5G”, which is the de-
fault wireless network name (SSID) of ASUS wireless routers.
NOTE: You can use either 3G/4G or wired connection for Internet
access.
NOTES:
• UseonlythebundledSIMadapter.
• AlwaysinserttheSIMadapterwithaMicroSIMcardorNanoSIMcard.
The SIM adapter might get stuck if it is inserted alone.
Bundled SIM
Adapter 1
Micro SIM Bundled SIM
Adapter 2
Nano SIM
APAC10632_4G-AC55U_QSG_v2.indb 6 2015-07-31 15:03:55

7
English
Quick Internet Setup Wizard
To set up your router using QIS (Quick Internet Setup):
1. Press the power button at the back of your router. Ensure that the following
LEDs light up:
• PowerLED • 2.4GHzWi-FiLED
• WANorMobileBroadbandLED • 5GHzWi-FiLED
2. Launch your web browser such as Internet Explorer, Firefox, Google Chrome,
or Safari.
NOTE: If QIS does not launch automatically, enter http://192.168.1.1
or http://router.asus.com in the address bar and refresh the browser
again.
3. Assign your router login name and password and click Next. You need this
login name and password to log into 4G-AC55U to view or change the router
settings. You can take note of your router login name and password for
future use.
4. If a wired network is connected, the wireless router’s Quick Internet Setup
(QIS) feature automatically detects if your ISP connection type is Dynamic
IP, PPPoE, PPTP, L2TP, and Static IP. Please obtain the necessary infor-
mation from your Internet Service Provider (ISP). If your connectino type is
Dynamic IP (DHCP), QIS wizard will automatically direct you to the next step.
5. If a 3G/4G network is connected, the wireless router’s Quick Internet Setup
(QIS) feature automatically detects and applies the APN setting to connect to
the wireless base station. If the QIS wizard failed to automatically apply the
APN setting, set up the APN setting manually.
6. Assign the network name (SSID) and security key for your 2.4GHz wireless
connection. Click Apply when done.
7. Your Internet and wireless settings are displayed. Click Next to continue.
8. Read the wireless network connection tutorial. When done, click Finish.
9. The 3G/4G signal strength LED lights up and is steady after completing the
3G/4G network settings via QIS, indicating a successful Internet connection.
APAC10632_4G-AC55U_QSG_v2.indb 7 2015-07-31 15:03:55
8
English
AiCloud
ASUS AiCloud app provides you with access to your data wherever and when-
ever you have an Internet connection. It also allows you to access your ASUS
WebStorage account via the AiCloud mobile app on your iOS or Android device,
or via a web browser.
To install AiCloud:
1. Ensure that your router’s rmware version is the latest one and supports
AiCloud.
2. Download AiCloud app from Google Play or App Store.
3. Install your USB storage device to your router. Refer to section A quick look
for the location of the USB ports.
4. Connect your iOS or Android devices to the router through Wi-Fi. The Ai-
Cloud app will automatically guide you through the setup process.
5. You can now access, stream and share to all les in your USB storage. Search
ASUS AiCloud for more information. Watch tutorial videos for step-by-step
guide.
Google Play App Store
APAC10632_4G-AC55U_QSG_v2.indb 8 2015-07-31 15:03:55
9
繁體中文
13 14 15 16 17
121 2 3 4 5 6 7 8 9 10 11
18
3G/4G antenna
3G/4G antenna
Wi-Fi antenna
認識您的 4G-AC55U 無線路由器
3G/4G 訊號強度指示燈 行動寬頻指示燈 電源輸入連接埠(DC-IN)
USB 2.0 指示燈 電源指示燈 USB 2.0 連接埠
LAN 指示燈 SIM 卡插槽 WAN 連接埠
2.4GHz Wi-Fi 指示燈 3G/4G 訊號按鈕 Wi-Fi 開關
5GHz Wi-Fi 指示燈 WPS 按鈕 LAN 連接埠
WAN 指示燈 電源開關 重置按鈕
包裝內容物
注意:若以上列出的任何一項配件有損毀或是短缺的情形,請儘速
聯絡您的經銷商。
4G-AC55U 無線路由器 RJ-45 網路線
電源變壓器 快速使用指南
公用程式光碟(含 使 用 手 冊)SIM 轉接卡
2 x 3G/4G 天線
天線
天線
天線
APAC10632_4G-AC55U_QSG_v2.indb 9 2015-07-31 15:03:56

10
繁體中文
安裝您的路由器
1. 安裝前的準備
設定您的無線路由器前,您需要滿足以下要求:
• 一張支援 WCDMA 和 LTE 服務的 SIM / USIM 卡
重要!請確認您的 SIM / USIM 卡開通了 WCDMA 和 LTE 服務。關於
這些服務請聯絡您的行動服務業者。
小心! 您的路由器只能使用標準的 SIM / USIM 卡。使用其他規格的
SIM 卡, 如 Micro 或 Nano SIM 卡可能會使您的路由器損毀。
• 一台可連線網際網路的 ADSL / cable 數據機
• 一台具有乙太網路 RJ-45 (LAN) 連接埠的電腦 (10/100/1000 Base-
TX) 或具有 2.4GHz 與 5GHz 802.11 a/b/g/n/ac Wi-Fi 功能的裝置
• 網路瀏覽器,如 Internet Explorer、Firefox、Safari 或 Google Chrome
(標準) (搭配 SIM 轉接卡 1) (搭配 SIM 轉接卡 2)
APAC10632_4G-AC55U_QSG_v2.indb 10 2015-07-31 15:03:56

11
繁體中文
2. 安裝您的 LTE 無線路由器
a. 安裝兩支 3G/4G 天線。
b. 將 SIM / USIM 卡插入 USIM 卡插槽。當 SIM/USIM 卡安裝正確時,行動
寬頻指示燈會亮起並緩慢閃爍。
c. 將無線路由器的 AC 變壓器的一端連接到路由器的電源輸入(DC-IN)連
接埠,另一端連接到電源插座。
d. 開啟路由器。
e. 用網路線將您的數據機連接至無線路由器的 WAN 連接埠。當網路線正確
連接後,WAN 指示燈會亮起。
f. 將數據機的 AC 變壓器的一端連接到數據機的電源輸入(DC-IN)連接
埠,另一端連接到電源插座。
注意:您可以使用 3G/4G 或有線連接來聯網。
g. 使用附贈的網路線將您的電腦連接至無線路由器的 LAN 連接埠。
Computer
Wall Power Outlet
Modem
Power
WAN
c
e
d
f
b
LAN
g
aa
APAC10632_4G-AC55U_QSG_v2.indb 11 2015-07-31 15:03:57

12
繁體中文
3. 安裝 SIM/USIM 卡至路由器
b. 拉出卡槽。
c. 將 SIM/USIM 卡裝入卡槽,接著將卡槽完全推入。
請按以下步驟手動連接至無線網路:
1. 開啟無線用戶端的 Wi-Fi 功能,自動掃描無線網路。
2. 選擇名為「ASUS」或 「ASUS_5G」 的無線網路,這是華碩無線路由器
初始的無線網路名稱 (SSID)。
注意:您可以使用 3G/4G 或有線連接來聯網。
注意:
• 請使用包裝內附贈的 SIM 卡配接器。
• 請在使用 Micro SIM 卡或 Nano SIM 卡時才搭配使用 SIM 卡配
接器。單獨插入 SIM 卡配接器可能會導致配接器被卡住。
Bundled SIM
Adapter 1
Micro SIM Bundled SIM
Adapter 2
Nano SIM
附贈的 SIM 轉接卡 1 附贈的 SIM 轉接卡 2
PIN hole Paper clip
3. 安裝 SIM/USIM 卡至路由器
a. 找到路由器側面的 SIM 卡卡槽。
APAC10632_4G-AC55U_QSG_v2.indb 12 2015-07-31 15:03:57

13
繁體中文
網路設定精靈(QIS)
請按照以下步驟用網路設定精靈(QIS)設定路由器:
1. 按下路由器背面的電源按鈕。確認以下這些指示燈亮起:
• 電源指示燈 • 2.4GHz Wi-Fi 指示燈
• WAN 或行動寬頻指示燈 • 5GHz Wi-Fi 指示燈
2. 開啟您的網路瀏覽器,如 Internet Explorer、Firefox、Google Chrome 或
Safari。
注意:若網路設定精靈(QIS)未能自動開啟,請在您的網路瀏覽器
中輸入 http://192.168.1.1 或 http://router.asus.com 並刷新頁面。
3. 為路由器設定登入名與密碼,然後點選 下一步。您需要使用此名稱與密
碼來登入 4G-AC55U 檢視並更改路由器設定。記錄下路由器登入名稱與
密碼以備日後使用。
4. 若您連接了有線網路,此路由器的網路設定精靈(QIS)可自動檢測 ISP
連線類型:自動取得 IP、PPPoE、PPTP、L2TP 與固定 IP。請從您的
ISP 處獲得網路連線類型的相關資訊。若您的網路連接類型為「自動取得
IP」(DHCP),網路設定精靈(QIS)將自動引導您進入下一步。
5. 若您連接了 3G/4G 網路,無線路由器的網路設定精靈(QIS)功能將自動
偵測並套用 APN 設定來連線到無線基站。若網路設定精靈自動套用 APN
設定失敗,請嘗試手動進行 APN 設定。
6. 指定網路名稱(SSID)與網路金鑰以連線 2.4GHz 與 5GHz 無線網路。完
成後點選 套用本頁面設定。
7. 畫面將顯示您的網路與無線設定。點選 下一步 繼續。
8. 閱讀無線網路連線教程。完成後點選 完成。
9. 透過 QIS 完成 3G/4G 網路設定後,3G/4G 訊號強度指示燈亮起,代表已
成功連線網際網路。
APAC10632_4G-AC55U_QSG_v2.indb 13 2015-07-31 15:03:57

14
繁體中文
AiCloud
ASUS AiCloud 應用程式可讓您在有網際網路連線的情況下隨時隨地存取您的
資料。您可以透過 iOS 或 Android 裝置上的 AiCloud 行動應用程式存取您的
ASUS WebStorage 帳戶。
按照以下步驟安裝 AiCloud:
1. 確定您的路由器韌體為最新版本,且支援 AiCloud。
2. 從 Google Play 或 App Store 下載 AiCloud 應用程式。
3. 將 USB 儲存裝置連接到路由器。請參考「認識您的 4G-AC55U 無線路由器」
部份的說明找到 USB 連接埠的具體位置。
4. 將 iOS 或 Android 裝置透過 Wi-Fi 連接到路由器。AiCloud 應用程式將自動
引導您進行設定。
5. 現在您就可以存取、串流並分享 USB 存儲裝置中的所有檔案。搜尋 ASUS
AiCloud 獲得更多資訊。請觀看教學影片了解具體設定步驟。
Google Play App Store
APAC10632_4G-AC55U_QSG_v2.indb 14 2015-07-31 15:03:57

15
簡體中文
認識您的 4G-AC55U 無線路由器
3G/4G 信號強度指示燈 移動寬頻指示燈 電源輸入接口(DC-IN)
USB 2.0 指示燈 電源指示燈 USB 2.0 接口
LAN 指示燈 SIM 卡插槽 WAN 接口
2.4GHz Wi-Fi 指示燈 3G/4G 信號按鈕 Wi-Fi 開關
5GHz Wi-Fi 指示燈 WPS 按鈕 LAN 接口
WAN 指示燈 電源開關 重置按鈕
包裝內容物
注意:若以上列出的任何一項配件有損壞或是短缺的情形,請儘快
聯繫您的經銷商。
4G-AC55U 無線路由器 RJ-45 網線
電源適配器 快速使用指南
應用程序光盤(含用戶手冊) SIM 卡卡套
2 x 3G/4G 天線
13 14 15 16 17
121 2 3 4 5 6 7 8 9 10 11
18
3G/4G antenna
3G/4G antenna
Wi-Fi antenna
天線
天線
天線
APAC10632_4G-AC55U_QSG_v2.indb 15 2015-07-31 15:03:58

16
簡體中文
安裝您的路由器
1. 安裝前的準備
設置您的無線路由器前,您需要滿足以下要求:
• 一張支持 WCDMA 和 LTE 服務的 SIM / USIM 卡
重要!請確認您的 SIM / USIM 卡開通了 WCDMA 和 LTE 服務。關
於這些服務請聯繫您的移動服務供應商。
小心! 您的路由器只能使用標準的 SIM / USIM 卡。使用其他規格
的 SIM 卡, 如 Micro 或 Nano SIM 卡可能會損壞您的路由器。
• 一台可連接互聯網的 ADSL / Cable 調製解調器
• 一台具有以太網 RJ-45 (LAN) 接口的電腦 (10/100/1000 Base-
TX) 或具有 2.4GHz 與 5GHz 802.11 a/b/g/n/ac Wi-Fi 功能的設備
• 網絡瀏覽器,如 Internet Explorer、Firefox、Safari 或 Google Chrome
(標準 SIM 卡) (搭配 SIM 卡卡套 1) (搭配 SIM 卡卡套 2)
APAC10632_4G-AC55U_QSG_v2.indb 16 2015-07-31 15:03:59

17
簡體中文
2. 安裝您的 LTE 無線路由器
a. 安裝兩根 3G/4G 天線。
b. 將 SIM / USIM 卡插入 USIM 卡插槽。當 SIM/USIM 卡安裝正確時,移動
寬頻指示燈會亮起並緩慢閃爍。
c. 將無線路由器的 AC 適配器的一端連接到路由器的電源輸入(DC-IN)接
口,另一端連接到電源插座。
d. 開啟路由器。
e. 用網線將您的調製解調器連接至無線路由器的 WAN 接口。當網線正確
連接後,WAN 指示燈會亮起。
f. 將調製解調器的 AC 適配器的一端連接到調製解調器的電源輸入(DC-
IN)接口,另一端連接到電源插座。
注意:您可以使用 3G/4G 或有線連接來聯網。
g. 使用附贈的網線將您的電腦連接至無線路由器的 LAN 接口。
Computer
Wall Power Outlet
Modem
Power
WAN
c
e
d
f
b
LAN
g
aa
卡插槽
電源插座
電 源
卡
APAC10632_4G-AC55U_QSG_v2.indb 17 2015-07-31 15:03:59

18
簡體中文
3. 安裝 SIM/USIM 卡至路由器
b. 拉出卡槽。
c. 將 SIM/USIM 卡裝入卡槽,接著將卡槽完全推入。
請按以下步驟手動連接至無線網絡:
1. 開啟無線客戶端的 Wi-Fi 功能,自動掃描無線網絡。
2. 選擇名為“ASUS”或 “ASUS_5G” 的無線網絡,這是華碩無線路由器
初始的無線網絡名稱 (SSID)。
注意:您可以使用 3G/4G 或有線連接來聯網。
注意:
• 請使用包裝內附贈的 SIM 卡卡套。
• 請在使用 Micro SIM 卡或 Nano SIM 卡時才搭配使用 SIM 卡
卡套。單獨插入 SIM 卡卡套可能會導致卡套被卡住。
Bundled SIM
Adapter 1
Micro SIM Bundled SIM
Adapter 2
Nano SIM
附贈的 SIM 卡卡套 1 附贈的 SIM 卡卡套 2
PIN hole Paper clip
a. 找到路由器側面的 SIM 卡卡槽。
APAC10632_4G-AC55U_QSG_v2.indb 18 2015-07-31 15:03:59

19
簡體中文
網絡設置嚮導(QIS)
請按照以下步驟用網絡設置嚮導(QIS)設置路由器:
1. 按下路由器背面的電源按鈕。確認以下這些指示燈亮起:
• 電源指示燈 • 2.4GHz Wi-Fi 指示燈
• WAN 或移動寬頻指示燈 • 5GHz Wi-Fi 指示燈
2. 開啟您的網絡瀏覽器,如 Internet Explorer、Firefox、Google Chrome 或
Safari。
注意:若網絡設置嚮導(QIS)未能自動開啟,請在您的網絡瀏覽器
中輸入 http://192.168.1.1 或 http://router.asus.com 並刷新頁面。
3. 為路由器設置登錄名與密碼,然後點擊【下一步】。您需要使用此名稱
與密碼來登錄 4G-AC55U 查看並更改路由器設置。記錄下路由器登錄名
稱與密碼以備日後使用。
4. 若您連接了有線網絡,此路由器的網絡設置嚮導(QIS)可自動檢測 ISP
連接類型:自動取得 IP、PPPoE、PPTP、L2TP 與固定 IP。請從您的
ISP 處獲得網絡連接類型的相關信息。若您的網絡連接類型為“自動取得
IP”(DHCP),網絡設置嚮導(QIS)將自動引導您進入下一步。
5. 若您連接了 3G/4G 網絡,無線路由器的網絡設置嚮導(QIS)功能將自
動偵測並應用 APN 設置來連接到無線基站。若網絡設置嚮導自動應用
APN 設置失敗,請嘗試手動進行 APN 設置。
6. 指定網絡名稱(SSID)與網絡金鑰以連接 2.4GHz 與 5GHz 無線網絡。
完成後點擊【應用本頁面設置】。
7. 畫面將顯示您的網絡與無線設置。點擊【下一步】繼續。
8. 閱讀無線網絡連接教程。完成後點擊【完成】。
9. 通過 QIS 完成 3G/4G 網絡設置後,3G/4G 信號強度指示燈亮起,代表
已成功連接互聯網。
APAC10632_4G-AC55U_QSG_v2.indb 19 2015-07-31 15:03:59

20
簡體中文
AiCloud
ASUS AiCloud 應用程序可讓您在有互聯網連接的情況下隨時隨地讀寫您的
數據。您可以通過 iOS 或 Android 設備上的 AiCloud 移動應用程序訪問您的
ASUS WebStorage 帳戶。
按照以下步驟安裝 AiCloud:
1. 確定您的路由器固件為最新版本,且支持 AiCloud。
2. 從 Google Play 或 App Store 下載 AiCloud 應用程序。
3. 將 USB 存儲設備連接到路由器。請參考“認識您的 4G-AC55U 無線路由
器”部分的說明找到 USB 接口的具體位置。
4. 將 iOS 或 Android 設備通過 Wi-Fi 連接到路由器。AiCloud 應用程序將自
動引導您進行設置。
5. 現在您就可以讀寫、串流並共享 USB 存儲設備中的所有文件。搜索 ASUS
AiCloud 獲得更多信息。請觀看教學視頻了解具體設置步驟。
Google Play App Store
APAC10632_4G-AC55U_QSG_v2.indb 20 2015-07-31 15:03:59
Other manuals for 4G-AC55U
2
Table of contents
Other Asus Network Router manuals

Asus
Asus AM602 User manual

Asus
Asus WL-500gP User manual

Asus
Asus RT-AC1200HP User manual

Asus
Asus 4G-N12 User manual

Asus
Asus Republic of Gamers Rapture GT-AX11000 User manual

Asus
Asus RT-AC57U V3 User manual

Asus
Asus RTAXE5H00 User manual

Asus
Asus RT-AX88U User manual

Asus
Asus RT-AC86U User manual

Asus
Asus ZenWiFi XD5 User manual

Asus
Asus REPUBLIC OF GAMERS GT-AX6000 User manual

Asus
Asus ZenWiFi XD4S User manual

Asus
Asus RT-AC68W User manual

Asus
Asus FX-D1161 User manual

Asus
Asus RT-AC750L Instruction manual

Asus
Asus RT-AX88U User manual

Asus
Asus RT-N10 LX User manual

Asus
Asus RT-N15 SuperSpeed N User manual

Asus
Asus DSL-AC68U User manual

Asus
Asus RT-AC58U User manual