Asus GigaX Series User manual

1
Content
English ..................................................................................................1
简体中文 ...............................................................................................8
Türkçe ................................................................................................15

1
GigaX Series
Layer 2 Unmanaged Switch
GigaX1048
User Manual

2
Introduction
Thank you for purchasing the GigaX1048 switch! The GigaX1048 switch is a multi-port switch
designed for building a high-performance workgroup network. It features store-and-forward
switching architecture which reduces transmission latency and therefore offers high-speed
network exchange. With non-blocking and full wire-speed functions, you do not need to compete
with other users for bandwidth. The GigaX1048 switch has forty-eight RJ-45 10/100Mbps ports,
one RJ-45 10/100/1000Mbps port and one Mini GBIC port for esay connection to a Gigabit
network backbone.The GigaX1048 switch is a perfect choice for a department workgroup or
backbone network for a Small & Medium Business (SMB) enterprise.
Features
• Port attributes:
- 48 x RJ-45 10/100Mbps ports
- 1 x RJ-45 10/100/1000Mbps port
- 1 x Mini GBIC slot
• IEEE 802.3, 802.3u, 802.3ab and 802.3z compatible
• Supports auto MDI/MDIX on all 10/100Mbps ports
• Supports auto-negotiation
• IEEE 802.3x flow control: Flow control on full-duplex; back pressure on half-duplex
• Store-and-Forward switching architecture
• Non-blocking architecture
• 20 Gbps switch fabric
• Embedded 6Mbits memory buffer
• 8K-entry MAC address table with auto-learning addresses
• 19'' rack mount design

3
GigaX 1048 switch Rubber stands
Power cord User manualRack-mount kit
Note: If any of the above items is damaged or missing, contact your retailer.
Package contents
Before you start installing the switch, check in your package for the following items:
1 x ASUS GigaX1048 switch
1 x Power cord
1 x User manual
1 x Rack-mount kit
4 x Rubber stands

4
Hardware description
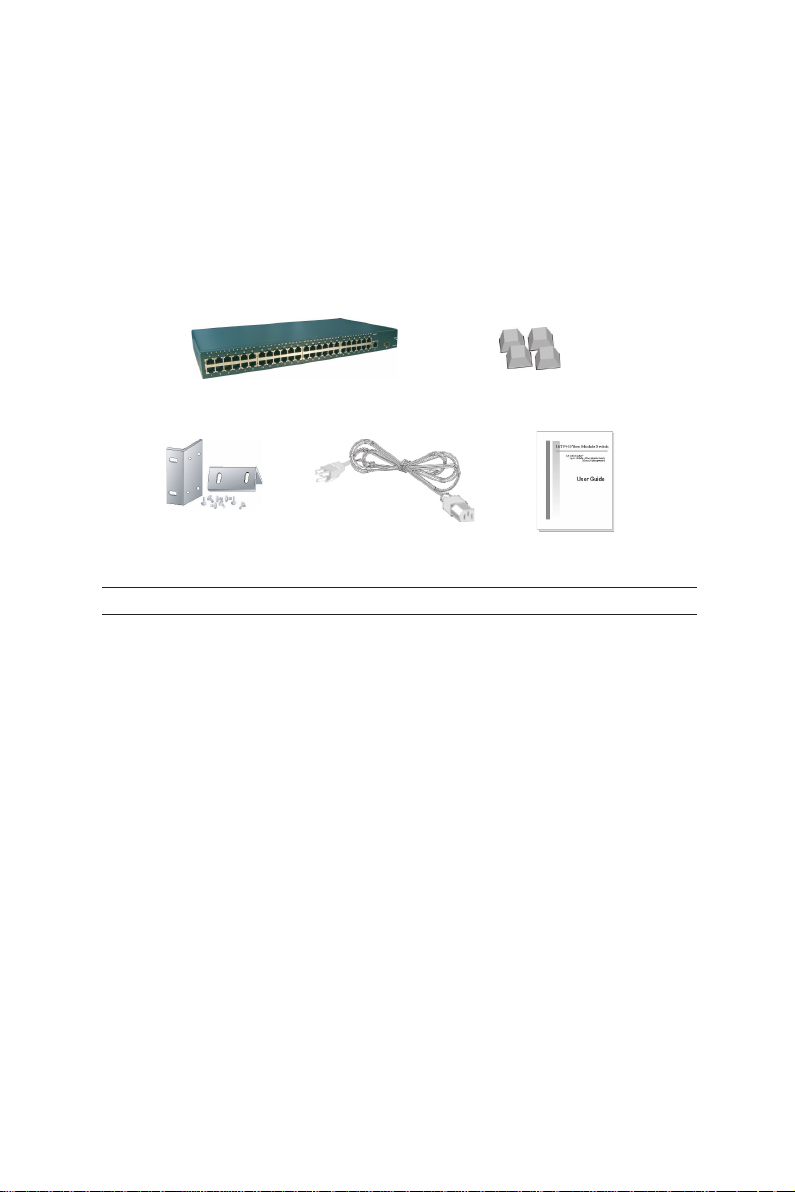
This section introduces the physical features of the GigaX1048 switch and its installation
procedure.
Front panel
The front panel of GigaX1048 switch features forty-eight RJ-45 10/100Mbps ports (auto MDI/
MDIX), one RJ-45 10/100/100Mbps port, one Mini GBIC slot for fiber connection, and LED
indicators that indicate the condition of the switch.
Figure 1. Front panel
RJ-45 Ports (Auto MDI/MDIX): The forty-eight RJ-45 10/100Mbps ports are auto MDI/MDIX
ready. Auto MDI/MDIX means that you can connect any compatible networking devices (e.g.
workstation, PC, switch, hub, etc.) using either a straight or cross-over Ethernet cable. Some
early models require straight and crossover cable for connecting different devices.
Gigabit port: 1 x 10/100/1000Mbps UTP port
1 x Mini GBIC slot.
Note: Mini GBIC module is optional.
LED indicators
The LED indicators provide real-time information of operation status. The following table
provides descriptions of LED status and their meaning.
LED Status Description
Power Green Unit is powered on
Off No power
LNK/ACT
Green Ethernet link is established
Flashing Data is being transmitted
Off No Ethernet link
LNK/ACT
(Gigabit
copper,G1)
Green Ethernet link is established
Flashing Data is being transmitted
Off No Ethernet link
Speed (Gigabit
copper,G1)
Yellow The port is operating in 1000Mbps mode.
Off The port is operating in 10/100Mbps mode or no
device is attached.
LNK/ACT (Mini
GBIC, G2)
Green Ethernet link is established
Flashing Data is being transmitted
Off No data being transmitted
LED Indicators

5
Rear panel
The three-pronged power plug is located at the rear panel of the GigaX1048 switch. The input
voltage is 100-240V AC with 50-60Hz frequency. The power plug includes a fuse (ø5mm x 20mm
2A/250V Max.) that prevents damage to the switch due to unstable voltage. The fuse could be
replaced when busted.
Figure 2. Rear Panel
Desktop installation
Attaching rubber stands
1. Place the switch on a stable and dust-free surface.
2. Remove the adhesive cover from a rubber stand.
3. Attach the rubber stand to one corner at the bottom of the switch.
4. Repeat steps 2 and 3 to place the other rubber stands.
Rack mount
The ASUS GigaX1048 switch comes with a rack mount kit that can be fitted into an EIA
standard 19-inch rack. The switch can be placed in a wire closet with other equipments.
Follow these steps to mount the switch onto a rack:
1. Use small screws to secure mounting brackets to the holes on both sides of the switch.
2. Position the ASUS GigaX1048 onto the rack. Match the holes in the brackets with the
holes on the rack, then secure the switch with the rack-mount screws.
Note: For proper ventilation, allow at least 4 inches (10 cm) of clearance to the front
and 3.4 inches (8 cm) at the back of the switch. We recommend this for an
enclosed rack installation.
When installed, connect the power cord to the power jack on the rear panel then to a power
outlet. The input voltage is 100-240VAC@50~60Hz. Check the power indicator on the front
panel to see if power is properly supplied.
Fuse specification: Ceramic tube type
ø5mm x 20mm 2A/250V (Max.)

6
Troubleshooting
Problem Suggested action
System LED does not light
up after the switch is turned
on.
Verify if the power cord is securely connected to the switch
and to a power strip.
Link LED does not light up
after an Ethernet cable is
attached.
1. Look for loose or faulty connections, make sure the
connections are secure. If these could not solve the
problem, try another cable.
2. Check the network cable used. Non-standard and
miswired cables can cause collisions and can seriously
impair network performance. Use of a category 5 cable
tester is recommended.
3. Check your network topology. Make sure that you have a
valid network topology. Common topology faults include
overlong cable and too many repeaters (hubs) between
end nodes. Also make sure that the network topology
contains no loops (i.e., only one active path is allowed
between every two nodes at any time). Loops can cause
broadcast storms and severely reduce your network
performance.

7
Standard
IEEE802.3 10BASE-T Ethernet
IEEE802.3u 100BASE-TX Fast Ethernet
IEEE802.3ab 1000BASE-T
IEEE802.2x Flow Control and Back-pressure
IEEE802.1z Gigabit fiber
LED
System power (Green)
10/100Base-TX Port: LInk/Activity (Green)
Gigabit copper port: Link/Activity (Green)
Speed (Yellow)
MINI GBIC: Link/Activity (Green)
Connector
100Base-T: 48 x RJ-45 ports
Gigabit copper: 1 x RJ-45 port
Mini GBIC: 1 x Mini GBIC slot
Switch architecture Store and Forward
MAC address 8k MAC address table with address auto learning
Memory buffer 6Mbits
Backplane 20 Gbps
Power supply 100-240V AC, 50~60Hz
Operation environment 0˚C to 45˚C (32˚F to 113˚F), 5% to 90% Humidity
Storage environment -10˚C to 60˚C, 5% to 95% Humidity
Power consumption 21 Watts max.
Dimension 440mm x 225mm x 44mm (W x D x H)
EMI FCC Class A, CE
Safety UL, cUL, CE/EN60950
Technical specifications
This section provides the specifications of the GigaX1048 switch.

8
GigaX 系列
两层非网管型交换机
GigaX1048
用户手册
8

9
产品简介
非常感谢您购买华硕的 GigaX1048 交换机!此 GigaX1048 交换机是一台具备组建高性能工作
组网络功能的多端口交换机。GigaX1048 采用可靠的存储转发的方式,减少潜在的不必要的数
据转发,从而有效改善网络性能。 同时由于支持非阻塞(Non-blocking)和全线速(Full Wire-
speed) 功能,您不用再为拥挤的网络而心烦气躁,轻松即可获得满意的网络带宽。此交换机带
有 48 个 RJ-45 10/100Mbps 端口,一个 RJ-45 10/100/1000Mbps 端口和一个 Mini GBIC 端口。
GigaX1048 交换机绝对是中小型企业组建局域网和广域网的最佳选择。
产品特性
• 端口情况 :
- 48 x RJ-45 10/100Mbps 端口
- 1 x RJ-45 10/100/1000Mbps 端口
- 1 x Mini GBIC 插槽
• 遵循 IEEE 802.3, 802.3u, 802.3ab 和 802.3z 标准
• 支持 10/100Mbps 端口自动 MDI/MDIX 适应功能
• 支持自动协商(Auto-negotiation)功能
• IEEE 802.3x 流量控制:支持全双工流量控制和背电压(Back Pressure)半双工流量控制
• 存储转发交换方式
• 非阻塞方式
• 20 Gbps 交换核心
• 内建 6Mbits 缓存
• 带自动学习功能的 8K-entry MAC 地址表
• 19'' 支架安装方式

10
GigaX 1048 switch Rubber stands
Power cord User manualRack-mount kit
注意:若以上列出的任何一项配件有损坏或丢失的情况,请尽快与您的经销商联系。
产品包装
在您准备安装交换机以前,请仔细检查包装盒内是否装有以下标准配件:
1 x 华硕 GigaX1048 交换机
1 x 电源线
1 x 用户手册
1 x 机架配件
4 x 橡胶底垫
华硕 GigaX1048 交换机 橡胶底垫
机架配件 电源线 用户手册

11
硬件信息
本节将详细介绍 GigaX1048 交换机的产品特性和安装步骤。
前面板
GigaX1048 交换机的前面板带有 48 个 RJ-45 10/100Mbps 端口(自动 MDI/MDIX 功能),1 个
RJ-45 10/100/1000Mbps 端口,1 个用于光纤连接的 Mini GBIC 插槽和相对应的 LED 指示灯以
显示各端口连接的状况。
图 1. 前面板
RJ-45 端口(自动 MDI/MDIX 功能 ):48 个 RJ-45 10/100Mbps 端口具备 MDI/MDIX 适应功
能。自动 MDI/MDIX 意味着您可以使用一根网线(交叉线或直通线)就能连接至任何兼容的
网络设备(如工作站、 PC 机、交换机、hub 等)。 某些早期的设备需要直通线和交叉线来连接不
同的设备。
Gigabit 千兆端口:1 x 10/100/1000Mbps UTP 端口
1 x Mini GBIC 插槽
注意:
Mini GBIC 模块是选购的。
LED 指示灯
LED 指示灯能实时地反应出交换机的运行状态。 下表中详细描述了 LED 状态及其含义。
LED 状态 阐述
Power 绿色 交换机已通电
关闭 无电
LNK/ACT
绿色 以太网连接已建立
闪烁 正传输数据
关闭 无连接
LNK/ACT
(Gigabit
copper,G1)
绿色 以太网连接已建立
闪烁 正传输数据
关闭 无连接
Speed (Gigabit
copper,G1)
黄色 此端口运行于 1000Mbps 模式
关闭 此端口运行于 10/100Mbps 模式或无任何设备与之
相连
LNK/ACT
(Mini GBIC,
G2)
绿色 以太网连接已建立
闪烁 正传输数据
关闭 无数据传输
LED 指示灯

12
后面板
GigaX1048 的后面板上有一个三叉头的电源插孔。输入电压要求是 50-60Hz 的 100-240V 直流
电源。插孔里有一个保险丝(最大 ø5mm x 20mm 2A/250V),能保护交换机不会因不稳定电压的
因素而损坏。当此保险丝坏掉后,请及时更换。
图 2. 后面板
桌面安装
安装橡胶底垫
1. 将交换机放置在一个稳定的无尘的物体表面。
2. 移除橡胶底垫的胶盖。
3. 将橡胶底垫安在交换机底部的一个角落。
4. 重复步骤 2 和 3,依次放置其他几个底垫。
机架安装
华硕 GigaX1048 交换机配带有适用于 EIA 标准 19 英寸机架的安装配件。请按照以下安装步骤
将交换机安装在机架上:
1. 使用小螺丝通过交换机两边的孔将支架固定。
2. 将华硕 GigaX1048 交换机放在机架上。 确认支架上的小孔与机架上的孔相对应,然后拧紧
螺丝。
注意:针对封闭的机架空间,为了保证一定的通风,交换机的前面至少要有 4 英寸(10 cm)的
空间,背面至少要有 3.4 英寸(8 cm)的空间。
安装完毕以后,请使用电源线,一头插入后面板的电源插孔,另一头插入电源插座。输出电压
要求是 100-240V 直流 @50~60Hz。 通电以后,请检查交换机前面板的电源指示灯的指示是否正
确。
保险丝规格:陶瓷管状 ø5mm x 20mm
2A/250V (最大)

13
疑问解决
问题 相关建议
交换机打开以后,系统 LED
指示灯仍旧不亮。
请检查电源线是否正确的连接至交换机和电源插座。
以太网线连接以后,Link
LED 指示灯仍旧不亮。
1. 您需要检查连接是否松动或有误,要确保连接必须是通畅
完好的。如果问题仍不能解决,请换一根网线试试。
2. 检查正使用的网线。不标准的、有问题的网线会引起网络
冲突,从而严重影响网络性能。请使用 CAT5 网线测试器
测试一下。
3. 请检查一下网络拓扑情况。请确认此拓扑是可行的。通常
的拓扑错误有网线过长,各结点间存在太多的中继器和集
线器。同样也请确认网络中不存在回路(因为两结点之间
在某一时刻仅允许一条路径是活动的)。网络回路会造成广
播风暴,以至严重占用网络带宽,导致网络性能急剧下降。

14
标准
IEEE802.3 10BASE-T Ethernet
IEEE802.3u 100BASE-TX Fast Ethernet
IEEE802.3ab 1000BASE-T
IEEE802.2x Flow Control and Back-pressure
IEEE802.1z Gigabit fiber
LED 指示灯
System power(绿色)
10/100Base-TX 端口:Link/Activity (绿色)
Gigabit copper 端口:Link/Activity(绿色)
Speed(黄色)
MINI GBIC:Link/Activity (绿色)
接口
100Base-T:48 x RJ-45 端口
Gigabit copper:1 x RJ-45 端口
Mini GBIC:1 x Mini GBIC 插槽
交换方式 存储转发方式
MAC 地址 带自动学习功能的 8k MAC 地址表
缓存大小 6Mbits
背板 20 Gbps
电源需求 100-240V 直流,50~60Hz
运行环境 0˚C to 45˚C (32˚F to 113˚F), 5% to 90% 湿度
存储环境 -10˚C to 60˚C, 5% to 95% 湿度
电力消耗 最大 21 瓦特
尺寸 440mm x 225mm x 44mm (W x D x H)
EMI 标准 FCC Class A, CE
安全认证 UL, cUL, CE/EN60950
技术规格
下表详细列出了 GigaX1048 交换机的规格:

15
GigaX Serisi
2 Katman Yönetilmeyen Anahtar
GigaX1048
Kullanıcı El Kitabı

16
Giriş
GigaX1048 anahtarını satın aldığınız için teşekkür ederiz! GigaX1048 anahtarı yüksek
performansa sahip çalışma grubu ağı oluşturmak için tasarlanan çoklu porta sahip bir
anahtardır. Sakla ve ilet anahtarlama mimarisine sahiptir ve bu da aktarım gecikme süresini
azaltır ve dolayısıyla yüksek hızda ağ değiştirme özelliği sunar. Bloke edilemeyen ve tam
kablo hızlı işlevleri sayesinde diğer kullanıcılar ile geniş bant için yarışmanıza gerek yoktur.
GigaX1048 anahtarında Gigabit ağ omurgasına kolay bağlanması için kırk sekiz RJ-45
10/100Mbps portu, bir RJ-45 10/100/1000Mbps portu ve bir Mini GBIC port bulunmaktadır.
GigaX1048 anahtarı, küçük ve orta ölçekli işletmelerde (KOBİ) departman çalışma grubu ya da
omurga ağı için mükemmel bir seçimdir.
Özellikleri
• Port özellikleri:
- 48 x RJ-45 10/100Mbps portlar
- 1 x RJ-45 10/100/1000Mbps portlar
- 1 x Mini GBIC yuva
• IEEE 802.3, 802.3u, 802.3ab ve 802.3z uyumlu
• Tüm 10/100Mbps portlarında otomatik MDI/MDIXʼi destekler
• Otomatik görüşmeyi destekler
• IEEE 802.3x akış kontrolü: Tam dubleks akış kontrolü; yarım dublekste geri basınç
• Sakla ve İlet anahtarlama mimarisi
• Bloke olmayan mimari
• 20 Gbps anahtar kumaşı
• Gömülü 6Mbits bellek tamponu
• Otomatik öğrenme adresleri ile birlikte 8K girişi MAC adres tablosu
• 19ʼʼ rafa monte edilebilen tasarım

17
GigaX 1048 switch Rubber stands
Power cord User manualRack-mount kit
Not: Yukarıda belirtilenlerden herhangi biri yoksa veya hasar görmüşse, bayiiniz ile
temasa geçiniz.
Paket muhteviyatı
Anahtarı kurmaya başlamadan önce, aşağıdakilerin paketinizde olduğunu kontrol ediniz:
1 x ASUS GigaX1048 anahtarı
1 x Güç kablosu
1 x Kullanım el kitabı
1 x Rafa monte etme kiti
4 x Plastik standlar

18
Donanım tanımı
Bu bölümde GigaX1048 anahtarının fiziksel özellikleri ve kurulum prosedürü anlatılmaktadır.
Ön Panel
GigaX1048 anahtarının ön paneli kırk sekiz RJ-45 10/100Mbps portuna (otomatik MDI/MDIX),
bir RJ-45 10/100/100Mbps portuna, fiber bağlantı için bir Mini GBIC yuvasına ve anahtarın
durumunu gösteren LED göstergelerine sahiptir.
Şekil 1. Ön Panel
RJ-45 Portları (Otomatik MDI/MDIX): Kırk sekiz RJ-45 10/100Mbps portu hazır otomatik
MDI/MDIXʼdir. Otomatik MDI/MDIX, düz veya çapraz Ethernet kablosunu kullanarak ağa bağlı
herhangi bir aygıta bağlanabileceğiniz anlamına gelmektedir (örn. Çalışma istasyonu, PC,
anahtar, hub vb.). Eski modellerin bazıları farklı aygıtlara bağlanmak için düz ve çapraz kablo
gerektirir.
Gigabit portu: 1 x 10/100/1000Mbps UTP portlar
1 x Mini GBIC portlar
Not: Mini GBIC modülü isteğe bağlıdır.
LED göstergeleri
LED göstergeleri çalıma durumu hakkında gerçek zamanlı bilgi sağlamaktadır. Aşağıdaki
tablo LED durumu ve anlamları hakkında bilgi vermektedir.
LED göstergeleri
LED Durum Açıklama
Güç Yeşil Üniteye elektrik verildi
Kapalı
Elektrik verilmedi
LNK/ACT
Yeşil Ethernet bağlantısı kuruldu
Yanıp sönüyor
Veri aktarılıyor
Kapalı
Ethernet bağlantısı yok
LNK/ACT
(Gigabit
bakırı,G1)
Yeşil Ethernet bağlantısı kuruldu
Yanıp sönüyor
Veri aktarılıyor
Kapalı
Ethernet bağlantısı yok
Hız (Gigabit
bakırı,G1)
sarı Port 1000Mbps modunda çalıştırılıyor.
Kapalı
Port 10/100Mbps modunda çalıştırılıyor veya
herhangi bir aygıt iliştirilmedi.
LNK/ACT (Mini
GBIC, G2)
Yeşil Ethernet bağlantısı kuruldu
Yanıp sönüyor
Veri aktarılıyor
Kapalı
Hiçbir veri aktarılmadı

19
Şekil 2. Arka Panel
Masaüstüne Kurulum
Plastik standların takılması
1. Anahtarı dengeli ve toz bulunmayan bir yüzeye yerleştirin.
2. Plastik standın yapışkan örtüsünü çıkarın.
3. Plastik standı anahtarın altındaki bir köşeye takın.
4. Dış plastik standları da takmak için 2. ve 3. adımları tekrarlayın.
Raf montesi
ASUS GigaX1048 anahtarı, EIA standart 19inçlik rafa takılabilen raf montaj kiti ile birlikte
verilmektedir. Anahtar, diğer cihazlar ile birlikte kablo dolabına yerleştirilebilir. Anahtarı rafa
monte etmek için aşağıdaki adımları yerine getirin:
1. Montaj desteklerini anahtarın her iki tarafındaki deliklere sabitlemek için küçük vidaları
kullanın.
2. ASUS GigaX1048ʼi rafa yerleştirin. Destekteki delikleri raftaki delikler ile eşleştirin, ardından
anahtarı raf montaj vidalarını kullanarak sabitleyin.
Not: Düzgün havalandırma yapmak için anahtarın ön tarafında en az 10 cm (4 inç) ve
arka tarafında ise 8 cm (3.4 inç) boşluk bırakın. Bu işlemi kapalı raf kurulumunda
yapmanızı öneririz.
Monte edildiğinde, elektrik kablosunu arka paneldeki güç rafına, ardından güç çıkışına bağlayın.
Giriş voltajı 100-240VAC@50~60Hzʼdir. Elektriğin düzgün verilip verilmediğini görmek için ön
paneldeki güç göstergesini kontrol edin.
Sigortanın özelliği: Seramik tüp türü
ø5mm x 20mm2A/250V (Maks)
Arka Panel
Guc fisi GigaX1048 anahtarinin arkasina güç fişi GigaX1048 anahtarının arkasında
yerleştirilmiştir. Giriş voltajı 50-60Hz frekansı ile 100-240V ACʼdir. Güç fişine sigorta (ø5mm
x 20mm 2A/250V Maks.) dahil olup kararsız voltaj nedeniyle anahtara zarar vermesini önler.
Sigorta patladığında değiştirilmelidir.
This manual suits for next models
1
Table of contents
Languages:
Other Asus Switch manuals

Asus
Asus GIGAX 2024M User manual

Asus
Asus GIGAX2024 User manual

Asus
Asus GX1105N User manual

Asus
Asus GigaX1024i User manual

Asus
Asus GigaX1008 User manual

Asus
Asus GigaX1105N User manual

Asus
Asus GigaX1008 User manual

Asus
Asus GigaX 1016 User manual

Asus
Asus GigaX1024 User manual

Asus
Asus GIGAX 2024M User manual

Asus
Asus GX1108B User manual

Asus
Asus E1816 User manual

Asus
Asus GigaX1104PS User manual

Asus
Asus GIGAX1005 User manual

Asus
Asus GigaX1024 User manual

Asus
Asus GigaX 2124X User manual

Asus
Asus GX-D1241 User manual

Asus
Asus GIGAX 1116 User manual

Asus
Asus GigaX1005N User manual

Asus
Asus GigaX 1124 User manual