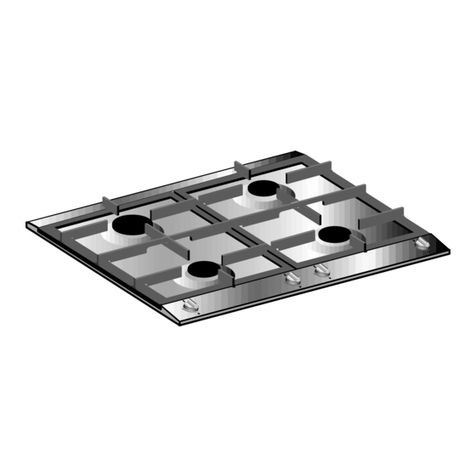
Atag HEK4 Series Technical manual

GEBRUIKSAANWIJZING /
INSTALLATIEVOORSCHRIFT
INSTRUCTIONS FOR USE /
INSTALLATION INSTRUCTIONS
MODE D’EMPLOI /
INSTRUCTIONS D'INSTALLATION
GEBRAUCHSANWEISUNG /
INSTALLATIONSANLEITUNG
INBOUW ELEKTRO-KOOKPLAAT
BUILT-IN ELECTRIC HOB
TABLE DE CUISSON ÉLECTRIQUE À
ENCASTRER
EINBAU-ELEKTROKOCHMULDE
HEK4..
700000751000
700000751000 HEK4.. 02-05-2002 10:53 Pagina 1

1. Normaal kookplaat Ø 18 cm
vermogen 1500 W
2. Snelkookplaat Ø 14,5 cm
vermogen 1500 W
3. Snelkookplaat Ø 18 cm
vermogen 2000 W
4. Normaalkookplaat Ø 14,5 cm
vermogen 1000 W
5. Vangschaal
6. Aan/uit signalering
7. Bedieningsknop
De vangschaal wordt door geleiding
warm. Dit veroorzaakt geen schade
aan het aanrechtblad, maar het is
wel een punt waar u rekening mee
moet houden, vooral met kleine
kinderen.
6
12
10 43
8
12
5
7
9
11
6
12
10 43
8
12
5
7
9
11
6
12
10 43
8
12
5
7
9
11
6
12
10 43
8
12
5
7
9
11
1
2 3
4
567
TOESTELBESCHRIJVING 2
700000751000 HEK4.. 02-05-2002 10:53 Pagina 2

BEDIENING
1. Controleer of de stekker in het
stopcontact zit.
2. Schakel alle elementen drie
minuten in op de hoogste stand
zonder dat er een pan op staat.
Een speciale roestwerende laag
brandt nu weg. Hierbij kan even een
onaangename geur optreden.
De bedieningsknoppen van de
normaal- en de snelkookplaat kunt u
zowel rechts- als linksom draaien.
INGEBRUIKNAME NORMAAL- EN
SNELKOOKPLAAT
0Uit
1 - 3 Warmhouden en sudderen
3 - 4 Doorkoken
4 - 6 Aan de kook brengen
6 - 8 Aanbraden en frituren
8 - 12 Bakken
STANDEN
3
700000751000 HEK4.. 02-05-2002 10:53 Pagina 3

BEDIENING
Aan het controlelampje in het
bedieningspaneel kunt u zien welke
kookplaat is ingeschakeld.
Kook met het deksel op de pan.
U kookt dan sneller en voordeliger.
De kookplaat blijft nog geruime tijd
warm nadat deze is uitgeschakeld.
Gebruik deze nawarmte voor de
bereiding. Voor een goede warmteoverdracht
is het belangrijk dat:
- De pan een solide vlakke bodem
heeft.
- De bodem van de pan droog is.
Vocht op de kookplaat kan roest
veroorzaken.
- De diameter van de pan iets
groter is dan de diameter van de
kookplaat.
Een te kleine pan veroorzaakt
een onregelmatige
warmteverdeling in de
kookplaat. Hierdoor kan de
kookplaat krom trekken of zelfs
barsten. Bovendien zal bij een te
kleine pan overgekookt voedsel
op de kookplaat komen.
CONTROLELAMPJE
4
Niet zo Maar zo
PANNEN
TIPS
700000751000 HEK4.. 02-05-2002 10:53 Pagina 4

ONDERHOUD
Verwijder overgekookt voedsel zo
snel mogelijk. Met name
overkooksel van gerechten als rode
kool, rabarber en appelmoes
moeten snel verwijderd worden.
Wanneer ze lang op het email of
roestvrijstaal inwerken kan dit
verkleuren.
elektrokookplaten (Collo Elektrol). U
kunt hiervoor ook een druppeltje
(naaimachine)olie gebruiken. De
elementen niet te dik insmeren
want dan worden ze plakkerig en
verspreiden ze een onaangename
geur.
De roestvrijstalen rand van het
element nooit schoonmaken met
een schuurmiddel maar met een
(vloeibaar) schoonmaakmiddel.
Na het schoonmaken de zeepresten
verwijderen, vooral uit de ruimte
tussen het gietijzeren element en
de roestvrijstalen rand.
Na het schoonmaken altijd
eventueel aanwezige zeepresten
verwijderen en het element even
inschakelen om het vocht te laten
verdampen.
Hardnekkige vlekken op geëmail-
leerde vangschalen kunt u
verwijderen met een vloeibaar
schuurmiddel of kunststof
schuursponsje.
Hardnekkige vlekken op roestvrij-
stalen toestellen kunt u
verwijderen met 3M roestvrijstaal-
reiniger (verkrijgbaar bij de
ijzerwarengroothandel) of een niet-
schurende sanitairspons. (Deze zijn
te herkennen aan het witte schuur-
vlak, bijv. Scotch Brite no. 373. In
groene schuursponsjes zitten
schuurmiddelen die krassen veroor-
zaken.) Het roestvrijstaal is voorzien
van een structuur. Bij schuren of
polijsten zullen er (glanzende)
vlekken in het oppervlak ontstaan.
ELEMENTEN
5
VANGSCHAAL
Afnemen met een prop
keukenpapier of een iets vochtige
doek is meestal voldoende.
Overgekookte en aangebakken
restjes verwijderen met een botte
kant van een mes of een kunststof
schuursponsje (Scotch Brite). Van
tijd tot tijd kunt u het element
invetten met een
onderhoudsmiddel voor
700000751000 HEK4.. 02-05-2002 10:53 Pagina 5
STORINGEN 6
Kookzones worden niet warm Stekker niet in het stopcontact
Zekering in de meterkast defect
Stekker in het stopcontact steken
Meterkast controleren
OORZAAKSTORING REMEDIE
Controleer bij een storing eerst of u het euvel zelf kunt verhelpen. Lukt dat niet, neem dan contact op met uw
leverancier. Kan hij u niet helpen, bel of schrijf ons en wij zullen u van dienst zijn.
Omschrijf de klacht altijd zo duidelijk mogelijk en geef altijd het typenummer van het toestel op.
TECHNISCHE GEGEVENS
Typenummer:
Energiesoort:
Aansluitwaarde:
HEK4.. * (topbediening)
230 V/50 Hz
6000 W
* Op de ontbrekende posities in het typenummer staat de kleurcode van het toestel. Voorbeeld: een kookplaat
HEK453 is een kookplaat HEK4.. in kleur 53 (jasmijnwit).
700000751000 HEK4.. 02-05-2002 10:53 Pagina 6

INSTALLATIEVOORSCHRIFT
Dit toestel mag alleen door een er-
kend elektro-technisch installateur
aangesloten worden.
230 V AC - 50 Hz
De aansluiting moet voldoen aan de
nationale en lokale voorschriften.
Op het gegevensplaatje staan de
aansluitmogelijkheden aangegeven.
Het gegevensplaatje vindt u aan de
onderzijde van het toestel. Het
toestel moet altijd geaard zijn.
Gebruik voor het aansluiten een
kabel van het type H0 5RR-F5G-
1,5mm2. Wilt u een vaste aansluiting
maken zorg er dan voor dat er een
omnipolaire schakelaar met een
contactafstand van minimaal 3 mm
in de toevoerleiding wordt
aangebracht.
HEK4.. 6000 W
1. Monteer de aansluitkabel.
2. Zaag de uitsparing in het
aanrechtblad (zie Inbouwmaten,
pag. 8). De minimale bladdikte
bedraagt 28 mm.
3. Laat de kookplaat in de
uitsparing zakken.
4. Zet de kookplaat vast. De
bevestigingsbeugels kunt u
tegen de onderkant van de
uitsparing klemmen.
5. Breng de elektrische aansluiting
tot stand.
6. Controleer tenslotte de werking
van het toestel.
Dit toestel voldoet aan de geldende
CE richtlijnen.
ALGEMEEN
7
AANSLUITWAARDE
INBOUWEN
Werkblad
28 mm
Opvulblokje
Werkblad
50 mm
ELEKTRISCHE AANSLUITING
700000751000 HEK4.. 02-05-2002 10:53 Pagina 7

INBOUWMATEN 8
50
50
590 530
490
36
560
40
6
12
10 43
8
12
5
7
9
11
6
12
10 43
8
12
5
7
9
11
6
12
10 43
8
12
5
7
9
11
6
12
10 43
8
12
5
7
9
11
700000751000 HEK4.. 02-05-2002 10:53 Pagina 8

ENGLISH
700000751000 HEK4.. 02-05-2002 10:53 Pagina 9

APPLIANCE DESCRIPTION
1. Normal cooking plate ø 18 cm,
power 1500 W
2. Rapid cooking plate ø 14.5 cm,
power 1500 W
3. Rapid cooking plate ø 18 cm,
power 2000 W
4. Normal cooking plate ø 14.5 cm,
power 1000 W
5. Base plate
6. On/off indicator
7. Operating dial
Heat conduction will make the base
plate warm. This will not damage
the counter top, but you must keep
it in mind, in particular in reference
to small children.
6
12
10 43
8
12
5
7
9
11
6
12
10 43
8
12
5
7
9
11
6
12
10 43
8
12
5
7
9
11
6
12
10 43
8
12
5
7
9
11
1
2 3
4
567
10
700000751000 HEK4.. 02-05-2002 10:53 Pagina 10

OPERATION
1. Check whether the plug has
been connected to the mains.
2. Switch on all of the elements in
the highest setting for three
minutes without pans.
A special rust-resistant coating will
be burnt off. This may result in an
unpleasant odour.
The operating dials for the normal
and rapid cooking plates can be
turned either clockwise or counter-
clockwise.
0Off
1-3 Simmering, warming
3-4 Cooking
4-6 Bringing to a boil
6-8 Browning and deep frying
8-12 Frying
FIRST USE
11
NORMAL AND RAPID COOKING
PLATES
SETTINGS
700000751000 HEK4.. 02-05-2002 10:53 Pagina 11

OPERATION
The indicator in the operating panel
shows which cooking plate is
switched on.
Cook with covers on the pans: this
is quicker and less expensive. The
cooking plate remains warm for
some time after it has been
switched off. Make use of this extra
heat in preparing your meals.
Pans that are too small result in
uneven distribution of the heat
through the cooking plate. As a
result, the plate may become
distorted or may even break. What
is more: if a pan boils over, it will
spill onto the cooking plate.
INDICATOR
PANS
For proper heat conduction, it is
important that:
- The pan has a solid, flat bottom.
- The bottom of the pan is dry.
Moisture on the cooking plate
may cause rust.
- The diameter of the pan is
slightly larger than the diameter
of the cooking plate.
TIPS
WRONG RIGHT
12
700000751000 HEK4.. 02-05-2002 10:53 Pagina 12

MAINTENANCE
Remove spills as quickly as
possible. Spills caused by boiling
over of dishes such as red cabbage,
rhubarb and apple sauce in
particular must be removed
immediately. If they remain on the
enamel or stainless steel surface for
too long, the surface may discolour.
Wiping clean with paper towelling
or with a slightly damp cloth is
normally sufficient. Spills and
burned food can be removed with
the dull edge of a knife or with a
synthetic scouring pad (Scotch
Brite).
Occasionally lubricate the element
with a lubricant for electric hobs
(Collo Elektrol). Or use a drop of
(sewing machine) oil. Do not over-
lubricate the elements, as this will
make them sticky and will result in
unpleasant odours.
The stainless steel edge of the
element must never be cleaned
with a scouring agent. Use only a
(liquid) cleanser. After cleaning
remove all cleanser remnants, in
particular from the space between
the cast iron element and the
stainless steel edge. After
cleaning, always remove any
cleanser remnants, then briefly
switch on the element to allow
all moisture to evaporate.
Tough spots on the enamel base
plate can be removed with a liquid
scouring agent or with a synthetic
scouring pad.
Tough spots on stainless steel
models can be removed with 3M
stainless steel cleanser (available at
hardware stores) or with a non-
scouring sanitary sponge (these
have a white scouring surface, e.g.
Scotch Brite no. 373. Green
scouring pads contain scouring
agents that may cause scratches).
The stainless steel has a specific
structure. Scouring or polishing will
cause (shiny) spots in the surface.
ELEMENTS
13
BASE PLATE
700000751000 HEK4.. 02-05-2002 10:53 Pagina 13

TROUBLE SHOOTING 14
TECNICAL DATA
CAUSETROUBLE REMEDY
In case of a malfunction, check first whether you can remedy it yourself. If not, contact your supplier. If the supplier is
unable to help, call or write us. We will be happy to assist you.
Always describe the complaint as completely as possible and always indicate the appliance type number.
* The dots in the model number indicate the colour code, e.g.: a HEK455 is a hob HEK4.. in the colour 55 (white).
Cooking zones do not get warm The mains power supply is not "On"
The fuse in the fuse box is
damaged
Turn on the mains power supply
Check the fuse box
Model number:
Energy supply:
Overall wattage:
HEK4.. * (top operation)
230 V / 50 Hz
6000 W
700000751000 HEK4.. 02-05-2002 10:53 Pagina 14

INSTALLATION INSTRUCTIONS 15
This appliance may only be
installed by a certified technician.
230 V AC - 50 Hz
The electrical connection must
comply with national and local
regulations.
The information plate explains the
connection options. This plate is
located at the bottom of the
appliance. The appliance should
always be earthed. It is
recommended that cable type H0
5RR-F5G-1.5 mm2be used. If you
want to make a fixed connection,
make sure that a multi-polar
switch with a contact separation
of at least 3 mm is fitted in the
supply line.
HEK4.. 6000 W
1. Attach the connection cable.
2. Cut the hole in the counter top
(see installation dimensions on
page 16). The counter must be at
least 28 mm thick.
3. Lower the hob into the hole.
4. Fasten the hob. You can fasten
the fixing clamps against the
underside of the ope-ning.
5. Make the electrical connection.
6. Check to ensure that the
appliance functions properly.
This appliance conforms to current
CE guidelines.
GENERAL
OVERALL WATTAGE
BUILDING-IN
Worktop
28 mm
Fill-up block
Worktop
50 mm
ELECTRICAL CONNECTION
700000751000 HEK4.. 02-05-2002 10:53 Pagina 15

BUILDING-IN DIMENSIONS 16
50
50
590 530
490
36
560
40
6
12
10 43
8
12
5
7
9
11
6
12
10 43
8
12
5
7
9
11
6
12
10 43
8
12
5
7
9
11
6
12
10 43
8
12
5
7
9
11
700000751000 HEK4.. 02-05-2002 10:53 Pagina 16

FRANÇAIS
700000751000 HEK4.. 02-05-2002 10:53 Pagina 17

DESCRIPTION DE L’APPAREIL
1. Plaque de cuisson normale de
18 cm de ø
Puissance de 1500 W
2. Plaque de cuisson rapide de
14,5 cm de ø
Puissance 1500 W
3. Plaque de cuisson rapide de
18 cm de ø
Puissance 2000 W
4. Plaque de cuisson normal de
14,5 cm de ø
Puissance 1000 W
6. Voyant de fonctionnement
7. Bouton de commande
Le plateau chauffe par conductivité.
Ce phénomène ne peut
endommager la table de travail,
mais il convient d'en tenir compte
en particulier avec les petites
enfants.
18
6
12
10 43
8
12
5
7
9
11
6
12
10 43
8
12
5
7
9
11
6
12
10 43
8
12
5
7
9
11
6
12
10 43
8
12
5
7
9
11
1
2 3
4
567
700000751000 HEK4.. 02-05-2002 10:53 Pagina 18

COMMANDE
1. Vérifier que l'appareil est
branché sur le réseau.
2. Allumer tous les éléments
chauffants pendant trois
minutes sur la position la plus
haute sans placer de casseroles
sur les zones chauffantes.
Une couche spéciale anti-rouille se
consume maintenant et peut
dégager une odeur désagréable.
Les boutons de commande des
plaques de cuisson normale et
rapide tournent vers la gauche et
vers la droite.
0arrêt
1-3 Garder au chaud et mijoter
3-4 Poursuite de cuisson
4-6 Faire bouillir
6-8 Saisir et frire
8-12 Rôtir à chaleur vive
MISE EN SERVICE
19
PLAQUES DE CUISSON
NORMALE ET RAPIDE
POSITIONS
700000751000 HEK4.. 02-05-2002 10:53 Pagina 19

Pour une bonne transmission de la
chaleur il importe que :
- la casserole possède un fond
solide et plat
- le dessous de la casserole soit
sec. L'humidité sur la plaque de
cuisson peut faire rouiller celle-ci.
- le diamètre de la casserole soit un
peu plus grand que le diamètre de
la plaque de cuisson.
COMMANDE
Le voyant lumineux situé sur le
panneau de commande permet de
voir quelle plaque de cuisson est
allumée.
Cuire avec le couvercle sur la
casserole. La cuisson est plus
rapide et donc économique. La
plaque de cuisson reste chaude
assez longtemps après avoir été
éteinte.
Utiliser cette chaleur pour la
préparation.
Une casserole trop petite donne
une diffusion irrégulière de la
chaleur dans la plaque de cuisson.
Celle-ci risque alors de se courber
et même de se fissurer. En outre,
lorsque la casserole est trop petite
il y a plus de risque que la casserole
déborde et que des aliments collent
s'attachent sur la plaque de
cuisson.
VOYANT LUMINEUX
CASSEROLES
20
CONSEIL
NON OUI
700000751000 HEK4.. 02-05-2002 10:53 Pagina 20
Table of contents
Languages:
Other Atag Hob manuals

Atag
Atag HG311MX/T User manual

Atag
Atag HC6471E User manual

Atag
Atag HG96 MD Series User manual

Atag
Atag HL60 A Series User manual

Atag
Atag HIDD8471LV Parts list manual

Atag
Atag HI1272S User manual

Atag
Atag HG61 M Series User manual

Atag
Atag HG6111K User manual

Atag
Atag HIDD8471E Parts list manual

Atag
Atag HG6411EBA User manual

Atag
Atag HI6271T User manual

Atag
Atag HI39673TF User manual

Atag
Atag HG511MX/T User manual

Atag
Atag HIDD7472EV/A01 User manual

Atag
Atag HG6471MBA User manual

Atag
Atag HG6411WEB User manual

Atag
Atag IG9571MB User manual

Atag
Atag HG40 P Series User manual

Atag
Atag HG6111H User manual

Atag
Atag HI170G User manual