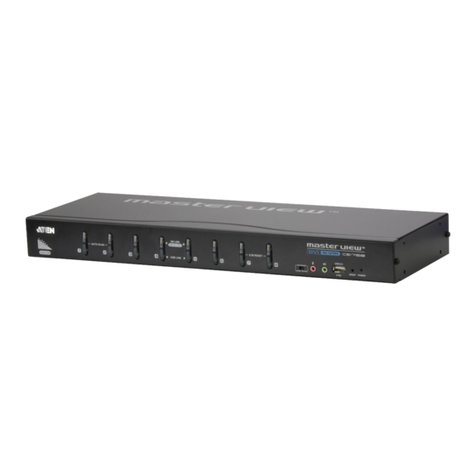
ATEN CS-1262 User manual

User Manual
CS-1262
Read this guide thoroughly and follow the installation and operation
procedures carefully in order to prevent any damage to the unit and/or
any devices that connect to it.
This package contains:
M1 CS-1262 Two Port DVI + Audio KVM Switch
M2 Custom KVM Cables (Part No. 2L-7D02P)
M1 Power Adapter (DC 5.3V; 2.4A)
M1 User Manual
M1 Quick Start Guide
If anything is damaged or missing, contact your dealer.
© Copyright 2004 - 2005 ATEN®International Co., Ltd.
Manual Part No. PAPE-1259-100G
Printed in Taiwan 07/2005
All brand names and trademarks are the registered property of their respective owners.
2005-07-01

Note: This equipment has been tested and found to comply
with the limits for a Class B digital device, pursuant to Part
15 of the FCC Rules. These limits are designed to provide
reasonable protection against harmful interference in a
residential installation. This equipment generates, uses and
can radiate radio frequency energy, and if not installed and
used in accordance with the instruction manual, may cause
interference to radio communications. However, there is no
guarantee that interference will not occur in a particular
installation. If this equipment does cause harmful
interference to radio or television reception, which can be
determined by turning the equipment off and on, the user is
encouraged to try to correct the interference by one or more
of the following measures:
MReorient or relocate the receiving antenna;
MIncrease the separation between the equipment and
receiver;
MConnect the equipment into an outlet on a circuit different
from that which the receiver is connected;
MConsult the dealer or an experienced radio/television
technician for help.
2005-07-01

Overview
The Master View CS-1262 DVI KVM Switch improves on
previous KVM Switch designs by incorporating DVI video and
audio. Now, two computers can be accessed and controlled
from a single PS/2 keyboard, DVI monitor, and PS/2 mouse
console.
DVI (Digital Visual Interface) supports both digital video input
(flat panel displays, data projectors, plasma displays, digital
TVs and set-top boxes) and analog video input (traditional
monitors and TVs).
The CS-1262 is audio enabled. A single microphone can
provide audio input to each of the computers, and you can
listen to the audio output of each computer on a single set of
speakers (on a one-at-a-time basis). With the CS-1262’s
independent (asynchronous) switching feature, you can even
have the KVM focus on one computer while the audio focus is
on the other.
Setup is fast and easy; simply plug the cables into their
appropriate ports. There are no installation routines, and no
software to configure.
There are two convenient methods to switch the KVM/Audio
focus between the computers: manually, with the push button
port selection switches located on the unit’s front panel; and
with hotkey combinations entered from the keyboard.
There is no better way to save time and money than with a
Master View CS-1262 installation. Since a single console
manages all of the computers, the CS-1262 setup: eliminates
the expense of having to purchase separate console
components for each computer; saves all the space those extra
components would take up; saves on energy costs; and
eliminates the inconvenience and wasted effort involved in
constantly moving from one computer to another.
- 1 -
2005-07-01

Features
MOne console controls two computers
MDVI digital and analog monitor support - fully compliant with
the DVI specification
MAudio enabled
MEasy to install - no software required - connecting cables to
the computers is all it takes
MEasy to operate - manual and hotkey computer selection -
Auto Scan function to monitor computer operation
MThe KVM and audio focus can be switched together or
separately (asynchronous switching)
MLED display for easy status monitoring
MHot pluggable - add or remove computers for maintenance
without powering down the switch
MKeyboard and mouse emulation for error free computer
booting
MSuperior video quality - up to 1600 x 1200; DDC2B
MCompatible with all PC compatible operating platforms
- 2 -
2005-07-01

Hardware Requirements
Console
MA DVI monitor
MA PS/2 mouse
MA PS/2 keyboard
Computers
The following equipment must be installed on each computer
that is to be connected to the system:
MA DVI video port
MA 6-pin mini-DIN (PS/2 sytle) mouse port
MA 6-pin mini-DIN (PS/2 sytle) keyboard port
Cables
Only CS Custom cable sets specifically designed to work with
this switch may be used to link to the computers. For optimum
signal integrity and to simplify the layout, two high quality
cables sets are provided with this package.
Note: There are three types of DVI signals (DVI-I, DVI-A,
DVI-D). The cable type must match the type of signal
being used by the DVI source and the DVI display.
- 3 -
2005-07-01

Front Panel
1. Port Selection Switches
2. Port LEDs
The Port LEDs are built into the Port Selection Switches.
The upper ones are the On Line LEDs; the lower ones are
the Selected Port LEDs:
MAn On Line LEDs lights ORANGE to indicate that the
computer attached to the corresponding port is up and
running.
MA Selected LED lights GREEN to indicate that the
computer attached to its corresponding port is the one
that has the KVM focus.
- 4 -
1&2
2005-07-01

Rear Panel
1. Console Port Section
The cables from your keyboard, monitor, mouse,
microphone, and speakers plug in here. Each port is color
coded and marked with an appropriate icon.
2. CPU Port Section
The cables that link the switch to your computers plug in
here. Each CPU section is comprised of a keyboard, DVI
video, mouse, microphone, and speaker port. Each port is
color coded and marked with an appropriate icon.
3. Power Jack
The power adapter cable plugs into this jack.
- 5 -
1 2
3
2005-07-01

Installation
Cable Connection
To set up your Master View CS-1262 installation, refer to the
installation diagram on the following page (the numbers in the
diagrams correspond to the steps, below), and do the following:
1. Plug your keyboard, DVI monitor, mouse, microphone, and
speakers into the Console Ports located on the unit’s rear panel.
2. Using a KVM cable set (provided with this package), plug
the DVI connector into any available DVI socket in the CPU
Port section of the switch, and plug the accompanying
keyboard, mouse, microphone and speaker connectors into
their corresponding sockets.
Note: 1. Use the end of the cable that has the shorter
connector leads - the end with the longer leads is
for plugging into the computer.
2. Be sure that all the plugs are in the same CPU Port
sockets (all in Port 1, all in Port 2, etc.).
3. The CPU Port sockets and cable plugs are color
coded and marked with an appropriate icon for
easy installation.
3. At the other end of the cable, plug the keyboard, DVI
monitor, mouse, microphone, and speaker connectors into
their respective ports on the computer.
4. Plug the power adapter that came with your switch into an
AC power source, then plug power adapter cable into the
switch’s Power Jack.
- 6 -
1. Make sure that power to each of the devices you
will be connecting up has been turned off. You
must unplug the power cords of any computers
that have the Keyboard Power On function.
2. Make sure that all devices you will be connecting up
are properly grounded.
2005-07-01
- 7 -
1
1
4
2
3
2005-07-01

Operation
Hot Plugging
The CS-1262 supports hot plugging - components can be
removed and added back into the installation by unplugging and
replugging their cables without the need to shut the unit down.
Powering Off and Restarting
If it becomes necessary to Power Off the Master View unit,
before starting it back up you must do the following:
1. Shut down all the computers that are attached to the switch.
2. Unplug the switch’s power adapter cable.
3. Wait 10 seconds, then plug the switch’s power adapter cable
back in.
4. After the switch is up, Power On the computers.
The Beeper
The CS-1262 beeps to provide information about its operations
as follows:
Beeps Meaning
1Manual port changes
Start of Auto Scan Mode
Beeper disabled
2Power On
End of Auto Scan Mode
Hotkey port changes
Beeper enabled
The Beeper can be toggled off and on with the following hotkey
combination:
[Scroll Lock] [Scroll Lock] [B] [Enter]
- 8 -
2005-07-01

Port Switching
There are two convenient methods to switch the KVM and
Audio focus between the computers: Manual - which involves
pressing the pushbutton port selection switches located on the
unit’s front panel; and Hotkey - which involves entering
combinations from the keyboard.
Manual:
Press the Port Selection switches as follows:
MPress a switch for longer than two seconds to bring the KVM
and audio focus to the computer attached to its
corresponding port.
MPress a switch for less than two seconds to bring only the
KVM focus to the computer attached to its corresponding
port.
MPress switches 1 and 2 simultaneously for 3 seconds to start
Auto Scan Mode. See p. 10 for details.
Hotkeys:
Key in the hotkey combinations according to the information in
the following table:
Hotkey Action
[Scroll Lock] [Scroll Lock]
[Enter] Switches the KVM and audio focus from the port
that currently has the KVM focus to the other port
(1 to 2; 2 to 1).
Note that the KVM and audio focus both go to
this port even if they were on different ports to
begin with.
[Scroll Lock] [Scroll Lock] [K]
[Enter] Brings only the KVM focus from the port that
currently has it to the other port. The audio focus
remains where it is.
[Scroll Lock] [Scroll Lock] [S]
[Enter] Brings only the audio focus from the port that
currently has it to the other port. The KVM focus
remains where it is.
- 9 -
2005-07-01

Auto Scanning
The CS-1262’s Auto Scan feature automatically switches the
KVM focus between the two computer ports at regular intervals.
This allows you to monitor the computer activity without having
to take the trouble of switching from port to port manually. See
the table below for details.
Hotkey Action
[Scroll Lock] [Scroll Lock]
[A] [Enter] Starts Auto Scan Mode. The KVM focus switches
from port to port at 5 second intervals.
[1, 2, 3, or 4] Once Auto Scan Mode begins, the scan interval can
be changed at any time by keying in the number that
represents the desired number of seconds, as
follows:
1 = 3 seconds
2 = 5 seconds
3 = 10 seconds
4 = 20 seconds).
[Esc] or [Spacebar] Exits Auto Scan Mode.
Note: 1. While Auto Scan Mode is in effect, ordinary keyboard
and mouse functions are suspended - only Auto
Scan Mode compliant keystrokes and mouse clicks
can be input. You must exit Auto Scan Mode in order
to regain normal control of the console.
2. Although the video focus switches from port to port,
the keyboard, mouse, and audio do not switch. They
stay at the port they were on when Auto Scanning
started.
- 10 -
2005-07-01

Hotkey Summary Table
Hotkey Action
[Scroll Lock] [Scroll Lock]
[Enter] Switches the KVM and audio focus from the port
that currently has the KVM focus to the other port
(1 to 2; 2 to 1).
Note that the KVM and audio focus both go to
this port even if they were on different ports to
begin with.
[Scroll Lock] [Scroll Lock] [K]
[Enter] Brings only the KVM focus from the port that
currently has it to the other port. The audio focus
remains where it is.
[Scroll Lock] [Scroll Lock] [S]
[Enter] Brings only the audio focus from the port that
currently has it to the other port. The KVM focus
remains where it is.
[Scroll Lock] [Scroll Lock] [A]
[Enter] Starts Auto Scan Mode. The KVM focus switches
from port to port at 5 second intervals.
[1, 2, 3, or 4] Once Auto Scan Mode begins, the scan time
interval can be changed at any time by keying in
the number that represents desired scan interval.
[Scroll Lock] [Scroll Lock] [B]
[Enter] Toggles the Beeper on and off.
- 11 -
2005-07-01

Appendix
DVI Pin Assignments
Pin Signal Pin Signal
1TMDS Data2- 16 Hot Plug Detect
2TMDS Data2+ 17 TMDS Data0-
3GND 18 TMDS Data0+
4N.C. 19 GND
5N.C. 20 N.C.
6DDC Clock 21 N.C.
7DDC Data 22 TMDS Clock Shield
8Analog Vertical Sync. 23 TMDS Clock+
9TMDS Data1- 24 TMDS Clock-
10 TMDS Data1+ C1 Analog Red
11 GND C2 Analog Green
12 N.C. C3 Analog Blue
13 N.C. C4 Analog H. Sync.
14 +5V Power C5 Analog Ground (Analog R, G,
B Return)
15 Ground (return for +5V, H
Sync., and V Sync.)
- 12 -
2005-07-01

Specifications
Function Specification
CPU Ports 2
Port Selection Push button switches; Hotkeys
Console
Connectors Keyboard 1 x 6 pin mini-DIN F
Mouse 1 x 6 pin mini-DIN F
Video 1 x DVI-I F
Speakers 1 x Earphone jack
Microphone 1 x Microphone jack
CPU Port
Connectors Keyboard 2 x 6 pin mini-DIN F
Mouse 2 x 6 pin mini-DIN F
Video 2 x DVI-I F
Speakers 2 x Earphone jacks
Microphone 2 x Microphone jacks
LEDs On Line 2 (Orange)
Selected 2 (Green)
Power Consumption DC 5.3V; 3.2W (max.)
Scan Interval 5 secs. (default)
KB / Mouse Emulation PS/2
Video Resolution 1600 x 1200; DDC2B
PC Compatibility Windows, Linux, Netware, Unix
Environment Operating Temperature: 0 - 50oC
Storage Temperature: -20 - 60oC
Humidity: 0 - 85% RH, Noncondensing
Housing Metal
Weight 0.8kg
Dimensions (L x W x H) 20.0 x 7.45 x 4.2 cm
- 13 -
2005-07-01

- 14 -
Limited Warranty
IN NO EVENT SHALL THE DIRECT VENDOR’S LIABILITY EXCEED THE PRICE
PAID FOR THE PRODUCT FROM THE DIRECT, INDIRECT, SPECIAL,
INCIDENTAL OR CONSEQUENTIAL DAMAGES RESULTING FROM THE USE
OF THE PRODUCT, DISK OR ITS DOCUMENTATION.
The direct vendor makes no warranty or representation, expressed, implied, or
statutory with respect to the contents or use of this documentation, and specially
disclaims its quality, performance, merchantability, or fitness for any particular
purpose.
The direct vendor also reserves the right to revise or update the device or
documentation without obligation to notify any individual or entity of such revisions,
or update. For further inquires please contact your direct vendor.
2005-07-01
Other manuals for CS-1262
1
Table of contents
Other ATEN Switch manuals

ATEN
ATEN Altusen KL1508Ai User manual

ATEN
ATEN AS-154P User manual

ATEN
ATEN Altusen KL1508Ai User manual

ATEN
ATEN VS-291 User manual

ATEN
ATEN CS782DP User manual

ATEN
ATEN VP2020 User manual

ATEN
ATEN VanCryst VM3200 User manual

ATEN
ATEN KN1000A User manual

ATEN
ATEN Altusen KL0116 User manual

ATEN
ATEN Master View CS-172 User manual