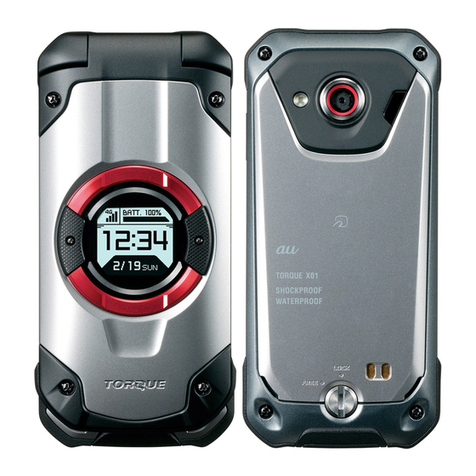
AU TORQUE G04 Service manual

Basic Operation
For explanations of basic functions, refer to "Basic Manual".
Incoming (charging) lamp
Lights in red during charging. Flashes in green for a missed call or new mail.
F Power button / fingerprint sensor
Turning the
Power On
Press and hold F
(Power button)
until the incoming
light turns on.
Home Screen Display
From the Start screen, slide/flick
" " toward "START" to display the
Home screen.
Slide/flick toward "CAMERA"/
"PHONE" to activate camera/phone.
《Start Screen》
[ (Apps)] Apps list icon
Display the apps menu.
k Camera button
Press and hold to activate the camera. Also use as shutter for still photos and
underwater camera screen.
Navigation bar
C (BACK): Return to the previous screen. When " " appears in the
character entry screen, tap this button to hide the keyboard or
menu.
H (HOME): Display the Home screen. Long-touching this button activates
Google Assistant.
N (RE-
CENTS):
Show recently-used applications. When the multi-window
activates, this button is changed to " ". Tap to switch apps
displayed in the multi-window.
d Direct button
Press and hold to activate the set function.
《Home Screen》
Display
Touch directly with your finger to operate. The touch operation is available on this product even when the screen or
your hands are wet, also wearing gloves. "Glove touch mode" is effective while the screen light is on. When you touch
the screen with your bare hands, the setting turns to off and remains until the screen turns off. To set "Glove touch
mode" to "Always ON", from the apps list → [Settings] → [Display] → [Glove touch mode] → [Always ON] → [OK]
Tap/Double-tap
Lightly touch a screen
and then immediately
release your finger. Tap-
ping a screen twice in the
same position is called
double-tap.
Long-touch
Keep touching a screen.
Slide/Swipe
While lightly touching
the screen, trace to the
desired direction.
Flick
Touch the screen and
flick up/down/left/right.
Zoom in/Zoom out
With two fingers on
the screen, widen your
fingers (zoom in) or close
them (zoom out).
Drag
To move an item, icon,
etc., lightly touch the
screen and slide it to the
desired position.
■ Character entry
For character entry, there are flick input and input by tapping a key
repeatedly.
Flick input
Tap a key to display characters like the right screen that can be input by
flick input. Flick to the direction of the character to enter.
《Character entry screen (10-key)》
Character
entry mode
switch key
Tap to switch
character type.
■ Setting Silent mode
Press r(volume up button) or l (volume down button), and tap Silent mode icons to toggle [ ] (Silent mode
(Vibrate)), [ ] (Silent mode (Mute)), [ ] (Drive) [ ] (OFF).
■ Setting App permissions
When you first activate app/function that access the functions or information of the product, a confirmation
screen for requesting access permission appears. If the confirmation screen appears, confirm the content and
operate.
• If you do not permit, app/function may not be activated or use of function may be restricted.
• For some apps/functions, an explanation screen for the permission appears. A confirmation screen may appear in
several times and its content may vary. Confirm the content and follow the on-screen instructions.
• In this manual, description of such confirmation screen may be omitted.
Initial Settings
When you turn on the product for the first time after purchasing the product, follow the on-screen instructions to
set language, functions and services.
■ Setting up Google account
Set up Google account to use Google applications such as "Gmail", "Play Store", "Duo".
Setting items are as below (besides the items below, register "First" name and "Last" name).
User name Register your Google account (user ID) and a character string for mail address. You can
register a desired name, but a name already registered by another user cannot be set.
Password Register password for the Google account.
12345
Tap "日本語(日本) "
to select "English".
*Selectthelanguage
region.Tap
[START].
Set up the Wi-Fi®
network to connect
as required
* Ifyoudonotset
up,tap[Usemobile
networkforsetup]→
[CONTINUE].
* Ifyoudonotuse
networksforsetup,
tap[SKIP].Continue
byfollowingtheon-
screeninstructions.
[DON'T COPY]
*Ifyoucopyapps
anddata,tap
[NEXT].Continue
byfollowingtheon-
screeninstructions.
[Create account]
* Whenthepop-up
screenforselecting
"Formyself"/"Formy
child"appears,select
"Formyself".
* IfyouhaveaGoogle
account,enteramail
addressorphone
number→[Next]
.
* Ifyoudonotsetup
aGoogleaccount,
tap[Skip].Continue
byfollowingtheon-
screeninstructions.
Enter "First name"
and "Last name" →
[Next] → Enter the
date of birth and
gender → [Next]
6 7 8 9
10
[Create a different
Gmail address]
→ Enter a Gmail
address → [Next]
*Youcanalsoselect
apreparedGmail
address.
Enter a password
and reenter the
password for
confirmation →
[Next]
[Yes, I'm in]
* Ifyoudonotsetup,
tap[Skip].
* Tochangehow
youaddaphone
number,tap"More
options"andfollow
theon-screen
instructions.
Check the
contents,
[Next]
Check the
contents,
[I agree]
11 12 13 14 15
Check the
contents,
[ACCEPT]
Check the
contents,
[AGREE]
[NEXT] → Follow
the on-screen
instructions to set
the type of security
*Ifyoudonotsetup,
tap[SKIP].Continue
byfollowingtheon-
screeninstructions.
Check Google app
permissions, then
[TURN ON]
*Ifyoudonotenable,
tap[NOTHANKS].
[NEXT] → [NO
THANKS]
*IfyouuseVoice
Match,tap[IAGREE].
*IfyouuseGoogle
Pay,tap[Adda
card].
Continuebyfollowing
theon-screen
instructions.Ifyoudo
notuse,tap[Skip].
16 17
When the settings are complete, "au
Initial Settings" start. See the next page.
Set up other
settings as required
*Ifyoudonotsetup,
tap[NOTHANKS].
Check the contents
and mark the check
box, then [NEXT]
*Ifyoudonotsetup,
tap[NEXT].
Switching to English Display
You can switch the language displayed on the screen to English. Follow the procedure below to switch the language to English
such as when you have performed the Initial Settings in Japanese mode.
12345
Apps menu →
[設定 (Settings)]
[システム
(System)]
[言語と入力 (Languages
& input)]
[言語 (Languages)] [English]
6
Confirm the
message (Attention:
Applications, mail
transmission/
reception, and
downloads may be
terminated.) → [OK]
Thank you for purchasing the "TORQUE G04" (simply called the "product" or "main unit" from here on).
This manual describes the settings and precautions for using the product.
For explanations of basic functions, refer to "Basic Manual".
"Online Manual" (Japanese)
For detailed descriptions
of various functions, refer
to the "Online Manual"
(Japanese). Check its
contents using the product
by following the steps on
the right.
12*"OnlineManual"(Japanese)is
availableontheauwebsite.
https://www.au.com/online-manual/
kyv46/
Home screen → [ ]
→ [サポート (Support)]
[取扱説明書
(Online Manual)]
(Japanese)
Company names and product names referred to in this manual are registered
trademarks or trademarks of the respective companies
.
TM or ® may be omitted in this manual.
The illustrations and screenshots in this manual may look different from the
actual product or screens.
Also, please note that the contents of the screen may be partially omitted.
This manual is based on the contents of Android™ 9 Pie.
For the latest version of the manual, refer to the "Settings Guide" on the au website.
https://www.au.com/support/service/mobile/guide/manual/
September 2019, 1st Edition
Sold by: KDDI CORPORATION,
OKINAWA CELLULAR TELEPHONE
COMPANY
Manufactured by: KYOCERA Corporation
Introduction
SettingGuide
G04

au Initial Settings
With au initial setting, you can make settings for updating pre-installed applications, setting au ID, downloading applications
previously used, or using this product more conveniently.
• When you have set an au ID, you can use various au services including "au かんたん決済 (au Simple Payment
Service)" which offers you a simple way to purchase applications from au Smart Pass and Google Play.
• If you finish the operation of "au Initial Settings", you can set it later. Apps menu → [Settings] → [au Settings] → [au
Settings Menu] → [au Initial Setting].
12345
Check/uncheck
"Update" → [GET
STARTED]
[Sign in]
* Ifyouhave
registeredanau
IDpreviously,step
3and4arenot
displayed.Proceed
tostep5
.
Enter the security
code → [次へ (Next)]
*Defaultvalueisafour-
digitnumberwrittenat
subscription.
Enter a security
password
→ [同意して次へ
(Agree)]
[次へ (Next)]
6 7 8 9
10
[OK] [ALLOW]
*Aconfirmation
screenisdisplayed
forpermission
severaltimes.
Continueby
followingtheon-
screeninstructions.
Select apps to
install → [Next]
*If"Selectapps"is
displayedinthe
"Backedup"field,
youcancheck
theapplicationby
tapping.
Select items to set
→ [Next]
[Finish]
* Ifyouhavedatawith
"DataStorageApp",
youcanrestore
databackups.
Tap[Restorefrom
backupnow]and
followtheon-screen
instructions.
au-mail Settings
To use au-mail, subscription to LTE NET is required. If you did not subscribe when you purchased the product,
contact an au shop or Customer Service Center.
Set the initial settings in a good signal reception area in Japan. Initial settings may not be correctly set if you are
in a poor signal reception area or in transit. You cannot make initial settings in Wi-Fi® communication.
Depending on the time of day, the initial settings take about 30 seconds to 3 minutes. When the screen "E メールアド
レスの設定中です。 しばらくお待ちください。" appears, wait for a few moments.
■Initial settings
123
Home screen
→ [ ]
Check the contents →
[Agree]
→ Check the contents
→ [Agree] → Follow
the on-screen
instructions
Check your au-mail
address →
[閉じる (Close)]
*Inthecaseofthe
modelchange,the
au-mailaddress
youusedbeforeis
displayed.
■Checking your au-mail address
1Home screen → [ ] → [ ] → [E-mail information]
■Checking how to operate au-mail
123
Home screen → [ ] [ ] [Operation guide]
■Changing your au-mail address
1Home screen → [ ] → [ ] → [Change Address/Setting Filter] → [OK]
2[ メールアドレスの変更へ (To Change E-mail Address)] → Enter the security code → [ 送信 (Send)]
3
Check the contents → [承諾する (Agree)] → Tap " ご希望のメールアドレスに変更する (Change to Your De-
sired E-mail Address)" and enter E-mail address → [送信 (Send)] → [OK]
*Whentheconfirmationscreenappears,followtheon-screeninstructions.
*Operationmethodandscreendisplayaresubjecttochangewithoutnotice.
Transferring data from au Settings Menu
Restore/back up data from/to your previously used au phone to/from this product using microSD card or the au server
.
• To return data using an au server, store the data from the old au phone to the au server beforehand. Setting au ID
is required for using the au server (If the old au phone does not have an au Settings Menu, use the au Cloud app).
• For restoring data using microSD memory card, save the data to the microSD memory card using your previously
used au phone in advance. (If the old au phone has not au Settings Menu, use au backup app).
1 2 3 4
Apps menu →
[Settings]
[au Settings] →
[au Settings Menu]
[Data Transfer]
Whenthetermsand
conditionsappearsfor
thefirsttimeyoulaunch
themenu,checkthe
contents→ [次へ(Next)]
andfollowtheon-screen
instructions.
[機種変更はこちら
(Here for model
change)]
Continuebyfollowing
on-screeninstructions
totransferdata.
Using "Data Storage App"
To use "Data Storage App" to back up photos, contacts, etc. to the au server automatically, set as follows.
Apps menu → [Settings] → [au Settings] → [au Settings Menu] → [Backup Setting] → Tap to
select a data type to back up automatically
Setting Display
Describes how to set the backlight time and brightness level.
■Increasing the backlight time of the screen
1 2 3 4 5
Apps menu →
[Settings]
[Display] [Sleep] [Sleep time] Select the
lighting time
■Making the screen brighter
1 2 3 4
Apps menu →
[Settings]
[Display] [Brightness
level]
Slide the indicator of
"Brightness level"
left/right
*Tomakebrighter,
slidetheindicator
right.Tomakedarker,
slidetheindicatorleft.
Setting Wi-Fi®
You can use a household wireless LAN (Wi-Fi®) environment or a public wireless LAN environment when outside to
connect to the Internet.
Main settings are as follows.
Select Wi-Fi® network
for connection
Search for and connect to an available Wi-Fi® network.
* If you turn on wireless LAN (Wi-Fi®), battery consumption increases. You are recommended to turn wireless LAN (Wi-Fi®)
function to OFF when not using wireless LAN (Wi-Fi®) function.
12345
Apps menu →
[Settings]
[Network & internet]
→ [Wi-Fi]
[OFF]
*Indicationchangesto
"ON".
AvailableWi-Fi
®
networksaredetected
automaticallyandtheir
SSIDsappear.
Select the Wi-Fi®
network SSID to
connect to*1
→ [CONNECT]*2
*1IftheWi-Fi®networkyouwanttoconnecttocannotbedetected,tap[Addnetwork]andaddtheWi-Fi®networkmanually.
*2ToconnecttoaprotectedWi-Fi®network,enterthepassword(securitykey)andtap"CONNECT".Thepassword(securitykey)
issetwiththeWi-Fi®network.Fordetails,contactwiththenetworkadministrator.
Checking Your Smartphone Periodically
You are recommended to use this function for comfortable use of the product.
■Performing quick diagnosis (Japanese)
1 2
From here on, follow
the on-screen instructions.
Apps menu →
[サポート (Support)]
→ [故障紛失サポート
(Repair and Delivery
Support)]
* Whenthe
confirmationscreen
isdisplayed,confirm
thecontentand
followtheon-screen
instructions.
[ クイック 診 断 し て
みる (Try Quick
Diagnosis)]
■Setting periodical cleaning notification (Japanese)
1 2 3
Apps menu →
[サポート (Support)] →
[故障紛失サポート
(Repair and Delivery
Support)]
→ [便利な機能 (Useful
functions)]
[各種設定 (Various
settings)]
[ ] on [ 定期クリーニ
ング通知 (Notification
of periodical
cleaning)]
*Setto" (ON)".
*Whenyoureceive
thenotification,try
diagnosiswithクイック
診断してみる(TryQuick
Diagnosis).

Setting Camera
■Activating camera
1Home screen → [ ]
*Youcanalsoactivate"Camera"byholdingdownk(Camerabutton).
■Viewing monitor screen
①
②
③
④
⑤
⑥
⑦
⑩
⑨
⑪
⑫
⑬
⑭
⑮
⑧
Monitor screen
① Mode switch
Changeshootingmodes.
② Direct SNS
Byenablingthisfunction,athumbnailisdisplayed,youcan
selectanapplicationwhichsharestoselectimages.
YoucanalsopostmultiplestillimagesorvideostoSNS.
③ Wide/Out switch
Switchbetweenthewidecameraandout-camera.
④ Camera switch
Switchbetweentheout-cameraandin-camera.
⑤ Flash setting
(Off) (On) (Auto) (Light)
⑥ Setting icon
Setcamerasettings.
⑦ Voice control
DisplayedwhentheVoicecontrolissetto"ON".
⑧ Zoom
Byspreadingorclosingwithtwofingersonthescreen,the
zoombarisdisplayedandyoucanadjustthezoom.Youcan
alsoadjustthezoomfunctionbypressingr(volumeup
button)/l(volumedownbutton).
⑨ Auto focus frame
Displayedwhenyoutouchthescreenandtheautomatic
focusisactivated.
*Thedisplaymayvarydependingontheoperationandthe
cameracondition.
⑩ Preceding shot/Recorded data
Displaythumbnailofprecedingshot/recordeddata.Tapto
checkthedataasrequired.
⑪ Shooting (shutter)
Thedisplaychangesdependingontheshootingmode/setting
youset.
•Thecameracanshootcontinuouslywhiletheshutteris
pressed.
⑫ Recording/Stop
⑬ Google Lens
CheckthenameortheQRcodeoftheobjectyouholdover.
•ConnectingtomobilenetworksorWi-Fi®networksis
required.
⑭ Determining location/add location information
(Determininglocation) (Determined) (Couldnot
determine)
⑮ Battery level
Displayedwhenchargingorthebatterylevelis20%orless.
■Setting camera
1Monitor screen → [ ]
YoucansetthePhotosize,Selftimer,Voicecontrol,
etc.
■Changing shooting modes
1Monitor screen → [ ]
• Auto: Shoot clearly with the automatic exposure function
• Manual: Set more functions to shoot (brightness, shutter speed, etc.)
・ In the manual mode, when you set " (Focus)" to Auto ("Face priority"/"Center") and " (ISO)"/"
(Shutter speed)" is also set to Auto.
• Photomeister: After taking a picture, you can adjust the focus position and the type and dense of blur
• Underwater: Optimize color in water, correct distortion and shoot
・To correct distortion, set "Underwater distortion" to "On".
• Slow motion: Slow motion shooting
• Time lapse: Shooting which records the time passage on fast-forward
• Effect: Shooting in 27 different modes (Monochrome, Sepia, etc.)
• Google Lens: Check the name or the QR code of the object
• Action Overlay: Shooting with the display of speed and travel distance
*Thedisplaymodemayvarydependingonthemodeortheproductcondition.
■Shooting with wide-angle camera
1Monitor screen → [ ]
Out camera Wide-angle camera
Other AU Cell Phone manuals

AU
AU AQUOS SHV31 Installation guide

AU
AU Xperia Z Ultra Sol24 Service manual
AU
AU Xperia Z3 SOL26 Installation guide
AU
AU Urbano V02 User manual
AU
AU Urbano L01 Installation guide
AU
AU Miraie Installation guide

AU
AU W32T Specification sheet

AU
AU Xperia ZL2 Sol25 Service manual

AU
AU KYL21 DIGNO S Installation guide
AU
AU A1301S Installation guide
AU
AU IS05 Installation guide

AU
AU Torque G03 Installation guide
AU
AU ISAI FL LGL24 Service manual
AU
AU pt003 Installation guide
AU
AU Aquos SHL25 Quick start guide
AU
AU Aquos SHV33 Quick start guide
AU
AU Qua Phone QX Installation guide
AU
AU A1304T Installation guide

AU
AU AQUOS SHV32 Installation guide

AU
AU GzOne 4G LTE Installation guide
