AU Miraie Installation guide

Contents
Basic Manual
Safety Precautions
Getting Ready
Basic Operation
au Disaster
Countermeasure
Appendix

Preface
Thank you for buying the "miraie" (simply called the
"product" or "main unit" from here on).
Before using the product, be sure to read the "Basic
Manual" (this manual) to ensure correct use.
After you have finished reading this PDF and the printed
manuals, be sure to store them in safe places so that you
can retrieve them whenever needed. If you lose the printed
manuals (Accessories), contact an au shop or the
Customer Service Center.
About Operating Instructions
"Basic Manual" (This manual)
Handles only basic operations for main features.
For detailed descriptions on various functions, refer to the
"Instruction Manual" app installed on the product or "取扱説
明書 詳細版 (Full Instruction Manual)" (Japanese) available
on the au homepage.
(http://www.au.kddi.com/support/mobile/guide/
manual/)
•Company names and product names referred to in this
manual are trademarks or registered trademarks of
respective companies.
"Instruction Manual" App (Japanese Only)
You can use the "Instruction Manual" app on the product to
confirm detailed operational procedures.
From the Home screen, [Apps] [Basic Manual]
•When you activate for the first time, follow the onscreen
instructions to download and install app.
Downloading Manuals
You can download the "Basic Manual" (this PDF manual),
the "取扱説明書 (Instruction Manual)" (Accessory)
(Japanese) and "取扱説明書詳細版 (Full Instruction
Manual)" (Japanese) in PDF format from the au homepage.
Download URL:
(http://www.au.kddi.com/support/mobile/guide/
manual/)
ii

Safety Precautions
Before you start using the product, make sure to read the
"Safety Precautions" to ensure correct use.
Before you assume that the product is malfunctioning,
check for possible remedies in the following au Customer
Support site of au homepage:
(http://www.au.kddi.com/english/support/)
When using the product
•Communication is not possible even inside the service
area in places where the signal does not reach (e.g.
tunnels and basements). Also, communication is
sometimes not possible in poor reception areas.
Communication is sometimes interrupted if you move into
a poor reception areas during communications.
•Since this product uses radio waves, the possibility of
communication intercepts by third parties cannot be
eliminated. (Though LTE/CDMA system has highly secure
confidential communication features.)
•This Product is designed for use in Japan only and cannot
be used in any other country.
•Since this product is a radio station under the Radio Law,
you may be asked to temporarily submit the product for
inspection in accordance with the Radio Law.
•IMEI information of your cell phone is automatically sent to
KDDI CORPORATION for maintenance and monitoring
operational status of your cell phone.
•Take care not to inconvenience people around you when
you use the product in a public place.
•When the product is used by a child, parents or guardians
should thoroughly read the "Basic Manual" (this manual)
and teach the child how to use it.
1

Cell Phone Etiquette
Use of the product is not allowed in the
following places!
•Do not use a cell phone while driving a car or riding a
motorbike or bicycle. It might cause a traffic accident.
Use of a cell phone while driving a car or motorbike is
prohibited by law. Use of a cell phone while riding a
bicycle may be punishable by some regulations.
•Use of cell phones on board is restricted. Follow the
instructions of each airline.
Pay attention to the place of use and
volume of your voice!
•To prevent ringtone from bothering other people, not only
refrain from making a call but also power off or use Silent
mode at a movie theater, theater, museum, library, etc.
•In a city area, use in a place where you do not bother
people walking.
•It is extremely dangerous to walk while looking at the
screen of the cell phone. Do not make calls or operate a
cell phone while walking or by stopping suddenly.
•Move to a place where you do not disturb others while
you are in shinkansen, a hotel lobby, etc.
•Be careful not to be loud while talking.
•Ask permission if you take photos with your cell phone
camera.
Consider people around you!
•There may be a person with a cardiac pacemaker nearby
at a place filled with people such as in a crowded train.
Set "Airplane mode" or turn off beforehand.
•When a medical institution has laid down designated
areas where use of the product is prohibited or is not
allowed to be brought in, abide by the instructions of that
medical institution.
2

List of Packaged Items
Before your start using the product, make sure that you
have all the following packaged with the product.
Main unit Back cover
(KYL23TPA/
KYL23TWA/KYL23TLA)
* Installed on back of main unit
Battery pack
(KYL23UAA)
•取扱説明書(ご家族用)(Instruction Manual (Family))
(Japanese)
•かんたん操作ガイド(お子様用)(Quick Operation Guide
(Child)) (Japanese)
•本体保証書 (Warranty for the main unit) (Japanese)
The following items are not included in the package.
•microSD memory card
•AC adapter
•microUSB cable
•Earphones
◎Purchase the specified charging equipment (sold
separately).
◎The illustrations of cell phone in the manual are used only
for explaining. They may differ from the actual product.
3

Regarding notations used in this
document
Note on key illustrations
In this manual, keys are represented by simplified
illustrations as shown below.
r
l
F
CHN
z
Description of Operations for Selecting
Item/Icon/Key etc.
The notations used for operation procedures in this manual
are as follows.
Tap onscreen keys and icons to select them by touching
them lightly (▶P.41).
Description Explanation
On the Home screen
→[Phone] →[1][4]
[1] →[Call]
Tap " (Phone)" at the bottom of
the Home screen. And tap " ",
" ", " ", then tap "Outgoing
call" at the end.
In sleep mode, FIn sleep mode, press F.
4

Notes on illustrations/Screenshots
Screen illustrations shown in this manual may look different
from the actual screens.
In some cases, minor details or a part of a screen may be
omitted.
Notations used in
this manual
Actual screen
In this manual,
some icons on
a screen are
omitted.
◎Operations from the vertical display are mainly described.
Menu items/icons/keys on a screen may be different from
the ones in the horizontal display.
◎Menu items/layers/icons may be different depending on
functions, conditions, etc.
◎In this manual, screenshots for body color "meteor blue" are
provided as examples.
◎In this manual, "microSD™ memory card" and
"microSDHC™ memory card" are abbreviated as "microSD
memory card" or "microSD".
◎All of the indicated amounts exclude tax unless otherwise
specified.
5

Contents
Preface .......................................................................ii
About Operating Instructions .....................................ii
Safety Precautions..................................................... 1
When using the product ............................................ 1
Cell Phone Etiquette .................................................. 2
List of Packaged Items.............................................. 3
Regarding notations used in this document.............. 4
Contents ..................................................6
Getting Ready..........................................8
Names and functions of parts ................................... 8
Attaching/Removing the battery pack..................... 13
au Micro IC Card (LTE) ............................................ 15
Attaching/Removing microSD memory card........... 17
Charging.................................................................. 19
Turning the power on/off.......................................... 21
Preparing the product for the child ......................... 22
Setting an au ID....................................................... 26
Parental settings menu............................................ 27
Contents Basic Operation ....................................41
Using the touch panel ............................................. 41
Switching character entry........................................ 41
Using Home screen................................................. 42
Using the Apps list .................................................. 42
Monitoring the product's status............................... 46
Setting Airplane mode............................................. 48
Setting Silent mode ................................................. 48
Making a call ........................................................... 49
Registering a contact to Contacts and making a call
... 50
Receiving a call ....................................................... 50
Checking your own phone number (Profile)............ 50
E-mail....................................................................... 51
Backing up & restoring e-mail................................. 52
Using Eco Mode...................................................... 53
Displaying menu...................................................... 53
Wireless LAN (Wi-Fi®) function................................ 53
Tethering.................................................................. 54
Capturing photos and video.................................... 55
Viewing files with the photo library .......................... 55
au Disaster Countermeasure ...............56
Using Disaster Message Board............................... 56
Using Emergency Rapid Mail.................................. 57
Using Disaster Voice Messaging Service ............... 59
Using Disaster information ...................................... 59
6

Contents
Safety Precautions................................60
Exemptions.............................................................. 60
Safety Precautions (Observe Strictly)...................... 61
Handling precautions .............................................. 75
Notes on water, dust, and shock resistance ........... 84
Notes on using Bluetooth®/Wireless LAN (Wi-Fi®)
function.................................................................... 92
Notes on packet communication charge ................ 94
Notes on applications.............................................. 94
Appendix................................................95
Introduction of related accessories ......................... 95
How do I . . .? Q&A.................................................. 96
Updating Software or OS....................................... 100
After-sales service ................................................. 102
Main specifications................................................ 105
Specific Absorption Rate of Cell Phone ................ 108
Intellectual property rights..................................... 110
OpenSSL License.................................................. 113
7

Getting Ready
Getting Ready
Names and functions of parts
①
②
③
⑲
⑯
⑬ ⑭
⑨
⑩
⑪
⑫
⑰
⑱
⑮
㉒
㉓
⑳
㉔
㉕
④
⑤ ⑥ ⑦ ⑧
㉑
①
②
③
⑲
⑯
⑬ ⑭
⑨
⑩
⑪
⑫
⑰
⑱
⑮
㉒
㉓
⑳
㉔
㉕
④
⑤ ⑥ ⑦ ⑧
㉑
dVolume UP/DOWN key
Adjusts sound volume. Press and hold l(Volume
DOWN key) to set "Silent mode" (▶P.48).
Strap eyelet
Earphone microphone terminal
FPower key
Power ON/OFF, activate/deactivate Sleep mode, etc.
8

Getting Ready
Proximity sensor/Light sensor
The proximity sensor turns the screen off and prevents
erroneous touch panel operation.
Light sensor detects the ambient light level to adjust the
display brightness.
Incoming (Charging) light
Lights in red while charging.
Blinks according to the settings for incoming call/mail.
Receiver
With Smart sonic receiver (▶P.10), hear the other party's
voice on call, play sound of answer memo, etc.
In camera (lens)
Display (touch panel)
CBack key
Return to the previous screen.
HHome key
Used for displaying the Home screen.
NRecent apps key
Display the recently-used apps.
External connection terminal
Used for connecting Common AC Adapter 05 (sold
separately), microUSB cable 01 (sold separately), etc.
Microphone
Transmits your voice to the other party during a call. Or
used for recording the voice sound. Take care not to
cover the microphone with your fingers during a call or
recording a video.
zPersonal alarm
Press and hold zfor at least 2 seconds to cause the
product to vibrate and display the personal alarm
standby screen. Press zagain to operate the personal
alarm (▶P.11).
Speaker
Ringtone or alarm sound can be heard from here.
Built-in sub antenna*
Built-in Bluetooth®/Wi-Fi®antenna*
Built-in main antenna*
Photo light/Simple light/Personal alarm flash
Out camera (lens)
Built-in GPS antenna*
Back cover
Remove the back cover and then the battery pack to
access the au Micro IC Card (LTE) and microSD memory
card slots.
microSD memory card slot
au Micro IC Card (LTE) slot
* Do not cover antennas with your hand or put stickers etc. It might affect
communication quality.
◎Do not adhere stickers, etc. on the proximity sensor/light
sensor.
9

Getting Ready
About Smart sonic receiver
The product is equipped with Smart Sonic Receiver, which
transmits sound by vibrating the display. Although there is
not receiver hole, you can use as usual.
Touching to your ear
Touch receiver part of the product to your ear as shown
below. By covering your ear to shut out surrounding noise,
voice sound will be heard more easily. Move position of the
product up/down/left/right to adjust according to your
hearing condition or an immediate environment.
Receiver
Microphone
◎Take care not to cover the microphone with your fingers
during a call.
◎When the earphones (sold separately) are connected, voice
sound can be switched to the one via earphones not using
Smart sonic receiver.
◎Do not put stickers, etc. on the display. May make receiver
sound to be heard hard.
◎There may be differences in the hearing easiness among
individuals.
◎Depending on environment, the hearing effect differs.
10

Getting Ready
Personal alarm
The product can be used as a personal alarm.
When the personal alarm is activated, it can automatically
report the current location, take and then send photos with the
cameras, and immediately allow a phone call to be made.
Sounding the personal alarm
1z(press and hold for at least 2 seconds)
The product vibrates and the personal alarm standby
screen is displayed.
2While the screen is displayed, [Start] or z
again
The personal alarm is activated, and an alarm screen is
displayed.
•A buzzer sounds at high volume. Do not hold the
product close to ears.
•The product returns to normal after 10 seconds.
Operation while the personal alarm is
activated
Once the personal alarm is activated, the personal alarm
flash flashes, and 5 seconds after*the alarm is first
activated, the product automatically takes 4 photos with the
out camera and 1 photo with the in camera.
* If a call is made while the cameras are counting down, photos are taken
after the call is ended.
The location and taken images are then sent to the
emergency contacts that are registered. After mail is sent,
the personal alarm flash begins flashing again.
To disable the personal alarm flash and sending of images,
refer to "Setting the personal alarm" (▶P.
29).
Making a call while the personal alarm is
activated
A call can be immediately made while the personal alarm is
activated to emergency contacts that have been preregistered.
For details on registering emergency contacts, refer to
"Adding or editing emergency contacts" (▶P.28).
While "Automatic calling" (▶P.29) is enabled, the product
automatically dials the emergency contacts that are
registered in order at the same time that the personal alarm
is activated.
To call a parent or guardian
1[Phone to a protector]
A call is made to the contact that is registered as
emergency contact 1.
To select an emergency contact and make a call
1[Emergency list]
2Tap " " next to the contact to call
•A contact can be selected from emergency contact
1/2/3*, 110 (Police), 119 (Fire/Ambulance), and 118
(Maritime rescue) and called.
* Not displayed if phone numbers are not registered as emergency
contacts.
11

Getting Ready
Stopping the personal alarm
1While the personal alarm is activated, z
(press and hold for at least 3 seconds)
◎If there is no operation for 10 seconds after the personal
alarm standby screen is activated, the personal alarm
stops.
◎The personal alarm discontinues sounding while a call is
being made. Once a call is ended, the buzzer sounds
again; immediately hold the product away from ears.
◎While the alarm screen is displayed, F, C, N, and
dcannot be operated.
◎Caution: If the power is not turned on, the personal alarm
cannot be activated.
◎Caution: The personal alarm will activate in the following
situations, however, voice calls and mail notification cannot
be made to emergency contacts.
•When no UIM card is installed
•When out of service area
Product operation when the personal alarm is
operated
◎Depending on the personal alarm settings, some product
function settings automatically change when the personal
alarm is activated. Settings do not return to as before; make
settings again as required.
•When Airplane mode is "ON": Airplane mode switches to
"OFF".
•When "Location information" is on: "Location" and "Data
enabled" switch on, and "Set data connection limit"
switches off.
•When "Photos" (▶P.29) is on: "Data enabled" switches on,
and "Set data connection limit" switches off.
◎The personal alarm cannot be activated in the following
situations.
•During a software update
•While "Lookout for au" is locked
•While the screen is displayed for entering the PUK code
12

Getting Ready
Attaching/Removing the battery
pack
Use a dedicated battery pack and attach it properly.
◎Before attaching/removing the battery pack and back
cover, always turn the power off.
Attaching the battery pack
1Remove the back cover of the back side of
the product
Lift the back cover by the notch at the bottom of the
main unit in the direction shown to remove.
Back cover
Notch
2After locating the battery pack contacts, slide
the battery pack in direction ①while pressing
firmly in direction ②to match the battery
pack with the tabs on the main unit
①
②
Tabs
Battery pack
Contacts
13

Getting Ready
3Attach the back cover on the main unit, then
press along the back cover in the direction
from ①to ②following the arrows leaving no
gaps, and then press at ③firmly
②
③
①
◎Be sure to check the au Micro IC Card (LTE) is certainly
attached and then attach the battery pack.
◎Attaching the back cover incorrectly might damage the
battery pack or back cover or allow intrusion of liquid.
Removing the battery pack
1Remove the back cover of the back side of
the product (▶P.13)
2Pressing from the notch on the main unit,
press the battery pack in direction ①while
lifting in direction ②
Battery pack
Notch
②
①
3Attach the back cover (▶P.14)
14

Getting Ready
au Micro IC Card (LTE)
The au Micro IC Card (LTE) contains customer phone
number and other information.
The product is compatible with au Micro IC Card (LTE) only.
You cannot use the product with an IC card other than au
Micro IC Card (LTE).
au Micro IC Card (LTE)
IC (metal) part
◎Do not insert the IC card held in a card adapter. Doing so
may cause malfunction.
◎Note the following while handling the au Micro IC Card
(LTE). Otherwise, handling may cause malfunction or
damage of the card or product.
•Do not touch the IC (metal) part of the au Micro IC Card
(LTE) or the IC card terminal inside the product.
•Insert in the correct direction.
•Do not use force to attach or remove.
◎Before removing the au Micro IC Card (LTE), be sure to
remove the microUSB plug of a specified AC adapter, etc.
from the product.
◎Be sure to turn off the product before installing/removing
the au Micro IC Card (LTE).
◎An error message is displayed for an improperly installed or
abnormal au Micro IC Card (LTE).
◎Do not lose the au Micro IC Card (LTE) after it has been
removed.
If the au Micro IC Card (LTE) is not inserted
The product cannot be used with any card other than the
au Micro IC Card (LTE) inserted.
If the product is turned on without the au Micro IC Card
(LTE) inserted, the following operations*1 are not possible.
" " is also displayed in the status bar.
•Making*2/accepting a call
•Sending/receiving SMS
•Making initial settings for and sending/receiving e-mail
(@ezweb.ne.jp)
•UIM card lock settings
•Checking the product's phone number and e-mail
address
*1 In addition to the above operations, functions requiring customer phone
number, etc. may also be unavailable.
*2 Emergency calls also cannot be made to 110 (Police), 119 (Fire/
Ambulance), or 118 (Maritime rescue).
Restricting product use with a PIN code
Your au Micro IC Card (LTE) contains valuable personal
information. To protect this information, you can change the
PIN code and lock the UIM card to restrict use by other
persons (▶P.82 "PIN code").
15

Getting Ready
Attaching au Micro IC Card (LTE)
Before installing the au Micro IC Card (LTE), turn the
product off and remove the battery pack.
1Turn the power off and remove the back cover
and battery pack (▶P.14)
2Confirm the orientation for inserting the au
Micro IC Card (LTE) and insert gently all the
way in without bending
Check the orientation of the notch.
•Correctly locate the bottom slot for the au Micro IC
Card (LTE).
Notch
au Micro IC Card (LTE)
slot (lower)
microSD memory card
slot (upper)
3Attach the battery pack/back cover (▶P.13)
Removing au Micro IC Card (LTE)
Before removing the au Micro IC Card (LTE), turn off the
product and remove the battery pack.
1Turn the power off and remove the back cover
and battery pack (▶P.14)
2Slowly remove the microSD memory card
Slowly pull the microSD memory card straight out.
3Attach the battery pack/back cover (▶P.13)
16

Getting Ready
Attaching/Removing microSD
memory card
Attaching microSD memory card
1Turn off the product and remove the back
cover and battery pack (▶P.14)
2Confirm the direction of the microSD memory
card and slowly insert it all the way in its slot
without bending
Insert with the metal contact side downward.
•Insert in the correct (upper) slot.
auMicroICCard(LTE)
slot(lower)
microSDmemorycard
slot(upper)
3Install the battery pack and back cover
(▶P.13)
◎Insert a microSD memory card with the right side up in the
appropriate direction. Inserting a microSD memory card
forcefully into the slot could result in failure to remove the
microSD memory card or damage to the microSD memory
card.
17

Getting Ready
Removing microSD memory card
1Home screen →[Settings] →[Parental
settings] →Enter parental password →[OK]
2[Other settings] →[Storage] →[Unmount SD
card] →[OK]
3Turn off the product and remove the back
cover and battery pack (▶P.14)
4Slowly remove the microSD memory card
Slowly pull the microSD memory card straight out.
5Install the battery pack and back cover
(▶P.13)
◎Do not touch the terminal part of microSD memory card.
◎Do not remove the microSD memory card forcefully. It may
result in damage to the microSD memory card or the data
loss.
◎The microSD memory card may be warm after a long time
use. It is normal.
◎When removing the microSD memory card, be sure to
unmount it to prevent data from loss (deletion).
18
Table of contents
Other AU Cell Phone manuals
AU
AU Aquos SHL25 Quick start guide
AU
AU AQUOS PHONE IS12SH Installation guide
AU
AU Urbano V02 User manual
AU
AU Aquos Phone SL IS15SH Installation guide
AU
AU Torque G03 Installation guide
AU
AU INFOBAR A03 Installation guide
AU
AU Urbano L01 Installation guide

AU
AU URBANO V01 Installation guide
AU
AU A1304T Installation guide

AU
AU GzOne 4G LTE Installation guide
AU
AU ISAI FL LGL24 Service manual
AU
AU E10K Installation guide
AU
AU Aquos SHV33 Installation guide
AU
AU INFOBAR A02 Installation guide

AU
AU A5505SA Installation guide

AU
AU K011 User manual
AU
AU Basio 2 Installation guide
AU
AU Digno ISW11K User manual

AU
AU W32H Installation guide
AU
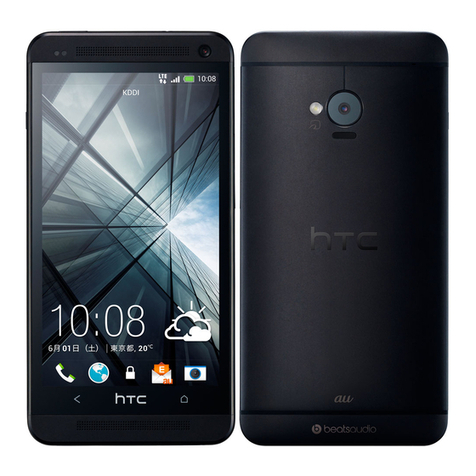
AU HTC J ONE HTL22 Installation guide
