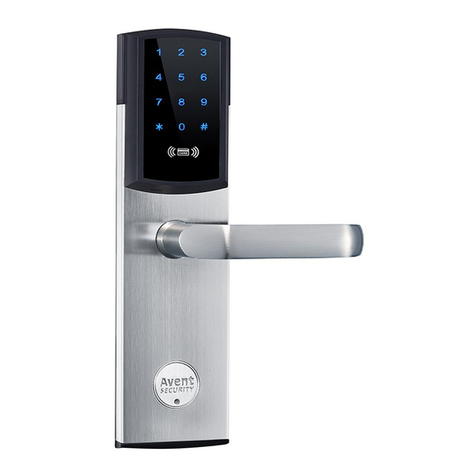
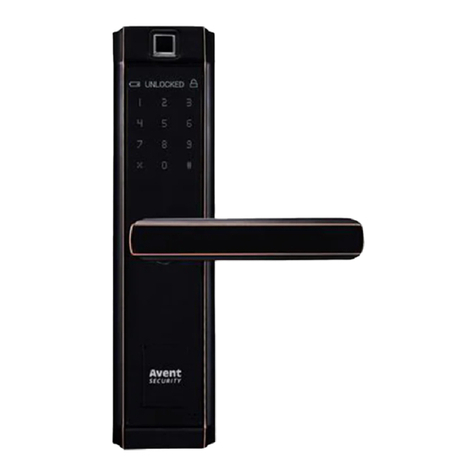
Avent Security M700 User manual

M700
FINGERPRINT DOOR LOCK

Brief Introduction
Product Guide
1
1There are 13 password users and 993 fingerprint users and RF card users available
in the lock.
2The password can be set with 6 to 10 digits.
3There are single unlocking mode and double unlocking mode in the lock.
Single unlocking mode is default.
Fingerprint Sensor
Touch Screen Keypad Battery
Lock Knob
1 2 3
4 5 6
*0#
87 9
4There is voice introduction to help you understand the operations in the lock.
5The lock will be locked for 3 minute after inputting wrong password in 5 times.
6When the battery voltage is low than 4.8V, the low battery alarm will be activated
every time when unlock the lock.
7The cylinder and the Micro USB port are at the bottom of outside panel.
8 The Security bolt has to be unlocked from inside.
Cylinder
Micro-USB Port

Installation
Fo ld
Fo ld
Si de
Fr on t
1.Place the template on the door.
According to the template,mark
the holes on the door with a
pencil.
35mm
35mm
35mm
20mm
20mm
-245
-235
-225
handle
2.Take out the mortise before
drilling the holes. Drill the
door hole with a driller of
20mm and 35mm for mortise.
Fix the mortise with screws.
3.Adjust upper screw sleeve
according to actual door hole
position. Insert square bar into
handle hole, make sure arrow
points to handle direction.
5.Take out battery cover,
connect cables of front and
back faceplates,and makesure
knob is fixed in correct direction.
4.Install front faceplate,
making sure different parts
go into correct holes.
2

6.Use one hand to press front
faceplate against the door,
fix back faceplate with 2 screws.
Installation
set
7.Adjust face plate position to
make sure it is straightly
and correctly installed.
8.Install the battery box and
batteries, test the deadbolt.
9.Install the striking box
and striker.
10.Test the installation by inner
handle, knob, mechanical key,
fingerprint, password and
reading card.
3

Some Suggestions to Help Capturing the Fingerprint
1
When placing the finger on the sensor, please make sure the “core” of fingerprint is staying in the
main area of sensor directly with a little be pressure. Like the pictures show as following:
Insert Image
The sensor may not capture the correct fingerprint image if you take the following operations.
Insert Image
it is suggested to register the thumb, first finger, and middle finger for better
fingerprint images.
Operation
4

Place the finger on the sensor, the lock will be activated automatically and started to capture the
fingerprint image for identification. Once the identification is passed, the keypad shows “Blue”
light with sounds, then you can press down the handle for unlocking.
Touch the keypad to activate the lock, and then input the password (6-10 digits) with pressing “#”
to finish. If the password is correct, the keypad shows “Blue” light with sounds, then you can press
down the handle for unlocking.
***
(6-10 digits)
When inputting a wrong password for 3 times, the lock will be locked for
5 minutes. During the 5 minutes, the lock cannot be activated and all
operations are not available. After that, the lock returns to normal state.
+
2Fingerprint Unlocking
3Password Unlocking
“BLUE” +
1 2 3
4 5 6
*0#
87 9
“BLUE” +
1 2 3
4 5 6
*0#
87 9
#
5

Random Password Protection
For a better security protection to the password user, the lock is designed with a random
password protection. You can add any digits before and after the real password.
When there is problem with electronic part, and the batteries run out of power, using mechanical key
is the way to unlock the lock.
For example, the password is “1234-5678”, you can unlock the lock by inputting the password
as following:
1:
2:
3:
1 2 3456 7 8 X X X X
X X X X 1 2 3 4 567 8
X X
5Mechanical Key Unlocking
#
X
1 2 3456 7 8 X#
XX#
X X
X X X X
4RF Card Unlocking
Place the card close to the card reader to verify, if the card is correct, the keypad shows “Blue” light
with sounds, then you can press down the handle for unlocking.
“BLUE” +
1 2 3
4 5 6
*0#
87 9
1 2 3
4 5 6
*0#
87 9
1 2 3
4 5 6
*0#
87 9
6

Operation
Register Master User
1
Press “SET” key in the battery case;
aFor Fingerprint User: place the finger
on the sensor twice, then finish registration;
b
SET
x2
For Password User: input the password twice,
finish by pressing “#” to confirm,
and then finish registration;
b
x2
*** #
1. There are maximum 3 master users are available in the lock;
2. Please try to use the master user to unlocking to make sure
the operations are successful.
3. The password can be set 6 to 10 digits;
For RF Card User: place the card
on the reader once, then finish registration.
b
x1
7

Register Normal User
2
Activate the lock, and then press “*”
and then press “#” to start the
registration mode;
aInput the master user for authorization;
b
Press number “1” for registration;
cInput the group number (group 0 to 9)
d
*#
Master
***
For Fingerprint User:
place the finger on the sensor twice;
eFor Password User:
input the password twice,
finish by pressing “#” key;
e
1
***
(0~9)
x2 *** #
+
x2
8
x2
For Card User: place the card
on the reader twice
e
Each group there are 99 users for Fingerprints
and RF cards, and 1 user for Password.
Please try to use the registered user to unlock
and make sure the operations are successful.
#
+#
+

Delete Normal User
3
Activate the lock, and then press “*”
and then press “#” to start the
registration mode;
aInput the master user for authorization;
b
Press number “2” to delete users;
cDelete all users in the same group,
press “1” and then press “#” to confirm;
d
*#
Master
***
Delete single user,
press “2”, and then input
the user ID, press “#” to confirm;
dDelete all normal users, press “3”,
and then press “#” to confirm;
d
2
#
1
3
ID
2
#
1. If delete all normal users, the lock keeps the master users only;
2. Please try to use the deleted user to unlock and make sure the
operations are successful.
+
+
9
#
+#
+

Double Unlocking Mode
4
Activate the lock, and then press “*”
and then press “#” to start the
registration mode;
aInput the master user for authorization;
b
Press number “3” ,
and then press “#”
to system setting;
cPress “1” , and then press “#”
to unlocking mode;
d
*#
Master
***
31
#
For better security, you can set up the lock to double unlocking mode.
When the lock is under double unlocking mode, you have to input 2 registered users
every time for unlocking.
Press “2” ,
and then press “#” to
set double unlocking mode;
e
2
#
#
During the lock is under double unlocking mode, you have to
input one fingerprint user and one password user every time to unlock.
++
+
10

Voice Setting
5
Activate the lock, and then press “*”
and then press “#” to start the
registration mode;
aInput the master user for authorization;
b
Press number “3” ,
and then press “#”
to system setting;
cPress “2” , and then
press “#” to voice setting
d
*#
Master
***
Press “2” to disable the voice;
e
2
#
2
To enable the voice, please follow the steps above, and then
press “1” to enable the voice.
3#
++
11

Passage Mode
6
When the lock is required to unlock frequently, set the lock to passage mode
can let the people unlock the lock without any identification.
*Enable:
Unlock with registered user;
aPress “#” and “1”
b
#1
+
The passage mode is activated;
e
*Disable:
Activate the lock;
aPress “#” to disable the passage mode;
b
#
12

Restore to Factory Default
7
Press and hold the “SET” key
in the battery case for some time;
aRelease the key when hearing
the lock says “initialization success”
b
SET
When the lock is reset to factory default, any fingerprint and password
can unlock;
13
Table of contents
Other Avent Security Door Lock manuals
Popular Door Lock manuals by other brands
Digitus Biometrics
Digitus Biometrics dbBioLock installation manual
Assa Abloy
Assa Abloy Connect 50 installation instructions
Ferguson
Ferguson HLK11 Series Installation
Dorma
Dorma D860 installation instructions
DynaLock
DynaLock 2282-TJ82 installation instructions

Assa Abloy
Assa Abloy v.G1 Sargent installation instructions
