manuals.online logo
Brands
  1. Home
  2. •
  3. Brands
  4. •
  5. Avidsen
  6. •
  7. Gate Opener
  8. •
  9. Avidsen 114359 User manual

Avidsen 114359 User manual

B - PRODUCT DESCRIPTION
B1 - PHOTOCELLS
1
2
3
1 Reception photocell RX
2 Transmission photocell TX
3 Lens of the infrared beam
C - INSTALLATION
C1 - SET OF PHOTOCELLS
• Read the label on the back to identify the transmission photocell (TX) and
the reception photocell (RX)
• Install the reception photocell (RX is indicated on the back) on the side
with the control box or the motor containing the electronic control board.
The surface of the posts must be perfectly flat in order to properly align
the infrared beam of the photocells.
• Place the photocells at exactly the same height from the ground; they
must be perfectly aligned and parallel to each other.
The distance between the outer side of the gate and the photocells must
be between 10cm and 15cm.
• Mount the photocells on the posts.
30cm min
60cm max
Outer side of the property
view from above
Inner side of the property
precise alignment
10cm min
15cm max
Take note: place a silicone seal between the pillar and the photocells
as well as at the output of the power cable.
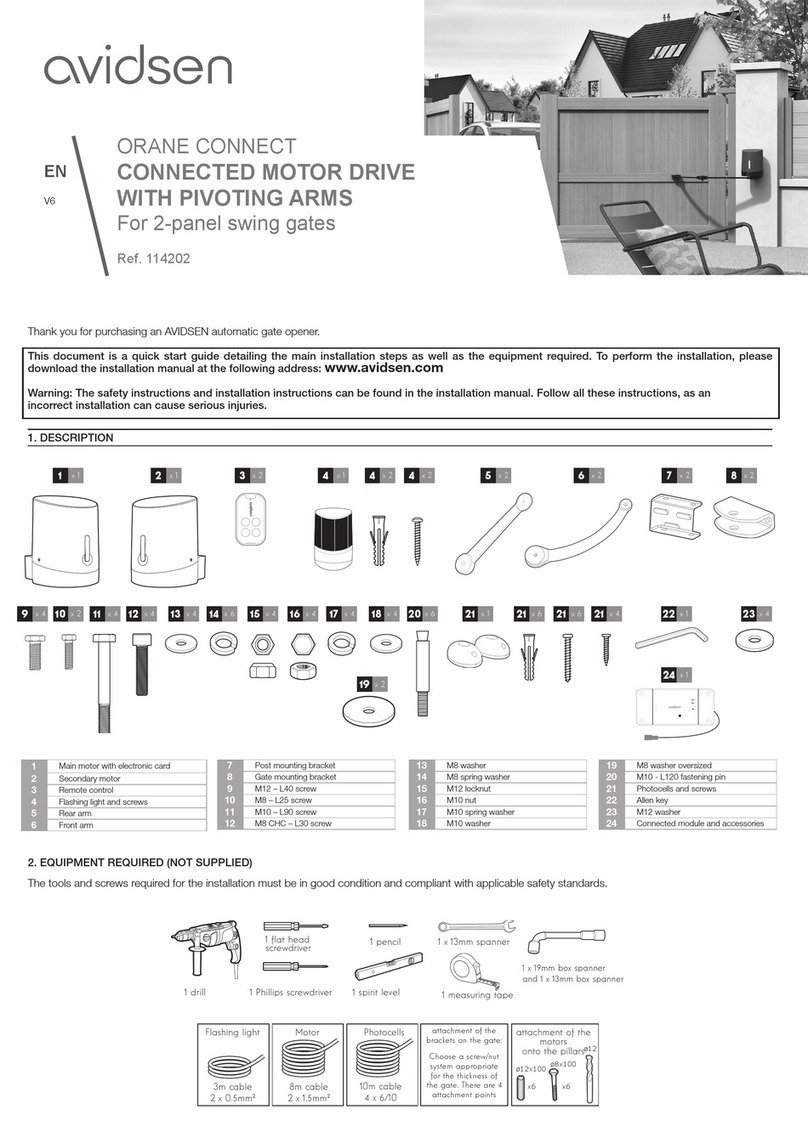
CONTENTS OF THE KIT
x 1 x 6 x 6 x 4
A - SAFETY INSTRUCTIONS
A1 - OPERATING PRECAUTIONS
• Read this entire manual before starting the installation.
• Do not allow children to operate the product.
A2 - SERVICING AND CLEANING
• Use a soft, slightly damp cloth to clean your product.
• All electrical connections must be performed with the power switched
off (safety switch in OFF position) and battery disconnected.
• Do not use abrasive or corrosive substances.
• Do not spray any products directly onto the unit.
• In winter, scrape off the frost which may have formed on the lenses.
A3 - RECYCLING
This logo denotes that devices which are no longer in use
must not be disposed of as household waste. They are likely
to contain hazardous substances that are dangerous to both
health and the environment. Return the equipment to your
local distributor or use the recycling collection service
provided by your local council.
Pour en savoir plus :
www.quefairedemesdechets.fr
Take care not to put silicone on the base of the photocell to avoid
condensation of the product.
45mm
20mm
Outer side of the property
C2 - SET OF PHOTOCELLS
When used with a non-visible gate, it is mandatory to
install a second set of photocells to prevent the
gate from opening when an object (a car, person, etc.) is behind the gate.
• The photocells must be perfectly aligned and parallel to each other.
• The reception photocells (RX indicated at the back) must be installed at
the same side of the gate as the electronic control box.
• The photocells must be installed on the inner side of the property. The
distance between the main edges of the gate in an open position at 90°
and the photocells must be between 10cm and 15cm maximum.
• The mounts used to secure the photocells must be correctly secured to
the ground and precisely aligned.
• The photocells must be placed exactly at the same height from the
ground, and the height must be between 30cm and 60cm.
pair 1
pair 2 TX2
TX1
RX1
90° 90°
RX2
Inner side of the property
View from above
10cm min / 15cm max
30cm min
60cm max
D - CONNECTIONS
The photocells are connected differently depending on the type of motor
specification:
- For the electric operation of sliding gates, see section D1
- For the electric operation of swing gates, see section D2
Disconnect the removable terminal block, connect the photocell wires to
the terminal block as shown in the diagram below and then reconnect the
terminal block.
D1 - CONNECTION FOR THE ELECTRIC OPERATION OF
SLIDING GATES
• 1 set of photocells
By connecting the photocells in this way, the system reacts to a break of the
infrared beam only during closing.
+
12V
HALL
GND
M1
~- ~+ ~+~-
NO COMNC
Transmission
photocell
TX1
Reception
photocell
RX1
• 2 sets of photocells
By connecting the photocells in this way, the system reacts to a break of
one or the other infrared beams only during closing.
+
12V
HALL
GND
M1
~- ~+ NO COMNC
~- ~+ ~+~-NO COMNC
~+~-
Reception
photocell RX1 Transmission
photocell TX1
Reception pho-
tocell RX2
Transmission
photocell TX2
V3
PHOTOCELLS
12/24V DC
EN
Ref. 114359
Note: In the previous case, the second set cannot be mounted to protect
the secondary edge of the gate during opening. In this type of set up, the
second set of photocells is to be connected at the “emergency stop” inlet,
as shown below:
+
12V
HALL
GND
M1
~- ~+ NO COM NC
~- ~+ ~+~-NO COM NC
~+~-
Reception pho-
tocell RX1 Transmission
photocell TX1
Reception pho-
tocell RX2 Transmission
photocell TX2
In the event of use at the entrance STOP,
the link between STOP and GND is to be removed
D2 - CONNECTION FOR THE ELECTRIC OPERATION OF
SWING GATES
• 1 set of photocells
+-
BATTRANS
GN
D
GN
D
PH
O
+24V
M1-
M2-
M1+
M2+
warn-
warn+
2B
~- ~+ ~+~-NO COMNC
Photocell
TX1
Photocell
RX1
• 2 sets of photocells
+-
BATTRANS
GND
GND
PHO
+24V
M1-
M2-
M1+
M2+
warn-
warn+
2B
~- ~+ ~+~-NO COM NC
~- ~+ ~+~-NO COM NC
Photocell
RX1
Photocell
TX1
Photocell
RX2
Photocell
TX2
E - PROCESS FOR ALIGNMENT OF THE
PHOTOCELLS
Ensure that the photocells are precisely aligned; see the relevant section
in the electric operation instructions
F - TECHNICAL AND LEGAL INFORMA-
TION
F1 - TECHNICAL FEATURES
• Type: Presence sensors with modulated infrared beam.
Type D security systems according to EN 12453
• Composition: 1 TX transmitter and 1 RX receiver
• Power supply: 12V DC, 24V DC
• Maximum power allocated: 1W max (for the pair)
• Output: - 1 dry contact output that is normally closed (COM / NC).
- 1 dry contact output that is normally open (COM / NC).
• Angle of transmission / Angle of reception: 10° approximately / 10°
approximately
• Range: 15m maximum (range may be reduced owing to weather-related
disturbances)
• Operating temperature: -20°C / +55°C
• Protection rating: IP44
F2 - ASSISTANCE AND ADVICE
• If, in spite of the care we have taken in designing our products
and drafting these instructions, you do encounter difficulties
when installing your product or you have any questions, we
recommend you contact one of our specialists who will be glad
to help.
• If you encounter operating problems during the installation or a
few days afterwards, it is essential that you are in front of your
installation when contacting us, so that one of our technicians
can diagnose the source of the problem, as it will probably be
the result of a setting that is incorrect or an installation that is
not to specification. If the problem is caused by the product
itself, the technician will give you an RMA number so that you
can return the unit to the shop.
Without this RMA number, the shop may refuse to exchange
your product.
Need advice for the installation or start-up of your product?
Contact our after sales service team technicians:
0,35 €
/ min
0 892 701 369
Monday to Friday, 9AM to 12PM and 2PM to 6PM CET.
Avidsen undertakes to keep a stock of spare parts for this
product throughout the contractual warranty period.
F3 - EU DECLARATION OF CONFORMITY
Declaration of compliance with the EMC Directive
Avidsen declares, under its sole responsibility, that the equipment with
reference number 114359 complies with the applicable Union harmonisation
legislation 2014/53/EU. Its conformity has been assessed pursuant to the
applicable standards in force:
• EN 61000-3-2:2014
• EN 61000-3-3:2013
• EN 61000-6-2:2005
• EN 61000-6-4:2007+A1:2011
The abovementioned product complies with the RoHS 2011/65/EU
directive.
Signed by Alexandre Chaverot,
CEO, on behalf of Avidsen
19 avenue Marcel Dassault, 37200 Tours, France
Tours, 15/04/2022

Other Avidsen Gate Opener manuals

Avidsen Styrka 310 User manual

Avidsen

Avidsen Styrka 310 User manual

Avidsen Orane 510 User manual

Avidsen

Avidsen Orane 510 User manual

Avidsen STYRKA310 User manual

Avidsen

Avidsen STYRKA310 User manual

Avidsen OREA550 User manual

Avidsen

Avidsen OREA550 User manual

Avidsen ORANE510 User manual

Avidsen

Avidsen ORANE510 User manual

Avidsen 114202 User manual

Avidsen

Avidsen 114202 User manual

Avidsen ORANE-CONNECT User manual

Avidsen

Avidsen ORANE-CONNECT User manual

Avidsen ZENIA250 User manual

Avidsen

Avidsen ZENIA250 User manual

Avidsen 114202 User manual

Avidsen

Avidsen 114202 User manual

Avidsen ORANE410 User manual

Avidsen

Avidsen ORANE410 User manual

Avidsen 114461 User manual

Avidsen

Avidsen 114461 User manual

Avidsen V300 User manual

Avidsen

Avidsen V300 User manual

Avidsen V250 User manual

Avidsen

Avidsen V250 User manual

Avidsen ORANGE510 User manual

Avidsen

Avidsen ORANGE510 User manual

Avidsen STYRKA400 User manual

Avidsen

Avidsen STYRKA400 User manual

Popular Gate Opener manuals by other brands

Comunello Automation ABACUS 220 Installation and user manual

Comunello Automation

Comunello Automation ABACUS 220 Installation and user manual

Nice Neo Installation and use instructions and warnings

Nice

Nice Neo Installation and use instructions and warnings

GTO /PRO SW-4000 installation manual

GTO

GTO /PRO SW-4000 installation manual

Allstar MVP quick start guide

Allstar

Allstar MVP quick start guide

CAME FROG installation manual

CAME

CAME FROG installation manual

Chamberlain Swing GATE Installation and operation instructions

Chamberlain

Chamberlain Swing GATE Installation and operation instructions

fadini Bart 350 instruction manual

fadini

fadini Bart 350 instruction manual

Power Master RSG installation manual

Power Master

Power Master RSG installation manual

Chamberlain myQ Home Bridge quick start guide

Chamberlain

Chamberlain myQ Home Bridge quick start guide

Nice ROBO Instructions and warnings for the fitter

Nice

Nice ROBO Instructions and warnings for the fitter

Chamberlain MEGA SLIDE owner's manual

Chamberlain

Chamberlain MEGA SLIDE owner's manual

BFT LUX BT installation manual

BFT

BFT LUX BT installation manual

Chamberlain ELITE Series Wiring diagrams

Chamberlain

Chamberlain ELITE Series Wiring diagrams

Mighty Mule FM350 installation manual

Mighty Mule

Mighty Mule FM350 installation manual

fadini DRIVE 700 installation manual

fadini

fadini DRIVE 700 installation manual

FAAC 412 Compact manual

FAAC

FAAC 412 Compact manual

Seco SPARK 4 installation manual

Seco

Seco SPARK 4 installation manual

FAAC B680 manual

FAAC

FAAC B680 manual

manuals.online logo
manuals.online logoBrands
  • About & Mission
  • Contact us
  • Privacy Policy
  • Terms and Conditions

Copyright 2025 Manuals.Online. All Rights Reserved.