3. INSTALLATION
Safety guidelines: please refer to the installation manual for all safety instructions.
To perform the installation, please download the installation manual at the following address: www.avidsen.com
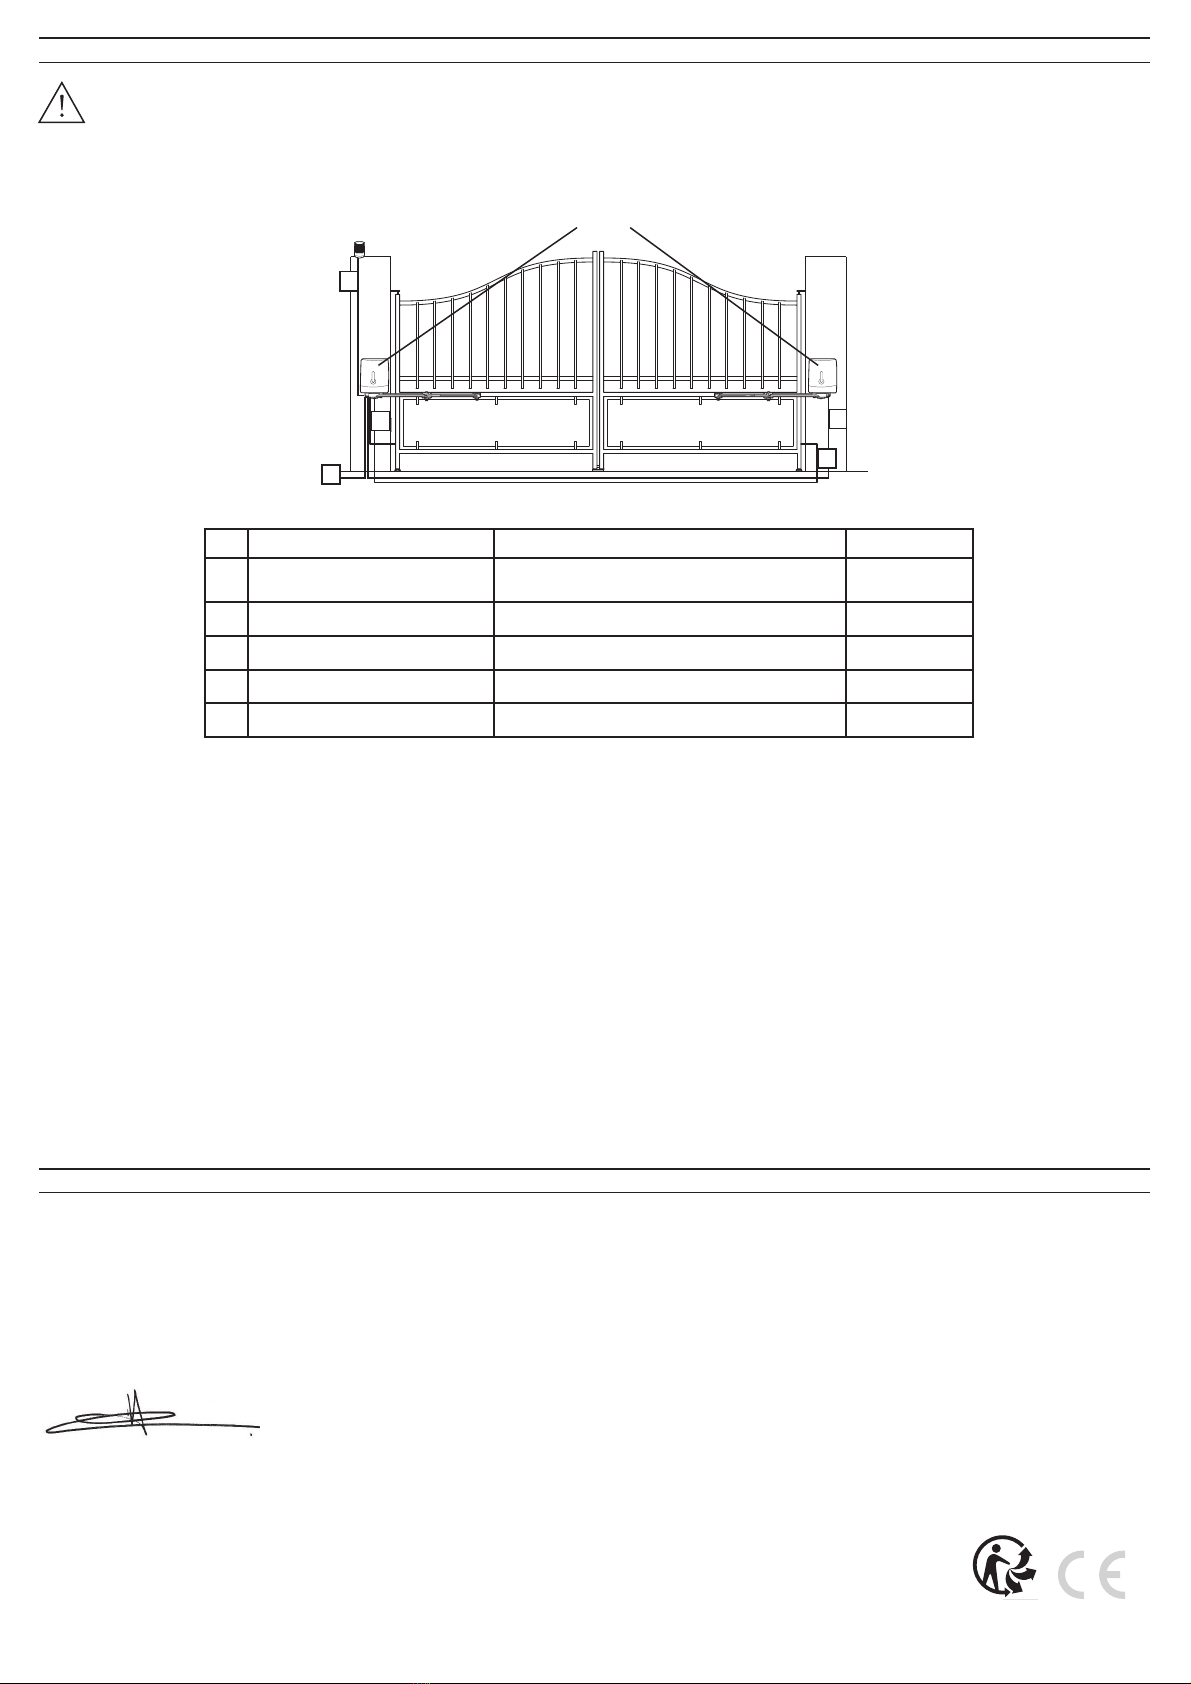
Overview:
The cables used must be appropriate for outdoor use (such as H07RN-F for example). The cable run between the two posts must comply with applicable
standards (NFC 15-100). The power cable of the opposite geared motor must run 80cm deep with red warning mesh.
Motors
Inner side of the property
Flashing light
1
2
3
4
5
List of cables:
Connection Cable Max length
1 230VAC power line Cable 3 x 2.5mm2 (more than 30m long)
Cable 3 x 1.5mm2 (less than 30m long) Unlimited
2 Flashing light Cable 2 x 0.5mm2 15m
3 Secondary motor 2 x 1.5mm² cable 10m
4 Reception photocell (RX) 4 x 6/10 cable 10m
5 Transmission photocell (TX) 4 x 6/10 cable 10m
The installation is a 4-step process:
1. Installation of the motors onto the pillars and gate, and of the flashing light (the main motor is installed on the pillar where the power comes from).
2. Electrical connection:
- of the secondary motor to the electronic card (in the main motor)
- of the flashing light to the electronic card (in the main motor)
- of the photocells to the electronic card (in the main motor)
- connection of the transformer to the mains. This connection must be performed by qualified personnel (electrician, etc.)
3. Adjustments and operation:
Note: Only switch on the system once all connections have been made.
- Read the installation manual chapter on simple adjustments.
- Launch the movement self-learning programme (press "+" for 3 seconds)
- Programme the remote controls:
- press "-" for three seconds, press "OK", press the remote control button to be memorised, repeat the operation for each remote control
- Choice of operating mode:
By default, automatic closing is deactivated. To activate it:
- Press PROG for three seconds, press "OK", press "+", press "OK"
4. Operational testing: To familiarise yourself with the automatism and ensure it operates properly, read the chapter on usage and conduct operational tests (open/
close, initiate obstacle detection, cut the photocell beam). Upon completion of these tests, you may have to modify certain settings (e.g. motor power).
4. DECLARATION OF CONFORMITY
Avidsen declares that the equipment complies with the essential applicable requirements of RED Directive 2014/53/EU.
Directive 2014/35/EU: (protection of users’ health and safety)
Directive 2014/30/EU: (protection requirements relating to electromagnetic compatibility).
Directive 2014/53/EU: (efficient use of the radio spectrum, in order to avoid harmful interference).
The full declaration of compliance is available on the website www.avidsen.com
Tours, 02/11/2020
Alexandre Chaverot, CEO
Pour en savoir plus :
www.quefairedemesdechets.fr
Avidsen
19 avenue Marcel Dassault - ZAC des Deux Lions - 37200 Tours - France


