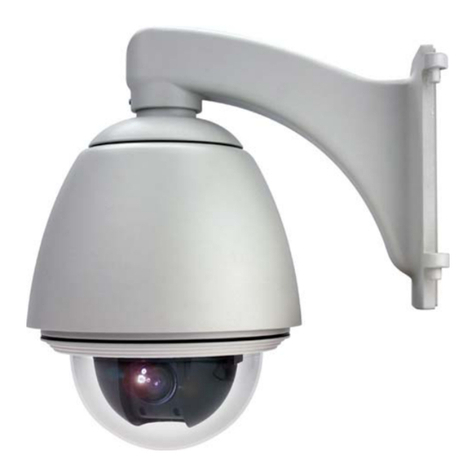
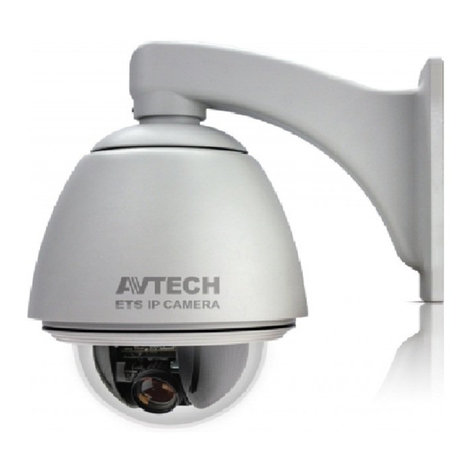
Avtech 22X series User manual

195Z
321Z_Manual_V0.82
U
Us
se
er
r
M
Ma
an
nu
ua
al
l
Please read instructions thoroughly before operation and retain it for future reference.
The image shown above may differ from the actual product appearance.

The content in this manual is subject to change without notice.
IMPORTANT SAFEGUARD
CAUTION
RISK OF ELECTRIC SHOCK
CAUTION:
To reduce the risk of electric shock, do not expose this apparatus to rain or moisture. Only operate this apparatus
from the type of power source indicated on the label. The company shall not be liable for any damages arising out
of any improper use, even if we have been advised of the possibility of such damages.
Graphic Symbol Explanation
The lightning flash with arrowhead symbol, within an equilateral triangle, is intended to alert the user
to the presence of uninsulated “dangerous voltage” within the product’s enclosure that may be of
sufficient magnitude to constitute a risk of electric shock to persons.
This exclamation point within an equilateral triangle is intended to alert the user to the presence of
important operating and maintenance (servicing) instructions in the literature accompanying the
appliance.
All lead-free products offered by the company comply with the requirements of the European law on
the Restriction of Hazardous Substances (RoHS) directive, which means our manufacture processes
and products are strictly “lead-free” and without the hazardous substances cited in the directive.
The crossed-out wheeled bin mark symbolizes that within the European Union the product must be
collected separately at the product end-of-life. This applies to your product and any peripherals
marked with this symbol. Do not dispose of these products as unsorted municipal waste. Contact your
local dealer for procedures for recycling this equipment.
This apparatus is manufactured to comply with the radio interference requirements.
About this document
We reserve the right to revise or remove any content in this manual at any time. We do not warrant or assume any
legal liability or responsibility for the accuracy, completeness, or usefulness of this manual. The content of this
manual is subject to change without notice.
Precautions
‧ Do not shoot images that are extremely bright for a long time (For example, light sources, the sun, etc.).
‧ Don’t use or store the camera in the following conditions: (1) Extremely hot or cold places (operating
temperature -10∘C ~ 40∘C (=14∘F ~ 104∘F) ) (2) Close to generators of powerful electromagnetic radiation
such as radio or TV transmitters. (3) Where it is subject to fluorescent light reflections. (4) Where it is subject
to unstable lighting (flickering, etc.) conditions. (5) Where it is subject to strong vibration. (6) Where it is near
water or in contact with water.

The content in this manual is subject to change without notice.
‧ Installation should be made by qualified service personnel.

TABLE OF CONTENTS
IMPORTANT SAFEGUARD......................................................................................................... 2
TABLE OF CONTENTS ...............................................................................................................4
1. INTRODUCTION ...................................................................................................................... 1
1.1 Overview..........................................................................................................................................................1
1.2 Features...........................................................................................................................................................1
1.3 Package Contents ...........................................................................................................................................1
1.4 Specification.....................................................................................................................................................2
2. INSTALLATION AND SETUP .................................................................................................. 3
2.1 Construction.....................................................................................................................................................3
2.2 Installation........................................................................................................................................................3
2.3 Connection (PTZ Camera / Keyboard Controller / DVR)..................................................................................5
3. QUICK MENU GUIDE .............................................................................................................. 8
3.1 Menu Configuration .........................................................................................................................................8
3.2 Quick Programming Guide...............................................................................................................................9
4. MAIN MENU – CAMERA ....................................................................................................... 11
4.1 White Balance................................................................................................................................................12
Auto:...............................................................................................................................................12
Indoor 1 / Indoor 2 / Sun / Cloudy:..................................................................................................12
4.2 Shutter Speed................................................................................................................................................12
Numeric Value:...............................................................................................................................12
4.3 Gain Control...................................................................................................................................................12
On (Low, Medium, High) / Off:........................................................................................................12
4.4 IRIS................................................................................................................................................................13
Auto IRIS Level (50 ~ 250):............................................................................................................13
4.5 Backlight Compensation (BLC)......................................................................................................................13
On / Off:..........................................................................................................................................13
4.6 Sharpness......................................................................................................................................................13
Auto:...............................................................................................................................................13
Sharpness Level (Low / Medium / High) :.......................................................................................13
5. MAIN MENU – TOOLS........................................................................................................... 14
5.1 Title Name......................................................................................................................................................15
Modify / New:..................................................................................................................................15
5.2 Title Position ..................................................................................................................................................15
Up / Down / Off:..............................................................................................................................15
5.3 Pan / Tilt Angle...............................................................................................................................................15

On / Off:..........................................................................................................................................15
5.4 Pan / Tilt Graph..............................................................................................................................................15
On / Off:..........................................................................................................................................15
5.5 Zoom Bar.......................................................................................................................................................16
On / Off:..........................................................................................................................................16
5.6 Focus Window...............................................................................................................................................16
On / Off:..........................................................................................................................................16
5.7 ID Code No....................................................................................................................................................16
Camera ID Code Number Setup: ...................................................................................................16
5.8 ID Code Display.............................................................................................................................................16
On / Off:..........................................................................................................................................16
5.9 Baud Rate......................................................................................................................................................17
2400 / 4800 / 9600 / 19200 (unit: bits/s).........................................................................................17
6. MAIN MENU – STATUS ......................................................................................................... 18
7. MAIN MENU – MODE ............................................................................................................19
7.1 Reset Default.................................................................................................................................................20
7.2 Pan / Tilt Speed..............................................................................................................................................20
7.3 Preset Setup..................................................................................................................................................20
Set the Preset Points:.....................................................................................................................20
Factory Default Preset Points:........................................................................................................20
Add New Preset Points: .................................................................................................................21
Set Duration Time of the Preset Points: .........................................................................................21
Deleting the Preset Points:.............................................................................................................21
Preview the Preset Points: .............................................................................................................21
Exit the Preset Point Setting Menu:................................................................................................21
7.4 Tracking Setup...............................................................................................................................................22
Set the Pre-defined Surveillance Area (=LIMIT=):..........................................................................22
Set the Pre-defined Tracking Timeout (=TIME=):...........................................................................22
Auto Tracking Mode: ......................................................................................................................22
7.5 Home Position ...............................................................................................................................................22
Set the Home Position:...................................................................................................................22
7.6 Auto Focus.....................................................................................................................................................23

Select the Auto Focus Mode: .........................................................................................................23
8. MAIN MENU – EXIT............................................................................................................... 24
Exit And Save the Settings:............................................................................................................24
Exit Without Saving the Settings: ...................................................................................................24
APPENDIX 1 DEFAULT VALUE ................................................................................................ 25

INTRODUCTION
-1-
1. INTRODUCTION
1.1 Overview
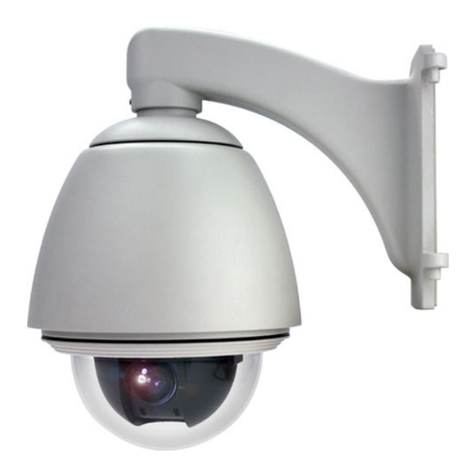
This outdoor type speed dome camera equipped with a 360° pan and 90° tilt base, and 22X optical zoom lens and
has the auto focus function. Moreover, it has many advanced functions, including Intelligent Auto Tracking, High
Spindle Reliability, Friendly Graphical OSD Interface and Convenient Keyboard Controller Control. With all
these strong features, various demanding applications for safety surveillance can be easily achieved.
1.2 Features
zHigh-Speed Pan/Tilt Mechanism and Auto-Focus Zoom Lens
‧ Provide 360∘panning, 90∘tilting and 22X optical zooming functionality.
zAuto Tracking Function to Follow Intruder
‧ With precise pan / tilt movement and zoom coefficient calculation, the speed dome camera can make precise pan,
tilt and zoom movement to keep tracking intruders.
‧ The camera will automatically aim and follow the largest movement in the monitoring view, making the camera pan
(max. 360º), tilt (max. 90º) and zoom to keep the target in the center of the view within: (1) the camera's
pre-defined surveillance area / (2) the pre-defined tracking timeout. When the locked target is out of the
pre-defined surveillance area or the aimed object stops moving longer than the pre-defined tracking timeout, the
camera returns to the point it originally monitors. It's the best function to provide evidentiary recording.
zProven Spindle Reliability
‧ The patented spindle of the speed dome camera passes rigidly component analysis after testing more than 2,000,000
revolutions.
zGraphical On-Screen Display
zEasy Operation via Keyboard Controller
‧ The optional keyboard controller provides convenient 3D joystick and touch screen design for easy operation.
zSupport PTZ Hot Point Function
zSupport 8 preset groups, up to 256 programmable preset points
zAdvanced White Balance Function
‧ According to different color temperature and installation place, set the white balance function to the different mode.
1.3 Package Contents
◎In the camera package: ◎In the bracket package (Optional) :
□Speed dome camera □Bracket
□Wall mounting screw * 4
□Wall plug * 4
□User manual
□Cap * 4
□M6 Nylok screw * 6
□Spirit level * 1
□Adapter (DC12V ± 10%, 1A)
□M4 screw * 1

INTRODUCTION
-2-
1.4 Specification
Outdoor 22X Zoom Speed Dome Camera Specification*
▓GENERAL
Signal System NTSC or PAL
Pick-up Element 1/4" Sony Color Super HAD CCD image sensor
Number of Pixels 768(H)*494(V)<NTSC> / 752(H)*582(V)<PAL>
Resolution 480TV lines
Min. Illumination 0.3 Lux / F1.6
S/N Ratio More than 48dB (AGC off)
Video Output 1.0 Vp-p. 75Ω
BLC On / Off
Gain Control Low, Medium & High / Off
Sharpness Low / Medium / High
White Balance Auto / Indoor 1 / Indoor 2 / Sun / Cloudy
* Indoor1 = 9000K; Indoor2 = 3000K; Sun = 5500K; Cloudy = 7000K
Camera Title 10 characters or symbols
Preset Points and Sequence Support 8 preset groups, up to 256 programmable preset points
* The sequence of all the preset points will follow the order of the minimal panning route.
Auto Tracking Yes (combined with auto zoom focus tracking)
▓LENS
Focal Length f3.9 mm ~ f85.9 mm
F-number F1.6 (Wide) ~ 3.7 (Tele)
Viewing Angle 4∘~ 60∘
Auto Electronic Shutter 1 / 60 (1/50) to 1 / 100,000 sec.
Auto Focus Manual / Auto
▓MECHANISM
Pan Range 360∘
Pan Speed 360∘/ 1 sec
* The pan speed can be adjusted according to the different pan speed mode.
Tilt Range 90∘
Tilt Speed 0∘~ 90∘under 1 sec
Zoom Ratio 22X optical zoom
Zoom Speed Approx. 7s (Tele ~ Wide)
▓OTHERS
IP Rating IP66
Ambient Operating Temperature -10°C ~ 40°C (14°F ~ 104°F)
Power Source DC12V ± 10%
Current Consumption 1A (max)
Dimension (mm) 145(Ø) x 184(H) mm (± 5mm)
Gross Weight (g) Approx. 1.2 kg
Optional Bracket Wall-mounted
Optional Device Keyboard controller
*The specifications are subject to change without notice.

INSTALLATION AND SETUP
-3-
2. INSTALLATION AND SETUP
For the installation and connection of this PTZ camera, please refer to qualified service personnel or installer.
2.1 Construction
2.2 Installation
Before installation, you need the following items before installation:
‧ Bracket (supplied with the bracket sales package)
‧ The accessory packages supplied with the bracket sales package, including:
(1) Wall mounting screws
(2) Wall plugs
(3) Cap
(4) M6 Nylok screws
(5) Spirit level
(6) M4 screw
‧ Power Drill

INSTALLATION AND SETUP
-4-
STEP 1: Attach the camera-mounting base to the PTZ camera.
Put the power, video and RS485 data connectors through the hole of the camera-mounting base.Align the
breach of the camera-mounting base to the sticker label on the PTZ camera, and use two M6 Nylok screws
to attach the camera-mounting base to the PTZ camera, as shown in the picture below.
STEP 2: Attach the bracket to the wall.
The bracket is composed of two parts: the upper part and the bottom part. Remove the upper part from the
bottom part of the bracket. Use the four mounting screws and wall plugs to attach the bottom bracket to the
wall, as shown in the picture below.
Use the spirit level supplied with the bracket package to check the surface is horizontal or not. If the
surface is horizontal, the bubble will remain in the center circle of the spirit level.
STEP 3: Attach the PTZ camera to the bracket. Connect the power, video and RS485 wires.
Turn the camera up side down, and put the power, video and RS485 data connectors through the hole of
the bracket. Then, slightly secure the camera and the bracket with three M6 Nylok screws.
Use the spirit level to check the surface is horizontal or not, and adjust the tightness of the three M6
Nylok screws. When you make sure the surface is horizontal, use the M4 screw supplied with the bracket
package to fix the camera and the bracket tightly.
Connect the PTZ camera with the indicated power adapter, video output device and RS485-A & RS485-B
wires. After connection, use the insulation tape to cover the connected wires and arrange the wires in the
proper position.
Note: For detailed connection, please refer to “2.3 Connection (PTZ Camera / Keyboard Controller / DVR)” .
STEP 4: Replace the upper part of the bracket, and finish the installation.
Place the upper part of the bracket back to the bottom part of the bracket, and fasten the bracket with a M6
Nylok screw. Then use the cap supplied with the package to cover it and finish the installation.

INSTALLATION AND SETUP
-5-
2.3 Connection (PTZ Camera / Keyboard Controller / DVR)
The optional peripheral (keyboard controller) allows you to accurately control of the pan / tilt / zoom movement for
a PTZ camera with the convenient 3D joystick and functional keypad design. The following connection illustration is an
example. For further connection and operation guide, please refer to your keyboard controller manual.
Rear panel of the keyboard controller:
DC 12VAUDIO LANEXTERNAL I/O DVR P.T.Z
1) Connect PTZ Camera to Keyboard Controller with RJ11 Line:
RJ11 Line RS485-A and RS485-B wires of the PTZ camera
RS485-A: Red wire RS485-A: Brown wire
RS485-B: Green wire RS485-B: Orange wire
The RJ11 line is not supplied in the sales package. Example of RS485-A and RS485-B wires of the PTZ camera.
STEP 1: Get a RJ11 line with the proper length to your connection.
Different RJ11 connector may have different line layout, so the connection might be different. If you cannot
control the PTZ camera after connection, please reverse the RJ11 line connection with the PTZ camera.
STEP 2: Remove one end of the insulating coating of the RJ11 line.
Remove one end of the insulating coating of the RJ11 line to find the RS485-A and the RS485-B wires, and
remove the insulating coating to reveal the naked wires for further connection.
STEP 3: Twist the RS485-A and RS485-B wires together (as shown in the picture above).
Twist the RS485-A(red) and RS485-B (green) wires of the RJ11 line to the RS485-A(brown) and RS485-B
(orange) wires of the PTZ camera (as shown in the picture above). To protect the naked wires, use the
insulation tape to cover on the twisted wires.
STEP 4: Connect the RJ11 connector to the “PTZ” port on the rear panel of the keyboard controller.

INSTALLATION AND SETUP
-6-
STEP 5: Press “F1” key on the keyboard controller, and go to “System” and “CAM” menu to make related
settings.
‧ System
Mode : To select the mode, press “FUN1” key on the keyboard controller. Go to “System” →
“Mode” and select Mode 1 (For the case of one DVR and one camera connection).
Net Setup : Check if this product is under the same domain as the connected PTZ camera.
‧ CAM
Baud Rate : Check and select the baud rate the same as the connected PTZ camera is used.
Protocol : Choose the proper camera protocol depending on the camera type, AVP321 / AVP311 /
PELCO (PELCO-D).
CAM ID : Assign an exclusive ID number. This ID is important for the keyboard controller to
identity the camera you want to control.
2) Connect DVR to Keyboard Controller with RJ11 Line and D-Sub Connector or RS-485 Port:
RJ11 Line For 4CH DVR –
15 PIN D-Sub Connector For 16CH & 8CH DVR –
RS-485 Port on the DVR Rear Panel
RS485-A: Red wire RS485-A: PIN 11 RS485-A: PIN 2
RS485-B: Green wire RS485-B: PIN 10 RS485-B: PIN 3
Solder Side of
15-pin D-Sub connector
RS485-A: PIN11; RS485-B: PIN10
1
912131415
16 17
2345678
1011
The RJ11 line is not supplied in the sales
package.
D-Sub connector is supplied with the
DVR package.
Example of RS485 port on the DVR rear
panel.
STEP 1: Get a RJ11 line with the proper length to your connection.
Different RJ11 connector may have different line layout, so the connection might be different. If you cannot
control the DVR after connection, please reverse the RJ11 line connection with the DVR.
STEP 2: Remove one end of the insulating coating of the RJ11 line.
Remove one end of the insulating coating of the RJ11 line to find the RS485-A and the RS485-B wires, and
remove the insulating coating to reveal the naked wires for further connection.
STEP 3: Solder the RS485-A and RS485-B wires together (as shown in the picture above).
For 4CH DVR MODEL
Solder the RS485-A (red) and RS485-B (green) wires of the RJ11 line to the corresponding pins on the
solder side of the 15 PIN D-Sub connector (as shown in the picture above). To protect the naked wires, use
the insulation tape to cover on the twisted wires.
For 16CH & 8CH DVR MODEL
Insert the RS485-A (red) and RS485-B (green) wires of the RJ11 line to the corresponding pins on the
“RS485” port of the DVR rear panel (as shown in the picture above).
STEP 4: Insert the D-Sub connector to the DVR’s external I/O port. And connect the RJ11 connector to the
“DVR” port on the rear panel of the keyboard controller.

INSTALLATION AND SETUP
-7-
STEP 5: Press “F1” key on the keyboard controller, and go to “System” and “DVR” menu to make related
settings.
‧ System
Mode : To select the mode, press “FUN1” key on the keyboard controller. Go to “System” →
“Mode” and select Mode 1 (For the case of one DVR and one camera connection).
Net Setup : Check if this product is under the same domain as the DVR.
‧ DVR
Baud Rate : Check and select the baud rate the same as the DVR is used.
Protocol : Choose the proper DVR protocol depending on the DVR type, DVR-16 (16CH) / DVR-8
(8CH) / DVR-4 (4CH).
DVR ID : Assign an exclusive ID number. This ID is important for the keyboard controller to
identity the DVR you want to control.
3) System Diagram Illustration:
The diagram below illustrates the available connections of this PTZ camera for you to picture your surveillance
system.

QUICK MENU GUIDE
-8-
3. QUICK MENU GUIDE
3.1 Menu Configuration
Setup menu is shown as below. You can customize the speed dome camera to your own requirements by setting
up the respective items in these menus. For details, please refer to the corresponding pages.
White Balance Auto, Indoor 1, Indoor 2, Sun, Cloudy
Shutter Speed 1/60, 1/100, 1/250, 1/500, 1/1000, 1/2000, 1/4000
,
1/10000
Gain Low, Medium, High, Off
IRIS
BLC On, Off
CAMERA
Sharpness Auto, Low, Medium, High
Title Name Modify, New
Title Position Up, Down, Off
Pan / Tilt Angle On, Off
Pan / Tilt Graph On, Off
Zoom Bar On, Off
Focus Window On, Off
ID Code No. 0
ID Code Display On, Off
TOOL
Baud Rate 19200, 9600, 4800, 2400
Auto Focus Yes
Motion Detect Yes
STATUS
Auto Tracking Yes
Reset Setting Set
Pan / Tilt Speed Slow, Fast
Preset Setup Group 1 ~ Group 8
Tracking Setup LIMIT, TIME
Home Position Set
MODE
Auto Focus Always, PTZ
SAVING
EXIT WITHOUT SAVING

QUICK MENU GUIDE
-9-
3.2 Quick Programming Guide
The optional keyboard controller can be used to control this speed dome camera.
Note: Please enter the PTZ camera control mode of the keyboard controller first.
(1) Press the “ ” key on the keyboard controller to enter the PTZ camera control mode.
Or use the stylus to click the PTZ icon on the touch screen of the keyboard controller to
enter the PTZ camera control mode.
Enter the PTZ Camera
Control Mode (2) In the control mode of the PTZ camera, the LED indication light of the PTZ camera on
the keyboard controller will be on.
KEYS OPERATIONS UNDER THE PTZ CAMERA CONTROL MODE OF THE CONTROLLER
Press this key to access the main menu of the PTZ camera.
Use the up or down key to make the selection.
Press the right key, the sub-menu shows up.
Press the left key, go the upper layer of the menu list.
Use the enter key “ ” to confirm the certain menu setting / enter the certain sub-menu
F1, F2, F3, F4 HOME: Go to the home position
GOTO: Go to the preset point
SEQ: Start sequence function. Press “STOP” key to exit the sequence mode.
HOTKEY
These four keys can
function as 4 types
customized hotkey. NONE: Saved for future functions
* For detailed hotkey function setup, please refer to section “” at page xx.
-FOCUS +Adjust the focus of the PTZ camera.
/Press these keys to zoom out / zoom in the PTZ camera.
TRACK Press this key to start auto-tracking function.
STOP Press this key to stop auto-tracking function.
-/ +Use the -/+key to modify the setting of the IRIS level or the ID code number or the
auto tracking angle in the menu.
0 ~ 9 Use this number pad to enter the camera ID, channel number and password, etc.
ESC Ignore the setting and exit.
Confirm the number / password entering.
Use the joystick to control the PTZ camera to move up / down / left / right.
Turn the joystick clockwise to zoom in. Turn the joystick counter-clockwise to zoom out.

QUICK MENU GUIDE
-10-
Press and hold , and press F1, F2, F3, F4 and respectively to quickly perform different functions as
follows:
Key Combination Functions Description
and F1 Show ID This keystroke combination will show the camera ID
display on the monitor if the ID is hided.
and F2 Clear ID This keystroke combination will clear the camera ID
information saved in the camera, and restore to the
default setting (00).
and F3 Hide ID This keystroke combination will hide the camera ID
display on the monitor.
and F4 Show firmware version of
the keyboard controller. This keystroke combination will show the current
firmware version of the keyboard controller.
* For the firmware version of the PTZ camera, please reboot the PTZ camera. The
firmware version will be shown on the monitor of the PTZ camera.
and Reset the keyboard
controller to factory default
settings.
This keystroke combination enables the reset of the
keyboard controller to the factory settings. Then, it will
prompt you to shut down and reboot again.
* To reset the PTZ camera to the factory default settings, please enter the MODE menu
of the PTZ camera.

MAIN MENU – CAMERA
-11-
4. MAIN MENU – CAMERA
Press the “ ” key on the keyboard controller to enter the PTZ camera control mode of the controller. Or use the
stylus to click the PTZ icon on the touch screen of the controller to enter the PTZ camera control mode, as shown in the
picture below.
In the PTZ camera control mode of the keyboard controller, press key on the controller to access the main
menu of the PTZ camera. Move the cursor to CAMERA “ ”, you will see the following window:
C
CA
AM
ME
ER
RA
A
1 White Balance Auto
2 Shutter Speed 1/60
3 Gain Medium
4 IRIS
5 BLC Off
6 Sharpness Auto
Note: You will see the current settings on right hand side of this menu page.
Press this key to access the main menu of the PTZ camera.
Use the up or down key to make the selection.
Press the right key, the sub-menu shows up.
Press the left key, go the upper layer of the menu list.
-/ +Use the -/+key to modify the setting of the IRIS level in the menu.
‧ Exit and Save the Settings / Exit without Saving the Settings:
Move the cursor to EXIT “ ”, press right key to enter the sub-menu. Select “EXIT & SAVE” or “EXIT & NO
SAVE” and press enter key. Then you’ll see the pop-out message “Are your sure ?”, press enter key again to apply the
settings and exit the menu.

MAIN MENU – CAMERA
-12-
4.1 White Balance
The white balance function processes the viewed
image to retain color balance over a color temperature
range. According to different color temperature and
installation place, set the white balance function to the
different mode.
C
CA
AM
ME
ER
RA
A
1 White Balance Auto
2 Shutter Speed Indoor 1
3 Gain Indoor 2
4 IRIS Sun
5 BLC Cloudy
6 Sharpness
zAuto:
Balance the color automatically depending on the
different color temperature.
zIndoor 1 / Indoor 2 / Sun / Cloudy:
You can select different white balance modes
provided here to adjust the picture output. As you
change the setting, you will see the color change on
your monitor.
White Balance Modes Color Temperature
Indoor 1 9000K
Indoor 2 3000K
Sun 5500K
Cloudy 7000K
4.2 Shutter Speed
Shutter speed is the duration of the electronic
shutter. You can program the shutter speed manually
(Numeric Value).
C
CA
AM
ME
ER
RA
A
1 White Balance 1/ 60
2 Shutter Speed 1/ 100
3 Gain 1/ 250
4 IRIS 1/ 500
5 BLC 1/ 1000
6 Sharpness 1/ 2000
1/ 4000
1/ 10000
zNumeric Value:
NTSC: (1/60, 1/100, 1/250, 1/500, 1/1000, 1/2000, 1/4000, 1/10000)
PAL: (1/50, 1/120, 1/250, 1/500, 1/1000, 1/2000, 1/4000, 1/10000)
The camera has several numerical shutter speed
settings. The higher the number, the faster the
electronic shutter. Increasing the shutter speed will
lower the amount of light passing through the lens.
The slowest shutter speed setting is 1/60 second
(NTSC) or 1/50 second (PAL).
The fastest shutter speed setting is 1/10000
second.
Note: When you use a NTSC camera in the PAL
system environment, set the shutter speed as
1/100, the effect of the camera picture output
will equal to the effect under flickerless mode.
Note: When you use a PAL camera in the NTSC
system environment, set the shutter speed as
1/120, the effect of the camera picture output
will equal to the effect under flickerless mode.
4.3 Gain Control
Gain control is a function that can adjust the
amplitude of the signal input according to the light
conditions.
C
CA
AM
ME
ER
RA
A
1 White Balance Low
2 Shutter Speed Medium
3 Gain High
4 IRIS Off
5 BLC
6 Sharpness
zOn (Low, Medium, High) / Off:
When the light condition is too bright, you can
select “Low” for the gain control to get lower sensitivity.
When the light condition is normal, you can select
“Medium” for the gain control to get normal sensitivity.
When the light condition is too dark, you can select
“High” to get the higher sensitivity and a brighter display.
However, the higher the sensitivity is, the more the
signal noise will be.

MAIN MENU – CAMERA
-13-
4.4 IRIS
Auto iris is the lens function that automatically
opens and closes the iris in response to changing light
conditions.
C
CA
AM
ME
ER
RA
A
1 White Balance
2 Shutter Speed 162
3 Gain
4 IRIS
5 BLC
6 Sharpness
zAuto IRIS Level (50 ~ 250):
Auto iris level is the numeric value the auto iris
uses to maintain the brightness level of the camera.
Use the “+” key to increase the value to brighten the
scene. Use the “-” key to decrease the level to darken
the scene.
4.5 Backlight Compensation (BLC)
If a bright backlight is present, the picture may
appear dark or as a silhouette. The backlight
compensation function can enhance objects in the
center of the picture and adjust the iris so that the
object will be properly exposed.
C
CA
AM
ME
ER
RA
A
1 White Balance On
2 Shutter Speed Off
3 Gain
4 IRIS
5 BLC
6 Sharpness
zOn / Off:
The backlight compensation can be set on or off.
4.6 Sharpness
Auto sharpness enhances picture detail by
increasing the aperture gain of the camera and
sharpening the edges in the pictures.
C
CA
AM
ME
ER
RA
A
1 White Balance Auto
2 Shutter Speed Low
3 Gain Medium
4 IRIS High
5 BLC
6 Sharpness
zAuto:
The camera automatically maintains a normal
sharpness mode.
zSharpness Level (Low / Medium / High) :
The sharpness of the picture can be set manually
or by different sharpness levels (Low / Medium / High).

MAIN MENU – TOOLS
-14-
5. MAIN MENU – TOOLS
Press the “ ” key on the keyboard controller to enter the PTZ camera control mode of the controller. Or use the
stylus to click the PTZ icon on the touch screen of the controller to enter the PTZ camera control mode, as shown in the
picture below.
In the PTZ camera control mode of the keyboard controller, press on the controller to access the main menu
of the PTZ camera. Move the cursor to TOOLS “ ”, you will see the following window:
T
TO
OO
OL
LS
S
1 Title Name Set
2 Title Position Up
3 Pan / Tilt Angle On
4 Pan / Tilt Graph On
5 Zoom Bar On
6 Focus Window On
7 ID Code No. 0
8 ID Code Display On
9 Baud Rate 2400
Graphical Display Monitor of the PTZ Camera:
Note: You will see the current settings on right hand side of this menu page.
Press this key to access the main menu of the PTZ camera.
Use the up or down key to make the selection.
Press the right key, the sub-menu shows up.
Press the left key, go the upper layer of the menu list.
Use the enter key “ ” to confirm the certain menu setting / enter the certain sub-menu
-/ +Use the -/+key to modify the ID code number in the menu.
‧ Exit and Save the Settings / Exit without Saving the Settings:
Move the cursor to EXIT “ ”, press right key to enter the sub-menu. Select “EXIT & SAVE” or “EXIT & NO
SAVE” and press enter key. Then you’ll see the pop-out message “Are your sure ?”, press enter key again to apply the
settings and exit the menu.
This manual suits for next models
1
Table of contents
Other Avtech Security Camera manuals

Avtech
Avtech AVN222 User manual

Avtech
Avtech KPC131E User manual

Avtech
Avtech AVM500 User manual

Avtech
Avtech AVN80X User manual

Avtech
Avtech AVC508 User manual

Avtech
Avtech DG104A User manual

Avtech
Avtech AVK584ZN User manual

Avtech
Avtech AVM5447 User manual

Avtech
Avtech AVM3455 User manual

Avtech
Avtech AVN304 User manual

Avtech
Avtech AVT1206TP User manual

Avtech
Avtech AVN80X User manual

Avtech
Avtech AVN211 User manual

Avtech
Avtech DGC5105T User manual

Avtech
Avtech AVI 201 User manual

Avtech
Avtech AVT1206A User manual

Avtech
Avtech AVM365 User manual

Avtech
Avtech DGC5445ASE Series User manual

Avtech
Avtech avn212 User manual

Avtech
Avtech AVM332 User manual