Ayra Compar Kit FX1 User manual

Compar Kit FX1
Complete light set with effects
User manual
The information in this user manual is subject to change at any time without notice.
Version:
1.0
Date of creation and author's initials:30-04-2018 RV Revision date and author's initials: -
Introduction
Thank you for purchasing the Ayra Compar Kit FX1. This extremely-versatile light set can be use for any
light show thanks to its four spotlight fixtures that can be aime wherever you want an its wi e assortment
of light effects. This manual provi es all the information you nee in or er to use this pro uct to its full
potential.
We a vise that you rea this user manual in its entirety before unpacking the contents of the box, so that you
are familiar with all of the functionality that this pro uct has to offer. Please be sure to check that all of the
parts an accessories liste below un er 'Box contents' are inclu e in the package. In the event that the
Compar Kit FX1 oes not function properly, or if you have any issues while operating it, please remove the
plug from the power socket an contact your ealer for assistance.
Box contents:
- flight bag with Compar Kit FX1 basic set (bar with four spotlights an stroboscope LEDs)
- flight bag with light stan + separate light stan pole
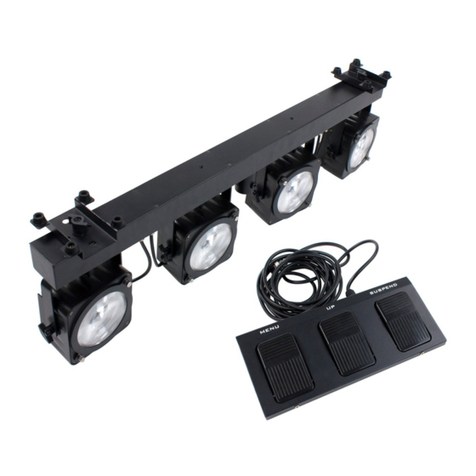
- foot controller with connection cable
- bag with remote control an mounting har ware (1x small knob with ring, 2x large knobs with ring)
- 2x LED Derby light effect with fixe cable
- 1x laser effect with fixe cable
- IEC C13 to Schuko connection cable (2 metres)
Please inspect the device and the included accessories
Shoul you iscover that either the evice or one or more of the inclu e parts have been amage or
ren ere efective while in transit, please contact your ealer irectly.
Please note that the pictures in this user manual serve illustrative purposes only and may differ slightly from
the product you receive.
The information in this user manual is subject to change at any time without notice.
Version:
1.0
Date of creation and author's initials:30-04-2018 RV Revision date and author's initials: -
Safety instructions
Everyone involve with the installation, operation an maintenance of this evice must:
- Be qualifie
- Be skille
- Have rea the instructions in this user manual
- Be sure that neither the evice nor the inclu e accessories are amage . Shoul the evice or the
inclu e accessories be amage , please contact your ealer for more information.
- Ensure that the evice is in goo working con ition an is safe to operate. Please follow the a vice an
instructions as they are escribe in this user manual.
Damage cause by misuse an /or mo ifications ma e to the evice are not covere by the warranty.
This evice oes not contain any parts that nee to be repaire or replace by the user. Shoul maintenance
or repairs be necessary, they must be han le by a qualifie technician.
The light source of this evice is not replaceable. If the light source no longer functions, then the entire
evice nee s to be replace .
Important information regarding health and safety:
The information in this user manual is subject to change at any time without notice.
Version:
1.0
Date of creation and author's initials:30-04-2018 RV Revision date and author's initials: -
WARNING!
Keep this device away from moisture, water and rain to avoid the chance of electric shocks
WARNING!
Only connect this device to a suitable power socket This device functions on a specific power
voltage If it is plugged into a power socket with a different voltage, it could result in permanent
damage and even dangerous situations such as fire or electric shocks
WARNING!
Be careful when operating this device Touching the wires that are connected to the mains,
inside or outside the device, could result in electric shocks
WARNING!
This product comes with a laser light effect If used incorrectly, lasers can cause permanent
damage to the eyes A distance of at least 30 cm must be observed at all times between the laser
and a person's eyes

- Do not remove any labels or stickers from this evice.
- Do not leave any cables lying aroun .
- The evice shoul not be opene up, an any har ware or software that may be present shoul not be
mo ifie .
- To achieve optimal performance, inputs on this evice shoul not be fe with a signal higher than
necessary.
- The evice shoul only be use in oors; contact with water, rain an moisture shoul always be avoi e .
Do not place any objects containing liqui on top of the evice.
- Remove the evice from any nearby flames or heat sources; o not place it near flammable flui s, gasses
or objects.
- Disconnect this evice from the power supply if it will not be use for a longer perio of time, if maintenance
is necessary, or if the evice nee s to be cleane .
- Do not pull on the cable to remove a connector, as this coul cause amage.
- Do not use any cables other than the ones escribe in this manual. Do not use efective cables. Please
contact your ealer if the inclu e or necessary cables o not function properly with this evice.
- Only use this evice with a stable AC power supply.
- Only use this evice with power from a groun e power source.
- In the event that the evice is expose to extreme temperature changes (e.g. transporte through a col
outsi e environment into a warm in oor environment), it shoul not be turne on until it has reache room
temperature. This is necessary to prevent moisture from forming in the evice, which coul lea to electric
shocks.
Guidelines and operation of this device:
- This evice is inten e for use by professionals on stage, in theatres, in clubs, an in similar entertainment
locations.
- This evice is not suitable for use by chil ren, an shoul always be operate by an a ult.
- This evice is esigne to create light effects for entertainment purposes. It is not suitable for househol
illumination.
- This evice shoul only be use in a suitable environment where no amage to the evice can occur. Do
not use the evice in moist or usty environments such as:
- in oor swimming pools where chlorine is use
- beaches where there is san an salt
- out oors
- in oors in spaces where intense heat sources are present, or where it reaches temperature levels
that woul be consi ere uncomfortable for a person
- Avoi impacts an collisions uring use an transport. Do not transport the evice while it is in use. Avoi
using excessive force when installing an operating the evice.
- The user shoul become familiar with the functions of the evice before using it.
- Shoul the evice not be use in the manner escribe in this user manual, amages or even injuries coul
occur. Ayra cannot be hel responsible for any injuries or amages that occur as a result of improper use of
this pro uct.
Storage and transport:
- This pro uct was esigne for mobile use. Please only transport the evice in the original packaging, or in
a flight case with a suitable foam inlay.
- This evice is not esigne for permanent (24/7) use. The expecte lifespan of the evice will not be
affecte by occasionally turning the evice off. Disconnect the evice or turn off the power when it is not
actively in use.
- If the evice will not be use for a longer perio of time, it shoul be isconnecte an store in a ust-free
environment.
- Do not expose the evice to extreme temperature ifferences.
Housing
- Inspect the evice's housing frequently, an always just before use. Avoi operating the evice if there are
large ents or cracks, or if screws are missing. Do not use the evice if the housing is not in goo con ition.
Contact your ealer or a qualifie technician if you are unsure about the state of the evice.
- Check the evice an the screws for corrosion. Corrosion must not be present on this evice. Contact your
ealer or a qualifie technician if you fin any corrosion on the screws.
The information in this user manual is subject to change at any time without notice.
Version:
1.0
Date of creation and author's initials:30-04-2018 RV Revision date and author's initials: -
Every power an signal connector shoul be securely mounte . Do not use the evice if the connectors are
not secure.
Avoi ust an irt buil -up. Clean the evice once a month by isconnecting it from the power supply an
wiping it own with a ry or slightly moist cloth. If the evice is use frequently, the cleaning intervals shoul
increase.
Symbol explanation:
WEEE: Ensure that this evice is ispose of properly. This pro uct falls un er the WEEE
(Waste Electrical an Electronic Equipment) irective. The requirements of this irective apply
to all manufacturers an pro ucers of electronic evices in the EU. Do not throw this pro uct
away with regular rubbish. Please contact your local authority for more information about how
to recycle an ispose of these pro ucts in your region. By recycling this pro uct in the proper
manner, we can work together to ensure that we can continue to enjoy these kin s of
pro ucts an still protect the environment as much as possible from pollution.
CE: The CE logo in icates that this pro uct meets the European norms an requirements to
which it must legally conform.
Only suitable for indoor use: this pro uct was only esigne for in oor use. The maximum
environmental temperature must not excee 40 egrees Celsius (104 egrees Fahrenheit).
Battery danger:
Warning!
Do not ingest the battery
Risk of injury due to chemical burns
The included remote control comes with a button-cell battery
If a button-cell battery is ingested, this can cause life-threatening internal burns
within just 2 hours and possibly lead to death
Keep new and used batteries away from children
If the battery compartment does not close properly, do not use the product and
keep it away from children
If you suspect a battery has been ingested or has otherwise ended up in the body, seek medical
attention immediately
PLEASE NOTE!
Risk of explosion if the battery is not replace properly.
Only replace the battery with a new battery of exactly the same type.
Do not expose batteries to intense heat from sunlight, open fire, etc.
Do not leave batteries out in high-temperature environments. This coul cause an explosion or flammable
flui or gas leaks.
Do not burn batteries or place them in a hot oven. Do not try to shape the battery or make incisions in it, as
this coul cause an explosion.
Do not expose batteries to extremely low air pressure levels (at high altitu es), as this coul cause
explosions or flui or gas leaks.
If equipment has gone unuse for an exten e perio of time (a few months for instance), then the battery
shoul be remove .
Remove empty batteries from the evice imme iately.
Do not store batteries in ivi ually or carry them in your pocket, wallet, or bag. Contact with metal objects
The information in this user manual is subject to change at any time without notice.
Version:
1.0
Date of creation and author's initials:30-04-2018 RV Revision date and author's initials: -
such as coins an keys can cause leaks, tears, or short circuits.
Keep batteries out of reach of chil ren.
Recycling:
Never throw batteries away with regular rubbish Batteries contain substances that can be hazardous
to the environment When batteries are recycled properly, they become a valuable source of
sustainable material Contact your local authority for information about how to dispose of batteries
in an eco-friendly way
Contact:
Ayra professional lighting pro ucts
Verrijn Stuartweg 18
4462 GE Goes
The Netherlan s
Please do not send any products to this correspondence address.
Should you wish to send in a product for repair or for a refund, please contact your dealer for an RMA
Return Merchandise Authorisation).
The information in this user manual is subject to change at any time without notice.
Version:
1.0
Date of creation and author's initials:30-04-2018 RV Revision date and author's initials: -
Guidelines and operation of this device
1. Foot controller - Strobe button
2. Foot controller - Auto button
3. Foot controller - Soun button
4. Foot controller - Blackout button
5. Effect B 2x 10 W RGBW LED Derby light effect
6. Effect A 2x 10 W RGBW LED Derby light effect
7. Re + green grating laser 150 mW
8. 3 W Stroboscope LED
9. flexible gooseneck, han a justable
10. LED projector, 12x RGBW 3 W LEDs
11. Effect A lockable connector (5-pin GX-16D connector)
12. C14 power input with fuse hol er (100 - 240V AC, 50/60 Hz)
13. C13 link power output (9A maximum)
14. 3-pin XLR input an output for DMX
15. lockable foot controller connector (5-pin GX-16D connector)
16. microphone for soun -controlle operation
17. lockable laser connector (5-pin GX-16D connector)
18. lock for laser (2 keys inclu e )
19. 4-character LED isplay with menu buttons
20. Effect B lockable connector (5-pin GX-16D connector)
The information in this user manual is subject to change at any time without notice.
Version:
1.0
Date of creation and author's initials:30-04-2018 RV Revision date and author's initials: -
2
11
5
6
7
8
9
1
3
4
10
12 13 14 15 16 17
18
19 20

Operation and mounting
To activate the evice, plug it into a mains socket. Once it's connecte to an active power source, it will turn
on automatically.
During startup, ‘ES 4’ will be shown on the isplay an the evice cannot be use . As soon as the evice is
rea y to use, it will enter the mo e last use . Operation mo es an other settings shown on the isplay can
now be a juste or change by using the menu buttons.
Shoul the evice etect a DMX signal, it will automatically switch to DMX mo e an will isplay the a ress
last use . For new evices, this will normally be DMX a ress 001. Of course, you can change the DMX
a ress via the isplay using the menu buttons.
Using the isplay an the menu buttons, you can a just the functions an settings of the evice. Press 'enter'
to select a function or confirm an a justment, use ‘up’ an ‘ own’ to change values an ‘menu’ to go back to
the menu. By hol ing the ‘menu’ button own for 2 secon s after saving a specific setting, the evice will
return to operation mo e an the setting will be a opte . This will also be one after any change are ma e to
the operation mo e or DMX a ress. Note that hol ing the menu button own is not necessary for settings to
be a opte as this is one automatically by the evice a few secon s after new settings have been
confirme .
The menu contains the following options an functions.
display Mode Function
ADDR / A001 DMX a ress configuration A ress A001 … A512
CHND Channel mo e selection 3CH/21CH/51CH channel mo es
NASL Slave mo e Master - (NAST)
Slave (SL 1)
SH L Show laser EL R = Laser ran om show
SH 1-5 = Laser show 1 - 5
OFF = Laser off
SPED = Laser spee 1 - 8
SH D Show laser + Derby ED R = Laser + erby ran om show
SH 1-6 = Laser + erby show 1-6
OFF = Laser + erby off
SPED = Laser erby spee 1 - 8
SH P Show 4 spotlights + strobe EP R= Par + strobe ran om show
SH 1-10 = Par + strobe show 1-10
OFF = Strobe off
SPED = Par + strobe spee 1 - 8
SH A Show all effects EA R = All ran om show
SH 1-5 = All show 1-5
OFF = All off
SPED = spee 1 - 8
SOUND Soun -controlle mo e Mo e: ON / OFF
SENS Soun sensitivity 0 - 100: sensitivity in %
DISP Display inversion LCD = ON/OFF
INVT = YES/NO
TEST Test mo e The test program runs through each LED colour
one by one to check they are all functioning
correctly
TEMP Temperature in egrees Celsius 0 ~ 9999 temperature in icator
RST Reset Reset function (for restarting the evice)
The information in this user manual is subject to change at any time without notice.
Version:
1.0
Date of creation and author's initials:30-04-2018 RV Revision date and author's initials: -
You'll fin an explanation of the various functions below:
ADDR: With this function, you can set the DMX start a ress of the evice. Set it to channel 001 an the
evice will respon to DMX channel 1. Set it to channel 003 an the evice will respon to DMX channel 3,
etc.
CHND:This evice has ifferent DMX channel mo es available. With this function, you can choose a concise
channel mo e if your DMX circuit is reasonably full of equipment an you o not require complete control
over the functions. It's also possible to choose the most comprehensive channel mo e which makes more
channels available that each have separate functions.
NASL: The Master-Slave mo e is esigne to sync multiple evices. A copy of the internal program is sent
to connecte evices so that each one projects the same effect. The master-slave function is also wire to
the DMX sockets using stan ar 3-pin XLR cables.The only ifference is that the first evice in the chain
oes not receive DMX input.
PLEASE NOTE: When Slave mo e is activate , the evice will wait for a signal from the Master evice. In
this case, it is not possible to simply select an automatic or soun -controlle mo e! To cancel Slave mo e,
select 'NAST' mo e in the NASL menu, which puts the evice in Master mo e. Then, all stan alone functions
can be activate again.
SH: This mo e consists of all sorts of automatic programs with a justable settings that are escribe below:
SH L: In this mo e, only the laser is active.
SH D: In this mo e, only the laser an the two erby light effects are active.
SH P: In this mo e, only the spotlights an the stroboscope LEDs are active.
SH A: In this mo e, all of the effects are active.
Various effects can be selecte per show mo e. Choosing ran om means ifferent programs will be playe
through or you can choose a specific program instea . You can also a just things like the spee unless
you're using the music-controlle program.
SOUN: This setting is use to activate an e-activate the microphone function. The setting is confirme with
an ON or OFF message. When the function is activate , the evice will be music-controlle when in
stan alone mo e. When the function is e-activate , the evice will return to the spee set by the selecte
program.
SENS: This mo e allows you to etermine the sensitivity level of the internal microphone. The further the
evice is from the speaker, the higher the sensitivity of the microphone nee s to be so it can react properly to
the music. The microphone is built to han le high soun pressure levels, but lou music combine with a
high level of microphone sensitivity will make it more ifficult for the evice to etect the beat of the music.
Experiment with the level of sensitivity an the istance/positioning of the evice in relation to the speaker to
fin the best results.
LED: When the LED isplay is not in use, it can be e-activate by turning the LED mo e OFF. The re
symbols will then no longer light up when using the evice in a ark environment. When you press one of the
menu buttons, the isplay will light up again an show any relevant information. When the evice registers
that the menu is not being actively use , it will automatically turn the LED isplay off again after 30 secon s.
The isplay also has an inversion function. This etermines whether the isplay will be shown as normal or
inverte . If the evice is suspen e , the isplay may be har er to rea . This function allows you to rotate it
vertically for better legibility.
TEST: When the evice un ergoes maintenance or inspection, the TEST function can be use to test one or
more evices simultaneously. The evice plays a continuous program that uses the LEDs so that you can
etermine if there are any abnormalities or efects. The evice will run the program until stoppe manually
(for example, when soun -controlle mo e is activate .)
RST: This function can be use to reset the evice. It oes the same job as turning the evice off an on
The information in this user manual is subject to change at any time without notice.
Version:
1.0
Date of creation and author's initials:30-04-2018 RV Revision date and author's initials: -
again or isconnecting the power cable. Normally, this function oesn't nee to be use an it will not reset
the evice to its factory settings.
Remote control
The Compar Kit FX1 comes with an infrare remote control. It can be use to
control various settings like selecting a colour for the spotlights, activating a
light show program or turning the evice on an off.
A overview of the functions:
- ON/OFF: Turns the evice on an off. Turning the evice off using the
remote control puts it in stan by mo e. It can be turne on again at any
moment.
- Soun : The Soun button activates soun -controlle mo e which means
the evice will play its programs accor ing to the soun of the music being
playe . In the event that the microphone sensitivity nee s to be a juste , this
can be one on the stan itself via the control panel an the isplay.
- Strobe: Activating this function will result in all of the effects turning white
an flashing quickly to create a strobe effect. A single press will activate this
function with another press stopping it an returning the evice to its normal
operating mo e.
- Show 1 - 5: Pressing these buttons will activate one of the built-in light
shows (1 to 5).
- Spee +: The Spee + function spee s up the automatic program being
playe . A single press will result in the current program being playe at a
faster spee .
- Spee -: The Spee - function slows own the automatic program being
playe . A single press will result in the current program being playe at a
slower spee .
- Dimmer +: The Dimmer + function raises the intensity of the entire light set
(with the exception of the laser).
- Dimmer -: The Dimmer - function lowers the intensity of the entire light set
(with the exception of the laser).
- 1-9: Select fixe colour for the spotlights
The remote control is equippe with a replaceable CR2025 battery. The battery compartment can be
accesse via a cover on the bottom of the remote control.
Foot controller
The inclu e , wire foot controller that comes with the Compar Kit FX1 gives users like musicians an DJs
the chance to control basic light functions without using their han s. This makes it i eal for use uring
performances.
The foot controller can be use for the following functions:
The information in this user manual is subject to change at any time without notice.
Version:
1.0
Date of creation and author's initials:30-04-2018 RV Revision date and author's initials: -
Strobe: Hol ing the button own will result in all of the effects turning white an flashing quickly to create a
strobe effect. Releasing the button again will stop the strobe effects.
Auto: Pressing the Auto button will select one of the built-in programs.
Sound: Pressing the Soun button will activate the evice's soun -controlle mo e, but it can also be use
to a just the spee of automate shows. Once the highest spee has been reache , the evice will switch
back to soun -controlle mo e. Pressing the Soun button again will then switch it back to the automate
show at the slowest spee .
Blackout: Pressing the Blackout button blocks the output from the entire light set. Pressing the Blackout
button again cancels the Blackout allowing the light show to resume.
Operating modes
The following overview is esigne to show the ifferences between the various operating mo es that are
supporte by the menu functions mentione above.
Auto:
In Automatic mo e, you are choosing one of the operating mo es where the evice is not epen ent on
external factors (such as a controlling signal or soun ). Choose one of the basic programs an set options
such as spee , if esire .
Sound:
When in Soun mo e, the evice's internal microphone etects music an reacts to the beat. The evice will
move in sync with the music an provi e an automate light show.
When there is no music for the evice to etect or when only high frequencies are au ible, the evice will
continue its program at a slower pace, so the light show will not stop abruptly. As soon as the microphone
etects music again, it will resume the automate program an follow the beat.
Slave
In Slave mo e, you can aisy-chain multiple evices of the same type so they all function a specific way.
This allows you to have a coor inate light show with multiple evices moving the same way instea of in
ifferent irections, which can look chaotic. In principle, you can connect an unlimite number of slave
evices to a master evice, but a DMX booster will also be require somewhere in between. Generally
speaking, you can connect up to four fixtures together without the nee for a DMX booster.
The information in this user manual is subject to change at any time without notice.
Version:
1.0
Date of creation and author's initials:30-04-2018 RV Revision date and author's initials: -

Be aware that when you attempt to connect evices of ifferent types an bran s, they may behave
strangely an you may not get the esire effect because certain functions are linke to the wrong channels.
This is true of DMX lighting of all bran s an types.
DMX
DMX mo e is the most comprehensive way to maintain ultimate control over all the functions this evice has
to offer. It enables you to etermine exactly how many functions you want to control via the DMX controller or
DMX software.
This evice can be set to various channel mo es so the channel layout, which is shown below, correspon s
perfectly with your DMX circuit layout, as well as with the functions you will be using.
3CH mode:
CH Function Value
1 Show mo e 000 - 005: Dimmer out
006 - 055 Ran om show
056 - 105: Laser show
106 - 155: Derby + strobe show
156 - 205: Par + strobe show
206 - 255: All show
2 If CH1 is set to 056 - 105
Laser show
If CH1 is set to 106 - 155
Derby + Strobe show
If CH1 is set to 156 - 205
Par + Strobe show
If CH1 is set to 206 - 255
All show
000 - 038: Show 1
039 - 101: Show 2
102 - 165: Show 3
166 - 229: Show 4
230 - 255: Show 5
000 - 030: Show 1
031 - 081: Show 2
082 - 132: Show 3
133 - 183: Show 4
184 - 234: Show 5
235 - 255: Show 6
000 - 016: Show 1
017 - 045: Show 2
046 - 073: Show 3
074 - 101: Show 4
102 - 130: Show 5
131 - 158: Show 6
159 - 186: Show 7
187 - 215: Show 8
216 - 243: Show 9
243 - 255: Show 10
000 - 038: Show 1
039 - 101: Show 2
102 - 165: Show 3
166 - 229: Show 4
230 - 255: Show 5
3 Spee selection + soun -controlle mo e 000 - 249: Spee (slow - fast)
250 - 255: Soun -controlle
22CH mode:
The information in this user manual is subject to change at any time without notice.
Version:
1.0
Date of creation and author's initials:30-04-2018 RV Revision date and author's initials: -
CH Function Value
1 LED main immer(Derby) 000 - 255: 0 - 100% intensity
2 Stroboscope spee (Derby) 000 - 007: No function
008 - 249: Stroboscope spee (slow -
fast)
250 - 255: Stroboscope spee (soun -
controlle )
3 Dimmer re (Derby) 000 - 255: Dimmer re , 0 - 100%
intensity
4 Dimmer green (Derby) 000 - 255: Dimmer green, 0 - 100%
intensity
5 Dimmer blue (Derby) 000 - 255: Dimmer blue, 0 - 100%
intensity
6 Dimmer white (Derby) 000 - 255: Dimmer white, 0 - 100%
intensity
7 Colour selection (Derby) 000 - 005: No function
006 - 125: Fixe colours (various
colours)
126 - 189: Colour jumps (slow - fast)
190 - 253: Colour fa es (slow - fast)
254 - 255: Colour selection via soun -
controlle mo e
8 Derby rotation 000 - 127: Positions
128 - 249: Automatic rotation (slow -
fast)
250 - 255: Soun -controlle movement
9 LED main immer (Strobe LEDs) 000 - 255: 0 - 100% intensity
10 Stroboscope spee (Strobe LEDs) 000 - 005: No function
006 - 249: Stroboscope spee (slow -
fast)
250 - 255: Stroboscope spee music-
controlle
11 Show selection Strobe LEDs 000 - 010: No function
011 - 020: Show 1
021 - 030: Show 2
031 - 040: Show 3
041 - 050: Show 4
051 - 060: Show 5
061 - 070: Show 6
071 - 080: Show 7
081 - 240: No function
241 - 255: Ran om effect
12 Effect spee 000 - 249: Spee (slow - fast)
250 - 255: Soun -controlle function
13 Laser on/off (re ) 000 - 010: Re laser off
011 - 020: Re laser on
021 - 255: Stroboscope spee (slow -
fast)
14 Laser on/off (green) 000 - 010: Green laser off
011 - 020: Green laser on
021 - 255: Stroboscope spee (slow -
fast)
15 Laser movement 000 - 099: Laser movement spee (fast
- slow)
100 - 109: No laser movement
The information in this user manual is subject to change at any time without notice.
Version:
1.0
Date of creation and author's initials:30-04-2018 RV Revision date and author's initials: -
(stationary)
110 - 209: Laser movement spee
(slow - fast)
210 - 255: Soun -controlle mo e
16 LED main immer (spotlight LEDs) 000 - 255: 0 - 100% intensity
17 Stroboscope an pulse effects 000 - 007: Dimmer function on
008 - 015: Dimmer function off
016 - 131: Stroboscope spee , (slow -
fast)
132 - 139: Dimmer function on
140 - 181: Slow off, fast on pulse effect
(slow - fast)
182 - 189: Dimmer function on
190 - 231: Fast off, slow on pulse effect
(slow - fast)
232 - 239: Dimmer function on
240 - 247: Ran om strobe effect
248 - 255: Dimmer function on
18 Dimmer re (Spotlights) 000 - 255: Dimmer re , 0 - 100%
intensity
19 Dimmer green (Spotlights) 000 - 255: Dimmer green, 0 - 100%
intensity
20 Dimmer blue (Spotlights) 000 - 255: Dimmer blue, 0 - 100%
intensity
21 Dimmer white (Spotlights) 000 - 255: Dimmer white, 0 - 100%
intensity
22 Colour selection (Spotlights) 000 - 005: No function
006 - 125: Fixe colours (various
colours)
126 - 189: Colour jumps (slow - fast)
190 - 253: Colour fa es (slow - fast)
254 - 255: Colour selection via soun -
controlle mo e
51CH mode:
CH Function Value
1 LED main immer(Derby 1) 000 - 255: 0 - 100% intensity
2 Stroboscope spee (Derby 1) 000 - 007: No function
008 - 249: Stroboscope spee (slow -
fast)
250 - 255: Stroboscope spee soun -
controlle
3 Dimmer re (Derby 1) 000 - 255: Dimmer re , 0 - 100%
intensity
4 Dimmer green (Derby 1) 000 - 255: Dimmer green, 0 - 100%
intensity
5 Dimmer blue (Derby 1) 000 - 255: Dimmer blue, 0 - 100%
intensity
6 Dimmer white (Derby 1) 000 - 255: Dimmer white, 0 - 100%
intensity
7 Colour selection (Derby 1) 000 - 005: No function
006 - 125: Fixe colours (various
colours)
126 - 189: Colour jumps (slow - fast)
The information in this user manual is subject to change at any time without notice.
Version:
1.0
Date of creation and author's initials:30-04-2018 RV Revision date and author's initials: -

190 - 253: Colour fa es (slow - fast)
254 - 255: Colour selection via soun -
controlle mo e
8 Derby rotation 000 - 127: Positions
128 - 249: Automatic rotation (slow -
fast)
250 - 255: Soun -controlle movement
9 LED main immer(Derby 2) 000 - 255: 0 - 100% intensity
10 Stroboscope spee (Derby 2) 000 - 007: No function
008 - 249: Stroboscope spee (slow -
fast)
250 - 255: Stroboscope spee soun -
controlle
11 Dimmer re (Derby 2) 000 - 255: Dimmer re , 0 - 100%
intensity
12 Dimmer green (Derby 2) 000 - 255: Dimmer green, 0 - 100%
intensity
13 Dimmer blue (Derby 2) 000 - 255: Dimmer blue, 0 - 100%
intensity
14 Dimmer white (Derby 2) 000 - 255: Dimmer white, 0 - 100%
intensity
15 Colour selection (Derby 2) 000 - 005: No function
006 - 125: Fixe colours (various
colours)
126 - 189: Colour jumps (slow - fast)
190 - 253: Colour fa es (slow - fast)
254 - 255: Colour selection via soun -
controlle mo e
16 Derby rotation 000 - 127: Positions
128 - 249: Automatic rotation (slow -
fast)
250 - 255: Soun -controlle movement
17 LED main immer (Strobe LEDs) 000 - 255: 0 - 100% intensity
18 Stroboscope spee (Strobe LEDs) 000 - 005: No function
006 - 249: Stroboscope spee (slow -
fast)
250 - 255: Stroboscope spee soun -
controlle
19 Show selection Strobe LEDs 000 - 010: No function
011 - 020: Show 1
021 - 030: Show 2
031 - 040: Show 3
041 - 050: Show 4
051 - 060: Show 5
061 - 070: Show 6
071 - 080: Show 7
081 - 240: No function
241 - 255: Ran om effect
20 Effect spee 000 - 249: Spee (slow - fast)
250 - 255: Soun -controlle function
21 Laser on an off (re ) 000 - 010: Re laser off
011 - 020: Re laser on
021 - 255: Stroboscope spee (slow -
fast)
22 Laser on an off (green) 000 - 010: Green laser off
011 - 020: Green laser on
The information in this user manual is subject to change at any time without notice.
Version:
1.0
Date of creation and author's initials:30-04-2018 RV Revision date and author's initials: -
021 - 255: Stroboscope spee (slow -
fast)
23 Laser movement 000 - 099: Laser movement spee (fast
- slow)
100 - 109: No laser movement
(stationary)
110 - 209: Laser movement spee
(slow - fast)
210 - 255: Soun -controlle mo e
24 LED main immer (Spotlight 1) 000 - 255: 0 - 100% intensity
25 Stroboscope an pulse effects (Spotlight 1) 000 - 007: Dimmer function on
008 - 015: Dimmer function off
016 - 131: Stroboscope spee (slow -
fast)
132 - 139: Dimmer function on
140 - 181: Slow off, fast on pulse effect
(slow - fast)
182 - 189: Dimmer function on
190 - 231: Fast off, slow on pulse effect
(slow - fast)
232 - 239: Dimmer function on
240 - 247: Ran om strobe effect
248 - 255: Dimmer function on
26 Dimmer re (Spotlight 1) 000 - 255: Dimmer re , 0 - 100%
intensity
27 Dimmer green (Spotlight 1) 000 - 255: Dimmer green, 0 - 100%
intensity
28 Dimmer blue (Spotlight 1) 000 - 255: Dimmer blue, 0 - 100%
intensity
29 Dimmer white (Spotlight 1) 000 - 255: Dimmer white, 0 - 100%
intensity
30 Colour selection (Spotlight 1) 000 - 005: No function
006 - 125: Fixe colours (various
colours)
126 - 189: Colour jumps (slow - fast)
190 - 253: Colour fa es (slow - fast)
254 - 255: Colour selection via soun -
controlle mo e
31 LED main immer (Spotlight 2) 000 - 255: 0 - 100% intensity
32 Stroboscope an pulse effects (Spotlight 2) 000 - 007: Dimmer function on
008 - 015: Dimmer function off
016 - 131: Stroboscope spee (slow -
fast)
132 - 139: Dimmer function on
140 - 181: Slow off, fast on pulse effect
(slow - fast)
182 - 189: Dimmer function on
190 - 231: Fast off, slow on pulse effect
(slow - fast)
232 - 239: Dimmer function on
240 - 247: Ran om strobe effect
248 - 255: Dimmer function on
33 Dimmer re (Spotlight 2) 000 - 255: Dimmer re (0 - 100%
intensity)
34 Dimmer green (Spotlight 2) 000 - 255: Dimmer green, 0 - 100%
intensity
The information in this user manual is subject to change at any time without notice.
Version:
1.0
Date of creation and author's initials:30-04-2018 RV Revision date and author's initials: -
35 Dimmer blue (Spotlight 2) 000 - 255: Dimmer blue, 0 - 100%
intensity
36 Dimmer white (Spotlight 2) 000 - 255: Dimmer white, 0 - 100%
intensity
37 Colour selection (Spotlight 2) 000 - 005: No function
006 - 125: Fixe colours (various
colours)
126 - 189: Colour jumps (slow - fast)
190 - 253: Colour fa es (slow - fast)
254 - 255: Colour selection via soun -
controlle mo e
38 LED main immer (Spotlight 3) 000 - 255: 0 - 100% intensity
39 Stroboscope an pulse effects (Spotlight 3) 000 - 007: Dimmer function on
008 - 015: Dimmer function off
016 - 131: Stroboscope spee (slow -
fast)
132 - 139: Dimmer function on
140 - 181: Slow off, fast on pulse effect
(slow - fast)
182 - 189: Dimmer function on
190 - 231: Fast off, slow on pulse effect
(slow - fast)
232 - 239: Dimmer function on
240 - 247: Ran om strobe effect
248 - 255: Dimmer function on
40 Dimmer re (Spotlight 3) 000 - 255: Dimmer re (0 - 100%
intensity)
41 Dimmer green (Spotlight 3) 000 - 255: Dimmer green, 0 - 100%
intensity
42 Dimmer blue (Spotlight 3) 000 - 255: Dimmer blue, 0 - 100%
intensity
43 Dimmer white (Spotlight 3) 000 - 255: Dimmer white, 0 - 100%
intensity
44 Colour selection (Spotlight 3) 000 - 005: No function
006 - 125: Fixe colours (various
colours)
126 - 189: Colour jumps (slow - fast)
190 - 253: Colour fa es (slow - fast)
254 - 255: Colour selection via soun -
controlle mo e
45 LED main immer (Spotlight 4) 000 - 255: 0 - 100% intensity
46 Stroboscope an pulse effects (Spotlight 4) 000 - 007: Dimmer function on
008 - 015: Dimmer function off
016 - 131: Stroboscope spee (slow -
fast)
132 - 139: Dimmer function on
140 - 181: Slow off, fast on pulse effect
(slow - fast)
182 - 189: Dimmer function on
190 - 231: Fast off, slow on pulse effect
(slow - fast)
232 - 239: Dimmer function on
240 - 247: Ran om strobe effect
248 - 255: Dimmer function on
47 Dimmer re (Spotlight 4) 000 - 255: Dimmer re , 0 - 100%
intensity
The information in this user manual is subject to change at any time without notice.
Version:
1.0
Date of creation and author's initials:30-04-2018 RV Revision date and author's initials: -
48 Dimmer green (Spotlight 4) 000 - 255: Dimmer green, 0 - 100%
intensity
49 Dimmer blue (Spotlight 4) 000 - 255: Dimmer blue, 0 - 100%
intensity
50 Dimmer white (Spotlight 4) 000 - 255: Dimmer white, 0 - 100%
intensity
51 Colour selection (Spotlight 4) 000 - 005: No function
006 - 125: Fixe colours (various
colours)
126 - 189: Colour jumps (slow - fast)
190 - 253: Colour fa es (slow - fast)
254 - 255: Colour selection via soun -
controlle mo e
The information in this user manual is subject to change at any time without notice.
Version:
1.0
Date of creation and author's initials:30-04-2018 RV Revision date and author's initials: -
Installation and connection requirements
Now that you know how the Compar Kit FX1 works, it's important to know how to use it correctly an safely
accor ing to the installation an connection requirements.
Make sure the evice an connection cables are out of reach of
chil ren, an if chil ren are present, that they are un er a ult
supervision at all times. The evice can be use when stan ing up or
suspen e an if chil ren pull on the cables, it coul cause the
evice to fall on top of them. To avoi injury, it is important to pay
close attention to the position an /or installation of the evice.
Stand-up use
When you want use the Compar Kit FX1 in a stan ing position make
sure to use the inclu e stan . Ensure that the feet of the stan are
fully exten e in or er to create a stable base. Exten the pole of the
stan as much as require . Bear in min that the further the pole is
exten e , the less stable the stan will be. Lock the stan in position
using the safety pin an the tightening knob, but on't use too much
force. This will ensure a stable base for the light set.
Place the light bar on top of the stan using the 35 mm flange
a apter. Use the tightening knob to secure the light to the stan so
that it can't turn or fall off acci entally.
Connecting the light effects
The Compar Kit FX1 comes with two LED erby light effects an a laser that make your light show more
ynamic. They can be mounte on top of the light bar using the holes you'll fin there.
The correct mounting sequence is: tightening knob - light effect bracket - ring - bar
This ensures the light effect bracket mounts easily an oesn't scratch the light bar.
Then connect each evice to the appropriate connector (name on the connection panel). There's only one
way to o this an then the connection can be seale by turning the ring of the connector. This ensures the
connection won't be acci entally isconnecte .
The Compar Kit FX1 can also be use without the extra light effects. If alrea y mounte , everything nee s to
be unmounte by reversing the or er in which things were mounte . The connectors shoul never be use
for other evices!
Suspended use (hooks)
If you want to suspen the Compar Kit FX1, the steps escribe below shoul be followe .
The two erby light effects an the laser nee to be unmounte . Make sure you have appropriate hooks
which you can buy from a ealer. You'll nee two for the light bar, two for the erby effects an a small hook
for the laser. With this har ware, you'll be able to use the light set with a truss system, a light bri ge or any
another piece of equipment that's suitable for hol ing light fixtures.
Har ware for mounting the Compar Kit FX1 on a wall, ceiling or beam is not inclu e . What's more,
mounting this pro uct on such surfaces is strongly iscourage .
When the Compar Kit FX1 is suspen e for use, a safety cable shoul be attache to the fixture. This is not
inclu e , but you'll fin one at your local ealer. Always choose the shortest safety cable possible to ensure
the bar won't fall far in the event of an inci ent. Place the safety cable aroun the base it is attache to (such
as a truss) an the bar itself, between one of the spotlights.
By ensuring that the safety cable is as short as possible an because the spotlights have fixe goosenecks,
even if one of the hooks breaks, the light set can not fall.
The information in this user manual is subject to change at any time without notice.
Version:
1.0
Date of creation and author's initials:30-04-2018 RV Revision date and author's initials: -
The separate effects can be secure in the same way, by fee ing the safety cable through the bracket of the
evice.
Ensure that the safety cable has a loa capacity of 10x the weight of the fixture an that the evice can not
fall further than 30 cm. You can wrap the safety cable aroun the truss or light stan several times to ensure
the fall is as short as possible. The shorter the fall, the less chance of amage or injury.
Light source
The Compar Kit FX1 contains powerful LED mo ules that create an even more powerful effect thanks to a
special lens that bun les the beams together. Never look irectly into the lens from close range, as the
human eye can't a just to the su en intensity of the beam of light this evice pro uces. It won't result in
permanent amage, but it can cause temporary blin spots which may cause isorientation an iscomfort.
Spotlights
The spotlights on the Compar Kit FX1 each have a flexible gooseneck that allows their position to be easily
a juste by han . Simply move them until they give off light in the irection an at the angle require .
Don't rotate the spotlights by more than 180 egrees horizontally aroun their axis in or er to prevent
amage to the gooseneck an the cabling that runs through them. A just the gooseneck with care an on't
force it into certain positions.
Laser
This evice is equippe with a laser light effect. The use of lasers is not without anger an , epen ing on
where you use the laser, may be subject to legal requirements. Before you use the laser, please check any
legal requirements with your local authority. It's important to know what class the laser is in. This pro uct has
a laser with a 3R class rating.
The laser sources insi e the pro uct have a 3B class rating. Do not open the housing or remove any screws,
panels or any other part of the housing. Before using the pro uct, check that the housing of the laser is not
amage . If the housing is amage , the pro uct shoul not be use . Contact your supplier to check if it can
be use safely.
The Compar Kit FX's laser has grating lens system. A laser can be a very angerous light source because it
emits an extremely intense beam with a very narrow ispersion range which can cause amage to the
human eye when use incorrectly.
The Compar Kit FX1's lasers shine onto an optical isc that breaks the beam up into hun re s of separate
light beams which means the power of an in ivi ually projecte laser light beam is not angerous. However,
it's still recommen e to ensure a minimum istance of 30 cm is kept between a person an the laser
because the light rays still converge in the source of the evice. Thanks to the construction of the laser
effect, this evice has a 3R class rating an meets the relevant requirements in stan ar IEC-60825 : 1-
2014 .
This evice's laser is locke with a key an 2 keys are provi e to lock an unlock it. This prevents it from
being use unintentionally. Always make sure that a minimum istance of at least 30 cm is maintaine
between the laser light effect an the human eye.
Before use, always check whether the optical component of the laser is still present. If not, a angerous
static laser beam can be pro uce when the laser is switche on!
The laser sources in the evice have the following properties:
Green:
wavelength: 532 nm
CW/Pulse : pulse
max. peak power output (after optics): 3.80 mW
nominal max. output laser io e in evice: 50 mW
Re :
wavelength: 659 nm
CW/Pulse : pulse
max. peak power output (after optics): 1.50 mW
The information in this user manual is subject to change at any time without notice.
Version:
1.0
Date of creation and author's initials:30-04-2018 RV Revision date and author's initials: -
This manual suits for next models
1
Table of contents
Other Ayra Dj Equipment manuals

Ayra
Ayra ERO 540 User manual

Ayra
Ayra DigiCon-1 User manual

Ayra
Ayra ERO 075 User manual

Ayra
Ayra ERO 101 User manual

Ayra
Ayra ComPar KIT 1 MKII User manual

Ayra
Ayra OSO SCENE 48 User manual

Ayra
Ayra ERO 404 User manual

Ayra
Ayra ERO Motion Heads 4W User manual

Ayra
Ayra TDC Seawave User manual

Ayra
Ayra ERO Twister Wash User manual

Ayra
Ayra ITA 320RB User manual

Ayra
Ayra ALO 019 User manual

Ayra
Ayra ComPar KIT 3 User manual

Ayra
Ayra OSO Sunny 512 User manual

Ayra
Ayra ERO 506 User manual

Ayra
Ayra ITA 350RG User manual

Ayra
Ayra ERO Hexabeam User manual

Ayra
Ayra TDC 4 LED User manual

Ayra
Ayra TDC Burst 6 FX User manual

Ayra
Ayra ALO 030 MKII User manual