Ayra ERO 706 User manual

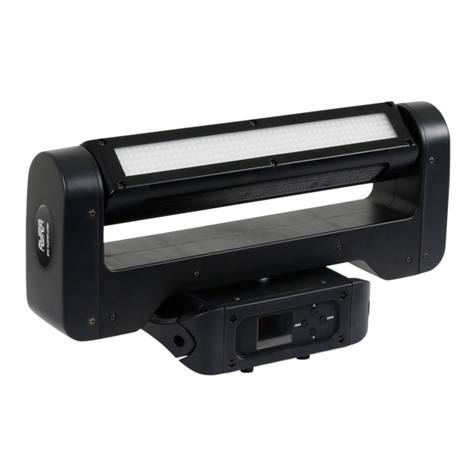
ERO 706
RGBAWUV LED moving head
User manual
All information and illustrations shown in this user manual are subject to change without further notice.
User manual version: 1.0 Creation date + author initials: 13-05-2015 RV Revision date + author initials:
Safe y ins ruc ions
This unit must be operated by, or under the supervision of an adult. This device is not suitable for children.
Every person involved with the installation, operation and maintenance of this device has to:
- Be qualified
- Follow the instructions of this manual
- Ma e sure there is no damage caused by transport. If the device seems damaged on the outside, do not
use it and contact your dealer for more information.
- To ma e sure the device remains in perfect condition and for safe operation, the user must follow the
instructions and warning notes in this user manual.
- Damage caused by improper use or modifications to the device is not covered by the warranty.
- This device does not have any user-serviceable parts inside. This device must be serviced by qualified
technicians.
- The light source of this device is not replaceable. When the light source reaches its end of life, the whole
luminaire must be replaced.
Impor an no es regarding safe y and heal h:
- Never let the power cord come in contact with other cables. Handle the power cord and all mains
connectors with caution.
- Never remove any warning or informative labels from the unit.
- The ground contact must be connected at all times. Do not cover or remove the ground contact.
- Never leave cables lying around.
- Do not open the device and do not modify any hardware or software.
- Do not insert objects into the air vents of this device.
- Do not connect this device to a dimmer pac .
- Do not switch the system on and off frequently, as this will reduce the lifespan of the device.
- Do not drive the inputs of the fixture with a signal greater than required to wor at full performance.
All information and illustrations shown in this user manual are subject to change without further notice.
User manual version: 1.0 Creation date + author initials: 13-05-2015 RV Revision date + author initials:
WARNING!
Always keep his device away from mois ure and rain! Hazardous elec ric shocks may occur!
WARNING!
Only connec his device o a ma ching power ou le . This device is in ended o work on a
specific AC curren . Connec ing his device o power ou le s wi h o her vol ages may resul in
permanen damage and possible hazardous si ua ions, such as fire or elec ric shocks!
WARNING!
Be careful when opera ing his device. Touching live wires inside or ou side he uni may cause
hazardous elec ric shocks!

- Only use this device indoors; avoid contact with water, moisture and other liquids. Do not place items filled
with liquids on top of the unit.
- Avoid nearby flames or heat sources; do not place this device near flammable liquids, gas or flammable
items.
- Always disconnect the device when it is not in use for a longer period or time, when servicing is needed, or
when the device needs cleaning.
- Only handle the power cord by its connectors. Never pull the cable to remove a connector from its soc et,
as this could lead to damage and electric shoc s.
- Always operate this device with a stable AC current.
- Always operate this device with the AC ground wire connected to the electrical system's ground.
- Never use cables other than those specified in the manual; do not use defective or malfunctioning cables.
Contact your dealer if the included or required cables do not wor properly with this device.
- If the device has been exposed to considerable temperature changes (for example, transport from outdoors
to indoors), do not connect the device immediately. Do not activate the unit until it has reached room
temperature, as moisture might build up inside the unit, which may cause short-circuiting and/or electric
shoc s.
Guidelines and ypes of use:
- This device is intended to be used by professionals on stage, in theatres, clubs and similar venues.
- This device is used for light effects and entertainment. This product is not suitable for regular household
room illumination.
- This device is not suitable for use by children and must always be operated by an adult.
- Only use the device when the environment is suitable and will not cause any damage. Do not use the
product in moist or dusty environments, or where long-term damage may occur such as:
- Indoor swimming pools where chlorine is used.
- Beaches, where sand and salt are present.
- Outdoors.
- Indoor areas where intense heat sources are present or where the temperature exceeds levels that
are comfortable for humans.
- Use only the included power cable and only connect the device to a suitable power outlet with the correct
output voltage. Connecting the device to a power outlet with the wrong type of voltage or using the product
with a wrong type of power supply may cause permanent damage to the device.
- Avoid shoc s and collision during use and transport. Do not transport the device while in use. Avoid brute
force during the installation and operation of this device.
- Familiarise yourself with the functions of the device before use. Do not allow operation of the device by
uns illed or unqualified people.
- Use of the device in ways other than described in this user manual may cause damage and injury. Ayra
cannot be held responsible for any damage or injury caused by improper use.
S orage and ranspor :
- This device is intended for mobile use as well as for use in fixed installations. During transport, use the
original pac aging of the product, or a fitting flight case, preferably filled with foam.
- This device is not intended for continuous use. Operation brea s will ensure that the lifespan of the device
is not reduced.
- If the device is not used for a longer period of time, disconnect it from its power source and store it in its
original pac aging, or in a fitting flight case.
- Store the device in a dry place indoors, and do not expose the device to extreme temperature changes.
Housing:
- Inspect the housing of the device frequently. Severe dents, crac s and missing screws should be prevented
at all costs. Do not use the device when the housing is not in optimal condition. Contact your dealer or a
s illed technician when in doubt about the state of the device.
- Chec the fixture and screws for corrosion. Corrosion should not be present on the fixture. Contact your
dealer or a s illed technician when corrosion is found on the fixture.
- Every power or signal chassis/connector should be mounted tightly. Do not use the device when connectors
are loose.
- Do not use the power cord if the cores are visible. Contact your dealer for a replacement if needed.
- Prevent the build-up of dust and dirt. Clean the exterior of the fixture every month with a dry or damp cloth.
If the device is used intensively, the cleaning frequency must be increased. Disconnect the fixture when it is
All information and illustrations shown in this user manual are subject to change without further notice.
User manual version: 1.0 Creation date + author initials: 13-05-2015 RV Revision date + author initials:
going to be serviced.
Fuses:
- The main fuse of this device can be found on the rear of the device, usually next to the power inlet.
- Only replace the fuse for a new one of the same type and rating! Do not use a fuse with a higher or lower
rating.
- Do not bridge the fuse in any way, as the fuse is used for protection against electric shoc s and short-
circuiting. The fuse is a safety measure to protect your audience from hazardous electric shoc s.
- Always replace the fuse cover over the fuse compartment. Do not use tape or other fastening materials to
close the cover. If the fuse holder is bro en, contact your local dealer and do not use the fixture.
Symbol clarifica ion:
WEEE: Dispose of this product properly. This product is part of the WEEE directive – the
Waste Electrical and Electronic Equipment directive. The requirements stated in this directive
apply to all manufacturers and producers of electronic equipment in the EU.
Do not dispose of this product together with regular household trash. Contact your local
government for more information about proper disposal and recycling of electronic products in
your region. By recycling this product properly after use, we can wor together to enjoy these
products and also protect our environment from being polluted.
CE: The CE mar indicates that the product complies with applicable European directives and
regulations.
Indoor use only: This device is designed exclusively for use indoors. The maximum
environmental temperature should not exceed 40 degrees Celsius (104 degrees Fahrenheit)
All information and illustrations shown in this user manual are subject to change without further notice.
User manual version: 1.0 Creation date + author initials: 13-05-2015 RV Revision date + author initials:
Box con en s
Box con en s
1x ERO 706 moving head
1x mounting brac et
1x safety eye bolt
1x mounting hardware (2 bolts and 1 hex wrench)
1x power cable blue Neutri Powercon to Schu o (3x 1.5 mm²)
1x power cable blue Neutri Powercon to UK (3x 1.5 mm²)
1x power lin cable blue Neutri Powercon to gray Neutri Powercon (3x 1.5 mm²)
Uni and accessory inspec ion
- Always use the supplied power cable to connect the unit to a power supply. If the cable appears bro en or
has visible damage, do not use it.
- If the unit is not going to be used for a longer period of time, disconnect it from the power supply and store it
in a dust-free environment.
- Always chec the unit for possible damage before use. If you suspect that something is wrong with the unit,
do not connect it to a power source! When you suspect that your unit is bro en or damaged, contact your
local dealer or a certified technician to inspect the unit.
All information and illustrations shown in this user manual are subject to change without further notice.
User manual version: 1.0 Creation date + author initials: 13-05-2015 RV Revision date + author initials:
Device overview
1. Beam ou pu
2. Carrying handles
3. Neu rik Powercon power inpu
4. Neu rik Powercon power ou pu
5. Power swi ch
6. Fuse cover
7. DMX inpu (3P XLR)
8. DMX ou pu (3P XLR)
9. Cooling fan
10. LED display wi h menu bu ons and s a us LEDs
Red LED left: DMX receiving OK
Yellow LED left: Slave mode OK
Red LED right: Master OK
Green LED right: Sound OK
11. Bracke moun ing poin s
12. Safe y eye bol moun ing poin
13. Bracke wi h a achmen poin for coupler
14. Safe y eye bol
15. Bracke moun ing hardware
All information and illustrations shown in this user manual are subject to change without further notice.
User manual version: 1.0 Creation date + author initials: 13-05-2015 RV Revision date + author initials:
1
2
3 4
5
6
7
8
9
10
11
222
10
11
12
13
14
15

Se ing up he uni
To activate the unit, connect the appropriate included power cable to the unit and to a suitable 230V, 50Hz
power outlet.
During start-up, the stepping motors and other parts of the fixture need to calibrate. You might notice some
sha ing and rattling of the fixture; this is perfectly normal if it lasts no longer than 30 seconds. During start-up
the display reads 'Ayra ERO 706' and the fixture can not be used. Do not try to enter the menu during start-
up. When the start-up is complete, the last used mode will be shown and the settings and values can be
changed. For a new product, this is usually the DMX mode with the value set to 001
Through the menu and the buttons below the display, you are able to adjust settings and read data from the
fixture.
Use the display and the menu buttons on the bottom to set preferences, change settings and scroll through
the menu. “Enter” is used to save a certain setting or preset; press “Menu” for at least 2 seconds to return to
the main menu.
The table below shows an explanation for every feature and value.
display Mode Func ion
DMX Address DMX address setting Address 001 … 512
Channel mode Channel mode selection 11 CH / 15 CH
Show mode Show mode selection (for music
controlled mode)
Show 1 – 4
Au oRun mode Select automatic program with
user set speed
Show 1-4
Speed 1-9
Slave mode Slave mode selection Master
Slave 1
Slave 2
Black ou Fixture blac out during DMX
signal loss?
Yes
No
Sound S a e Sound activated mode enabled or
disabled
Sound mode on yes/no
Sound Sense Sound sensitivity Set sound sensitivity 0-100
Whi e Balance Adjust the white balance of the
beam output
Red 50-255
Green 50-255
Blue 50-255
Pan inverse Invert the pan values Invert pan values yes/no
Til inverse Invert the tilt values Invert tilt values yes/no
Back ligh Bac light on/off during use when
the menu is no longer in use
Bac light yes/no
Au o es Internal test mode, for service
and maintenance purposes
Internal testing mode, testing LED and pan/tilt
Temp. check Chec fixture temperature Head/body (switch with up/down)
Displayed temperature in Celsius
Fan speed Fan speed selection, complete
control
Auto run
Bloc up
Slow
Medium
Fastest
Fix ure ime Number of hours the fixture has
been used
0000 - 9999
Firmware
version
Displays the current firmware
version, not user upgradeable
V1.0 - ….
Rese Use this mode to reset the fixture
without removing power
connectors
Reset, shows Ayra ERO 706 on display
DMX Address: DMX address setting, used to determine the DMX starting channel. From this channel on,
All information and illustrations shown in this user manual are subject to change without further notice.
User manual version: 1.0 Creation date + author initials: 13-05-2015 RV Revision date + author initials:
the fixture will respond to values corresponding with the number of channels that the fixture is occupying.
(For example, when you set the starting address to value 003, the fixture will respond to channels 3, 4, 5
etc.)
Channel mode: The channel mode of the fixture ma es it possible to use the correct channel mode setting
for every application. For simple and basic setups, users may prefer to use the 11 CH mode. For advanced
setups, users may prefer to choose the 15CH mode to be able to control the colour of every pixel.
Show mode: Select one of the 4 built-in shows for the music controlled mode. Please note that the Sound
State needs to be activated for this function to be used effectively.
Au oRun mode: Select one of the 4 built-in shows and select a speed for the show to operate on. The user
can choose from speeds 1 through 9, where 1 is slow and 9 is fast. During low speed operation, movements
will change as fluidly as possible.
Slave mode: Select the right operation for the fixture. The most common mode is the master mode. If you
select Slave mode 1 or 2 (2 is partially reversed in music controlled mode), the fixture only listens to a signal
provided by the master fixture.
To use the master-slave mode, connect two ERO 706 fixtures together with standard 3P XLR male – 3P XLR
female cable (not included). Connect the DMX output of the master to the DMX input of the slave function.
Regardless of the mode selected on the master fixture (AutoRun, Sound controlled), the slave will mimic the
actions.
It is possible to invert the pan or tilt value of the slave, which ma es wonderful synchronized or mirrored
performances possible without having to use a controller.
NOTE: Please note that it is not possible to switch to any wor ing mode if the Slave mode is active on your
fixture!
Black ou : Choose what the fixture will do during DMX signal loss. For theatrical applications, most users
choose to let the fixture switch to Blac out, where all values are set to 0 and there is no light output until the
signal comes bac .
For disco applications, most users might want to activate the last chosen mode if the last signal is lost. This
can be the AutoRun mode or the music controlled mode.
Sound s a e: The sound state shows whether the unit's built-in microphone is active or not. It can be enabled
or disabled in the menu.
Sound sense: The sensitivity of the built-in microphone is adjustable, in order to optimise the built-in sound-
controlled mode. For example, when your music source (spea ers) is placed far away, it is possible to
increase the sensitivity to ma e sure that the fixture responds to the sound accurately.
Whi e balance: Colour balance. For theatrical applications, users may want to change the colour balance of
the bar so it is more similar to the colours of other lighting fixtures. With this mode, the maximum intensity for
each basic colour (red, green, blue) can be limited from values 50 to 255. When this mode is selected, use
the up and down buttons to scroll between the basic colours, and press enter to see the current values.
Adjust values with the up and down buttons and press enter to store changes. The default setting is 255 for
each basic colour.
Backligh : LED display on/off. When using this device in a club or theatre, the environment is mostly dar .
Therefore, it is possible to shut off the LED menu display when it is not in use. the default setting is ON, which
means that the LED display remains on all the time.
Au o es : When this mode is selected, the unit will perform pan and tilt movements to test the stepping
motors. After this, the LEDs are tested to see if there are any bro en LEDs. The process continues until the
process is disabled manually via the menu display.
Temp check: Chec the temperature of the fixture to see if anything is wrong or if you are interested in the
All information and illustrations shown in this user manual are subject to change without further notice.
User manual version: 1.0 Creation date + author initials: 13-05-2015 RV Revision date + author initials:
current temperature levels of the fixture. The temperature of the head and body is measured and displayed in
Celsius. Use the up and down buttons to switch between the head and body temperature display.
Fan speed: users can change the fixture's fan speed, ma ing the fixtures suitable for any purpose. For
example, for regular use, the auto mode can be used to regulate the fan speed automatically. When the
temperature of head and body increases, the fan speed will be increased.
Fan noises are, however, undesireable for theatrical applications. As such, if you are only going to use the
fixtures for single or mixed colour use and not continuously on full performance/output, it is possible to switch
off the internal fans. By eeping the internal temperature chec active, you can preserve the lifespan of your
fixture.
When using the fixtures installed in night clubs (where the temperature near the roof can be quite high) it is
recommended to select the auto speed or the medium/high speed selection. This way you are ensured that
the internal components are being cooled sufficiently and that there will be no damage to your products on
long-term basis.
Fix ure ime:
Service intervals are primarily used by companies who hire products for all inds of purposes and users who
use the fixtures frequently. So after a particular number of hours, the fixture is brought in for service, to chec
if all components are in good shape and to fix any problems. This function displays the number of hours that
the product has been used.
Firmware version:
Displays the firmware version that is installed on the PCB. Users can not upload new firmware to this fixture.
Rese :
Resets the fixture without requiring you to remove the power cables or switch the product off.
All information and illustrations shown in this user manual are subject to change without further notice.
User manual version: 1.0 Creation date + author initials: 13-05-2015 RV Revision date + author initials:
Opera ing modes
The ERO 706 offers various operating modes, and each with its own advantages. For simple events there are
stand-alone modes, for advanced situations it's possible to create synchronised light shows. You can also
control every feature of the ERO 706 via DMX, in two channel modes. A short description for each mode can
be found below:
Au oRun:
Automatic light show with a pre-programmed internal show, on a pre-defined speed. Use the AutoRun modes
to activate the programs and set the speed. The speed of the internal programs can be adjusted from 0 to 9.
Sound:
Automatic light show with a pre-programmed internal show, in sync with the music, than s to an internal
microphone that pic s up the beat of the music and changes a step every time a beat is detected. Use the
Sound Sense mode to change the sensitivity of the internal microphone so it will respond optimally to the beat
of the music. In this mode, any set function in the AutoRun mode is overruled and the fixture will change
effects in sync with the beat of the music.
Slave:
In master/slave mode, it is possible to lin several ERO 706 fixtures together, to create synchronised light
shows in the AutoRun or Sound mode. The first fixture in the chain must be set in the Auto or Music mode,
and the other fixtures must be set to Slave, so they will mimic the behaviour of the first fixture. The
master/slave function requires 3p XLR male – XLR female cables (not included). Connect the DMX out of the
master fixture to the DMX input of the second (and other slave) fixtures. You can also experiment with
inverting pan and tilt values, to create amazing mirrored light shows.
DMX:
The ERO 706 can be connected to a DMX controller with standard 3p XLR male – XLR female cable. In DMX
mode, a DMX terminator must be connected to the last fixture at the end of the DMX chain, to prevent
reflections in the DMX signal, which could cause flic ering and unwanted behaviour from your intelligent
fixtures.
A DMX terminator is an XLR connector with a 120-ohm resistor placed between pin 2 and 3 as a bridge.
NOTE: The ERO 706 can be switched between two DMX modes. The only difference is that in the 15CH
mode you have control over pan and tilt fine values (for the precise aiming of your beams) and there are extra
functions to for triggering the music controlled mode and colour macros.
11CH mode:
CH Func ion Values
CH1 Pan movement 000-255
CH2 Tilt movement 000-255
CH3 Shutter/strobe channel 000-007 – Shutter closed
008-015 – LED quic start
016-131 – Strobe, slow to fast
132-139 – LED quic start
140-181 – Pulse, slow to fast
182-189 – LED quic start
190-231 – Inverted pulse, slow to fast
232-239 – LED quic start
240-247 – Strobe, slow to fast
248-255 – Shutter open
CH4 Dimmer Red 0-100% 000-255
CH5 Dimmer green 0-100% 000-255
All information and illustrations shown in this user manual are subject to change without further notice.
User manual version: 1.0 Creation date + author initials: 13-05-2015 RV Revision date + author initials:
CH6 Dimmer blue 0-100% 000-255
CH7 Dimmer White 0-100% 000-255
CH8 Dimmer Amber 0-100% 000-255
CH9 Dimmer UV 0-100% 000-255
CH10 Master dimmer 0-100% 000-255
CH11 Sound active trigger 000-239 – No function
240-255 – Sound active trigger on
15CH mode:
CH Func ion Values
CH1 Pan movement 000-255
CH2 Pan fine movement 000-255
CH3 Tilt movement 000-255
CH4 Tilt fine movement 000-255
CH5 X/Y movement speed, fast to slow 000-255
CH6 Master dimmer 0-100% 000-255
CH7 Shutter/strobe channel 000-007 – Shutter closed
008-015 – LED quic start
016-131 – Strobe, slow to fast
132-139 – LED quic start
140-181 – Pulse, slow to fast
182-189 – LED quic start
190-231 – Inverted pulse, slow to fast
232-239 – LED quic start
240-247 – Strobe, slow to fast
248-255 – Shutter open
CH8 Dimmer Red 0-100% 000-255
CH9 Dimmer green 0-100% 000-255
CH10 Dimmer blue 0-100% 000-255
CH11 Dimmer White 0-100% 000-255
CH12 Dimmer Amber 0-100% 000-255
CH13 Dimmer UV 0-100% 000-255
CH14 Colour macro 000-007 – No function
008-255 – Colour macro
CH15 Sound active trigger 000-239 – No function
240-255 – Sound active trigger on
All information and illustrations shown in this user manual are subject to change without further notice.
User manual version: 1.0 Creation date + author initials: 13-05-2015 RV Revision date + author initials:

Ins alla ion and connec ion requiremen s
The Ayra ERO 706 is a versatile product and can be used in many ways. To use this device as intended and
to be sure that the product is used in a safe way, the following requirements must be met during the setup,
installation and connection of the device.
S anding ins alla ion
The ERO 706 is equipped with rubber feet at the bottom and may be used in an upright position. Please
ma e sure the fixture is placed on a solid surface that is perfectly horizontal. This way you can ensure that
the fixture will not fall during use. The device can be placed on a table or DJ booth, as well as truss totems. If
the fixture is being placed on a surface higher than 2 meters from the floor, near an audience, you have to
anchor the moving head to the surface via the handles and the bottom of the fixture's base. This eeps it
from falling off. You may use a small ratchet strap to secure the fixture, but please be cautious when
tightening the strap as the handles may brea if the tension becomes too high. Avoid brute force.
Hanging ins alla ion
The ERO 706 comes with installation hardware for hanging installation. The ERO 706 may be installed in
any position. The included hardware was designed for permanent and mobile installation to truss and lighting
stands, but also may used for installation to a ceiling, beam or wall.
When hanging the ERO 706 from a truss, always use proper installation materials. As the thic ness of the
main tubes may vary, clamps are not included in delivery. These can be purchased separately from your
local dealer. Ayra recommends using of half couplers as they will not damage your truss.
If you want to mount the ERO 706 directly to a ceiling, wall or beam, use proper installation materials to do
so, and contact a s illed engineer if necessary to find out if the material can handle it. As the material may
vary, installation hardware is not included in delivery and should be purchased separately.
If the fixture is going to be suspended from a construction (such as truss, a beam, a ceiling or a lighting
stand) the included safety eye bolt has to be mounted to the fixture in the correct place. Furthermore, a
proper safety cable has to be attached between the safety eye bolt and the construction to which it is being
mounted. This way the fixture is secure, should the primary mounting gear fail for any reason. Please note
that the safety cable has to be mounted in a way that ma es it impossible for the fixture to fall more than 30
cm should the primary mounting gear fail. This prevents the fixture from swinging and possibly damaging
other nearby fixtures.
Ayra can not be held responsible for any damage or injury caused by improper use of the fixture or the
included hardware.
Transpor and s orage
The Ayra ERO 706 can be transported directly after shut-down. As the light sources of the ERO 706 do not
need time to cool down, the device can be stored and transported instantly.
During transport, the device must be securely protected to ensure it stays reliable and in optimal shape.
Always use the original box and pac aging material to transport the unit, or a fitting flight case or flight bag if
the device is transported frequently during mobile use.
Power inpu and ou pu
The ERO 706 is equipped with original Neutri Powercon inputs and outputs. Proper connection cables anda
lin cable, are included in delivery. Please notice that the corresponding colour is used to connect the fixture.
When connecting the plug to the chassis, please be aware that the connector has to be loc ed by turning the
connector cloc wise or counter-cloc wise. When you hear a 'clic ', the connector is in place and secured
tightly. This ensures a proper connection.
To disconnect the Powercon connectors, pull the metal loc mechanism of the connector bac with your
thumb to release the loc ing mechanism. While pulling bac the mechanism with your thumb, turn the
connector cloc wise or counter-cloc wise and remove the connector from its soc et.
All information and illustrations shown in this user manual are subject to change without further notice.
User manual version: 1.0 Creation date + author initials: 13-05-2015 RV Revision date + author initials:
Please note that Neutri Powercon connectors are not 'hot-swappable'. This means that the Powercon
connectors may not be pulled out of the chassis if the cable is still connected to a power output soc et.
The ERO 706 is equipped with a fuse for its own components. The power input of the device is directly lin ed
to the power output of the device.
Please note that the internal 1.5mm² power wiring of the fixture wiring and the included cables are designed
to withstand a maximum current of 16 A. However, please pay attention to the maximum allowed power that
is available on the power outlet (and/or the electrical installation) you are going to use.
When using the daisy-chain option to lin several fixtures through the input and output of the device (using
only the original, included cables), a maximum of 17 fixtures can be used. If you wish to power additional
fixtures, a new daisy-chain loop must be made on a new power outlet.
XLR inpu and ou pu
The ERO 706 fixtures are equipped with XLR chassis connectors. The DMX input is usually connected with a
XLR cable that has a loc ing mechanism so it can not be pulled from the chassis easily. Usually the loc ing
part has to be pressed and held to unloc the mechanism. When doing this, the connector can be removed
from its soc et.
Fan con rol
The ERO 706 is equipped with intelligent fan and temperature control. Through the display, it is possible to
read the actual temperature measured by the head and body by temperature sensors.
The default setting of the fans is automatic. This means that the fans are in temperature-controlled mode and
will not turn on unless the temperature rises to a certain level. The fans have 3 speeds, so when the fan is
activated after passing the first temperature level, it will only spin slightly without too much noise.
Through the menu, the user has access to the fan control settings. Please be aware that the automatic mode
is the best mode, as the fixture will regulate the fan speed properly.
The internal fans of the head and body (for the LEDs and power supply) can be turned off, should the
situation require it. If the temperature is high, which could occur if the fixture is used at full output for a
longer period of time, for instance, the fixture will try to reduce output power to lower the temperature. If this
does not wor , the fixture will be shut down.
When using the fixture for theatrical applications, you may want to switch off the fans during quiet scenes, so
the theatre is absolutely silent and without fan noise.
If the fans are switched off and the temperature rises, the LED output power will be decreased should the
temperature level exceed 65 degrees Celsius. If the temperature rises any further, the output will be
progressively lowered to protect the LED and its connections from overheating and/or reducing the lifespan
of the device.
When using the fixture in fixed installations such as a club or bar, where loud music is typically present, it is
recommended to use the fan control's medium, high or auto mode, as the music will drown out any noise
from the fan. Often there is a large crowd present in night clubs and bars, and as such the temperature in the
venue rises easily. As hot air rises, the temperature level at the ceiling or roof (where fixtures are installed
usually) may be up to 10 degrees Celsius higher than the average temperature level in the room!
To ensure that the fixture remains reliable and the temperature control will not reduce the output power, use
proper fan settings so the fixtures will continue to perform without any problems. Please contact your local
dealer if you are not sure which settings to use for your purpose.
All information and illustrations shown in this user manual are subject to change without further notice.
User manual version: 1.0 Creation date + author initials: 13-05-2015 RV Revision date + author initials:
DMX ligh ing roubleshoo ing
If you have any problems with DMX lighting, consult this troubleshooting section to solve the difficulties with
your product. If this troubleshooting section does not solve your problem, contact your dealer for more
information and help.
This troubleshooting section contains the most frequent problems and is not a complete collection of possible
faults, defects and solutions. The troubleshooting section applies for DMX controllers, DMX cabling and DMX
lighting fixtures. It is possible that not all described problems, causes and solutions apply to your situation as
product details may vary from product to product.
Problem Possible Cause Solu ion
The fixture cannot be turned on Blown fuse Chec the fuse compartment for
blown fuses and replace them if
necessary
No power cable plugged in Connect the power cable to a
suitable power outlet
The fixture does not respond to
DMX signals
Wrong DMX address Set the DMX address to the right
value
DMX controller blac out function
activated
Deactivate the blac out function of
your DMX controller
Faulty positioning of the DMX
polarity switch on the controller
Flip the polarity switch on your
DMX controller
No response or DMX activity
signal LEDs active
Chec your DMX cables for
possible connector brea s and
replace them if necessary
Wrong operating mode Switch the operating mode of the
device to DMX mode.
The fixture does not respond to
sound
Wrong operating mode selected. Chec if the sound-activated mode
of the fixture is activated.
Microphone sensitivity level is set
too low
Increase the sensitivity level of the
built-in microphone
Spea er placed too far away or
lac of bass
Place your light effect closer to
your spea ers (or vice versa)
and/or increase low-frequency
volumes. The microphone will not
be triggered by high-pitched
sounds.
The beam output is very low Dirty/dusty optics Clean the lens and/or other optics
with a dry or damp cloth
Dimmer is not set to full output Set all dimmer levels to 100% on
your DMX console
Sometimes the DMX signal is lost
and/or some fixtures are
flic ering / behaving oddly
Faulty/bro en DMX cables Chec your DMX cables for
possible connector brea s and
replace them if necessary.
Power cable interference on your
DMX signal
Avoid installing the DMX and
(high) power cables parallel to
each other.
No DMX terminator Insert a DMX terminator at the end
All information and illustrations shown in this user manual are subject to change without further notice.
User manual version: 1.0 Creation date + author initials: 13-05-2015 RV Revision date + author initials:
of your DMX chain
Signal loss or distortion in DMX
values
Insert a DMX booster in your DMX
chain after 32 fixtures or less. After
a maximum of 32 fixtures the DMX
signal needs to be refreshed.
The fixture does not respond to all
DMX channels
Wrong DMX channel mode Chec the DMX channel mode of
the fixture. If the wrong value is
set, change the channel mode to a
different setting and try again.
The pan and tilt of the fixture does
not respond to DMX commands
properly
Movement speed set too high in
15CH DMX mode
Decrease the movement speed
value so the speed increases.
Programming of the fixture is not
optimal
If the movement values switch
directly from value 000 to 255 and
bac in a program and the speed
is set too high, it may be possible
that the fixture can not eep up
physically. Decrease the speed or
try to adjust your programming.
I can not switch wor ing modes Fixture set to slave mode Enter the menu and adjust the
Master-slave function to Master if it
is set to Slave 1 or 2. During
operation as Slave, it is not
possible to activate the automatic
or music controlled modes.
Fans ma e too much noise Adjust fan settings If the fans ma e too much noise
for your purpose, it is possible to
adjust the fan speed through the
menu. It is recommended to use
the automatic fan speed mode so
the cooling is regulated
automatically. For theatrical
purposes, the fans can be turned
off. The built-in temperature
protection has to be enabled if you
switch the fans off.
Fan does not turn on Auto mode, temperature controlled The fan will spin for some seconds
during startup. If the automatic fan
control mode is used, the fan will
only turn on if needed to cool the
head or body of the device. When
the temperature of the fixture
increases, the fan will start cooling
slowly.
All information and illustrations shown in this user manual are subject to change without further notice.
User manual version: 1.0 Creation date + author initials: 13-05-2015 RV Revision date + author initials:
Technical specifica ions
-powerful RGBAWUV LED beam moving head
- 7x18 W RGBAWUV 6-in-1 LED chips
- unique 6-in-1 LED colour technology!
- use White, Amber and UV to create amazing accents, warm colours and spectacular blac light
effects!
- projection angle: 35 degrees
- X/Y movement: 540 / 220 degrees
- high-quality stepping motors for fast, precise, smooth and silent movement
- special optics for intense and large light beams
- auto mode with user defined speed
- 4 exciting built-in programs for auto and music control
- smooth movement and colour fading when slow speed is selected
- music controlled mode through built-in microphone
- microphone sensitivity adjustable
- master-slave mode with slave 1 and 2 options
- Pan/tilt invert options in every mode
- Neutri Powercon power input and output
- easy power and DMX lin ing through inputs and outputs
- 3-pin XLR input and output for DMX
- DMX control via 11 or 15 channels
- temperature controlled fan, can also be set to a standard fan level
- temperature protection, reduces power if the temperature gets too high
- temperature sensor display – easy read-out of temperature levels
- digital shutter via DMX: strobe and pulse control
- movement speed control in 15CH wor ing mode
- DMX colour macros in 15CH wor ing mode
- 16 character display with bac light LED
- bac light on/off during operation
- on/off switch
- operation status LEDs (DMX signal reception, audio signal, master/slave)
Technical da a:
- fixture dimensions: 310 (H) x 260 (W) x 150 (D) mm (including feet and handles)
- operation voltage: 100-240V AC, 50/60 Hz
- power consumption: 75 W max.
- Fuse: F3AL250 V
- Neutri Powercon power input and output
- 3-pin XLR input and output for DMX
- Power factor: 0.544 PF
- AC current: 0.606 A
- Minimal and maximum environmental temperature: 0 to 40 degrees Celsius max.
- Exterior surface temperature during steady use: 48 degrees Celsius
Pho ome ric da a:
- Red: 1,626 lux @ 1 m, 425 lux @ 2 m, 74 lux @ 5 m
- Green: 2,368 lux @ 1 m, 601 lux @ 2 m, 100 lux @ 5 m
- Blue: 2,330 lux @ 1 m, 606 lux @ 2 m, 104 lux @ 5 m
- White: 4,070 lux @ 1 m, 972 lux @ 2 m, 159 lux @ 5 m
- Amber: 1,184 lux @ 1 m, 270 lux @ 2 m, 42 lux @ 5 m
- UV: 1,065 lux @ 1 m, 249 lux @ 2 m, 41 lux @ 5 m
- Full output: 11,170 lux @ 1 m, 2,860 lux @ 2 m, 481 lux @ 5 m
All information and illustrations shown in this user manual are subject to change without further notice.
User manual version: 1.0 Creation date + author initials: 13-05-2015 RV Revision date + author initials:
Included accessories:
- mounting brac et
- brac et hardware
- safety eye bolt
- Neutri Powercon to Schu o cable (1.5 m, 3x 1.5 mm²)
- Neutri Powercon to UK cable (1.5 m, 3x 1.5 mm²)
- Neutri Powercon extension cord (3 m, 3x 1.5 mm²)
Connec ors and wiring schema ics:
DMX connec ors: Elec rical wiring:
All information and illustrations shown in this user manual are subject to change without further notice.
User manual version: 1.0 Creation date + author initials: 13-05-2015 RV Revision date + author initials:
This manual suits for next models
1
Table of contents
Other Ayra Dj Equipment manuals

Ayra
Ayra ERO Motion Heads 4W User manual

Ayra
Ayra ERO 506 User manual

Ayra
Ayra ERO 540 User manual

Ayra
Ayra TDC Burst 6 FX User manual

Ayra
Ayra ERO 150BSW User manual

Ayra
Ayra TDC 4 LED User manual

Ayra
Ayra ComPar KIT 1 MKII User manual

Ayra
Ayra ITA 320RB User manual

Ayra
Ayra ALO 019 User manual

Ayra
Ayra ERO 406 User manual

Ayra
Ayra ITA100 MKII User manual

Ayra
Ayra TDC Seawave User manual

Ayra
Ayra OSO SCENE 48 User manual

Ayra
Ayra ERO Hexabeam User manual

Ayra
Ayra ERO 101 User manual

Ayra
Ayra DigiCon-1 User manual

Ayra
Ayra Compar Kit FX1 User manual

Ayra
Ayra ERO Micro Beam FX User manual

Ayra
Ayra ALO 030 MKII User manual

Ayra
Ayra ComPar KIT 3 User manual