Ayra ERO 150BSW User manual

ERO 150BSW
LED Moving Head with Beam, Spot and Wash
Fun tion
User Manual
The information shown in this user manual could be subject to change without further notice.
Version: 1.1 Date of creation and initials of author: 07-10-2019 RV Date of revision and initials of author: -
Introdu tion
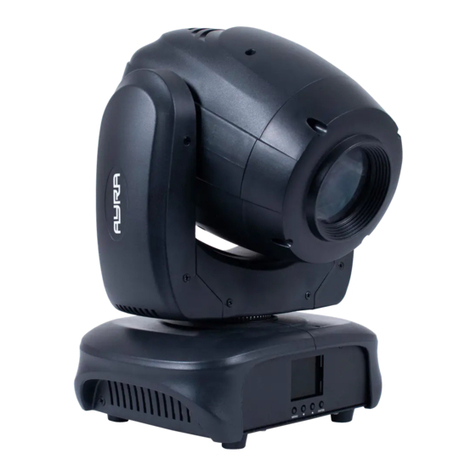
Thank you for purchasing the ERO 150BSW moving head. This compact and versati e device is packed fu
of the atest techno ogy and wi add an extra specia e ement to any occasion. This manua provides a the
information you need to know about the product before you start using it.
We advise that you read this user manua in its entirety before unpacking the contents of the box, so that you
are fami iar with a of the functiona ity that this product has to offer. P ease be sure to check that a of the
parts and accessories isted be ow under 'Box Contents' are inc uded in the package. In the event that the
ERO 150BSW does not function proper y, or if you have any issues whi e operating it, p ease remove the
p ug from the power socket and contact your retai er for assistance.
Box Contents:
- ERO 150BSW LED movinghead
- quick- ock mounting brackets X2
- power cab e with b ue, ockab e p ug to Schuko
- safety eyebo t
Please inspe t the devi e and in luded a essories.
Shou d you discover that either the device or one or more of the inc uded parts have been damaged or
rendered defective whi e in transit, p ease contact your dea er direct y.
Please note that the pictures in this user manual serve illustrative purposes only and may differ from the
actual product.
The information shown in this user manual could be subject to change without further notice.
Version: 1.1 Date of creation and initials of author: 07-10-2019 RV Date of revision and initials of author: -
Safety Instru tions
Everyone invo ved with the insta ation, operation and maintenance of this device must:
- Be qua ified.
- Be ski ed.
- Have read the instructions inc uded in this user manua .
- Be sure that neither the device nor the inc uded accessories are damaged. Shou d the device or the
inc uded accessories be damaged, p ease contact your retai er for more information.
- Ensure that the device is in good working condition and is safe to operate. P ease fo ow the advice and
instructions as they are described in this user manua .
Damage caused by misuse and/or modifications made to the device are not covered by the warranty.
This device does not contain any parts that can be repaired or rep aced by the user. Shou d maintenance or
repairs be necessary, they must be hand ed by a qua ified technician.
The ight source of this device is not rep aceab e. If the ight source no onger functions, the entire device
needs to be rep aced.
Important information regarding health and safety:
- Do not remove any abe s or stickers from this device.
- Do not eave any cab es ying around.
- The device shou d not be opened up and any hardware or software that may be present shou d not be
modified.
- To achieve optima performance, any inputs on the device shou d not be fed with a signa higher than
necessary.
- The device shou d on y be used indoors; contact with water, rain and moisture shou d a ways be avoided.
Do not p ace any objects containing iquid on top of the device.
- Remove the device from any nearby f ames or heat sources; do not p ace it near f ammab e f uids, gasses
The information shown in this user manual could be subject to change without further notice.
Version: 1.1 Date of creation and initials of author: 07-10-2019 RV Date of revision and initials of author: -
WARNING!
Keep this devi e away from moisture, water and rain to avoid the han e of ele tri sho ks!
WARNING!
Only onne t this devi e to a suitable power so ket. This devi e fun tions on a spe ifi power
voltage. If it is plugged into a power so ket with a different voltage, it ould result in permanent
damage and even dangerous situations su h as fire or ele tri sho ks.
WARNING!
Be areful when operating this devi e. Tou hing the wires that are onne ted to the mains,
inside or outside the devi e, ould result in ele tri sho ks!

or objects.
- Disconnect this device from a power source if it is not being used for a ong period of time; if maintenance is
necessary, or if it needs to be c eaned.
– Do not pu or tug on the cab e to remove a connector as this may cause damage.
- Do not use any cab es other than the ones described in this manua . Do not use defective cab es. P ease
contact your retai er if the inc uded or necessary cab es do not function proper y with this device.
- On y use this device with a stab e AC power supp y.
- On y use this device with power from a grounded power source.
- In the event that the device is exposed to extreme temperature changes (e.g. transported from a co d
outdoor environment into a warm indoor environment), it shou d not be turned on unti it has reached room
temperature. This is necessary to prevent moisture (condensation) from forming inside the device, which
cou d ead to e ectric shocks.
Guidelines and operation of this devi e:
- This device is intended for use by professiona s on stage, in theatres, in c ubs and in simi ar entertainment
ocations.
- This device is not suitab e for use by chi dren and shou d a ways be operated by an adu t.
- This device is designed to create ight effects for entertainment purposes. It is not suitab e for househo d
i umination.
- This device may on y be used in a suitab e environment where no damage to the device can occur. Do not
use the device in moist or dusty environments such as:
- indoor swimming poo s where ch orine is used
- beaches or any ocation where sand and/or sa t is present
- outdoors
- indoors in spaces where intense heat sources are present, or where it can reach temperature eve s
that wou d be considered uncomfortab e for a person
- Avoid impact and co isions during use and transport. Do not move or transport the device whi e it is in use.
Avoid using excessive force when insta ing and operating the device.
- Any user must become fami iar with the functions of this device before using it.
- Shou d the device not be used in the manner described in this user manua , damages or even injuries cou d
occur. Ayra cannot be he d responsib e for any injuries or damages that occur as a resu t of improper use of
this product.
Storage and transport:
- This product was designed for mobi e use. P ease on y transport the device in the origina packaging, or in
a f ight case with a suitab e foam in ay.
- This device was not designed for permanent (24/7) use. The expected ifespan of the device wi not be
affected by occasiona y turning the device off. Disconnect the device or turn off the power when it is not
active y in use.
- If the device is not in use for a ong period of time, it shou d be disconnected and stored in a dust-free
environment.
- Do not expose the device to extreme temperature differences.
Housing:
- Inspect the device's housing frequent y and a ways just before use. Avoid operating the device if there are
any arge dents or cracks, or if screws are missing. Do not use the device if the housing is not in good
condition.
Contact your dea er or a qua ified technician if you are unsure about the state of the device.
- Check the device and the screws for corrosion. Corrosion must not be present on this device. Contact your
dea er or a qua ified technician if you find any corrosion on the screws.
Every power and signa connector shou d be secure y attached. Do not use the device if the connectors are
not secure.
- Avoid dust and dirt bui d-up. C ean the device once a month by disconnecting it from the power supp y and
wiping it down with a dry or s ight y moist c oth. If the device is used frequent y, the c eaning interva s shou d
increase.
The information shown in this user manual could be subject to change without further notice.
Version: 1.1 Date of creation and initials of author: 07-10-2019 RV Date of revision and initials of author: -
Symbol explanation:
Ensure that this device is disposed of proper y. This product fa s under the WEEE (Waste
E ectrica and E ectronic Equipment) directive. The requirements of this directive app y to a
manufacturers and producers of e ectronic devices in the EU. Do not throw this product away
with regu ar rubbish. P ease contact your oca authority for more information about how to
recyc e and dispose of these products in your region. By recyc ing this product in the proper
manner, we can work together to ensure that we can continue to enjoy these kinds of
products and sti protect the environment as much as possib e from po ution.
CE: The CE ogo indicates that this product meets the European norms and requirements to
which it must ega y conform.
Suitable for indoor use only: this product was on y designed for indoor use. The maximum
environmenta temperature must not exceed 40 degrees Ce sius (104 degrees Fahrenheit).
Conta t:
Ayra professiona ighting products
Verrijn Stuartweg 18
4462 GE Goes
The Nether ands
Please do not send any products to this correspondence address.
Should you wish to send in a product for repairs or for a refund, please contact your dealer for an RMA
re uest (Return Merchandise Authorisation).
The information shown in this user manual could be subject to change without further notice.
Version: 1.1 Date of creation and initials of author: 07-10-2019 RV Date of revision and initials of author: -

Operation Guidelines for this Devi e
1. Moving head with ight-output via ens
2. Disp ay with menu buttons
3. Hand e
4. Power input and output via ockab e power connector
5. Fuse ho der inc uding fuse
6. 3-pin DMX input and output
7. 5-pin DMX input and output
8. head coo ing fan
The information shown in this user manual could be subject to change without further notice.
Version: 1.1 Date of creation and initials of author: 07-10-2019 RV Date of revision and initials of author: -
45
6
7
8
1
3
2

Operation and Mounting
To activate the device, p ug it into a mains socket. Once it's connected to an active power source, it wi turn
on automatica y.
The device cannot be operated whi e it is sti starting up. Once the device has fu y started up, it wi
automatica y jump to the ast mode and setting. Operation modes and other settings shown on the disp ay
can now be adjusted or changed via the menu buttons.
If a DMX signa is detected, the device sha automatica y switch to DMX mode and the DMX address that
was ast used. For a new device, this is usua y DMX address 001. The DMX address can of course be
changed via the disp ay and menu buttons.
The functions, modes and settings can be changed by using the disp ay and menu buttons. Push ‘Enter’ to
se ect a function or to confirm a change. Push ‘Up’ and ‘Down’ to change any va ues and push the ‘Menu’
button to return to the main menu.
The Menu inc udes the fo owing options and fuctions:
Menu Fun tion Settings and Values
DMX Settings
DMX Address 001-512
DMX Channe Mode Mode 1 (17)
Mode 2 (20)
DMX State (DMX status at signa oss)
Master / S ave
B ackout
Ho d
Fixture Settings
Pan Inverse (horizonta movement mirroring) Yes / No
Ti t Inverse (vertica movement mirroring) Yes / No
Pan/Ti t Feedback Yes / No
Dimmer Curve
Linear
Square Low
Inverted Square Low
S Curve
Show Focus
5m
10m
15m
Show Settings
Show Mode Show 1-4
S ave Mode
Master
S ave 1
S ave 2
Sound Sense 0-100
Disp ay Settings
Disp ay Inverse (f ip disp ay) Yes / No
Contrast Ratio Disp ay 0-30
Unit Temperature Disp ay Disp ays temperature in
degrees Ce sius
Language Eng ish / Chinese
Fixture Test Auto Test Automatic wa k-through test
mode
Manua Test Manua test mode
The information shown in this user manual could be subject to change without further notice.
Version: 1.1 Date of creation and initials of author: 07-10-2019 RV Date of revision and initials of author: -
Fixture Information
Fixture Use Hour Disp ays operating time in
hours
Firmware Version Disp ays current firmware (not
user adjustab e)
Reset functions
Pan & Ti t Reset Yes / No
Effect Reset Yes / No
A Reset Yes / No
Specia functions Factory Settings Yes / No
An exp anation of a functions can be found be ow:
DMX Settings:
DMX address: This is the DMX Start address, in other words, the DMX address from which the device sha
receive DMX signa s and anticipate this with the execution of certain actions. The DMX Start address can be
set between 001 and 512.
DMX Channel Mode: DMX channe mode a ows the se ection of ‘X’ number of channe s with which certain
functions of the device can be operated. For certain functions, a simp e, imited channe mode can be used
whi e others wi require more extensive modes for optimum functiona ity. For this device, a 17 channe and
20 channe mode is avai ab e.
DMX State: This indicates what the device shou d do if the DMX signa were to sudden y drop out.
Depending on its app ication, it may be best that the device retains its ast known position unti it receives a
signa again. For other more definitive app ications, it is best that the device be set to ‘zero’ (b ackout) in the
event of a DMX signa drop out. This is to prevent the device operating different y from other devices that are
sti receiving DMX signa .
Fixture Settings
Pan Inverse: When Pan Inverse is on, the horizonta movements of the device are mirrored.
Ti t Inverse: When Ti t Inverse is on, the vertica movements of the device are mirrored.
Pan/Ti t Feedback: If the device shifts outside of its pan and/or ti t range during use (for examp e, due to a
very sudden or intensive movement or as a resu t of manua correction), it can be automatica y corrected so
that the device can resume its origina movements and not deviate from that of any other devices.
Dimmer Curve: It is possib e to set different dimmer curves for the LED modu e so that the device disp ays
different amp types in terms of dimming behaviour.
Linear: The increase of ight intensity corresponds with the DMX signa va ues.
Square Law: The ight intensity can be regu ated very precise y at ow eve s and becomes steep as the
va ues increase.
Inv. Square Law: The ight intensity increases and decreases steep y at ower va ues and is more precise at
higher va ues.
S-Curve: The ight intensity can be fine y adjusted at both high and ow va ues with a steep rise between.
The information shown in this user manual could be subject to change without further notice.
Version: 1.1 Date of creation and initials of author: 07-10-2019 RV Date of revision and initials of author: -
Show Fo us:
With the function, the range of the motorised focus can be pre-set to maintain an optimum sharpness of ight
rays at a distance of 5, 10 or 15 metres. A 5-metre range is optimum for sma er ocations. A 15-metre range
is optimum for e ongated spaces or arge ocations.
Show Settings
Show mode: Choose this function to use 1 of the 4 in-bui t shows.
Slave Mode: Se ect Master or S ave mode. In the Master-mode, the device sha ead in a chain of any
inked moving heads. In S ave-mode, the device wi fo ow the commands of the designated Master-unit.
In S ave 1 mode, the device fo ows precise y the same commands as that of the designated Master. In S ave
2 mode, the device perform a ternate, contrasting effects.
Sound Sense: In this mode, the sound sensitivity can be set between 0 and 100. 0 is equa to no sensitivity
and 100 is equa to the maximum sensitivity.
Display settings:
Disp ay Inverse: With this function switched on, the disp ay is f ipped. This is usefu for hanging devices.
Contrast Ratio Disp ay: Here, the contrast of the disp ay screen can be adjusted so it is easier to read in
darker or brighter environments. The va ue can be set between 0 and 30.
Unit Temperature Disp ay: Here, the temperature of the device is disp ayed. There is a so the option to view
the temperature in Ce sius or Fahrenheit.
Language: It is possib e to change the Disp ay Menu anguage from Eng ish to Chinese. The device is set to
Eng ish as standard. It is recommended that the anguage not be changed un ess you are a f uent Chinese
speaker, since resetting the anguage to Eng ish or performing a factory reset may prove difficu t.
Fixture Test:
Auto Test: The Auto Test mode automatica y runs the device through a of its functions. In practice, this is
done with one master device and a number of s aved devices so that if there is a prob em with any unit, that
unit can be immediate y identified.
Manua Test: In the Manua Test mode, functions of the device can be checked more precise y. By se ecting
specific va ues of a function, a technician can simu ate certain situations in which prob ems may arise. When
the menu of this function is eft within Manua Test mode, the set va ues are not saved.
Fixture Information:
Fixture use hour: Disp ays the usage of the device in hours so that any maintenance interva s can be pre-
p anned for examp e.
Fixture firmware information: Disp ays the current firmware that has been insta ed on the device. This cannot
be updated or changed.
Reset fun tions:
Pan & Ti t Reset: This command resets and reca ibrates the pan and ti t motors. This can be practica if the
pan and ti t positions differ for any reason.
Effect Reset: This command reca ibrates a stepping motors of the effect whee s. This refers to co ours,
gobos, prisma and the motorised focus.
A Reset: This command resets a functions as if this device has been switched off and on again.
Spe ial Fun tions:
Factory Reset: This command removes any saved setting and va ues and restores the origina factory
settings. Certain preferences and changes made wi be cance ed and reverted back to basic va ues.
The information shown in this user manual could be subject to change without further notice.
Version: 1.1 Date of creation and initials of author: 07-10-2019 RV Date of revision and initials of author: -
Hidden feature: Home Position Adjustment
If it appears that the ERO 150BSW is not 100% a igned with other devices, it is possib e to make sma
corrections. By making these minor corrections per device and in advance, mechanica corrections need not
be made during use and time is therefore saved.
To enter this mode and make any needed adjustments, press the Menu button and enter the regu ar menu.
Then, press and ho d down the ‘Enter’ button for 3 seconds. The Offset Menu sha then appear on the
disp ay, within which you can configure the offset va ue for each step motor between -128 and 127, with 127
as the base va ue.
These adjustments can be made to the fo owing functions: Pan, Ti t, Co our, Gobo 1, Gobo 2, Gobo rotation,
Prisma rotation, Ang e / Frost and Focus.
Working Modes
P ease find a c ear picture of the differences between a avai ab e Work Modes be ow and how they are
affected by the menu functions isted above.
Auto
In Auto Mode, you can se ect one of the Work Modes in which the device is not dependent on externa
factors such as DMX signa s, master signa s or sound. Se ect one of the avai ab e basic programs such as
one in which the switching speed can be set.
Sound
The sound-contro ed mode or ‘sound mode’ uses an in-bui t microphone that registers the beat of music and
a runs a program based on this. For examp e, the device can move in virtua synchronisation with any music,
providing an automatic ight-show.
When no music is detected or on y highs are present in the music due to a break, the device wi continue its
program at a s ower pace. As such, the ight show does not appear to come to a stand sti . As soon as sound
is registered by the microphone once more, the device sha continue its program in synchronisation with the
beat.
Slave
In S ave Mode, it is possib e to connect severa devices of the same type with one another so that they
perform exact y the same movements and functions. Therefore, sing e devices do not respond individua y
(or chaotica y) and this resu ts in a better coordinated show. In theory, by adding a DMX booster, an
un imited number of S ave devices can be inked to one Master device. Initia y, no prob em wou d occur if 4
devices were inked and no DMX booster were added.
P ease note: If you ink devices of a different type or brand (even if they appear to have the same function),
chaotic or strange behaviour can occur. This is often because certain functions are inked to the incorrect
channe s. This app ies to DMX ighting of a types and brands.
DMX
The DMX Mode is the most comprehensive mode for optimum contro over a functions of this device. Via
DMX, it is possib e to contro either a imited or arge amount of functions via a DMX contro er or DMX
software.
The device can be set to different channe modes so the channe ayout (inc uded be ow) is in a ignment with
the ayout of your DMX circuit and with the functions you want to use.
The information shown in this user manual could be subject to change without further notice.
Version: 1.1 Date of creation and initials of author: 07-10-2019 RV Date of revision and initials of author: -
17CH mode:
CH Fun tion Value
1 Pan 0 - 540 Degrees 000 - 255
2 Ti t 0 - 270 Degrees 000 - 255
3 Pan / Ti t Speed 000 - 255 (fast - s ow)
4 Show Mode 000 - 015 No va ue
016 - 063 Show 1
064 - 127 Show 2
128 - 191 Show 3
192 - 255 Show 4
5 Pan / Ti t Macro 000 - 007 Off
008 - 015 Macro 1
016 - 023 Macro 2
024 - 031 Macro 3
032 - 039 Macro 4
040 - 047 Macro 5
048 - 055 Macro 6
056 - 063 Macro 7
064 - 071 Macro 8
072 - 079 Macro 9
080 - 087 Macro 10
088 - 095 Macro 11
096 - 103 Macro 12
104 - 111 Macro 13
112 - 119 Macro 14
120 - 127 Macro 15
128 - 135 Macro 16
136 - 143 Macro 17
144 - 151 Macro 18
152 - 159 Macro 19
160 - 167 Macro 20
168 - 175 Macro 21
176 - 183 Macro 22
184 - 191 Macro 23
192 - 199 Macro 24
200 - 207 Macro 25
208 - 215 Macro 26
216 - 223 Macro 27
224 - 231 Macro 28
232 - 239 Macro 29
240 - 247 Macro 30
248 - 255 Macro 31
6 Macro Speed 000 - 255 (fast - s ow)
7 Co our Whee 000 - 015 Open
016 - 018 Co our 1
019 - 021 Co our 2
022 - 024 Co our 3
025 - 027 Co our 4
028 - 030 Co our 5
031 - 033 Co our 6
034 - 036 Co our 7
037 - 039 Co our 8
040 - 042 Co our 9
043 - 045 Co our 10
046 - 048 Co our 11
The information shown in this user manual could be subject to change without further notice.
Version: 1.1 Date of creation and initials of author: 07-10-2019 RV Date of revision and initials of author: -

049 - 051 Co our 12
052 - 054 Co our 13
055 - 057 Co our 14
058 - 060 Co our 15
061 - 063 Co our 16
064 - 127 Co our Whee indexing
128 - 189 Anti-c ockwise rotation, fast
to s ow
190 - 193 Stop co our rotation
194 - 255 C ockwise rotation, s ow to
fast
8 Gobo Whee 1 000 - 007 Open
008 - 016 Gobo 1
017 - 025 Gobo 2
026 - 034 Gobo 3
035 - 043 Gobo 4
044 - 052 Gobo 5
053 - 061 Gobo 6
062 - 067 Gobo 7
068 - 127 Gobo 1-7 shake
128 - 189 Anti-c ockwise rotation, fast
to s ow
190 - 193 Stop Gobo whee rotation
194 - 255 C ockwise rotation, s ow to
fast
9 Gobo Whee 2 000 - 007 Open
008 - 016 Gobo 1
017 - 025 Gobo 2
026 - 034 Gobo 3
035 - 043 Gobo 4
044 - 052 Gobo 5
053 - 061 Gobo 6
062 - 127 Gobo 1-6 shake
128 - 189 Anti-c ockwise rotation, fast
to s ow
190 - 193 Stop Gobo whee rotation
194 - 255 C ockwise rotation, s ow to
fast
10 Gobo Rotatie 000 - 127 Gobo indexing
128 - 189 Gobo rotation, c ockwise, fast
to s ow
190 - 193 Stop rotation
194 - 255 Anti-c ockwise rotation, s ow
to fast
11 Ang e / Frost 000 - 007 Off (beam)
008 - 128 Spot
129 - 255 Frost
12 Prisma 000 - 007 No effect
008 - 255 Prisma effect
13 Prisma Rotation 000 - 127 Prisma indexing
128 - 189 Prisma rotation, anti
c ockwise, fast to s ow
190 - 193 Stop Prisma rotation
194 - 255 Prisma rotation, c ockwise,
s ow to fast
14 Focus 000 - 255 Focus 0-100%
15 Shutter 000 - 007 Off
008 - 015 On
The information shown in this user manual could be subject to change without further notice.
Version: 1.1 Date of creation and initials of author: 07-10-2019 RV Date of revision and initials of author: -

016-131 S ow – fast, Stroboscope
function
132 - 139 Open
140 - 181 S ow open, fast c ose
182 - 189 Open
190 - 231 S ow c ose, fast open
232 - 239 Open
240 - 247 Random Strobe
248 - 255 Open
16 Dimmer 000 - 255 0-100% Dimmer
17 Specia Functions 000 - 069 No function
070 - 079 B ackout whi e panning /
ti ting
080 - 089 No b ackout whi e panning /
ti ting
090-099 B ackout during co our
changes
100 - 109 No b ackout during co our
changes
110 - 119 B ackout during Gobo
changes
120 - 129 No b ackout during Gobo
changes
130 - 139 No function
140 - 149 Pan/Ti t reset
150 - 159 Reset effect whee s
160 - 199 No function
200 - 209 Reset a
210 - 219 B ackout during a changes
(Pan, Ti t, Gobo, Co ours)
220 - 229 No b ackout during a
changes
230 - 255 No function
```````
```````
```````
```````
```````
```````
```````
```````
```````
```````
`````
20CH mode:
CH Fun tion Values
1 Pan 0 - 540 Degrees 000 - 255
2 Pan Fine 000 - 255
3 Ti t 0 - 270 Degrees 000 - 255
4 Ti t Fine 000 - 255
5 Pan/ti t speed 000 - 255 fast - s ow
The information shown in this user manual could be subject to change without further notice.
Version: 1.1 Date of creation and initials of author: 07-10-2019 RV Date of revision and initials of author: -
6 Show Mode 000 - 015 No va ue
016 - 063 Show 1
064 - 127 Show 2
128 - 191 Show 3
192 - 255 Show 4
7 Pan / Ti t Macro See Channel 5 in 17 Channel Mode
8 Macro Speed 000 - 255 (fast - s ow)
9 Co our Whee See Channel 7 in 17 Channel Mode
10 Gobo Whee 1 See hannel 8 in 17 Channel Mode
11 Gobo Whee 2 See Channel 9 in 17 Channel Mode
12 Gobo Rotation 000 - 127 Gobo Indexing
128 - 189 Gobo rotation, c ockwise, fast
to s ow
190 - 193 Stop rotation
194 - 255 Anti-c ockwise rotation, s ow
to fast
13 Ang e / Frost 000 - 007 Off (beam)
008 - 128 Spot
129 - 255 Frost
14 Prisma 000 - 007 No effect
008 - 255 Prisma effect
15 Prisma Rotation 000 - 127 Prisma indexing
128 - 189 Prisma rotation, anti-
c ockwise, fast to s ow
190 - 193 Stop Prisma rotation
194 - 255 Prisma rotation, c ockwise,
s ow to fast
16 Focus 000 - 255 Focus 0-100%
17 Shutter 000 - 007 Off
008 - 015 On
016-131 s ow – fast, stroboscope
function
132 - 139 Open
140 - 181 S ow open, fast c ose
182 - 189 Open
190 - 231 S ow c ose, fast open
232 - 239 Open
240 - 247 Random Strobe
248 - 255 Open
18 Dimmer 000 - 255 0-100% Dimmer
19 No Function No function
20 Specia Functions See Channel 17 in 17 Channel mode
The information shown in this user manual could be subject to change without further notice.
Version: 1.1 Date of creation and initials of author: 07-10-2019 RV Date of revision and initials of author: -
Installation and Conne tion Instru tions
Now you know how the ERO 150BSW works. So that the device is used in the correct and safest way,
p ease make sure to fo ow the insta ation and connection instructions.
Make sure that chi dren do not have access to the device or any connecting cab es. If there are chi dren
present, make sure that they are supervised. Since the device can be p aced upright or be suspended, it is
possib e for chi dren to pu on any connecting cab es and cause the device to fa . To prevent any accidents
or injury, this must be taken into account whenever the device is being positioned and/or insta ed.
Upright use
When you want to p ace the ERO 150BSW in an upright position, make sure that the device is p aced on a
stab e surface such as a tab e, DJ booth or bar. The ERO 150BSW is fitted with feet to ensure that it sits
stab e where it is p aced and without danger of shifting or s ipping whi e in use.
Suspended use (bra kets)
Shou d you want to suspend the ERO 150BSW, p ease use the mounting brackets that are a ready fitted on
the base p ate of the moving head. These brackets can be mounted by inserting, then quarter-rotating the
quick coup ings into the opening.
If you want to suspend the device with a ha f-coup er or G-hook, this can be done by using the pre-dri ed
ho es in the bracket. Standard hooks and/or brackets for 35 or 50 mm tubes (trusses or ight stands) are
avai ab e from your oca retai er.
Hardware for mounting the ERO 150BSW to the wa , cei ing, or beam is not inc uded. Contact a specia ist if
you're not sure what hardware is required for your situation. A wooden beam and stone wa require different
mounting methods.
Shou d you want to suspend the ERO 150BSW, you wi need to attach a safety cab e to the armature. This
is not inc uded, but is avai ab e at your oca retai er. The ERO 150BSW is equipped with an eye et for
hooking a safety cab e. Once it's hooked on, you can wrap the cab e around the truss or ight stand and
attach it again to the same hook. This ensures the device is secured and prevents it from fa ing, even if one
or both of the brackets shou d come oose.
Ensure that the safety cab e has a oad capacity of 10x the weight of the armature and that the device can
not fa farther than 30cm. You can wrap the safety cab e around the truss or ight stand severa times to
ensure the fa is as short as possib e. The shorter the fa , the ess chance of damage or injury.
Light sour e
The ERO 150BSW uses powerfu LED modu es that are made more powerfu by a specia ens that groups
and focuses these beams, much ike a magnifying g ass. Since the human eye cannot adjust quick y enough
to sudden and intense exposure to the eve of brightness this device produces, never ook direct y into the
ens at c ose range. Whi e it won't resu t in permanent damage, it can cause temporary b ind spots which
may cause disorientation and discomfort.
Cooling
The ERO 150BSW is coo ed by fans fitted in the head and the housing. These are activated whenever the
device is switched on. Make sure the fans and vents are not b ocked and regu ar y check that they are
functioning norma y. Be aware that shou d the fans becomes c ogged with substances ike dust, smoke and
moisture, this may impair operation and shorten the ife-span of the device.
Parts and repair
This product does not inc ude spare parts and can not be repaired by the user. Any inspections and overa
maintenance shou d be carried out by a specia ist on y.
Cleaning and maintenan e
C ean the exterior of this device on a month y basis with a dry, or s ight y damp microfibre c oth. Ensure that
The information shown in this user manual could be subject to change without further notice.
Version: 1.1 Date of creation and initials of author: 07-10-2019 RV Date of revision and initials of author: -
the device is unp ugged before c eaning it.
Check that a screws are intact and secured and tighten or rep ace them where needed. Check a meta
parts of the device for any signs of corrosion. If corrosion is found, the device needs to be checked
thorough y.
3-pin and 5-pin DMX via XLR
The ERO 150BSW is fitted with both 3-pin and 5-pin XLR ports to ink a DMX signa from device to device.
These are hard-wired to each other and can be used mutua y.
DMX terminator and 110 Ohm ables
It is best to use a DMX terminitor at the end of your DMX circuit. This is a terminating resistor that prevents
ref ection of signa and therefore any ma functions on the DMX ine. A ways use 110 Ohm DMX cab es for
optimum signa transmission.
DMX splitter/booster
If more than 32 devices are being used on one DMX ine, it is recommended that a DMX sp itter is used to
divide the ine over severa groups. This prevents the signa from weakening, especia y if a significant
number of metres need to be bridged between devices.
Use near sunlight / in dire t sunlight
The ERO 150BSW is fitted with different optics, inc uding one arge, centra ens. If direct and pro onged
sun ight is shone into the optics, there is a danger of ight concentrating inside the device itse f. The
concentration of ight inside the unit can cause interna damage or in the worst case, fire. A ways protect the
centra ens from any direct and / or ong term exposure to sun ight.
Power transfer
The ERO 150BSW is fitted with ockab e b ue and grey power ports for both supp ying and passing on power.
This makes it possib e to ink mu tip e devices with one sing e power supp y, wa socket or power b ock.
Make sure to consider the maximum oad capacity that a standard f ow group can hand e and the tota
amount of devices (with associated power consumption) that you want to add. In theory, it is possib e to
connect devices amounting to approximate y 3000 Watts to the grey output of the ERO 150BSW. A safety
margin has been bui t in here and the device itse f a so consumes energy.
The information shown in this user manual could be subject to change without further notice.
Version: 1.1 Date of creation and initials of author: 07-10-2019 RV Date of revision and initials of author: -
DMX Lighting Troubleshooting
If you have a prob em with your DMX ight effect, p ease consu t the troub eshooting section for possib e
so utions. If, after consu ting this section, the prob em remains unreso ved, p ease contact your retai er for
more information and/or he p.
This troub eshooting section contains information on how to so ve the most common DMX ight effect
prob ems, but it does not and cannot cover every eventua ity. It is possib e that you won't find your prob em,
cause and so ution in this section due to specific product differences.
Problem Possible Cause Solution
The device can not be turned on A fuse is b own Check the fuse to ru e out if it is
b own or not. If it is b own, rep ace
it with a new fuse of the same type
and c ass.
Power cab e not p ugged in Check if the power cab e is
proper y connected to the device
and p ugged into an active power
socket.
The device is not reacting to DMX
signa s
Incorrect DMX start address Check if the device has been set
to the correct DMX start address
DMX contro er is set to ‘B ackout’ Make sure the ‘B ackout’ function
on the DMX contro er is not
activated
Make sure the po arity switch on
the DMX contro er is set correct y
Try to reverse the DMX po arity
switch on the DMX contro er.
The device is not reacting, there is
no DMX signa indication
Make sure the XLR cab es are
connected proper y and are not
defective. Rep ace if necessary.
The device does not react to
sound/music
Incorrect operation mode Make sure the sound-activated
mode has been se ected.
The interna microphone sensitivity
is too ow
Check the microphone sensitivity
eve and increase it if necessary.
The speaker is too far away, or is
not producing enough ow tones
P ace the ight effect c oser to a
speaker (or vice versa) and/or
increase the ow-frequency eve .
The bui t-in microphone is not
triggered by high tones.
The amount of projected ight is
minima
Dirty or dusty optics C ean the ens and/or other optics.
Dimmer is not comp ete y open Check if the dimmers on the
spot ights themse ves and/or if the
master dimmer is comp ete y open.
The DMX signa appears to be
interrupted and some devices are
f ashing or behaving strange y
Damaged/defective cab es Check and rep ace the DMX
cab es if necessary.
Power interference on the DMX
signa
Avoid connecting signa cab es
para e to power cab es.
DMX terminator missing C ose the DMX circuit with a DMX
terminator
Signa oss or interference in the C ose the DMX circuit with a
The information shown in this user manual could be subject to change without further notice.
Version: 1.1 Date of creation and initials of author: 07-10-2019 RV Date of revision and initials of author: -
DMX circuit terminator or connect a booster
after maximum 32 fixtures.
The operation mode can not be
changed
The device is in S ave mode If the device is in S ave mode, it
wi wait for a master signa un ess
there is a DMX signa present. Set
the device to Master to activate the
sound-contro ed or automated
operation modes.
Pan and/or Ti t range is minimum The Pan and / or Ti t range needs
to be reset
Check that the Pan or Ti t range is
set as desired on your DMX
contro er and correct as needed.
Pan and/or Ti t work in reverse Pan or ti t inversion is set Check pan or ti t inversion settings
and switch them on or off as
required.
The projected bund e is not sharp Set the optica e ements correct y This device has various e ements
that constant y optimise or change
optica properties. The sharpness
of a projection can depend on the
p acement of the device or the
space in which is it p aced. Use
the motorised focus and other
optics adjustment options to
sharpen the projection.
The information shown in this user manual could be subject to change without further notice.
Version: 1.1 Date of creation and initials of author: 07-10-2019 RV Date of revision and initials of author: -
Te hni al Spe ifi ations
Spe ifi ations:
- Versati e and professiona LED moving head
- Beam / Spot / Wash 3-in-1 character
- Light source: 150 W LED
- Diverse user modes (automatic, sound contro ed, DMX, master / s ave)
- 17 of 20 DMX channe s
- offset ca ibration for a step motors
Opti s and Beam angle
- Beam ang e: 11 Degrees when fu y open
- Beam ang e with beam reducers: 2, 4, 6, 8, 10 Degrees
- Beam ang e with zoom ens: 3, 6, 9, 12, 15, 20 Degrees
- Spot beam ang e: 2 to 15 Degrees with fixed Gobos and zoom ens
- Spot beam ang e: 10 to 17 Degrees with rotating Gobos and zoom ens
- Wash beam ang e: 15 to 28 Degrees
- Frost ens function
- 3-facet rotating prisma, rotation with variab e speed and in both directions
- Motorised focus with zoom
Pan / Tilt
- Pan range: 540 Degrees
- Ti t range: 270 Degrees
- Automatic Pan / Ti t correction
- Pan and Ti t fine option via DMX
- Pan and Ti t movement-speed DMX adjustab e
- Magnetic ‘Zero-point’ positioning
Dimmer / Strobe
- 0-100% dimmer
- 4 dimmer characteristics ( inear, Square aw, inv. Square aw, S-curve)
- various shutter and stroboscope effects (e.g. random strobe)
Colours and Gobos:
- Fixed co our whee with 8 static co ours + white
- Rainbow effect in both directions
- 1 Gobo whee with 7 fixed Gobos + open (inc uding beam reducers)
- 1 Gobo whee with 6 rotating Gobos + open
Conne tions and housing
- 3-pin and 5-pin XLR DMX inputs and outputs
- Lockab e power inputs and outputs
- Co our disp ay with 4 menu buttons for navigation
- Robust housing with p astic covers
- Side mounted hand es on the base
- Base mounted quick- ock coup er bracket connections
- Suitab e for upright and suspended use
- Power supp y: 100 - 240V AC, 50/60 Hz
- Maximum power consumption: 189 Watt
- Fuse: T6.3A 250V
- Maximum temperature of housing when in norma conditions: 33 Degrees
- Use at room temperature: 0 tot40 Degrees Ce sius
- Dimensions: 453 x 290 x 256 mm
- Weight: 12 kg
The information shown in this user manual could be subject to change without further notice.
Version: 1.1 Date of creation and initials of author: 07-10-2019 RV Date of revision and initials of author: -
Table of contents
Other Ayra Dj Equipment manuals

Ayra
Ayra TDC 4 LED User manual

Ayra
Ayra ERO 540 User manual

Ayra
Ayra ITA 320RB User manual

Ayra
Ayra ComPar KIT 3 User manual

Ayra
Ayra ERO 406 User manual

Ayra
Ayra ALO 019 User manual

Ayra
Ayra ALO 030 MKII User manual

Ayra
Ayra ERO 706 User manual

Ayra
Ayra ERO 404 User manual

Ayra
Ayra OSO Sunny 512 User manual

Ayra
Ayra TDC Seawave User manual

Ayra
Ayra Compar Kit FX1 User manual

Ayra
Ayra OSO SCENE 48 User manual

Ayra
Ayra DigiCon-1 User manual

Ayra
Ayra ERO 704 User manual

Ayra
Ayra ERO Micro Beam FX User manual

Ayra
Ayra ERO 506 User manual

Ayra
Ayra ERO 075 User manual

Ayra
Ayra ITA 350RG User manual

Ayra
Ayra ComPar KIT 1 MKII User manual