manuals.online logo
Brands
  1. Home
  2. •
  3. Brands
  4. •
  5. Aztech
  6. •
  7. Modem
  8. •
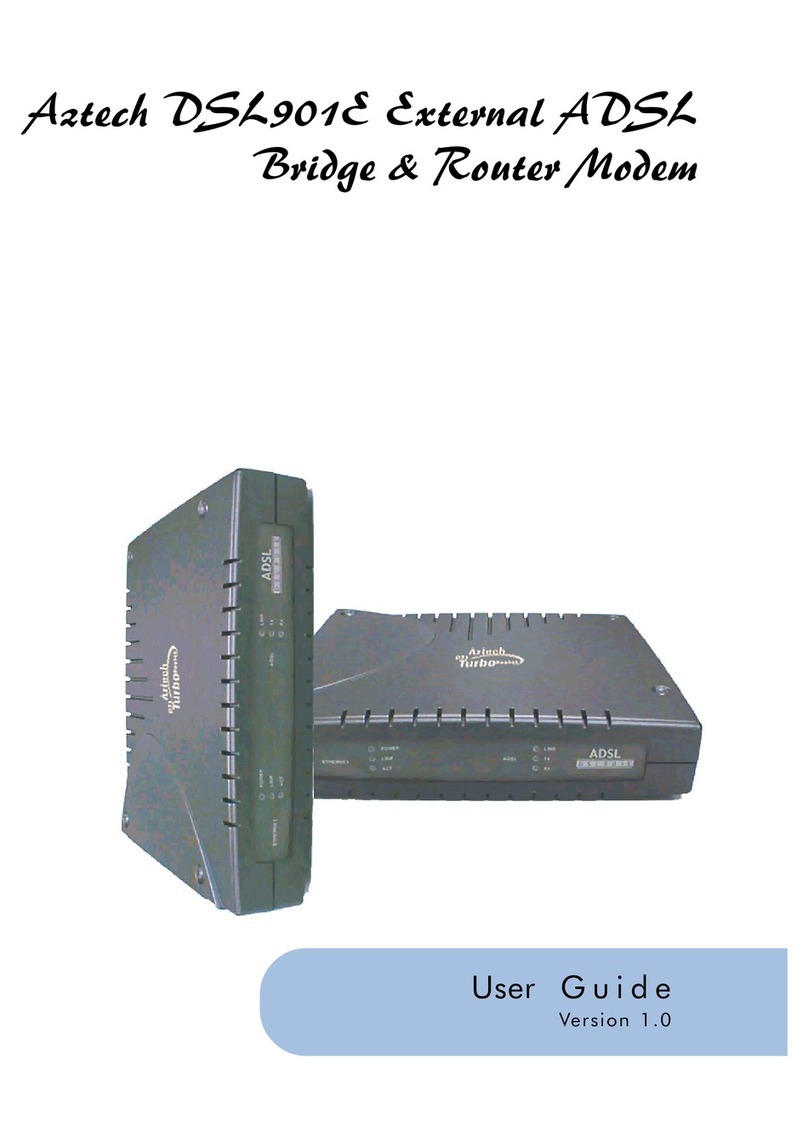
  9. Aztech DSL305E Instructions for use

Aztech DSL305E Instructions for use

ADSL Ethernet Modem
Easy Start
Version 1.0
Contents
Introduction ....................................................... 2
Minimum System Requirements ........................... 2
Modem Package .................................................2
ADSL Ethernet Modem Overview .......................... 3
Step 1: Connecting the ADSL Ethernet Modem to
Your Computer/Notebook ......................... 4
Step 2: Configuring Your Ethernet Network Card ... 8
Step 3: Configuring Your Internet Browser ............ 11
Step 4: Connecting to the Internet ....................... 14
Diagnostic Test ................................................... 16
ADSL/WAN Status .............................................. 16
Firmware Upgrade .............................................. 17
Frequently Asked Questions ................................. 18
Technical Support ............................................... 20
• Product warranty does not apply to damage caused by lightning, power surges or wrong voltage usage.
• This product is for use only in UL Listed computers.
2
Easy Start
Introduction
Thank you on your purchase of the ADSL Ethernet Modem! The Modem provides you with
a high-speed broadband Internet connection using your existing phone line that at the same
time allows you to make phone calls.
The ADSL Ethernet Modem can be connected to any computer/notebook with a 10/100
Base-T Ethernet Network card. This documentation assumes that your computer/notebook
already has an Ethernet Network card installed.
Minimum System Requirements
 Pentium®MMX 233MHz with Ethernet Network card (installed with TCP/IP Protocol)
 Operating system support:
Windows®: Windows® 98 / Windows® 98 Second Edition / Windows® Me /
Windows® XP / Windows® 2000
Macintosh®: OS 9.x and above
 Web Browser support:
Microsoft Internet® Explorer 4.0 (or later versions)
Netscape® Navigator 4.7 (or later versions)
Modem Package
¬ADSL Ethernet Modem
¯Telephone cable (RJ-11) 1°Power adapter (DC 12V) 2
®CAT-5 UTP Straight
Ethernet Network cable (RJ-45)
Easy Start
1 The telephone extension cable used for this Modem is a UL Listed Communication Circuit Accessory,
minimum 26AWG.
2 Different countries are bundled with different types of power adapter. The above illustration is only
a representative.
3 Depending on your country of purchase, your package may or may not come with a POTS Splitter.
The POTS Splitter is required if you are connecting a Telephone Set to the Ethernet Modem. Please
refer to Step 1.2 - Connecting to the ADSL Line for details. POTS-Splitter can also be purchased
from your dealer.
±POTS-Splitter3
(optional)
3
Easy Start
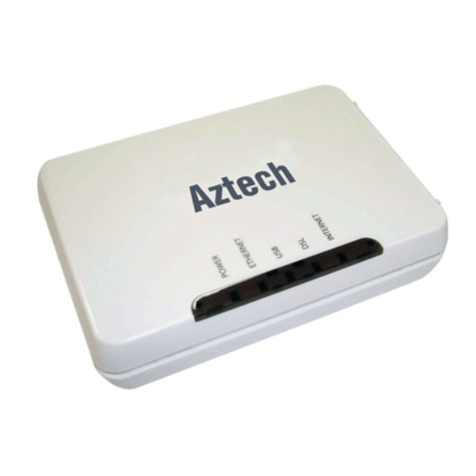
ADSL Ethernet Modem Overview
Front View
ÊETH/ACT
Lights up when the Ethernet Network cable is properly
connected from the Modem to the Ethernet Network Card.
Blinks when the ADSL is transmitting/receiving data.
ËDSL
Lights up when the ADSL connection is established.
Blinks when modem is trying to establish an ADSL
connection with your ADSL Service Provider.
ÌPOWER
Lights up when power is supplied to the Modem.
4To activate the reset function:
- Ensure that your Modem is powered on.
- Use a paper clip or a pencil tip to depress the reset button and release. At this point, the DSL
indicator will be off, followed by the ETH/ACT indicator. The reset is in progress.
- When the DSL indicator starts blinking, it means that the reset process is completed. The
default settings are now restored.
- ADSL line is established once the DSL indicator lights up.
ÊLINE
Telephone jack (RJ-11) to connect to your Telephone Wall
Socket (ADSL line).
ËRESET
To reset your Modem to factory default settings. (All
customised settings that you have saved will be lost!)
Please refer to the below footer4on how to activate the
reset function.
ÌETHERNET
10 / 100 Base-T Ethernet jack (RJ-45) to connect to your
Ethernet Network card.
ÍDC IN
To connect to your Power Outlet via the Power Adapter
that comes with your package.
Rear View
Ë
Ì
Ê
Ê
Ë
Ì
Í
4
Easy Start
Step 1: Connecting the ADSL Ethernet Modem to
Your Computer/Notebook
Power off your Computer/Notebook or/and any connected devices before
connecting to the ADSL Ethernet Modem!
To connect the ADSL Ethernet Modem to your Computer/Notebook, you need to have an
Ethernet Port present on your Computer/Notebook.
(See the following note if you are not sure of how an Ethernet Port looks like).
Locating the Ethernet Port on your Computer/Notebook
The following are some tips to help you locate your Ethernet Port on your
Computer/Notebook. Alternatively, you may refer to the documentation that
comes with your Computer/Notebook.
Most Computers/Notebooks have labels describing the Ports. For Ethernet Port,
you will see either ETHERNET,ETH or RJ45 labelled near the Port.
If your Computer/Notebook does not have such descriptions, try the following.
-Picture A gives the illustration of an Ethernet Port. All Ethernet Ports have 8
conductors on it. Do not mistaken with the LINE Port (Picture B) that has only
6 conductors.
- An Ethernet Port is slightly bigger than a LINE Port.
A. ETHERNET: B. LINE:
Step 1.1 Connecting to the Ethernet
Back view of a computer
Ethernet Network cable (that comes
with your Modem package)
Ethernet Port
Back view of
the ADSL
Ethernet
Modem
Ethernet
Network Card
5
Easy Start
Step 1.2 Connecting to the ADSL Line
To connect the ADSL Ethernet Modem to the ADSL line, carried out Step 1.2(a).
To connect the ADSL Ethernet Modem to the ADSL line and a Telephone Set, carried out
Step 1.2(b).
(a) To connect to the ADSL line
Back view of the ADSL
Ethernet Modem
Telephone Wall
Socket
Telephone cable
(b) To connect to the ADSL line and Telephone Set
Telephone cable
Back view of the ADSL
Ethernet Modem
Telephone Wall
Socket
The POTS Splitter is a device that allows you to connect both your Telephone
cable and Telephone Set to the same Telephone Wall Socket. The device at the
same time helps to eliminate background noise on the telephone line, ensuring
the best possible phone performance.
Telephone Set
POTS Splitter
Connect the Telephone set to the
jack labelled TEL or PHONE and
the telephone cable to the jack
labelled LINE.
6
Easy Start
Step 1.3 Connecting to the Power Outlet
Connect the ADSL Ethernet Modem to the Power Outlet via the Power adapter (that comes
with your Modem package).
Connect the other end of the
Power Adapter to the Power
Outlet.
Back view of the ADSL
Ethernet Modem
If you have Telephone set(s)/Facsimile
machine connected to other Telephone
Wall Socket(s), you will need to plug
in a Micro-Filter to each of the
Telephone Wall Socket before
connecting to the Telephone set as
illustrated.
Like the POTS Splitter, Micro-Filter
helps to eliminate noise on the
telephone line when your Ethernet
Modem and Telephone set are both
sharing the same line. The only
difference is that the POTS Splitter
has two RJ-11 jacks whereas the
Micro-Filter has only one.
(Micro-Filter can be purchased from
your dealer).
7
Easy Start
Step 1.4 Checking Your Connections
Please check your connections before proceeding.
Step 1.5 Powering Up
-Power on the Power Outlet that the ADSL Ethernet Modem is connected to.
-Power on your Computer/Notebook.
Proceed to Step 2.
LINE
ETHERNET
12V DC
To your Power Outlet
To the Ethernet Port on your
Computer/Notebook
To your Telephone Wall
Socket (ADSL line)
8
Easy Start
2.1.1 For Windows®98 Second Edition / Windows®Me
iii Click the option Obtain an IP address
automatically and click OK to save
the settings.
Ensure that your Modem is powered on.
Restart your system.
Proceed to Step 3.
iFrom your Windows desktop, right-click on the Network Neighborhood icon. Select
Properties.
ii From the Configuration tab, select TCP/IP-> xxx where xxx refers to the model of your
Ethernet Network Card that is connected to the ADSL Ethernet Modem.
Click Properties.
Step 2: Configuring Your Ethernet Network Card
This documentation assumes that your computer/notebook is already installed with an
Ethernet Network card.
(This screen shot uses 3Com EtherLink
Ethernet card model as an example).
2.1 For PC users
9
Easy Start
ii Ensure that the field Connect Using indicates the model of your Ethernet Network Card
that is connected to your ADSL Ethernet Modem.
(This is important especially if you have more than one Local Area Connection icons displayed
at the Network and Dial-up Connections / Network Connections window. Ensure that you have
selected the correct one.)
Select Internet Protocol (TCP/IP) and click Properties.
iii Select the option Obtain an IP
address automatically and click OK.
Click OK again to close.
Ensure that your Modem is powered on.
Restart your system.
Proceed to Step 3.
2.1.2 For Windows®2000 / Windows®XP
iWindows® 2000:
a) From your Windows desktop, right-click on the icon My Network Places and
select Properties.
b) At the Network and Dial-up Connections window, right-click on the Local Area
Connection icon and select Properties.
Windows® XP:
(Instructions are based on default Start menu option)
a) From your Windows desktop, click Start >All Programs > Accessories >
Communications > Network Connections.
b) Right-click on the Local Area Connection icon that reflects the model of your
Ethernet Network Card that is connected to the ADSL Ethernet Modem and
click Properties.
(This screen shot uses 3Com EtherLink
Ethernet card model as an example).
10
Easy Start
2.2 For MAC users
2.2.1 For MAC OS 9.x
iClick Apple Menu > Control Panels > TCP/IP.
ii At the following display, ensure that your selections for Connect via and Configure are
as indicated.
iii Close the window to save. Proceed to Step 3.
2.2.2 For MAC OS X
iClick Apple Menu > System Preferences.
ii At Internet & Network row, click Network icon.
iii At the following display, ensure that your selections for Location, Show and Configure
(at the TCP/IP selection) are as indicated.
Ë
Ê
Ì
iv Click Apply Now to save. Close the window. Proceed to Step 3.
If you do not see this
selection, click the PPPoE tab.
Unselect the option, 'Connect
using PPPoE'. Repeat step
2.2.2 iii.
Ê
Ë
11
Easy Start
Step 3: Configuring Your Internet Browser
3.1 For PC users
3.1.1 Microsoft® Internet Explorer (based on IE 5.5)
iFrom your Windows desktop, double-click on your Internet Explorer icon to
launch your Browser.
ii From the Menu, click Tools and select Internet Options... .
iii Clear the offline content:
- Select the General tab. Click on Delete Files buttons.
- Click on Delete all offline content to enable the option.
- Click OK.
- Click on Clear History button followed by Ye s .
iv Select the Connection tab. Click the field, 'Never dial a connection'. (This option will
be grayed off if you have never installed an analog modem on your computer/notebook
before. Proceed with 3.1.1 v).
vDisable the Proxies:
- At the Connection tab, click on LAN Settings button.
- Disable all proxies settings if it has been enabled.
- Click OK.
vi Click OK again to close the dialog box. You may now proceed to Step 4 to establish
your Internet connection.
3.1.2 Netscape® Browser (based on Netscape® 4.7)
iFrom your Windows desktop, double-click on your Netscape icon to launch your
Browser.
ii Clear the offline content:
- Click Edit > Preferences.
- Double-click on Advanced and click Cache. Click on Clear Memory Cache and
Clear Disk Cache buttons.
iii Disable the Proxies:
- Double-click on Advanced and click Proxies. Ensure that the option Direct
Connection to the Internet is enabled.
iv Click OK for the changes to take effect. You may now proceed to Step 4 to establish
your Internet connection.
12
Easy Start
3.2 For MAC users
3.2.1 For MAC OS 9.x
iLaunch your Internet Browser.
ii Click Edit > Preferences.
iii For Internet Explorer:
Clear the offline content:
- Click on Advanced.
- Click on the Clear History and Empty Now buttons.
Disable the Proxies:
- Click Network > Proxies. Make sure that all the selections at Use Proxy Servers
are disabled as indicated.
For Netscape®:
Clear the offline content:
- Click Advanced > Cache.
- Click on Clear Disk Cache Now.
Disable the Proxies:
- Click Advanced > Proxies.
- Select the option Direct connection to the
Internet as indicated.
iv Click OK. Close the window. You may now
proceed to Step 4 to establish your Internet
connection.
13
Easy Start
3.2.2 For MAC OS X
iLaunch your Internet Browser.
ii For Internet Explorer:
Clear the offline content:
- Click on Explorer > Preferences.
- Click on Advanced.
- Click on the Clear History and Empty Now buttons.
Disable the Proxies:
- Click Network > Proxies. Make sure that the selections at Use Proxy Servers are
disabled as indicated:
For Netscape®:
Clear the offline content:
- Click Edit > Preferences.
- Click Advanced > Cache.
- Click on Clear Disk Cache Now.
Disable the Proxies:
- Click Advanced > Proxies. Select the option Direct connection to the Internet as
indicated.
iii Click OK. Close the window. You
may now proceed to Step 4 to
establish your Internet connection.
14
Easy Start
vCheck on the Status column. You should see Connected. This means that you are
now connected to the Internet. You can start surfing!
Step 4: Connecting to the Internet
4.1 To Connect/Login
iFrom your Internet Browser, you may either key in startmodem or login at the address
bar and hit <Enter>. (You may also enter the address 10.0.0.2 at the address bar).
ii A Quick Start page will be displayed.
Enter your Username and Password as given by your ADSL Service Provider and click
Submit.
OR
iii Allow some time (about 1 minute) for your modem to save your profile and reboot.
At the following prompt, click on the link.
OR
(isp: refers to your Internet
Service Provider name)
15
Easy Start
4.2 To Disconnect/Logout
iClick the Connection Status on the left panel.
ii Click Disconnect. This will end your Internet session.
iii Alternatively, you may type in logout at the address bar and hit <Enter>.
Allow some time for the log out to process. This will end your Internet session.
16
Easy Start
Diagnostic Test
ADSL/WAN Status
Click ADSL/WAN Status on the left
panel to check your ADSL line status
and the connection statistic.
ADSL Line State SHOWTIME means that your ADSL line is established.
WAN Statistic Shows the current IP Addressand Subnet Mask that are assigned
to your ADSL Ethernet Modem by your ADSL Service Provider.
MAC Address refers to the hardware ID of the device that
assigned the IP Address.
PVC values The unique data path your ADSL Ethernet Modem uses to
communicate with your ADSL Service Provider.
Protocol & The type of protocol and data link used to communicate
Encapsulation Mode with your ADSL Service Provider.
Click Diagnostic Test on
the left panel should you
fail to connect to the
Internet. Allow some
time for the results to
show.
Click on the corresponding HELP for more information.
(A test is SKIPPED if the previous test has failed. Proceed to solve the problem before
clicking Test again).
17
Easy Start
Firmware Upgrade
This option allows you to do a firmware upgrade with the file sent to you by your ADSL
Service Provider/Modem Manufacturer.
iFrom the left panel, click Firmware Upgrade.
ii Click Browse.
iii Navigate to the location where you have saved the file that is given by your ADSL
Service Provider/Modem Manufacturer.
Click Upload to start the uploading process. It will take about a few seconds.
iv Upon completion, you will be prompted that your firmware has been successfully
upgraded.
Click Reboot to restart your ADSL Ethernet Modem.
vWhen the rebooting process completes, the modem will try to establish the ADSL
connection again. Once the DSL indicator lights up, it means that the ADSL
connection is now established. (The process will take about 1 minute).
Please proceed to Quick Start to submit your username and password again.
(During the rebooting process, you may encounter 'The Page cannot be displayed'
prompted. This is due to the time-out of your Internet Browser. When this happens,
click Refresh and allow some time for the Quick Start page to be displayed.)
(Drefers to the CD-ROM drive letter
and FIRMWARE.DLF refers to the file
that was sent to you by your ADSL
Service Provider/Modem Manufacturer).
18
Easy Start
Frequently Asked Questions
Q: 'The page cannot be displayed' is prompted when I launch my browser.
A: Ensure that you are using the Ethernet Network cable that comes with your ADSL
Ethernet Modem package to connect to the ADSL Ethernet Modem.
Restart your computer and try to launch your browser again. If the problem persists,
please contact your Modem manufacturer.
Q: The DSL light keeps on blinking consistently.
A: i. Ensure that your ADSL line has already been activated by your ADSL Service
Provider.
ii. Ensure that you have connected the telephone cable as illustrated in Step 1.2.
If the problem persists, please check with your ADSL Service Provider.
Q: The DSL light is on. But I keep getting 'Not Connected' state at the Connection
status.
A: i. Ensure that your ADSL line has already been activated by your ADSL Service
Provider.
ii. Ensure that you have entered the correct username and password at the
Quick Start page. Enter and re-submit the username and password.
Q: Can I connect my ADSL Ethernet Modem to a Broadband Router (for Multiple-
Users)?
A: Yes. The ADSL Ethernet Modem can be connected to a Broadband Router. Please
configure your ADSL Ethernet Modem before proceeding to connect to the Broadband
Router.
Q: How do I configure my ADSL Ethernet Modem for Broadband Router?
From the Internet Browser, key in connectrouter at the the address and hit <Enter>.
Allow sometime for your Modem to auto-configure and restart. During the process
of restart, the DSL indicator will go off, followed by the ETH/ACT indicator. Once
you see the ETH/ACT indicator lights up and DSL indicator flickers (and gets lighted
up), it means that the restart process is completed. Please refer to your Broadband
Router documentation on how to connect to the Internet.
NOTE! In Multiple-Users mode, you will not be able to use the commands
startmodem, login and logout.
19
Easy Start
Q: How do I configure my ADSL Ethernet Modem from Multiple-Users mode to Single-
User mode?
From the back of your ADSL Ethernet Modem, activate the reset button. For details
on how to activate the reset, please refer to the footer note on page 3.
Q: Is VPN client supported in ADSL Ethernet Modem?
A: Not all VPN clients are supported using ADSL Ethernet Modem. For details, you may
check with your Modem manufacturer.
20
Easy Start
© Copyright September 2002. All Rights Reserved.
P/N: 040-501483-101 (Ref:305)
Technical Support
Hotline : (65) 6741 7211 (Sales Enquiry)
(65) 6749 2062 (Technical Support)
Email : [email protected] (Sales Enquiry)
[email protected] ( Technical Support)
Fax : (65) 6749 1198
Working Hours : Monday to Friday - 0900 to 1730
Saturday/Sunday/Public Holidays - Closed
Technical Support Considerations
Majority of enquiries can be resolved efficiently. However, there may be cases when it is
beyond our technical support to assist you. We may not be able to assist you in:
Hardware conflicts
We will try to discover them and make suggestions but we are unable to repair them
over the telephone.
Software conflicts
Removal of other software and reinstalling our software may be the only solution.
O/S problem
If you encounter problems like fatal exception or illegal operation, kindly refer to your
PC vendor.
Modifications made to your software
Our technical support officers are trained to support the software we provide as part
of our service and they are knowledgable about a wide range of other programs.
However, we are unable to support software that has been modified.

Other Aztech Modem manuals

Aztech 100U Product information sheet

Aztech

Aztech 100U Product information sheet

Aztech ADSL2/2+ Modem User manual

Aztech

Aztech ADSL2/2+ Modem User manual

Aztech 305E User manual

Aztech

Aztech 305E User manual

Aztech DSL Turbo 900 Package User manual

Aztech

Aztech DSL Turbo 900 Package User manual

Aztech MDP3880SP-U User manual

Aztech

Aztech MDP3880SP-U User manual

Aztech MDP3858A Series User manual

Aztech

Aztech MDP3858A Series User manual

Aztech ADSL USB Modem Product information sheet

Aztech

Aztech ADSL USB Modem Product information sheet

Aztech UM9800-U User manual

Aztech

Aztech UM9800-U User manual

Aztech DSL605E Instructions for use

Aztech

Aztech DSL605E Instructions for use

Aztech PCI 56K Instructions for use

Aztech

Aztech PCI 56K Instructions for use

Aztech DSL500U Instructions for use

Aztech

Aztech DSL500U Instructions for use

Aztech DSL5018EN User manual

Aztech

Aztech DSL5018EN User manual

Aztech DSL5018EN(1T1R) Instructions for use

Aztech

Aztech DSL5018EN(1T1R) Instructions for use

Aztech HomePlug AV Wireless N Extender User manual

Aztech

Aztech HomePlug AV Wireless N Extender User manual

Aztech MDP3880-U User manual

Aztech

Aztech MDP3880-U User manual

Aztech DSL Turbo 900 Package User manual

Aztech

Aztech DSL Turbo 900 Package User manual

Aztech ADSL PCI Modem Product information sheet

Aztech

Aztech ADSL PCI Modem Product information sheet

Aztech MDP3858W Series User manual

Aztech

Aztech MDP3858W Series User manual

Aztech ADSL USB Modem Instructions for use
Aztech

Aztech ADSL USB Modem Instructions for use

Aztech MR8800-U User manual

Aztech

Aztech MR8800-U User manual

Aztech DSL 300P Product information sheet

Aztech

Aztech DSL 300P Product information sheet

Aztech MSP3885 Instructions for use

Aztech

Aztech MSP3885 Instructions for use
Aztech DSL700P User manual

Aztech

Aztech DSL700P User manual
Aztech DSL500U Product information sheet

Aztech

Aztech DSL500U Product information sheet

Popular Modem manuals by other brands

Sierra Wireless PinPoint X quick start guide

Sierra Wireless

Sierra Wireless PinPoint X quick start guide

Gogo P49159-002 installation manual

Gogo

Gogo P49159-002 installation manual

TP-Link VX420-G2v Setup guide

TP-Link

TP-Link VX420-G2v Setup guide

Linear ACM-1 installation instructions

Linear

Linear ACM-1 installation instructions

ActionTec GT724WGR quick start guide

ActionTec

ActionTec GT724WGR quick start guide

Elekitsorparts FUNtronics NPR-70 Assembly guide

Elekitsorparts

Elekitsorparts FUNtronics NPR-70 Assembly guide

Inseego Wavemaker PRO 5G Outdoor CPE FW2000e installation guide

Inseego

Inseego Wavemaker PRO 5G Outdoor CPE FW2000e installation guide

ZyXEL Communications P-660HN-T1A v2 Update instructions

ZyXEL Communications

ZyXEL Communications P-660HN-T1A v2 Update instructions

Versitron F242x Technical manual

Versitron

Versitron F242x Technical manual

Draytek Vigor160 Series quick start guide

Draytek

Draytek Vigor160 Series quick start guide

Motorola SURFboard SBV5322 datasheet

Motorola

Motorola SURFboard SBV5322 datasheet

Quectel UC15 MUX user guide

Quectel

Quectel UC15 MUX user guide

NETGEAR A7000 quick start

NETGEAR

NETGEAR A7000 quick start

D-Link DU-562M user guide

D-Link

D-Link DU-562M user guide

Flarion PAD-1000 user guide

Flarion

Flarion PAD-1000 user guide

Campbell Sierra Wireless AirLink RV50 Quick Deploy Guide

Campbell

Campbell Sierra Wireless AirLink RV50 Quick Deploy Guide

WM Systems WM-E1S Datasheet and User Manual

WM Systems

WM Systems WM-E1S Datasheet and User Manual

Motorola SB5101 - SURFboard - 30 Mbps Cable Modem Specification sheet

Motorola

Motorola SB5101 - SURFboard - 30 Mbps Cable Modem Specification sheet

manuals.online logo
manuals.online logoBrands
  • About & Mission
  • Contact us
  • Privacy Policy
  • Terms and Conditions

Copyright 2025 Manuals.Online. All Rights Reserved.