manuals.online logo
Brands
  1. Home
  2. •
  3. Brands
  4. •
  5. B.E.G. LUXOMAT
  6. •
  7. Security Sensor
  8. •
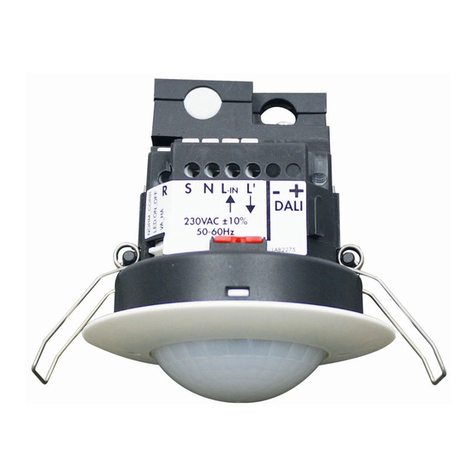
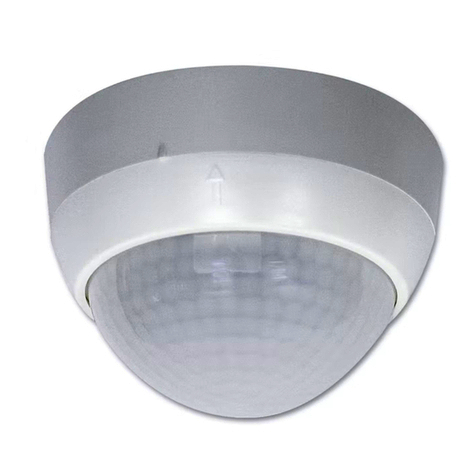
  9. B.E.G. LUXOMAT PD4-M-DIM-HVAC 16A User guide

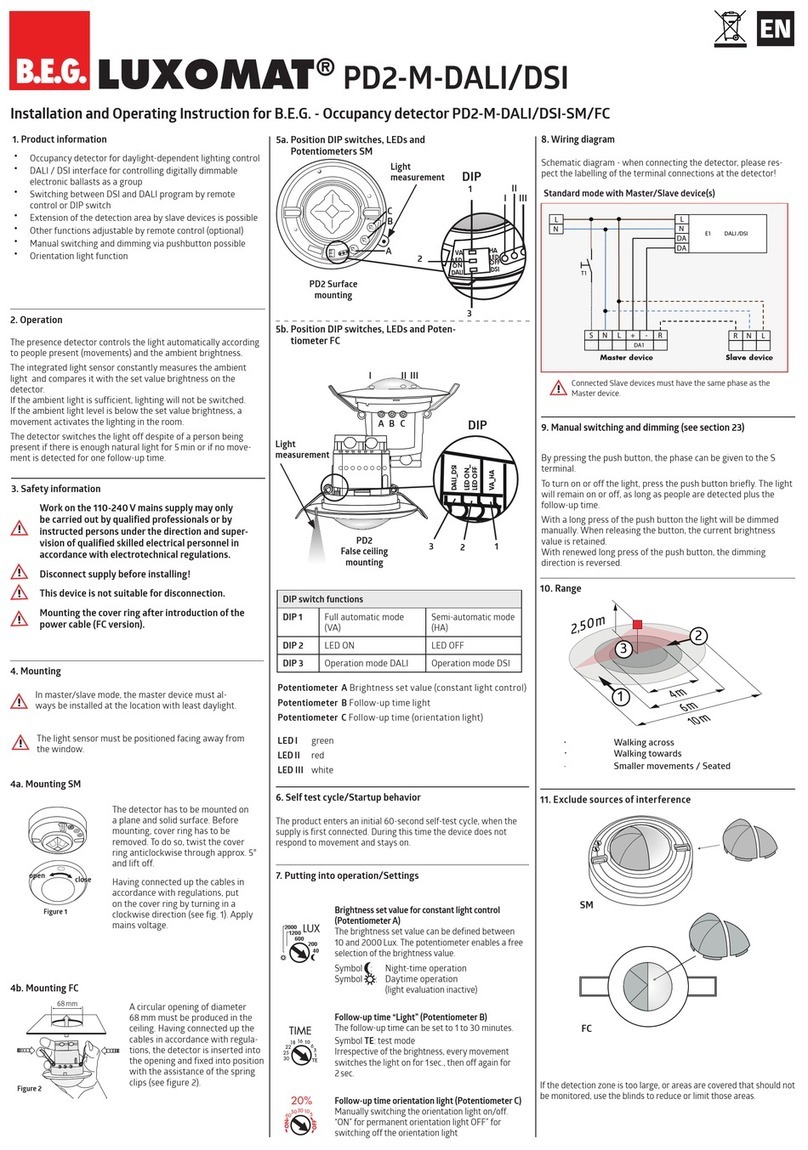
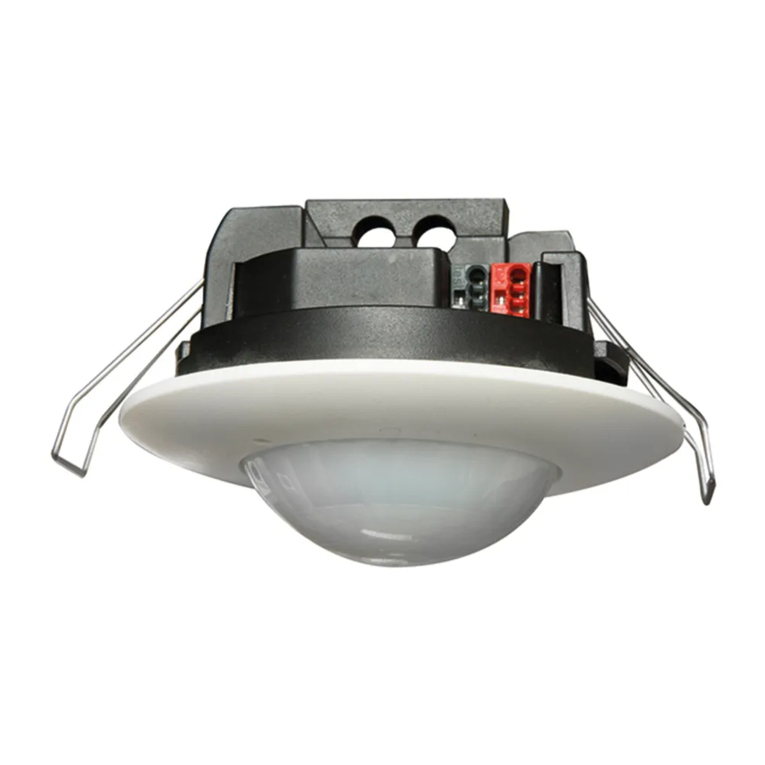
B.E.G. LUXOMAT PD4-M-DIM-HVAC 16A User guide

Light on / off when closed
=> (see page 2, point 12)
Dimming in the closed state
=> (see page 2, point 11)
Test operation in the closed condition to enable
Disable the test mode: press reset
Resetting when closed
The lighting relay is switched off, i.e. opened and the follow-up times
reset.
Permanent protection against sabotage
This function blocks the unit permanently (green LED is illuminated). This
operating mode can only be activated during the period of 5 seconds
after pressing the “lock“ button. This status will only permit actuating the
function “Light on/Light off”. The procedure for leaving this mode is as
follows:
1. Switch off the current
2. Apply current for 31 - 59 seconds
3. Switch of the current again
4. Apply current
5. Open detector
Dim in the open state
To set a target value, proceed as follows (example workplace): Place
one lux meter flat on the desk. Set the light. With the help of remote
control IR-PD-DIM-HKLby pressing the buttons “max” or “min” as neces-
sary. Wait until the desired light level is reached.
Conrmation by the preset value
Light during the initialization
The light is on by default in the initialization time.
On / off with the “Light” button during Initialization. The final condition
is then active.
Orientation light ON / OFF when open
Note:
Also during the orientation phase of the light constant light control
is active: With sufficient brightness is <20% dimmed and turned off the
lights if necessary.
Installation and Operating Instruction for
B.E.G.-Occupancy detectors
PD4-M-DIM-HVAC-FC 16 A
1. Mounting preparations
Work on the 230 V mains supply
may only be carried out by quali-
fied professionals or by instructed
persons under the direction and
supervision of qualified skilled
electrical personnel in accordance
with electrical regulations.
Disconnect supply before installing!
The device is not suited for safe
disconnection of the mains supply.
When in Master/Slave mode of op-
eration, the Master-appliance must
always be installed at the location
where there is least daylight.
LUXOMAT®PD4-M-DIM-HVAC 16 A
GB
4. DIP switch functions
DIP-
switch
ON OFF
1Corridor mode Standard mode
2LED OFF LED ON
3Semi automatic mode Fully automatic mode
Corridor function: After deactivation by an external push
button, the detector switches off and returns to automatic
mode after 5 sec.
3. Position DIP-Switches, LEDs and Potentiometer
7. Option:
Wall bracket for remote
control IR-PD-DIM-HKL
IR-PD-DIM-HKL
max
50
Lux
1500
Lux
ON
OFF
t < 5sec.
8. Settings by remote control 9. Explanation of the remote control button functions
Unlocking device – Activation of
the programming mode
Preset/user mode
=> (see page 2, point 11)
Resetting when-
open: Deletes all
values set with
the remote con-
trol, light OFF.
Orientation lighting and its
follow-up time
Orientation lighting ON/OFF
20 % of the nominal light
or Dimming of the lighting on the
desired luminance value
Luminance set point for constant
light control
50
Lux to 1500
Lux
1
min to 60
min
max
50
Lux
1500
Lux
ON
OFF
max
50
Lux
1500
Lux
ON
OFF
max
50
Lux
1500
Lux
ON
OFF
max
50
Lux
1500
Lux
ON
OFF
or
Automatic reading in the current light
value as new luminance set point
max
50
Lux
1500
Lux
ON
OFF
6. Settings carried out using remote
control (optional)
Remote control LUXOMAT®
IR-PD-DIM-HKL
1. Check Battery:
Open battery compartment by pressing the plastic
springs together and removing the battery-holder.
2. IMPORTANT
Please pay attention, that the setting is Potentiometer
1 at “TEST” and Potentiometer 2 not at “SUN”. All
values which have been programmed using the remote
control will be deleted in the event of power failure in
the position “TEST/SUN”. Please switch Potentiometer 2
over to“MOON” or any other value.
Caution:
Settings with remote control supersede the settings
by courtesy of potentiometers.
A circular opening of
diameter 68 mm must first
of all be produced in the
ceiling.
Having connected up the
cables in accordance with
regulations, the detector is
inserted into the opening
as shown in the drawing
opposite and fixed into
position with the assis-
tance of the spring clip.
2. Installation of the LUXOMAT®
PD4-M-DIM-HVAC-FC
max
50
Lux
1500
Lux
ON
OFF
optional optional optional
Locking device – Exit programming
mode
Permanent protection against
sabotage
LED ashes
t < 5 sec.
The DIP settings are enabled again by
• Adjusting the DIP switches when closed
• Reset with test sun setting at the potentiometers
• Reset when open
Function LEDs OFF: In the open state and in test mode, the
LEDs are always ON.
DIP
OFF ON
1
2
3
Follow-up time Channel 1
1 - 30 min.
Follow-up time Channel 2 (HVAC)
5 - 60 min. or impulse
1
min
5
min
30
min
60
min
Fully automatic/semi automatic
mode => (see page 2, point10)
20 %
500
TEST
B.E.G. LUXOMAT®
IR-PD-DIM-HKL
7501000
1500
50
100250
RESET
5
min
10
min
15
min
1
min
OFF
ON
30
min
60
min
10
min
30
min
60
min
15
min
1
min
5
min
min
max
30
min
20%
R1
R2
5. Putting into operation / Settings
Self test cycle
After an initial 60-second self-test cycle, the LUXOMAT®PD4-M-DIM-HVAC is ready
for operation.
Follow-up time for light control
The time can be set infinitely variably at between 1 and 30 minutes.
Symbol TEST: Test mode
Every movement switches on the light for a period of 1 second, switching
it off for a period of 2 seconds after that regardless of the level of
brightness
Twilight-switch for light control (relay 1)
The switch-on value for the light can be set at between 10 and 2000 Lux.
Using the rotary control, the luminance set points can be set as desired.
Symbol
: Night-time operation
Symbol
: Daytime/Night-time operation
Orientation lighting (fixed to 20%)
The orientation lighting can be set infinitely variably at between 5 and
60 minutes resp. “ON” for permanent orientation lighting or “OFF”
for no orientation lighting.
9s 2s
LED ON
LED OFF
Follow-up time for appliance-control
The time can be set infinitely variably at between 5
minutes and 120 minutes. After 15 minutes the switch-
on delay is activated. If there is no further movement
detected within 5 min. period, the switch-on delay
would start again.
Symbol : Impulse = 2.5 sec.
Symbol A: Alarm impulse = 2sec.
Alarm impulse
In order to set off an alarm impulse, at least 3 move-
ments within 9sec. have to be detected.
Pulse spacing PD-Slave
2 or 9 seconds can be set for the pause between 2
pulses sent to the master. The setting can be made with
activated ( ) or deactivated ( ) LED indicator.
For devices with a separate slave input, 2 sec. can
be set.
R1
TE
1
3
6
22
18 16
10
30
25
LUX
40
2000
600
120 0
200
HKL
A
120
60
5
15
30
40
50
20%
60 5
10
50 30
OFF
ON
R1
TE
1
3
6
22
18 16
10
30
25
LUX
40
2000
600
120 0
200
HKL
A
120
60
5
15
30
40
50
20%
60 5
10
50 30
OFF
ON
R1
TE
1
3
6
22
18 16
10
30
25
LUX
40
2000
600
120 0
200
HKL
A
120
60
5
15
30
40
50
20%
60 5
10
50 30
OFF
ON
R1
TE
1
3
6
22
18 16
10
30
25
LUX
40
2000
600
120 0
200
HKL
A
120
60
5
15
30
40
50
20%
60 5
10
50 30
OFF
ON
R1
TE
1
3
6
22
18 16 10
30
25
R1
TE
1
3
6
22
18 16 10
30
25
LUX
40
2000
600
120 0
200
LUX
40
2000
600
120 0
200
HKL
A
120
60
5
15
30
40
50
20%
60 5
10
50 30
OFF
ON
12R1
TE
1
3
6
22
18 16 10
30
25
LUX
40
2000
600
120 0
200
12
IIIIII
DCBA
1 2 3
The DIP switch settings are over-
riden using the remote control.
Potentiometer A HVAC Channel 2
Potentiometer B Orientation lighting
Potentiometer C Time Channel 1
Potentiometer D Lux Channel 1
LED I white
LED II red
LED III green
PD4-M-DIM-HKL_16A_4lang+DK_291112.indd 1 12/5/2012 12:14:37 PM
Sensor and power supply in one case for onwall-, ceiling- and
flushmounting
Power supply: 230 V~ ±10 %
Power consumption: < 1W
Ambient temperature: -25°C to +50°C
Degree of protection/class:
FC IP20 / II
Settings: locally and by remote control
Light values remote control:
50 - 1500 Lux
Extension of the detection area:
with Slaves
Area of coverage:
circular 360°
Range of coverage Ø H 2,50 m / T = 18°C:
seated 6.
40m
/ tangential 24 m /
radial 8 m
Recommended height for mounting:
2 - 3 m
Light measurement:
Mixed light, daylight + artificial light
Lux values potentiometers:
10 - 2000 Lux
• Channel 1 for light-connection
Type of contact:
NOC/with pretravel tungsten
contact
Contact load:
2300 W cos ϕ=1 /
1150 VA cos ϕ= 0.5, µ-Contact
DIM-Outputs:
1 x (1-10V)
Max. no. of series-connected electronic ballasts: max. 50 electronic
ballasts by one single supply with max. 100 m cable run and a
conductor cross-section of 0.75 mm²
Time-settings:
1 - 30min. / Test
•
Channel 2 for control devices (only reacts on motion)
Contact load
:
230 V~, 16 A cosϕ=1, µ-Contact
Time-settings
:
5 min. - 120 min. with time delay of
5 min. for follow-up time > 15 min./
Alarm impulse
Dimensions H x Ø [mm]
103x98
Visible portion when built into ceiling: 38 x 98 mm
Technical data PD4-Slave
Power supply: 230 V~ ±10 %
Impulse output: Optocoupler max. 2 W
Impulse duration: 2 sec. or 9sec.
Dimensions: see above
Declaration of Conformity: The product complies with the low
voltage recommendation 2006/95/EC and the EMV recommenda-
tion 2004/108/EC.
19. Technical data PD4-M-DIM-HVAC 16 A
14. Wiring diagrams
15. Connections
Type SM FC FM
PD4-M-DIM-HVAC 16 A
(Master) –92547 –
PD4-S (Slave) 92142 92254 92163
LUXOMAT®Remote control
IR-PD-DIM-HKL (incl. wall bracket) 92114
Accessory:
BSK Ball basket guard 92199
Occupancy detectors – Covering IP23 92206
17. Article / Part nr. / Accessory
MAN 7508 – PD1245-DIM-2C-V12 – 281112– 4
In case the sensing area of the LUXOMAT®PD4-M-DIM-HVAC
is too large or areas are being covered that should not
be monitorerd, the range can be reduced or limited
through use of the enclosed masking clips
18. Exclude sources of interference
13. Range
11. Manual Dimming – Preset /User
(for IR-PD-DIM-HKL functions see page 1)
You can dim manually by pressing the push button for
a long time (> 2 sec). When the button is released,
the current dimming value is retained. Upon renewed
dimming, the dimming direction is reversed.
PRESET – the luminance set point is set during start-up
operation by the installer and remains unchanged.
The luminance set-point congured through manual
dimming is only applied for the time being.
Caution:
The constant light regulation is now deactivated!
The currently set articial light is retained independent
of the ambient/daylight brightness!
After switching off and then back on, the originally set
luminance set-point is reset = constant light regulation
is activated.
USER – can only be activated via the remote control!
The luminance set-point is changed upon each manual
dimming and re-adjusted by the user (Conformation
through relay clicking!) The constant light regulation
remains activated!
The system switches over when the “Doublelock” push-
button is open (see remote control functions, page 1).
Each time a push-button is pressed, the current operating
mode is indicated:
Red lights for 3 sec. = Preset
Green lights for 3sec. = User
10. Fully / Semi automatic mode
(for IR-PD-DIM-HKL functions see page 1)
The system switches over when the “Light” push-button is
open (see remote control functions, page 1).
Each time a push-button is pressed, the current operating
mode is indicated by the red LED:
Red lights for 3 sec. = Fully automatic mode
Green lights for 3 sec. = Semi-automatic mode
Fully automatic operation
In this operating mode, the lighting switches automatically on
and off for increased comfort, depending on presence and
brightness.
Semi automatic operation
(Semi automatic can only be activated via the remote control!)
In this operating condition, in order to gain increasedsav-
ings, the lighting is energized only after being manually
switched on. Switch-off takes place automatically. The
semi automatic mode basically behaves like the fully
automatic. However, the difference is that switching-on
must always be carried out manually!
As many (closer-contact) buttons as desired can be wired in
parallel on the “S” button input (ON/OFF Dimm).
12. Manual Switching
The light will remain switched on or off, as movements are
detected in the area. After the last detected movement the
light will be off for the duration of the set-up time. The device
will then return independently to the Operation mode (Full or
Semi automatic).
20. LED-functional indicators, fault-finding
The functional indicators in the case of the LUXOMAT®
PD4-M-DIM-HVAC (red and green LED‘s)
Red LED indicating self-checking mode (over a period of 60
seconds following mains‘-supply lock-on)
Flashing at intervals of 1 second
EEPROM/memory empty
Flashing rapidly
EEPROM/memory contains information
Red LED as an indicator of status
Flashing irregularly
Movements are detected within the area of coverage
Flashing regularly
Detector identifies bright, light off
(dependent upon operating mode)
Not illuminated
Detector identifies dark, light on
(dependent upon operating mode)
Flashing extremely rapidly
Too bright / Too dark / Undefined
Red LED as an acknowledgement of receipt for commands from
the remote control
Illuminated for 2 seconds
Signal validly received
Illuminated for 0.5 seconds
Not-accepted command, detector blocked
Flashing extremely rapidly
Not-accepted command, occurs, for example, when an attempt is
made to input twilight-value are too bright or too dark
Green LED as an acknowledgement of receipt for commands from
the remote control
Lights up for 3 seconds
Semi automatic or user signal correctly received
Green LED as an indicator of status (only for status
“Permanent protection against sabotage”)
Flashing irregularly
Movement are detected within the area of coverage
Flashing regularly
Detector identifies bright, light off
(dependent upon operating mode)
Not illuminated
Detector identifies dark, light on
(dependent upon operating mode)
lluminated for 2 seconds
Signal validly received
(dependent upon operating mode)
White LED
Lights permanently
Semi-automatic active (shines)
Illuminates 4 seconds, then 1sec. off
Semi-automatic and active corridor
Illuminates 1 seconds, then 4sec. off
Only active corridor
e
1
2
3
Walking across
Walking towards
Seated
24 m
8 m
6,40 m
24 m
360°
2.50 m
2
3
1
WE RECOMMEND THAT BEFORE DIMMING OF THE CONNECTED
LIGHTS A 100h BURN IN (T5 TUBES OR 80 HOURS FOR T8 TUBES )
FUNCTION TAKES PLACE .
THE LIFESPAN OF THE LAMPS CAN BE REDUCED IF THE BURN IN
DOES NOT TAKE PLACE .
Standard mode with master-DIM-HVAC-occupancy detectors
M1 = HVAC-Function
optional
T1 = NO button for Light-Channel
T2 = NO button for HVAC-Channel
Slave to the extension of coverage
PD4-M-DIM-HVAC-FC
L
N
R
Slave
L' NO NO
LR
T2
N
L
+
–
E1
1-10 V
EB
max
50
Lux
1500
Lux
ON
OFF
max
50
Lux
1500
Lux
ON
OFF
M1
16. Manual switching HVAC-Channel
230VAC for 0.1 - 1 second on the slave port R
Lay on the slave port R for 0.1 - 1 second to 230VAC,is this
like a key signal for the HVAC channel interpreted.
quer zum Melder gehen
frontal zum Melder gehen
Unterkriechschutz
max
50
Lux
1500
Lux
ON
OFF
–
+
Master Slave
L
N
E1 1-10 V EB
N
L
+
-
RSL L´1N -+NLR
T1
C1 C1
M1
NO
HVAC
NO
HVAC
T2
N S
T1
PD4-M-DIM-HKL_16A_4lang+DK_291112.indd 2 12/5/2012 12:14:39 PM
This manual suits for next models

2

Other B.E.G. LUXOMAT Security Sensor manuals

B.E.G. LUXOMAT PD2-M-DALI User guide

B.E.G. LUXOMAT

B.E.G. LUXOMAT PD2-M-DALI User guide

B.E.G. LUXOMAT PD9-M-1C-FC User guide

B.E.G. LUXOMAT

B.E.G. LUXOMAT PD9-M-1C-FC User guide

B.E.G. LUXOMAT PD4-CAS-GH User manual

B.E.G. LUXOMAT

B.E.G. LUXOMAT PD4-CAS-GH User manual

B.E.G. LUXOMAT PD2N-KNX-BA User manual

B.E.G. LUXOMAT

B.E.G. LUXOMAT PD2N-KNX-BA User manual

B.E.G. LUXOMAT RC-plus Service manual

B.E.G. LUXOMAT

B.E.G. LUXOMAT RC-plus Service manual

B.E.G. LUXOMAT PD4-M-1C-GH-SM User guide

B.E.G. LUXOMAT

B.E.G. LUXOMAT PD4-M-1C-GH-SM User guide

B.E.G. LUXOMAT Indoor 180-R/2W UK Service manual

B.E.G. LUXOMAT

B.E.G. LUXOMAT Indoor 180-R/2W UK Service manual

B.E.G. LUXOMAT PD4-M-HCL-FC User guide

B.E.G. LUXOMAT

B.E.G. LUXOMAT PD4-M-HCL-FC User guide

B.E.G. LUXOMAT PD2N-KNX-DX User manual

B.E.G. LUXOMAT

B.E.G. LUXOMAT PD2N-KNX-DX User manual

B.E.G. LUXOMAT PD2N-KNX-ST-EM User manual

B.E.G. LUXOMAT

B.E.G. LUXOMAT PD2N-KNX-ST-EM User manual

B.E.G. LUXOMAT PD3-1C User guide

B.E.G. LUXOMAT

B.E.G. LUXOMAT PD3-1C User guide

B.E.G. LUXOMAT PD4-CAS-GH User manual

B.E.G. LUXOMAT

B.E.G. LUXOMAT PD4-CAS-GH User manual

B.E.G. LUXOMAT PICO-DALILINK 93908 User manual

B.E.G. LUXOMAT

B.E.G. LUXOMAT PICO-DALILINK 93908 User manual

B.E.G. LUXOMAT PD2N-KNX-ST User manual

B.E.G. LUXOMAT

B.E.G. LUXOMAT PD2N-KNX-ST User manual

B.E.G. LUXOMAT PD4N-KNX-DX User manual

B.E.G. LUXOMAT

B.E.G. LUXOMAT PD4N-KNX-DX User manual

B.E.G. LUXOMAT PD2N-KNX-BA-EM User manual

B.E.G. LUXOMAT

B.E.G. LUXOMAT PD2N-KNX-BA-EM User manual

B.E.G. LUXOMAT LC-Click-N 140 Owner's manual

B.E.G. LUXOMAT

B.E.G. LUXOMAT LC-Click-N 140 Owner's manual

B.E.G. LUXOMAT PD2N-KNX-ST-FT User manual

B.E.G. LUXOMAT

B.E.G. LUXOMAT PD2N-KNX-ST-FT User manual

B.E.G. LUXOMAT PD9-M-DALI/DSI-FC User guide

B.E.G. LUXOMAT

B.E.G. LUXOMAT PD9-M-DALI/DSI-FC User guide

B.E.G. LUXOMAT PD4N-DALILINK User manual

B.E.G. LUXOMAT

B.E.G. LUXOMAT PD4N-DALILINK User manual

B.E.G. LUXOMAT PD2-M-DALI/DSI-1C User guide

B.E.G. LUXOMAT

B.E.G. LUXOMAT PD2-M-DALI/DSI-1C User guide

B.E.G. LUXOMAT PD4-M-1C-GH-AP User manual

B.E.G. LUXOMAT

B.E.G. LUXOMAT PD4-M-1C-GH-AP User manual

B.E.G. LUXOMAT PD4N-DALILINK User manual

B.E.G. LUXOMAT

B.E.G. LUXOMAT PD4N-DALILINK User manual

Popular Security Sensor manuals by other brands

HIK VISION DS-PD2-T10AME-EH user manual

HIK VISION

HIK VISION DS-PD2-T10AME-EH user manual

Maxouttech RF-Panic-One-Button-319-NN manual

Maxouttech

Maxouttech RF-Panic-One-Button-319-NN manual

Co2meter SAN-13 operating instructions

Co2meter

Co2meter SAN-13 operating instructions

Watchguard ALE-PIRB instruction manual

Watchguard

Watchguard ALE-PIRB instruction manual

Maxouttech RF-ROR-135S-345-NN manual

Maxouttech

Maxouttech RF-ROR-135S-345-NN manual

OEM Tools HDL-100+ Operating instructions and parts manual

OEM Tools

OEM Tools HDL-100+ Operating instructions and parts manual

Sound Tube Motion Sensor FP Series Install instructions

Sound Tube

Sound Tube Motion Sensor FP Series Install instructions

Paradox TM50 Touch user manual

Paradox

Paradox TM50 Touch user manual

Pro-tec Cirrus Pro Locator operating manual

Pro-tec

Pro-tec Cirrus Pro Locator operating manual

CANchecked VADpro VAD15 user manual

CANchecked

CANchecked VADpro VAD15 user manual

C.P. Electronics MWS3A-PRM-VFC-NC installation guide

C.P. Electronics

C.P. Electronics MWS3A-PRM-VFC-NC installation guide

C.P. Electronics EBDHS-DNET1-LT30 installation guide

C.P. Electronics

C.P. Electronics EBDHS-DNET1-LT30 installation guide

Ceasefire PRO-SENSE TI-002271 quick start guide

Ceasefire

Ceasefire PRO-SENSE TI-002271 quick start guide

C.P. Electronics MWS1A-IP-PRM-VFC installation guide

C.P. Electronics

C.P. Electronics MWS1A-IP-PRM-VFC installation guide

North Light HJ9104 manual

North Light

North Light HJ9104 manual

Medi Alarm Pro 4G quick start guide

Medi Alarm

Medi Alarm Pro 4G quick start guide

Paradox PMD85 user manual

Paradox

Paradox PMD85 user manual

Heath Zenith 5846 manual

Heath Zenith

Heath Zenith 5846 manual

manuals.online logo
manuals.online logoBrands
  • About & Mission
  • Contact us
  • Privacy Policy
  • Terms and Conditions

Copyright 2025 Manuals.Online. All Rights Reserved.