manuals.online logo
Brands
  1. Home
  2. •
  3. Brands
  4. •
  5. B.E.G. LUXOMAT
  6. •
  7. Security Sensor
  8. •
  9. B.E.G. LUXOMAT PD2-M-DALI/DSI-1C User guide

B.E.G. LUXOMAT PD2-M-DALI/DSI-1C User guide

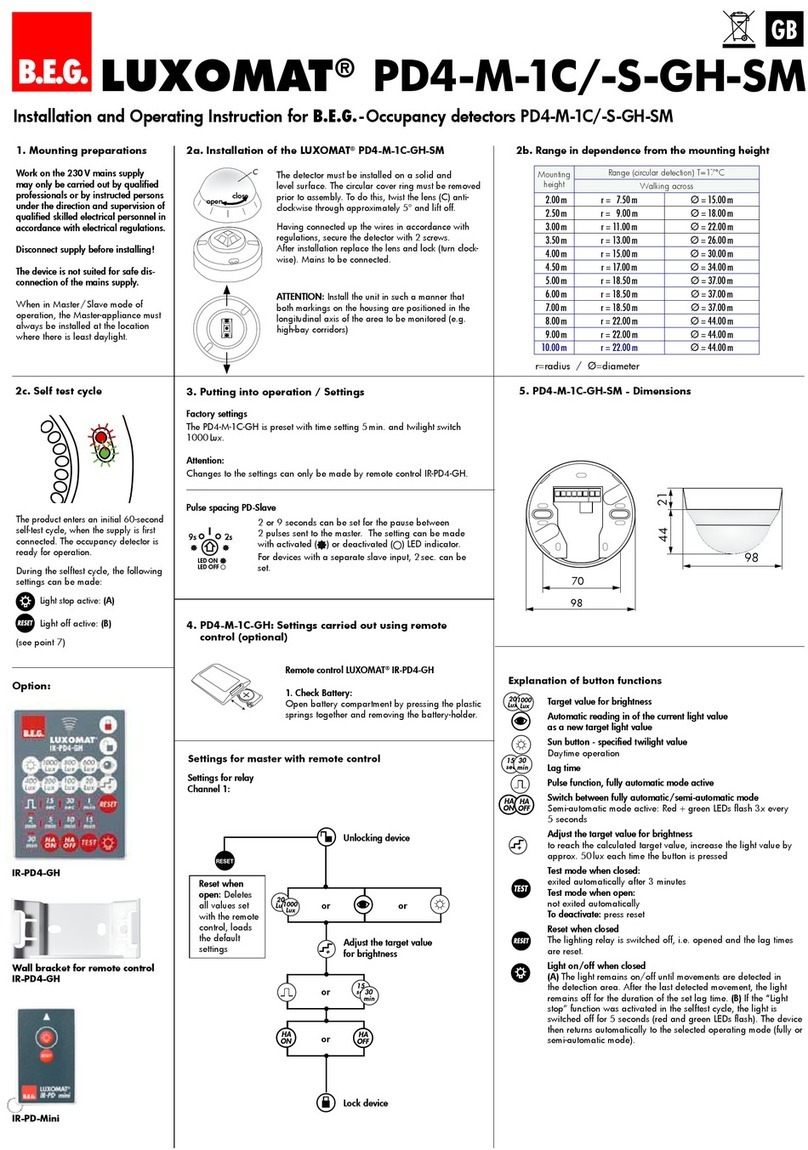
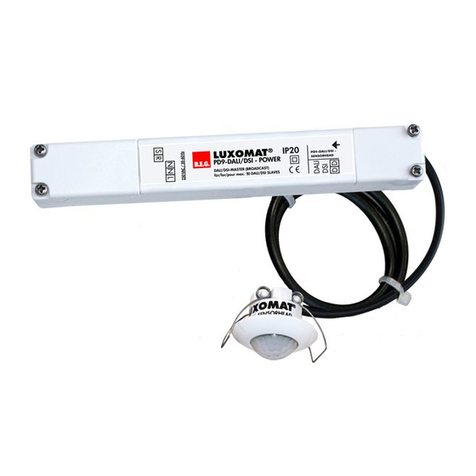
Installation and Operating Instruction for B.E.G. - Occupancy detector
PD2-M-DALI/DSI-1C-FC
LUXOMAT®
PD2-M-DALI/DSI-1C
EN
1. Product information
• Occupancydetectorfordaylight-dependentlighting
control
• DALI/DSIinterfaceforcontrollingdigitallydimmable
electronicballastsasagroup
• Oneadditionalswitchingchannelforcontrollinglights
andHVAC(heating,ventilation,airconditioning)devices
• SwitchingbetweenDSIandDALIprogrambyremote 
controlorDIPswitch
• ExtensionofthedetectionareabySlavedevicesis
possible
• Setvaluebrightness,follow-uptime–LIGHT/HVACand
orientationlightadjustable
• Manualswitchinganddimmingviapushbuttonpossible
• Orientationlightfunction
2. Operation
Thepresencedetectorcontrolsthelightautomaticallyaccording
topeoplepresent(movements)andtheambientbrightness.
Theintegratedlightsensorconstantlymeasurestheambientlight
andcomparesitwiththesetvaluebrightnessonthedetector.If
theambientlightissufficient,lightingwillnotbeswitched.
Iftheambientlightlevelisbelowthesetvaluebrightness,a
movementactivatesthelightingintheroom.
Thedetectorswitchesthelightoffdespiteofapersonbeingpre-
sentifthereisenoughnaturallightfor5minorifnomovement
isdetectedforonefollow-uptime.
3. Safety information
Work on the 110-240V mains supply may only be
carried out by qualified professionals or by instructed
persons under the direction and supervision of quali-
fied skilled electrical personnel in accordance with
electrotechnical regulations.
Disconnect supply before installing!
This device is not suitable for disconnection.
Mounting the cover ring, after introduction of the
power cable (FC version).
4. Mounting
68 mm
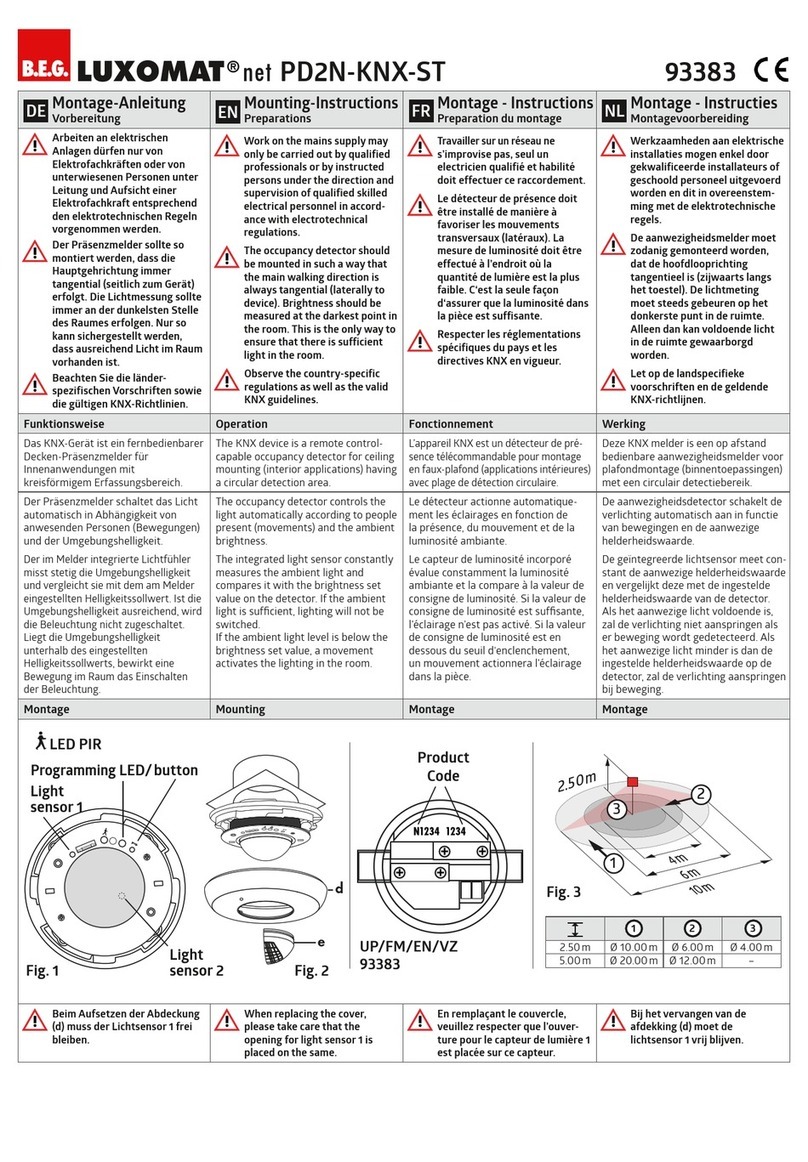
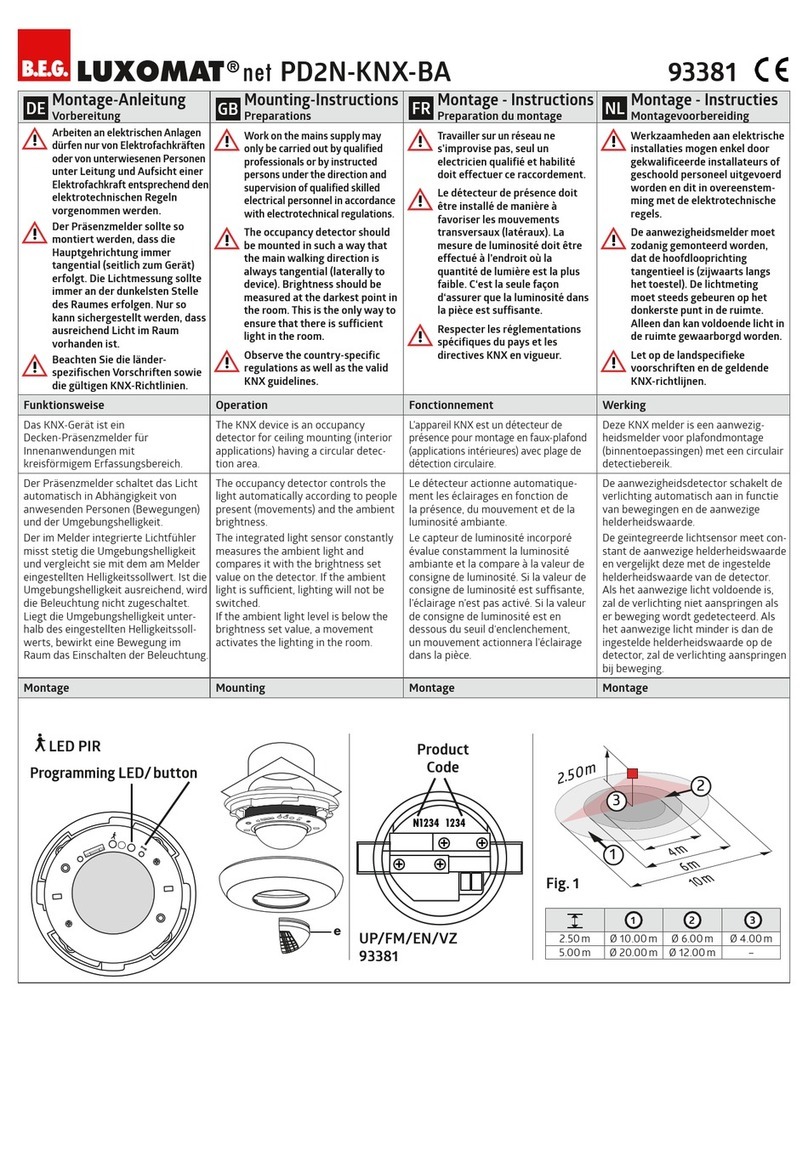
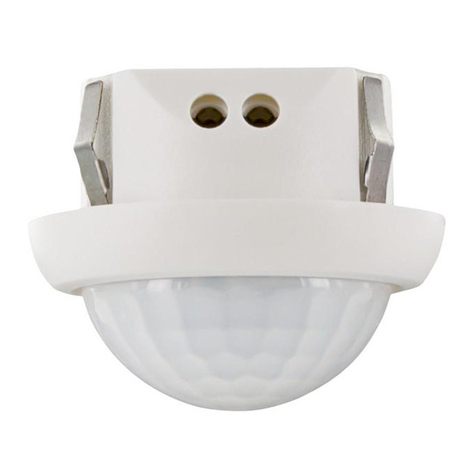
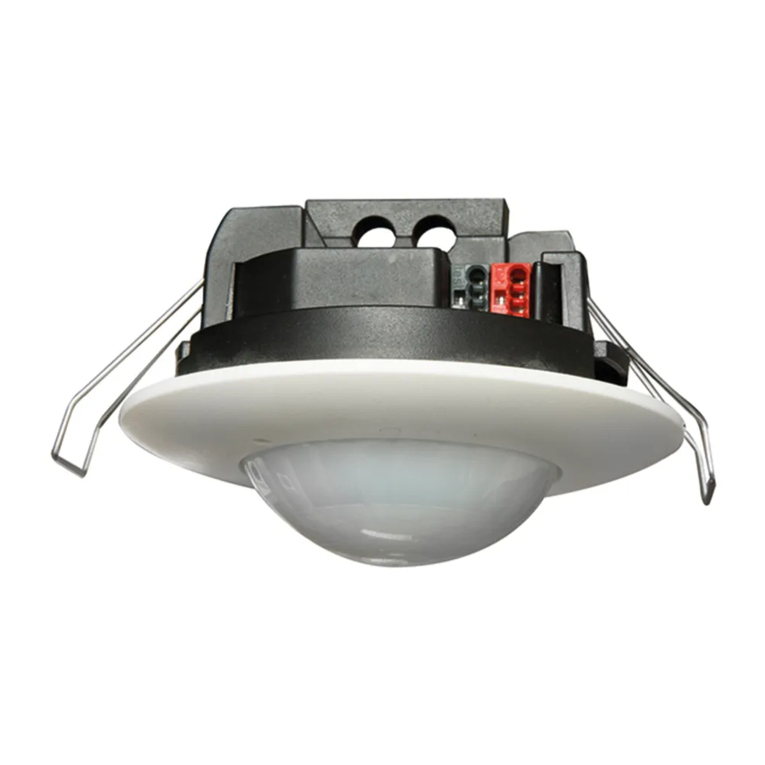
Acircularopeningofdiameter68 mmmustbeproducedinthe
ceiling.Havingconnectedupthecablesinaccordancewith
regulations,thedetectorisinsertedintotheopeningasshownin
thedrawingandfixedintopositionwiththeassistanceofthe
springclips.
5. Position DIP switches, LEDs and
Potentiometers
PD2
False ceiling
mounting
CB
A
Light
measurement
DALI_DSI
HVAC_
LIGHT
VA_HA
1
2
3
6. Self test cycle/Startup behavior
Theproductentersaninitial60-secondself-testcycle,whenthe
supplyisfirstconnected.Duringthistimethedevicedoesnot
respondtomovementandstayson.
7. Putting into operation / Settings
Brightness value for constant light control
(Potentiometer A)
Thebrightnesssetvaluecanbedefinedbetween
10and2000lux.Thepotentiometerenablesafree
selectionofthebrightnessvalue.
Symbol :Night-timeoperation
Symbol :Day-timeoperation
(Lightevaluationinactive)
Follow-up time for light control (Potentiometer B)
Thefollow-uptimecanbesetto1to30minutes.
SymbolTEST:testmode
Irrespectiveofthebrightness,everymovementswitches
thelightonfor1s,thenoffagainfor2s.
Follow-up time for orientation light (Potentiometer C)
Thefollow-uptimecanbesetinfinitelyvariablyat
between5and60minutes.ManuallyswitchingON/
OFFtheorientationlight.
“ON”forpermanentorientationlight
“OFF”fordeactiviationoforientationlight
Follow-up time for device control (Potentiometer D)
Thefollow-uptimecanbeadjustedbetween5 min.and
120 min.Thedelayisactivefromasettimeof>15mi-
nutes.Thisdelayisabout5 min.Ifnoothermovements
aredetectedduringthistime,thedelaystartsagain.
Impulse function
Theimpulsefunctioncanbeusedtocontrolexternal
HVACsystems.All9 sec.willbesetanimpulseof
2.5 sec.
Alarm impulse
Inordertoinitiateanalarmimpulse,therehavetobe
threedetectedmovementswithinaperiodof9 sec.
Thisfunctioncanbeusedtodisplayapresenceinthe
roomonexternalvisualizations.All9 sec.willbesetan
impulseof2.5 sec.
ThedevicedoesnotfulfiltherequirementsofDIN
EN50131-2-2andthereforecannotbeusedin
professionalintrusiondetectionsystems.
DIP switch functions
DIP 1 Fullautomaticmode Semi-automaticmode
DIP 2 HVACfunction Lightcontrol*
DIP 3 OperationmodeDALI OperationmodeDSI

*Ifyouselect“LIGHT”,theswitchingrelayR2operatessynchro-
nouslytotheDALIlightchannel.ThepotentiometerR2hasno
functioninthissetting.
Potentiometer ABrightness(constantlightcontrol)channel1
Potentiometer BFollow-uptime(light)channel1
Potentiometer CFollow-uptime(orientationlight)
Potentiometer DFollow-uptime(devicecontrol)channel2
LED I green
LED II red
LED III white
8. Wiring diagram
Standard mode with Master/Slave



L
N
L
NN
N
S
Master Slave
RL LR
-
+L‘
T1
DA1
M1
T2
DA
DA
E1 DALI/DSI
9.
Manual switching and dimming
Bypressingthepushbutton,thephasecanbegiventotheS
terminal.
Toturnonoroffthelight,pressthepushbuttonbriefly.Thelight
willremainonoroff,aslongaspeoplearedetectedplusthe
follow-uptime.
Withalongpressofthepushbuttonthelightwillbedimmed
manually.Whenreleasingthebutton,thecurrentbrightnessvalue
isretained.
Withrenewedlongpressofthepushbutton,thedimmingdirection
isreversed.
TakingthephasetotheRterminalbyusingabutton,theHVAC
channelcanbeswitchedwithashortkeypress.
10. Range
!
ConnectedSlavedevicesmusthavethesamephase
astheMasterdevice.
R1
TE
1
3
6
22
18 16 10
30
25
LUX
40
2000
600
120 0
200
R2
A
120
60
5
15
30
40
50
20%
60 5
10
50 30
OFF
ON
R1
TE
1
3
6
22
18 16 10
30
25
LUX
40
2000
600
120 0
200
R2
A
120
60
5
15
30
40
50
20%
60 5
10
50 30
OFF
ON
R1
TE
1
3
6
22
18 16 10
30
25
LUX
40
2000
600
120 0
200
R2
A
120
60
5
15
30
40
50
20%
60 5
10
50 30
OFF
ON
!
R1
TE
1
3
6
22
18 16 10
30
25
LUX
40
2000
600
120 0
200
R2
A
120
60
5
15
30
40
50
20%
60 5
10
50 30
OFF
ON
A
!
!
!
!
Thelightsensorshouldbemountedontheopposite
sideofthewindow.
InMaster/SlaveoperationtheMasterdevicemust
alwaysbeinstalledatthesitewithlessdaylight.
!
!
D
III III
LEDs
10 m
6 m
4 m
10 m
360°
2.50 m
2
1
1
2
quer zum Melder gehen
frontal zum Melder gehen
Unterkriechschutz
Walking across
Walking towards
Seated
11. Exclude sources of interference
Ifthedetectionzoneistoolarge,orareasarecoveredthatshould
notbemonitored,usetheblindstoreduceorlimitthoseareas.
12. Technical data
Power supply:  110-240 VAC,50/60 Hz
Power consumption: approx.1W
Ambient temperature -25°Cto+50°C
Degree of protection/class:
 IP20/II
Recommended height
for mounting:
  2-3 m
Range of coverage
Ø H 2,5 m / T = 18°C:
seated4 m/tangential10 m/
   radial6 m
Area of coverage:
 circular360°
Dimensions H x Ø [mm]
 FC
   84.5x 80 mm
Visible part when built into ceiling:
15x 80 mm
Lux value:
  10-2000 Lux
• DALI/DSI
digitalBUScontrolwire,2-core,nopolarity(broadcastonly)
Max. no. of series-connected electronic ballasts:
upto50(broadcastonly)
Time settings:
  1-30 min./test
• Channel 2
Type of contact:
NOC/withpre-traveltungsten
contact
Contact load:
  2300 W,cosϕ=1;
 1150 VA,cosϕ=0,5,µcontact
Declaration of Conformity:
Thisproductrespectsthedirectivesconcerning
1.electromagneticcompatibility(2004/108/EU)
2.lowvoltage(2006/95/EU)
3.restrictionoftheuseofcertainhazardoussubstancesinelectrical
andelectronicequipment(2011/65/EU)
13. Article / Part nr. / Accessory
Typ FC
PD2-M-DALI/DSI-1C (Master) 92486
PD2-S (Slave) 92166
LUXOMAT®Remote control:
IR-PD-DALI-1C(incl.wallbracket) 92116
IR-PD-DALI-Mini 92112
IR-RC-Adapterwithsmartphoneapp 92726
Accessories:
BSKWirebasket 92199
14. LED function indicators
LED function indicators
Process
Standard
mode
Double-locked
Initialisationtime
unprogrammed Redflashes Greenflashes
Initialisationtime
programmed
Redflashes
quickly
Greenflashes
quickly
Motiondetection
Redflashes
oneach
detected
movement
Greenflashes
oneach
detected
movement
Toobrightdetected
Redflashes
2xper
second
Green
flashes
2xper
second
Toobright/toodark/
undefinedinopenedstate
Redflashes
veryquickly
Greenflashes
veryquickly
ToggleDALI/DSI
DSIactive
Redshines
3 sec.
ToggleDALI/DSI
DALIactive
Greenshines
3 sec.
ToggleHA/VA
HAactive
Whiteshines
permanently
TogglePreset/User
Presetactive
Redshines
3 sec.
TogglePreset/User
Useractive
Greenshines
3 sec.
IRsignalvalidreceived
Redand
whiteshine
3 sec.
IRsignalinvalidreceived Redshines
0.5 sec.
100 hfunctionactive
Red/Green
flash
alternately
Red/Green
flash
alternately
Lightmeasurementin
progress
Green
flashes1xin
10 sec.
Greenflashes
1xin10 sec.
Wall bracket for remote
control IR-PD-DALI-1C
IR-PD-DALI-1C
15. Putting into operation of the remote control
(optional)
Settingswithremotecontroloverridethepotentiometer
andDIPsettings.
TheDIPsettingsarereactivatedby
• settingthepotentiometersto“TEST“and”SUN”(see
section24),or
• pressingthe“Reset”buttonontheremotecontrolin
openstate
LUXOMAT®IR-PD-DALI-1C
1. Check Battery:
Openbatterycompartmentbypressing
theplasticspringstogetherandremoving
thebattery-holder.
2. Note:
Usingtheremotecontrol,theoccupancydetectorcanonlybe
operatedbrightness-depending.Thesetting„SUN“canonlybe
chosenwithpotentiometerA.
WhenusingtheremotecontrolIR-PD-DALI-1C,werecommandto
setpotentiometerAto„SUN“.PressingtheRESETbuttononthe
remotecontrolthenresetsthedetectortobrightness-independant
mode(SUN).
!
16. Settings by remote control in open state
Unlocking device –
Activation of the
programming mode
Resetting
when open:
Deletesall
valuessetwith
theremote
control,light
OFF.
Orientation light
on/off
Automatic reading
in the current light
value as new lumi-
nance set value
or
Dimming of the
lighting to the
desired brightness
value
Adjusting of the lumi-
nance set value from
50 to 1500 Lux:
+/– 5  Luxsteps
+/– 10 L u x  steps
+/–2 0 L u x  steps
max
50
Lux
1500
Lux
ON
OFF
max
50
Lux
1500
Lux
ON
OFF
DSI/
DALI
Switching between DSI
and DALI program;
The Factory setting
is DALI
or
+–
Full automatic /semi-
automatic mode (se.18)
Preset/user mode
(see section 23)
max
50
Lux
1500
Lux
ON
OFF
Follow-up time
orientation light
at
1
min
10
min
optional
optionaloptional
optional
1. Start light meas-
urement by long
press of the button
(see section 17)
2. Start LED ON/OFF
by a
short press of
the button
Follow-up time
Channel 1: 1 - 30min.
Follow-up time
Channel 2 (HVAC): 5 -
60 min. or impulse
1
min
5
min
30
min
60
min
Exit programming mode
Ifthereisnoentryfor
about3 min.
theprogramming
modeisended
automatically.
Permanent double lock
Withthisfunction,the
detectorispermanently
locked.Thismodecan
onlybeactivatedduring
5sec.afterclosingthe
detector.Inthismode,
onlythefunction„Light
ON/OFF“canbe
activated.
Red LED ashes
optional
max
50
Lux
1500
Lux
ON
OFF
t < 5 sec.
24. Reset the detector
Ifthedoublelockisactivated,thedetectorcanbeopenedagainas
follows:
• Disconnectoperatingvoltage
• Connectoperatingvoltagefor31 sec.to59 sec.
• Disconnectoperatingvoltageagain
• Connectoperatingvoltageagainandwaitfortheselftesting
• Opendetector
Withthisprocedure,theremotecontrolprogrammedvaluesarenot
deleted(beforeactivationofthedoublelock).
Ifthesettingisnotchangedbyremotecontrolafterdeactivationof
thedoublelock,thedetectorchangesinthedoublelockedmode
againafteraperiodof30minutes.Thiswaythedetectorcannotbe
unlockedduringanaccidentalpowerfailure.
Alternatively,thedetectorcanberesetinthisway:
SetpotentiometerAto“Sun”andpotentiometerBto“Test”.Thede-
tectornowisintestmodeandthepotentiometersettingsareactive.
AlloperatingLEDsareflashingforthreeseconds.
ExceptoftheINION/OFFsetting,thedetectorisresettofactory
settingorthesettingofthepotentionmeter.
Pushingthe“RESET”buttonontheremotecontrol,inopenedmode,
willdeleteallofthevalueswhichweresetbytheremotecontrol
(besideofINION/OFF)andsetthedetectorbackto
itsfactorysettings.
Factory settings
Thedetectorisdeliveredwiththefollowingfactory
settings:luxvalue:500 Lux,follow-uptime:10minutes.
Startingthedetectorinthefactoryprogramtheinitialisation
modestartswithaconstantashingofthethreeoperating
LEDs.
23. Manual Dimming - Preset /User
(longpresswhenclosed)
Youcandimmanuallybypressingtheexternalpushbuttonorthe
remotecontrolbuttons"min/max"–foralongtime
(>2 sec.).Whenthebuttonisreleased,thecurrentdimming
valueisretained.Uponreneweddimming,thedimmingdirection
isreversed.
max
50
Lux
1500
Lux
ON
OFF
Twodifferentoperatingmodesareselected
intheopenedstate.
Changingthemodeisdonebypressingthe"doublelock"button.
Eachtimethebuttonispressed,thecurrentoperatingmodeis
indicated:
Redshinesfor3 sec.=Preset
Greenshinesfor3 sec.=User
PRESET –
thesetvaluebrightnessissetduringstart-upoperationby
theinstallerandremainsunchanged.Thesetvaluebrightnesscong-
uredthroughmanualdimmingisonlyappliedforthetimebeing.
Theconstantlightregulationisnowdeactivated!Thecurrentset
articiallightisretainedindependentoftheambient/daylight
brightness!Afterswitchingoffandthenbackon,theoriginalset
setvaluebrightness
isreset=constantlightregulationisactivated.
USER can only be activated via the remote control
The
setvaluebrightness
ischangeduponeachmanualdimming
andre-adjustedbytheuser.Theconstantlightregulationremains
activated!
22. Manual Switching
(shortpresswhenclosed)
max
50
Lux
1500
Lux
ON
OFF
Youcanswitchthelightingonandoffmanuallybypressingthe
pushbuttonortheremotecontrolbutton“LightON/OFF”fora
shorttime.Itwillstayonoroffaslongaspeoplearedetected
plustheconguredfollowuptime.
17. Light regulation
Thedetectorhastwodifferentintegratedlightcontrolalgorithms.
Thesetvaluefortherstalgorithmisadjustedbypotentiometer
(LUX)onthedevice.Verysmalllightamounts,whichshine
directlytothedetector,haveasresultthatthesetvaluebrightness
isexceeded.
Thesecondalgorithmhasanintegrateddaylightcompensation.
Therefore,itisnecessarythatthedetectoranalysestheswitched
lightquantity.Thisalgorithmcanonlybeusedbyremotecontrol.
Theprogrammingofthesetvalueandthemeasurementofthe
lightquantityiscarriedoutintwosteps:

In the open state
• Thesetvalueisadjustedwithoutdaylight(pleasedarkenthe
room)byusingtheremotecontrol.
• Measuringthelightquantitywillbeinitiatedbyalongpress
(>3 sec.)ofthetestbutton.Thedetectorturnsthelighton
for5 min.at100 %.Thenthelightwillturnonandofffora
shorttimeandstaysonafterthat.Thismeasuringprocess
isshownbyaashinggreenLED(10 sec.off/1sec.on).
Thismeasuringprocessisrequiredforeachchangeofthe
setvalue.
Ifthesetting“permantorientationlight”ischosen,thefunc-
tiononlywillbeactiveafterthemeasuringprocessisdone.
Ifthemeasuringprocessisnotperformed,thedetectorperforms
itautomaticallywhentheambientlightislessthan50 luxfor1h.
MAN8677_PD2-M-DALI/DSI-1C_FC_230615_1
18. Full / Semi-automatic mode
max
50
Lux
1500
Lux
ON
OFF
Themodeischangedusingthebutton"Light"intheopenstate.
Eachtimethebuttonispressed,thecurrentoperatingmodeis
indicatedbytheLEDs:
Redshinesfor3 sec.=Fullautomaticmode
Greenshinesfor3 sec.=Semi-automaticmode
Full automatic operation
Inthisoperatingmode,thelightingswitchesautomaticallyon
andoffforincreasedcomfort,dependingonpresenceand
brightness.
Semi-automatic operation
Inthisoperatingmode,thelightturnsononlyafteramanual
switching,foranincreasedsavingssuccess(seesection22).
Switchingoffisautomaticallyormanually
(
seesection22
).
Thesemi-automaticmodebasicallybehaveslikethefullautomatic
mode.Theonlydifferenceisthattheswitchingonhastobedone
byhand.
Incasemotionisdetectedwithinthe10 sec.afterelapseofthe
follow-uptime,thedetectorswitchesthelightonagainandthe
follow-uptimestartsagain.Ifthereisnomotiondetectedwithin
the10 safterelapseofthefollow-uptime,thelighthastobe
turnedonmanually.
INI-OFF/ON mode:
Turnofforturnonthelightduringtheself-testcycleof
60 sec.Thelaststateisactive.Factorysettingisthatthe
lightisonduringinitialisation.
WhenINIOFFischosen,thedetectordoesnotswitch
onthelightaftervoltagesupply.Evenupondetected
movementthelightisswitchedononlyafter60 sec.
Startup behavior
:
Thesetvaluecanbereachedintwowaysafter
switchingon.Thedetectorswitchesthelightsonat10 %
andthenadjustsupwards(minbutton)oritswitchesthe
lightonat100 %andregulatesdown(maxbutton).
Thisisconfirmedbyashortflashingoftheredand
whiteLEDaswellasthelighting.Factorysettingisthat
thedetectorswitchesthelightonat100 %.
Reset of electronic ballasts
IfrequiredtheconnectedEBcanberesetandpreset
parametercanbedeleted.Pressthebutton“Reset”
for3secondsininitialisationmode.
!
19. Settings during the Self-test cycle
Intherst60secondsafterconnectingtheACvoltage,the
followingfunctionscanbeset:
20. Test mode/Reset
Test mode
Use“Test”buttonforactivatingthetestmode.
Usethe“Reset”buttontodeactivateit.
Reset in closed state
Thelightingisswitchedoff,andthefollow-uptimesare
reset.
Reset in open state
Pressingthebuttonfor>3 sec.deletesallsettings
(exceptofINION/OFF)andthedetectorisresetto
factorystate.
!
21. 100 h function
(longpress(>3 sec.)whenclosed)
max
50
Lux
1500
Lux
ON
OFF
Beforethelampcanbedimmed,thedimmingfunctionhas
tobesuppressedforacertaintimeinordertoburninthe
lamps.
T5uorescentlamps:80 h
T8uorescentlamps:100 h
Foractivatingthefunction,pressbutton
“LightON/OFF”
inclosed
state.Duringthistime,thedetectoronlyswitchesthelightONor
OFF.Adimmingtothesetvaluedoesnottakeplace.Afterhaving
activatedthefunction,theredandgreenLEDashalternately.
Bypressingthebutton
“LightON/OFF”
again,itispossibleto
deactivatethefunctionbeforethetimehaselapsed.
Failuretocomplytotheburn-inwouldleadtoreducingthelifeof
thelamp.Afurtherdisadvantagecouldbeunwantedrandomvari-
ationsinlightintensity.
!

This manual suits for next models

1

Other B.E.G. LUXOMAT Security Sensor manuals

B.E.G. LUXOMAT PD4-M-HCL-FC User guide

B.E.G. LUXOMAT

B.E.G. LUXOMAT PD4-M-HCL-FC User guide

B.E.G. LUXOMAT PD9-M-DALI/DSI-FC User guide

B.E.G. LUXOMAT

B.E.G. LUXOMAT PD9-M-DALI/DSI-FC User guide

B.E.G. LUXOMAT PD4-M-DIM-HVAC 16A User guide

B.E.G. LUXOMAT

B.E.G. LUXOMAT PD4-M-DIM-HVAC 16A User guide

B.E.G. LUXOMAT PD4-M-1C-GH-AP User manual

B.E.G. LUXOMAT

B.E.G. LUXOMAT PD4-M-1C-GH-AP User manual

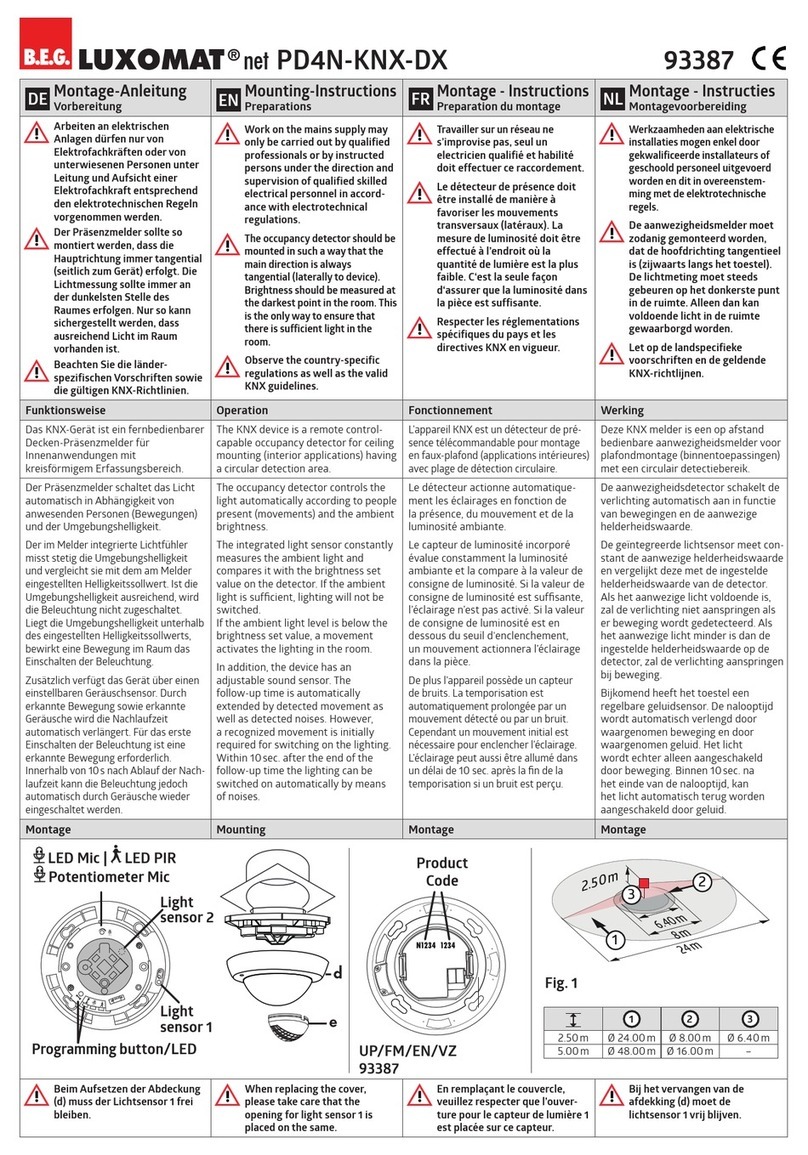
B.E.G. LUXOMAT PD4N-KNX-DX User manual

B.E.G. LUXOMAT

B.E.G. LUXOMAT PD4N-KNX-DX User manual

B.E.G. LUXOMAT PD2N-KNX-ST User manual

B.E.G. LUXOMAT

B.E.G. LUXOMAT PD2N-KNX-ST User manual

B.E.G. LUXOMAT PD4-M-1C-GH-SM User guide

B.E.G. LUXOMAT

B.E.G. LUXOMAT PD4-M-1C-GH-SM User guide

B.E.G. LUXOMAT PICO-DALILINK 93908 User manual

B.E.G. LUXOMAT

B.E.G. LUXOMAT PICO-DALILINK 93908 User manual

B.E.G. LUXOMAT PD4N-DALILINK User manual

B.E.G. LUXOMAT

B.E.G. LUXOMAT PD4N-DALILINK User manual

B.E.G. LUXOMAT Indoor 180-R/2W UK Service manual

B.E.G. LUXOMAT

B.E.G. LUXOMAT Indoor 180-R/2W UK Service manual

B.E.G. LUXOMAT PD3-1C User guide

B.E.G. LUXOMAT

B.E.G. LUXOMAT PD3-1C User guide

B.E.G. LUXOMAT RC-plus Service manual

B.E.G. LUXOMAT

B.E.G. LUXOMAT RC-plus Service manual

B.E.G. LUXOMAT PD2N-KNX-BA-EM User manual

B.E.G. LUXOMAT

B.E.G. LUXOMAT PD2N-KNX-BA-EM User manual

B.E.G. LUXOMAT PD9-M-1C-FC User guide

B.E.G. LUXOMAT

B.E.G. LUXOMAT PD9-M-1C-FC User guide

B.E.G. LUXOMAT LC-Click-N 140 Owner's manual

B.E.G. LUXOMAT

B.E.G. LUXOMAT LC-Click-N 140 Owner's manual

B.E.G. LUXOMAT PD4-CAS-GH User manual

B.E.G. LUXOMAT

B.E.G. LUXOMAT PD4-CAS-GH User manual

B.E.G. LUXOMAT PD2N-KNX-DX User manual

B.E.G. LUXOMAT

B.E.G. LUXOMAT PD2N-KNX-DX User manual

B.E.G. LUXOMAT PD2N-KNX-ST-EM User manual

B.E.G. LUXOMAT

B.E.G. LUXOMAT PD2N-KNX-ST-EM User manual

B.E.G. LUXOMAT PD4N-DALILINK User manual

B.E.G. LUXOMAT

B.E.G. LUXOMAT PD4N-DALILINK User manual

B.E.G. LUXOMAT PD2N-KNX-ST-FT User manual

B.E.G. LUXOMAT

B.E.G. LUXOMAT PD2N-KNX-ST-FT User manual

B.E.G. LUXOMAT PD2-M-DALI User guide

B.E.G. LUXOMAT

B.E.G. LUXOMAT PD2-M-DALI User guide

B.E.G. LUXOMAT PD4-CAS-GH User manual

B.E.G. LUXOMAT

B.E.G. LUXOMAT PD4-CAS-GH User manual

B.E.G. LUXOMAT PD2N-KNX-BA User manual

B.E.G. LUXOMAT

B.E.G. LUXOMAT PD2N-KNX-BA User manual

Popular Security Sensor manuals by other brands

Axis T8331-E PIR installation guide

Axis

Axis T8331-E PIR installation guide

Optex X-ZONE manual

Optex

Optex X-ZONE manual

tibelec FL-130 manual

tibelec

tibelec FL-130 manual

Dragon Wholesaling DFD30 Operation instructions

Dragon Wholesaling

Dragon Wholesaling DFD30 Operation instructions

Elcometer 136 operating instructions

Elcometer

Elcometer 136 operating instructions

AJAX LifeQuality Jeweller user manual

AJAX

AJAX LifeQuality Jeweller user manual

B.E.G. LUXOMAT PD4N-KNX-K-DX Short manual

B.E.G.

B.E.G. LUXOMAT PD4N-KNX-K-DX Short manual

Z-Wave EAP-402I manual

Z-Wave

Z-Wave EAP-402I manual

Hioki 3120-21 instruction manual

Hioki

Hioki 3120-21 instruction manual

Hytronik HCD438 manual

Hytronik

Hytronik HCD438 manual

Atlantis A18-DSD06 manual

Atlantis

Atlantis A18-DSD06 manual

Orno OR-DC-619 operating manual

Orno

Orno OR-DC-619 operating manual

ARCTIC HAYES AHATEX12 user manual

ARCTIC HAYES

ARCTIC HAYES AHATEX12 user manual

Sensit VMD Set-up & operating instructions

Sensit

Sensit VMD Set-up & operating instructions

Global Fire Equipment ZEOS-AD manual

Global Fire Equipment

Global Fire Equipment ZEOS-AD manual

SensoScientific Sub-1 GHz Series Quick setup guide

SensoScientific

SensoScientific Sub-1 GHz Series Quick setup guide

mcmurdo SMARTFIND PLUS G5 user manual

mcmurdo

mcmurdo SMARTFIND PLUS G5 user manual

Visonic DA-5 installation instructions

Visonic

Visonic DA-5 installation instructions

manuals.online logo
manuals.online logoBrands
  • About & Mission
  • Contact us
  • Privacy Policy
  • Terms and Conditions

Copyright 2025 Manuals.Online. All Rights Reserved.