manuals.online logo
Brands
  1. Home
  2. •
  3. Brands
  4. •
  5. B.E.G.
  6. •
  7. Security Sensor
  8. •
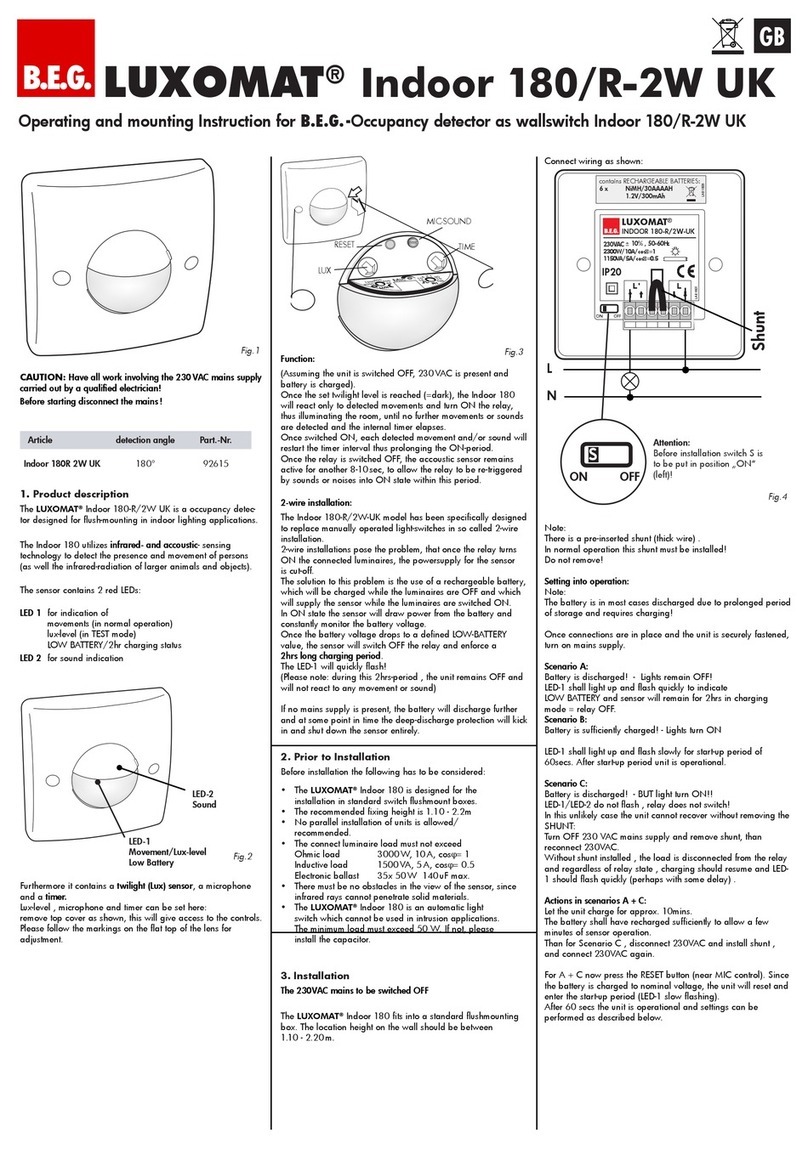
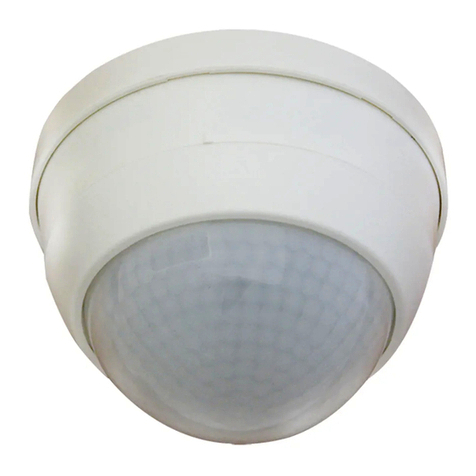
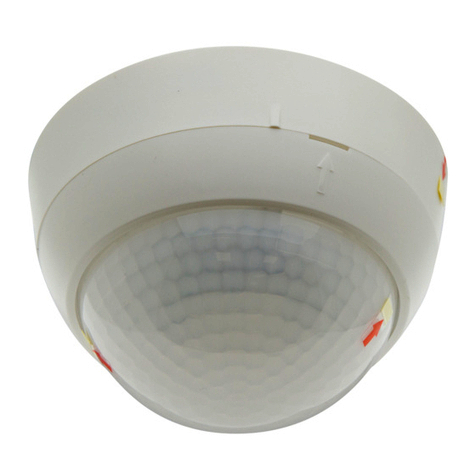
  9. B.E.G. LUXOMAT PD4-M-GH-SM User guide

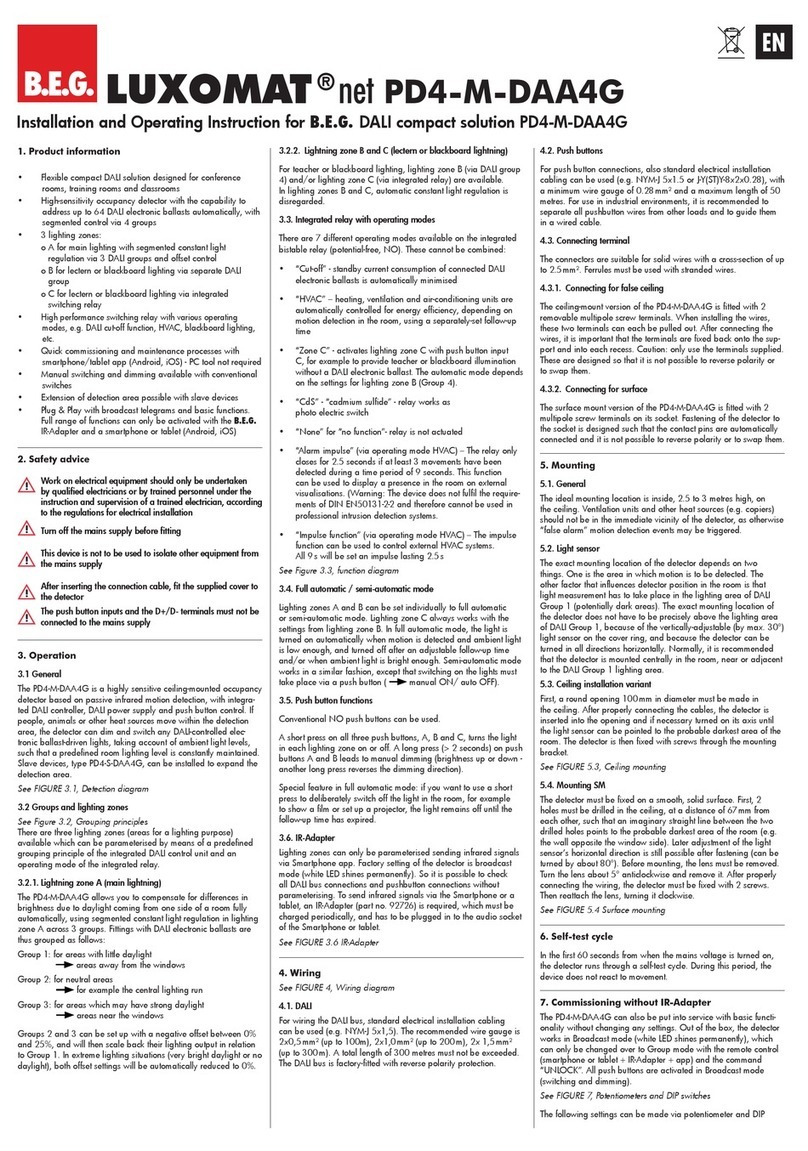
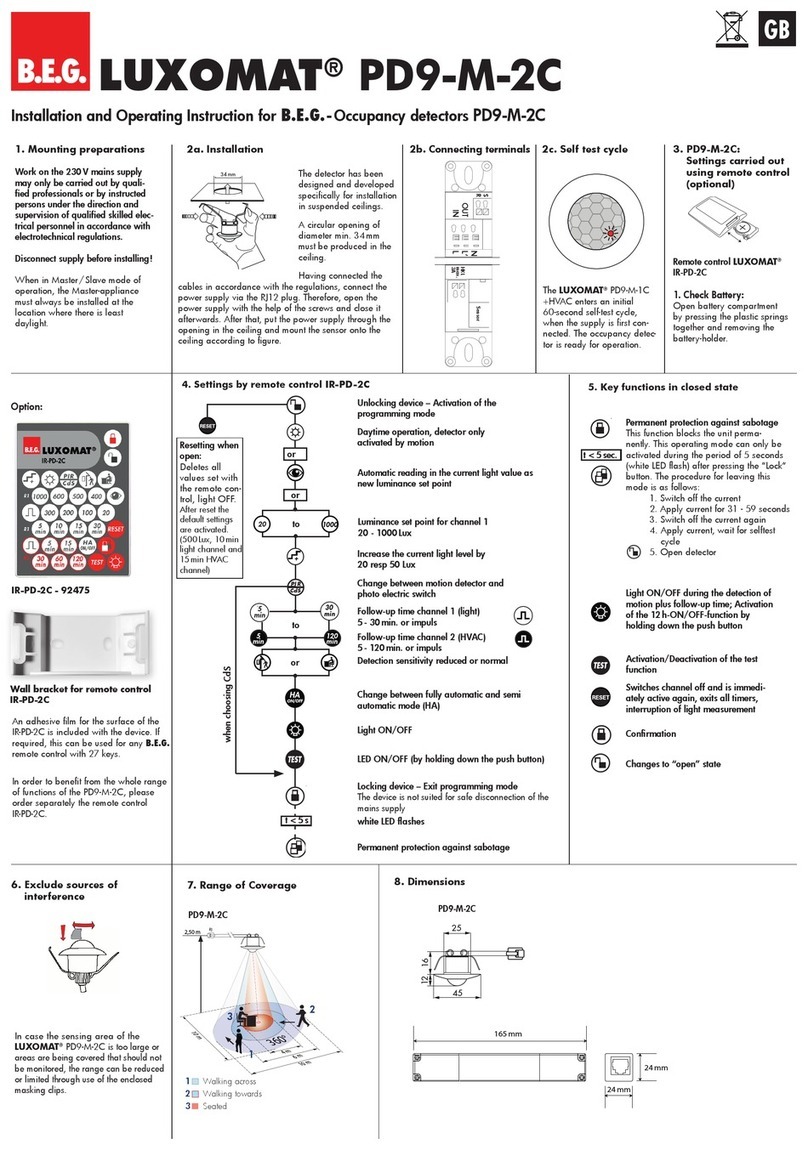
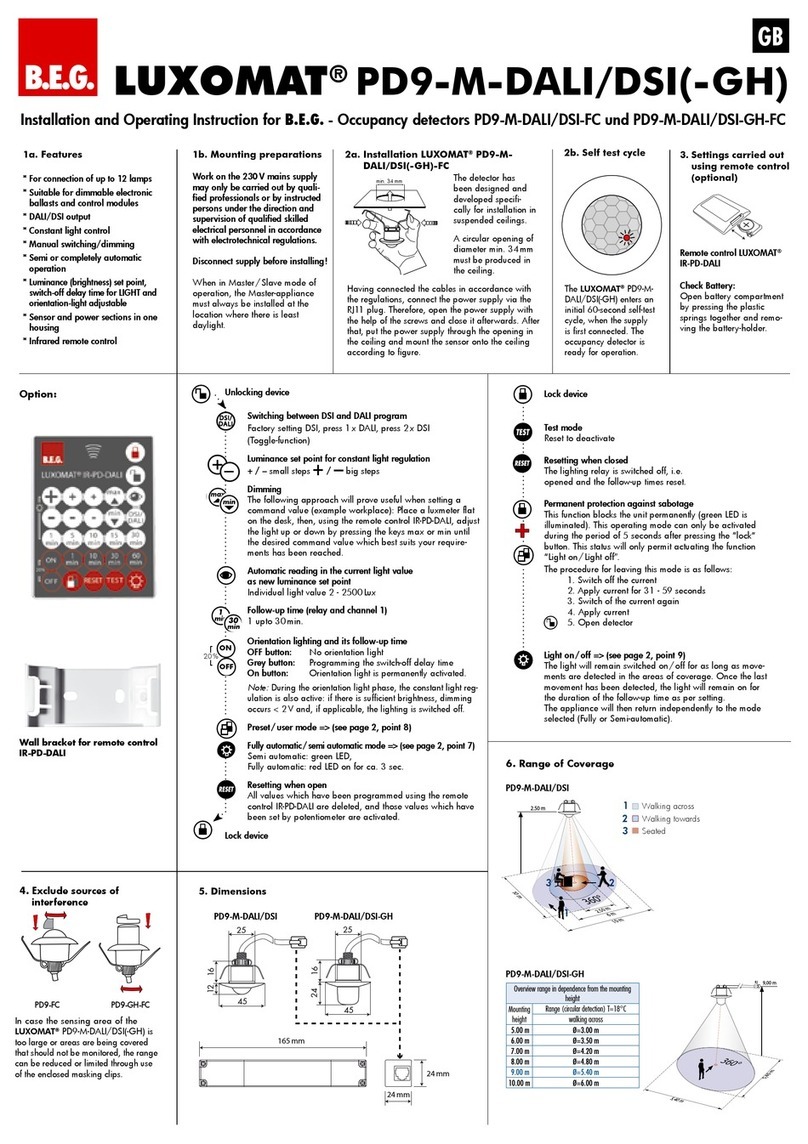
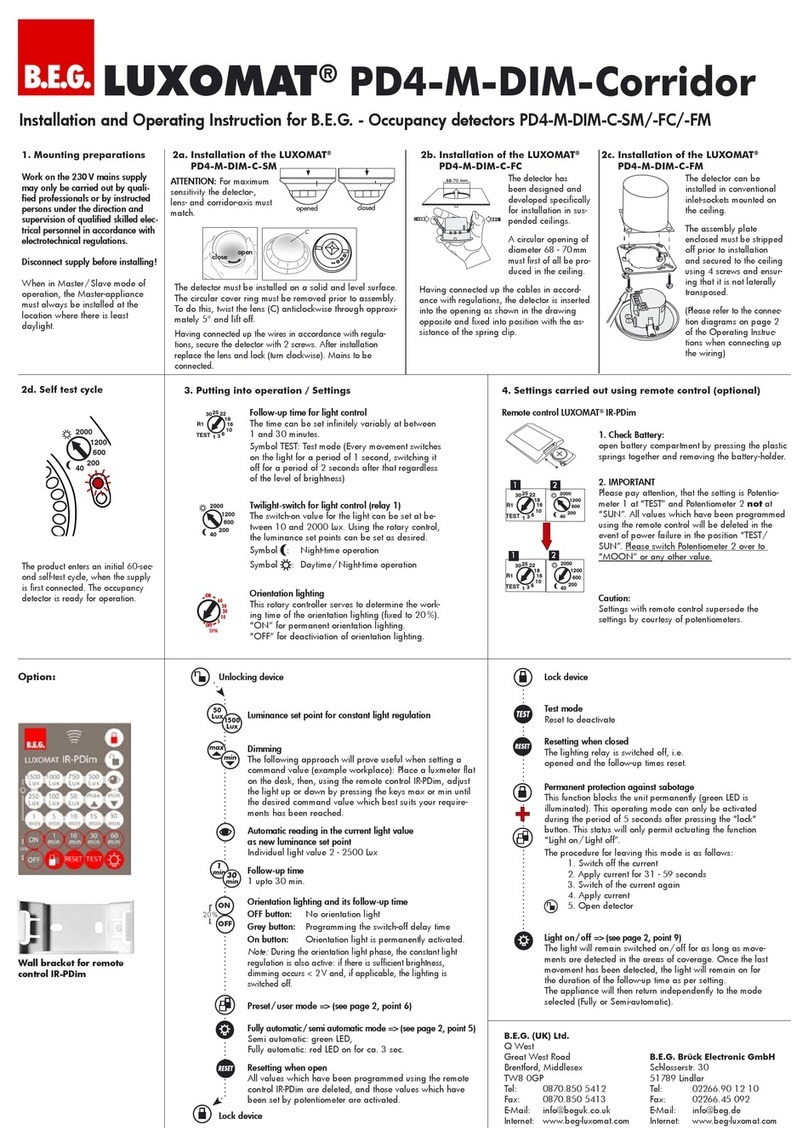
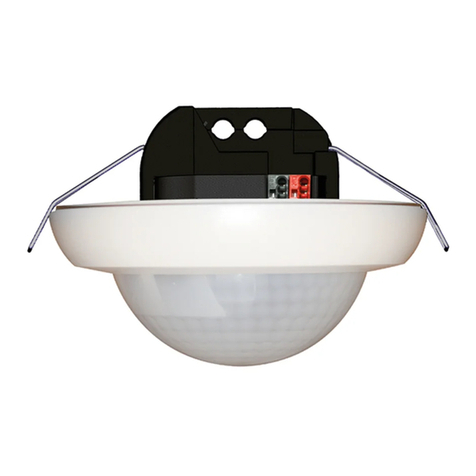
B.E.G. LUXOMAT PD4-M-GH-SM User guide

2000
1200
600
200
40
C
N L'L N L'L
N L'
L
70
98
21
44
98
3. Putting into operation / Settings
Factory settings
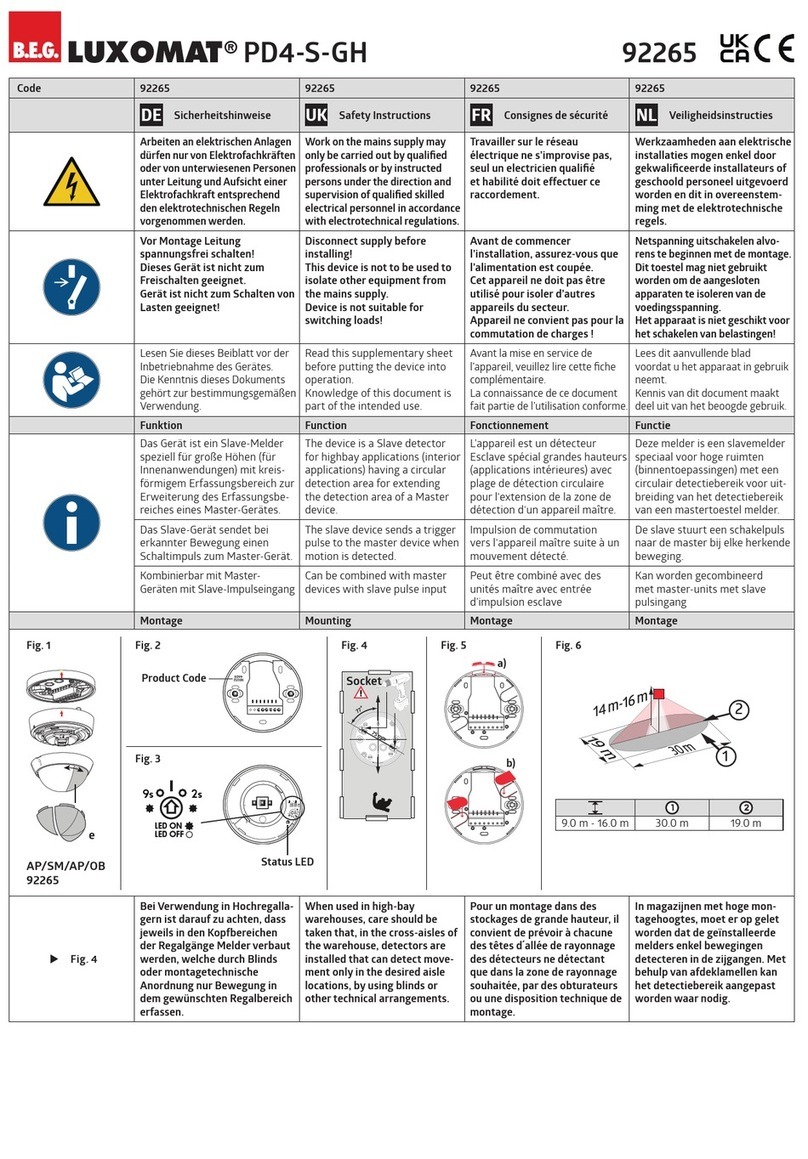
The PD4-M-GH is presetted with time setting 5 min. and twilight switch
1000 Lux.
Attention:
No settings on the unit are possible with potentiometers. Modifications are
only available by remote control IR-PD4-GH.
Installation and Operating Instruction for B.E.G. - Occupancy detectors PD4-M-GH-SM
2a. Installation of the LUXOMAT®
PD4-M-GH-SM
Unlocking device
Lock device
4. Settings carried out using remote control (optional)
Remote control LUXOMAT®IR-PD4-GH
1. Check Battery:
open battery compartment by pressing the plastic
springs together and removing the battery-holder.
Caution:
Settings with remote control supersede the settings
by courtesy of potentiometers.
1. Mounting preparations
Work on the 230 V mains supply
may only be carried out by quali-
fied professionals or by instructed
persons under the direction and
supervision of qualified skilled
electrical personnel in accordance
with electrotechnical regulations.
Disconnect supply before installing!
When in Master/Slave mode of
operation, the Master-appliance
must always be installed at the
location where there is least
daylight.
Luminance set point
Sun button - preselected light
daylight operation
Automatic reading in the current light value
as new luminance set point
Individual light value 10 - 2000 Lux
Follow-up time (relay and Channel 1)
15 sec. upto 30 min.
Impulse function (relay and Channel 1)
1 sec. ON, 9 sec. OFF
Change between operation modes
fully automatic/
semi automatic mode => (see page 2, point 6)
Semi automatic: green LED,
Fully automatic: red LED on for ca. 3 sec.
Determination of the switch on threshold
to attain a calculatory target value
Resetting when open
All values which have been programmed using the
remote control IR-PD4-GH are deleted, and those values
which have been set by potentiometer are activated.
Lock device
Test mode
Reset to deactivate
Resetting when closed
The lighting relay is switched off, i.e.
opened and the follow-up times reset.
Light on/off
The light will remain switched on/off for as long as move-
ments are detected in the areas of coverage. Once the last
movement has been detected, the light will remain on for
the duration of the follow-up time as per setting.
The appliance will then return independently to the mode
selected (Fully or Semi-automatic).
Option:
Wall bracket for remote control
IR-PD4-GH
The product enters an initial 60-second
self-test cycle, when the supply is first
connected. The occupancy detector is
ready for operation.
2c. Self test cycle
IR-PD4-GH
IR-PD-Mini
B.E.G. LUXOMAT®PD4-M-GH-SM
The detector must be installed on a solid and
level surface.
The circular cover ring must be removed
prior to assembly. To do this, twist the lens (C) anti-
clockwise through approximately 5° and lift off.
Having connected up the wires in accordance with
regulations, secure the detector with 2 screws.
After installation replace the lens and lock (turn clock-
wise). Mains to be connected
.
ATTENTION:
Install the unit in such a manner that
both markings on the housing are positioned in the
longitudinal axis of the area to be monitored (e.g.
high-bay corridors)
5. PD4-M-GH-SM - Dimensions
with jumper = switched live (L‘)
without jumper = potentialfree
2b. Range in dependence from the mounting height
Mounting
height
Range (circular detection) T=17°C
walking across
2.00 m r=7.50 m Ø=15.00 m
2.50 m r=9.00 m Ø=18.00 m
3.00 m r=11.00 m Ø=22.00 m
3.50 m r=13.00 m Ø=26.00 m
4.00 m r=15.00 m Ø=30.00 m
4.50 m r=17.00 m Ø=34.00 m
5.00 m r=18.50 m Ø=37.00 m
6.00 m r=18.50 m Ø=37.00 m
7.00 m r=18.50 m Ø=37.00 m
8.00 m r=22.00 m Ø=44.00 m
9.00 m r=22.00 m Ø=44.00 m
10.00 m r=22.00 m Ø=44.00 m
r=radius / Ø=diameter


15
sec
30
min
+
HA
ON
HA
OFF
close
open


B.E.G. (UK) Ltd.
The Lightbox
111, Power Road, Chiswick
W4 5PY
Tel: 0870.850 5412
Fax: 0870.850 5413
E-Mail: inf[email protected]
Internet: www.beg-luxomat.com
B.E.G. Brück Electronic GmbH
Schlosserstr. 30
51789 Lindlar
Tel: 02266.90 12 10
Fax: 02266.45 092
E-Mail: inf[email protected]
Internet: www.beg-luxomat.com
max
50
Lux
1500
Lux
ON
OFF
Sensor and power supply in one
Power supply: 230 V~ +6 %/-10 %
Power consumption: < 1 W
Ambient temperature: -25°C – +40°C
Degree of protection/class:
IP20 / II
Settings:
locally and by remote control
Light values - IR-PD4-GH:
10 - 2000 Lux
Parallel operation:
Master/Slave
Area of coverage:
circular 360°
Range of coverage Ø H 2.5 m / T=17°C: 22 m tangential
Recommended height for mounting:
2 - 3 m
Light measurement:
mixed light, daylight + artificial light
Lux values:
10 - 2000 Lux
• Relay/Channel 1 for light-connection
Type of contact
: NOC/with pretravel tungsten contact
Contact load:
2300 W, 230 V~, 10 A cos (ϕ) =1 /
1150 VA cos (ϕ) = 0.5
Time-settings:
15 sec. - 30 min. / Test
Max. no. of series-connected electronic ballasts:
depending on type and make, total connectable 140 µF.
Dimensions H x Ø [mm]
: 98 x 65
Technical data PD4-GH-Slave
Electrical data same as above, but just one channel for
signaling motion detection
Declaration of Conformity:
The product complies with
the low voltage recommendation 2006/95/EC and the
EMV recommendation 2004/108/EC.
9.
Technical data
PD4-M-GH
10. Wiring diagrams
Type SM
PD4-M-GH (Master) 92245
PD4-S-GH (Slave) 92265
LUXOMAT®Remote control:
IR-PD4-GH (incl. wall bracket) 92215
IR-PD-Mini 92159
Accessory:
BSK Ball basket guard 92199
Wall bracket for remote control as replacement
92100
12. Article / Part-Nr. / Accessory
MAN 5636 – 01_09/2008
13. LED-functional indicators, fault-finding
The functional indicators in the case of the LUXOMAT®
PD4-M-GH (red and green LED‘s)
Red LED indicating self-checking mode (over a period
of 60 seconds following mains‘-supply lock-on)
Flashing at intervals of 1 second
EEPROM/memory empty
Flashing rapidly
EEPROM/memory contains information
Red LED as an indicator of status
Flashing irregularly
Movements are detected within the area of coverage
Flashing regularly
Detector identifies bright, light off
(dependent upon operating mode)
Not illuminated
Detector identifies dark, light on
(dependent upon operating mode)
Flashing extremely rapidly
Too bright / Too dark / Undefined
Red LED as an acknowledgement of receipt for
commands from the remote control
Illuminated for 2 seconds
Signal validly received
Illuminated for 0.5 seconds
Not-accepted command, detector blocked
Flashing extremely rapidly
Not-accepted command, occurs, for example, when
an attempt is made to input twilight-value are too
bright or too dark
Lights up for 3 seconds
Fully automatic mode
Flashing for 3 seconds
Semi automatic mode
Green LED as an indicator of status (only for status
“Permanent protection against sabotage”)
Flashing irregularly
Movement are detected within the area of coverage
Flashing regularly
Detector identifies bright, light off
(dependent upon operating mode)
Not illuminated
Detector identifies dark, light on
(dependent upon operating mode)
lluminated for 2 seconds
Signal validly received
(dependent upon operating mode)
Attention:
For switching phase put a jumper cable.
Terminal connection for standard operation
S R N L L NO NO
SLAVE
8.
Range of Coverage
11. PD4-M-GH - Connections
Connections
NONO
L LRS N
SLAVE
5. Fully / Semi automatic mode
(
for IR-PD functions see page 1
)
Fully automatic operation
In this operating mode, the lighting switches automati-
cally on and off for increased comfort, depending on
presence and brightness.
Semiautomatic operation
(Semiautomatic can only be activated via
the remote control!)
In this operating condition, in order to gain increased
savings, the lighting is energized only after being manu-
ally switched on. Switch-off takes place automatically.
The semiautomatic mode basically behaves like the fully
automatic one. However, the difference is that switching-
on must always be carried out manually!
As many (closer-contact) buttons as desired can be wired
in parallel on the “S” button input (ON/OFF).
6. Manual Switching
You can switch the lighting on and off manually by
pressing the pushbutton for a short time. It will stay on or
off as long as people are detected plus the congured
follow up time.
WARRANTY
YEARS
3
ca. 28 m
Ø 44 m
360°
Mounting height
9 m
HA
ON
HA
OFF

Other B.E.G. Security Sensor manuals

B.E.G. LUXOMAT PD9-M-1C+HVAC User guide

B.E.G.

B.E.G. LUXOMAT PD9-M-1C+HVAC User guide

B.E.G. LUXMAT PD4-S User guide

B.E.G.

B.E.G. LUXMAT PD4-S User guide

B.E.G. LUXOMAT PD4-M-DIM-Corridor User guide

B.E.G.

B.E.G. LUXOMAT PD4-M-DIM-Corridor User guide

B.E.G. LUXOMAT PD9-S User manual

B.E.G.

B.E.G. LUXOMAT PD9-S User manual

B.E.G. 93385 User manual

B.E.G.

B.E.G. 93385 User manual

B.E.G. LUXOMAT PD9-DIGI-FC User guide

B.E.G.

B.E.G. LUXOMAT PD9-DIGI-FC User guide

B.E.G. LUXOMAT PD4-M-1C-C-SM User guide

B.E.G.

B.E.G. LUXOMAT PD4-M-1C-C-SM User guide

B.E.G. LUXOMAT PD2-M-1C User guide

B.E.G.

B.E.G. LUXOMAT PD2-M-1C User guide

B.E.G. LUXOMAT PD4-S Series User manual

B.E.G.

B.E.G. LUXOMAT PD4-S Series User manual

B.E.G. LUXOMAT PD4-S-DAA4G User guide

B.E.G.

B.E.G. LUXOMAT PD4-S-DAA4G User guide

B.E.G. LUXOMAT net PD11-KNX-FLAT-BA User manual

B.E.G.

B.E.G. LUXOMAT net PD11-KNX-FLAT-BA User manual

B.E.G. LUXOMAT PD4-BMS User manual

B.E.G.

B.E.G. LUXOMAT PD4-BMS User manual

B.E.G. LUXOMAT PD11-KNX-FLAT-DX How to use

B.E.G.

B.E.G. LUXOMAT PD11-KNX-FLAT-DX How to use

B.E.G. LUXOMAT PD2-M-DALI/DSI-SM/FC User guide

B.E.G.

B.E.G. LUXOMAT PD2-M-DALI/DSI-SM/FC User guide

B.E.G. 93386 User manual

B.E.G.

B.E.G. 93386 User manual

B.E.G. LUXOMAT PD2-M-2C User manual

B.E.G.

B.E.G. LUXOMAT PD2-M-2C User manual

B.E.G. MINI-S-PP-FC User guide

B.E.G.

B.E.G. MINI-S-PP-FC User guide

B.E.G. LUXOMAT PD2N-KNX-ST-UP User manual

B.E.G.

B.E.G. LUXOMAT PD2N-KNX-ST-UP User manual

B.E.G. LUXOMAT PD4-M-DIM-Corridor Series User guide

B.E.G.

B.E.G. LUXOMAT PD4-M-DIM-Corridor Series User guide

B.E.G. LUXOMAT RC-plus next N-230 KNX-DX User manual

B.E.G.

B.E.G. LUXOMAT RC-plus next N-230 KNX-DX User manual

B.E.G. LUXOMAT PD4-M-DAA4G User guide

B.E.G.

B.E.G. LUXOMAT PD4-M-DAA4G User guide

B.E.G. LUXOMAT net PD11-KNX-FLAT-ST User manual

B.E.G.

B.E.G. LUXOMAT net PD11-KNX-FLAT-ST User manual

B.E.G. LUXOMAT PD1-M-DIM User guide

B.E.G.

B.E.G. LUXOMAT PD1-M-DIM User guide

B.E.G. LUXOMAT LC-Click 140 Owner's manual

B.E.G.

B.E.G. LUXOMAT LC-Click 140 Owner's manual

Popular Security Sensor manuals by other brands

Siemens 5WG1 258-2EB22 Technical product information

Siemens

Siemens 5WG1 258-2EB22 Technical product information

Aerox 4110-725 SERIES OPERATING INSTRUCTIONS AND EQUIPMENT LIMITATIONS

Aerox

Aerox 4110-725 SERIES OPERATING INSTRUCTIONS AND EQUIPMENT LIMITATIONS

CP EBDHS-PRM-LT30 Product guide

CP

CP EBDHS-PRM-LT30 Product guide

Electronics Line EL-4607 quick start guide

Electronics Line

Electronics Line EL-4607 quick start guide

Rittal DK 7030.130 Installation and Short User Guide

Rittal

Rittal DK 7030.130 Installation and Short User Guide

Honeywell Home HS3PIR2X quick start guide

Honeywell Home

Honeywell Home HS3PIR2X quick start guide

Industrial Scientific MX6 iBrid Operation guide

Industrial Scientific

Industrial Scientific MX6 iBrid Operation guide

AECO SMS88-P5 NO+2NC CL LC5 manual

AECO

AECO SMS88-P5 NO+2NC CL LC5 manual

Vision-EL 75501 instructions

Vision-EL

Vision-EL 75501 instructions

Fracarro TEATRO'35 EVO quick start guide

Fracarro

Fracarro TEATRO'35 EVO quick start guide

DSC PG9933 Installation and operating instructions

DSC

DSC PG9933 Installation and operating instructions

AJAX DoorProtect quick start guide

AJAX

AJAX DoorProtect quick start guide

FISCHER DAREX 712967 Instructions for use

FISCHER DAREX

FISCHER DAREX 712967 Instructions for use

Niko 1-55511 Series manual

Niko

Niko 1-55511 Series manual

GHM Delta OHM HD2013.3 operating manual

GHM

GHM Delta OHM HD2013.3 operating manual

Zennio WinDoor RF quick start guide

Zennio

Zennio WinDoor RF quick start guide

SAFE FIRE DETECTION ProLocator Fire Sniffer PI6198600 Operator's manual

SAFE FIRE DETECTION

SAFE FIRE DETECTION ProLocator Fire Sniffer PI6198600 Operator's manual

Perel E300LS user manual

Perel

Perel E300LS user manual

manuals.online logo
manuals.online logoBrands
  • About & Mission
  • Contact us
  • Privacy Policy
  • Terms and Conditions

Copyright 2025 Manuals.Online. All Rights Reserved.