manuals.online logo
Brands
  1. Home
  2. •
  3. Brands
  4. •
  5. Balboa
  6. •
  7. Control Panel
  8. •
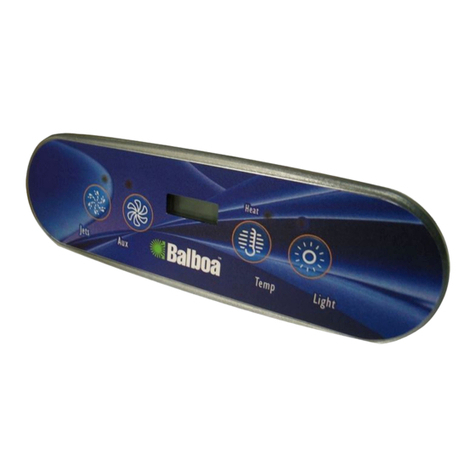
  9. Balboa GL Series User manual

Balboa GL Series User manual

Other manuals for GL Series

1

This manual suits for next models

2

Other Balboa Control Panel manuals

Balboa ML700 User manual

Balboa

Balboa ML700 User manual

Balboa spaTouch series User manual

Balboa

Balboa spaTouch series User manual

Balboa TP800 series User manual

Balboa

Balboa TP800 series User manual

Balboa BP2000 Operator's manual

Balboa

Balboa BP2000 Operator's manual

Balboa MVP260 Parts list manual

Balboa

Balboa MVP260 Parts list manual

Balboa TP200 PANEL User manual

Balboa

Balboa TP200 PANEL User manual

Balboa ML260 User manual

Balboa

Balboa ML260 User manual

Balboa TP200 PANEL User manual

Balboa

Balboa TP200 PANEL User manual

Balboa EL Series User manual

Balboa

Balboa EL Series User manual

Balboa ML550 User manual

Balboa

Balboa ML550 User manual

Balboa GL Series User manual

Balboa

Balboa GL Series User manual

Balboa TP600 User manual

Balboa

Balboa TP600 User manual

Balboa TP900 series Reference guide

Balboa

Balboa TP900 series Reference guide

Balboa ML400 User manual

Balboa

Balboa ML400 User manual

Balboa TP500 User manual

Balboa

Balboa TP500 User manual

Balboa TP600 User manual

Balboa

Balboa TP600 User manual

Balboa ML900 User manual

Balboa

Balboa ML900 User manual

Balboa SUV M-7 Parts list manual

Balboa

Balboa SUV M-7 Parts list manual

Popular Control Panel manuals by other brands

GENEVO PRiMA 6 installation manual

GENEVO

GENEVO PRiMA 6 installation manual

NAPCO X 255 - Programming instructions

NAPCO

NAPCO X 255 - Programming instructions

Next Systems UNIR1 230 instruction manual

Next Systems

Next Systems UNIR1 230 instruction manual

HORNER HE-XPW1E0 user manual

HORNER

HORNER HE-XPW1E0 user manual

DSC CLASSIC PC1555 instruction manual

DSC

DSC CLASSIC PC1555 instruction manual

Bosch Solution 2000 installation guide

Bosch

Bosch Solution 2000 installation guide

VRinsight MS Panel user manual

VRinsight

VRinsight MS Panel user manual

Zeiss SYCOP 3 Quick reference guide

Zeiss

Zeiss SYCOP 3 Quick reference guide

HULTSTEINS ECOFRIDGE DISPLAY user manual

HULTSTEINS

HULTSTEINS ECOFRIDGE DISPLAY user manual

Elkron C420 Programming manual

Elkron

Elkron C420 Programming manual

GST GST200-2 Installation and operation manual

GST

GST GST200-2 Installation and operation manual

Efka Variocontrol V810 instruction manual

Efka

Efka Variocontrol V810 instruction manual

RDZ PC-HRX user manual

RDZ

RDZ PC-HRX user manual

STG-BEIKIRCH MZ3 operation instruction

STG-BEIKIRCH

STG-BEIKIRCH MZ3 operation instruction

AMX AutoPatch CP-15 instruction manual

AMX

AMX AutoPatch CP-15 instruction manual

Cebora 208-10 instruction manual

Cebora

Cebora 208-10 instruction manual

Satel CA-6 KLED-S user manual

Satel

Satel CA-6 KLED-S user manual

Evolution IQ plus 800 installation manual

Evolution

Evolution IQ plus 800 installation manual

manuals.online logo
manuals.online logoBrands
  • About & Mission
  • Contact us
  • Privacy Policy
  • Terms and Conditions

Copyright 2025 Manuals.Online. All Rights Reserved.

EL/GL Series - Mach 3
ML240 Quick Reference Guide
Initial Start-up
When your spa is first actuated, it will go into Priming
mode (after displaying some configuration information).
Please see the M-7 Installation Instruction Manual for
complete instructions on Power-up and Pump Priming.
The Priming mode will last for up to 4 minutes and
then the spa will begin to heat and maintain the water
temperature in the Standard mode. You can exit Priming
mode early by pressing “Temp”.
Temp
Press the “Temp” button once to display the set
temperature. To change the set temperature, press the pad
a second time before the LCD stops flashing. Each press of
the “Temp” button will continue to either raise or lower the
set temperature.
If the opposite direction is desired, release the pad and let
the display revert to the current water temperature. Press
the pad to display the set temperature, and again to make
the temperature change in the desired direction.
After three seconds, the LCD will automatically display the
last measured spa temperature.
Jets
Press the “Jets” button once to turn pump 1 on or off, and
to shift between low and high speeds if equipped. If left
running, the pump will turn off after a timeout period. The
pump 1 low speed timeout on some systems may be as
long as 4 hours.
On non-circ systems, the low speed of pump 1 runs
when the blower or any other pump is on. It may also
activate for at least 1 minute every 30 minutes to detect
the spa temperature (polling) and then to heat to the set
temperature if needed, depending upon mode. When the
low speed turns on automatically, it cannot be deactivated
from the panel; however, the high speed may be started.
Aux LightTempJets Aux LightTempJets
YXcYfX$`ejkild\ekj%Zfd
Mode
A button combination is used to switch between
standard, economy, and sleep modes. Press “Temp”
followed by “Light” to enter mode programming, press
“Temp” to cycle through to desired mode (LCD flashes
until confirmed), then press “Light” to confirm selection.
Standard mode maintains the desired temperature. Note that
the last measured spa temperature displayed is current only
when the pump has been running for at least 1 minute.
“” will appear on the display momentarily when you
switch into Standard Mode.
Economy mode heats the spa to the set temperature only
during filter cycles. “ ” will appear solid when the
temperature is not current and will alternate with the
temperature when the temperature is current.
Pressing “Jets” while in Economy mode puts the spa in
Standard-In-Economy mode, (“ ”) which operates the
same as Standard Mode, then reverts to Economy Mode
automatically after 1 hour. During this time, pressing
“Temp” followed by “Light” will revert the mode to
Economy immediately.
Sleep mode heats the spa to within 20°F (11°C) of the set
temperature only during filter cycles. “ ” will appear on
the display until mode is changed.
Standby Mode
Pressing “Temp” followed by “Aux” or “Jets 2” or “Blower”
will turn off all spa functions temporarily. This is helpful
when changing a filter. Pressing any button exits Standby
mode. On some systems the “Jets” button will control the
pump in Standby Mode (“Drain Mode”). In this case, press
any other button to exit. System will revert to previous
mode after 1 hour.
Locking Features
If this panel is used as the main panel, locking features will
not be available.
If this panel is used as a remote or additional panel, it will
lock when the main panel is locked. To unlock this panel,
unlock the main panel.
In the same way, the set temperature can be locked and
unlocked by a main panel. When the set temperature is
locked, it cannot be changed from either panel.
Additional Features
Refer to your User Guide for additional details and features
that are available with your ML240 panel and EL/GL
Series system.
P/N 40634-80_B 06/14/2006
900854