manuals.online logo
Brands
  1. Home
  2. •
  3. Brands
  4. •
  5. Balt
  6. •
  7. Indoor Furnishing
  8. •
  9. Balt iFlex BLT-90005 User manual

Balt iFlex BLT-90005 User manual

1
123456789012345678901234567890121234567890123456789012345678901212345678901234
123456789012345678901234567890121234567890123456789012345678901212345678901234
123456789012345678901234567890121234567890123456789012345678901212345678901234
123456789012345678901234567890121234567890123456789012345678901212345678901234
123456789012345678901234567890121234567890123456789012345678901212345678901234
123456789012345678901234567890121234567890123456789012345678901212345678901234
123456789012345678901234567890121234567890123456789012345678901212345678901234
123456789012345678901234567890121234567890123456789012345678901212345678901234
123456789012345678901234567890121234567890123456789012345678901212345678901234
123456789012345678901234567890121234567890123456789012345678901212345678901234
123456789012345678901234567890121234567890123456789012345678901212345678901234
123456789012345678901234567890121234567890123456789012345678901212345678901234
123456789012345678901234567890121234567890123456789012345678901212345678901234
123456789012345678901234567890121234567890123456789012345678901212345678901234
123456789012345678901234567890121234567890123456789012345678901212345678901234
123456789012345678901234567890121234567890123456789012345678901212345678901234
123456789012345678901234567890121234567890123456789012345678901212345678901234
123456789012345678901234567890121234567890123456789012345678901212345678901234
123456789012345678901234567890121234567890123456789012345678901212345678901234
123456789012345678901234567890121234567890123456789012345678901212345678901234
123456789012345678901234567890121234567890123456789012345678901212345678901234
123456789012345678901234567890121234567890123456789012345678901212345678901234
123456789012345678901234567890121234567890123456789012345678901212345678901234
123456789012345678901234567890121234567890123456789012345678901212345678901234
123456789012345678901234567890121234567890123456789012345678901212345678901234
123456789012345678901234567890121234567890123456789012345678901212345678901234
123456789012345678901234567890121234567890123456789012345678901212345678901234
123456789012345678901234567890121234567890123456789012345678901212345678901234
123456789012345678901234567890121234567890123456789012345678901212345678901234
123456789012345678901234567890121234567890123456789012345678901212345678901234
123456789012345678901234567890121234567890123456789012345678901212345678901234
123456789012345678901234567890121234567890123456789012345678901212345678901234
123456789012345678901234567890121234567890123456789012345678901212345678901234
123456789012345678901234567890121234567890123456789012345678901212345678901234
123456789012345678901234567890121234567890123456789012345678901212345678901234
123456789012345678901234567890121234567890123456789012345678901212345678901234
123456789012345678901234567890121234567890123456789012345678901212345678901234
123456789012345678901234567890121234567890123456789012345678901212345678901234
123456789012345678901234567890121234567890123456789012345678901212345678901234
123456789012345678901234567890121234567890123456789012345678901212345678901234
123456789012345678901234567890121234567890123456789012345678901212345678901234
123456789012345678901234567890121234567890123456789012345678901212345678901234
123456789012345678901234567890121234567890123456789012345678901212345678901234
123456789012345678901234567890121234567890123456789012345678901212345678901234
123456789012345678901234567890121234567890123456789012345678901212345678901234
123456789012345678901234567890121234567890123456789012345678901212345678901234
123456789012345678901234567890121234567890123456789012345678901212345678901234
123456789012345678901234567890121234567890123456789012345678901212345678901234
123456789012345678901234567890121234567890123456789012345678901212345678901234
123456789012345678901234567890121234567890123456789012345678901212345678901234
123456789012345678901234567890121234567890123456789012345678901212345678901234
123456789012345678901234567890121234567890123456789012345678901212345678901234
123456789012345678901234567890121234567890123456789012345678901212345678901234
123456789012345678901234567890121234567890123456789012345678901212345678901234
123456789012345678901234567890121234567890123456789012345678901212345678901234
123456789012345678901234567890121234567890123456789012345678901212345678901234
123456789012345678901234567890121234567890123456789012345678901212345678901234
123456789012345678901234567890121234567890123456789012345678901212345678901234
123456789012345678901234567890121234567890123456789012345678901212345678901234
123456789012345678901234567890121234567890123456789012345678901212345678901234
123456789012345678901234567890121234567890123456789012345678901212345678901234
123456789012345678901234567890121234567890123456789012345678901212345678901234
123456789012345678901234567890121234567890123456789012345678901212345678901234
123456789012345678901234567890121234567890123456789012345678901212345678901234
123456789012345678901234567890121234567890123456789012345678901212345678901234
123456789012345678901234567890121234567890123456789012345678901212345678901234
123456789012345678901234567890121234567890123456789012345678901212345678901234
123456789012345678901234567890121234567890123456789012345678901212345678901234
123456789012345678901234567890121234567890123456789012345678901212345678901234
123456789012345678901234567890121234567890123456789012345678901212345678901234
123456789012345678901234567890121234567890123456789012345678901212345678901234
123456789012345678901234567890121234567890123456789012345678901212345678901234
123456789012345678901234567890121234567890123456789012345678901212345678901234
123456789012345678901234567890121234567890123456789012345678901212345678901234
123456789012345678901234567890121234567890123456789012345678901212345678901234
123456789012345678901234567890121234567890123456789012345678901212345678901234
123456789012345678901234567890121234567890123456789012345678901212345678901234
123456789012345678901234567890121234567890123456789012345678901212345678901234
123456789012345678901234567890121234567890123456789012345678901212345678901234
123456789012345678901234567890121234567890123456789012345678901212345678901234
123456789012345678901234567890121234567890123456789012345678901212345678901234
123456789012345678901234567890121234567890123456789012345678901212345678901234
123456789012345678901234567890121234567890123456789012345678901212345678901234
123456789012345678901234567890121234567890123456789012345678901212345678901234
123456789012345678901234567890121234567890123456789012345678901212345678901234
123456789012345678901234567890121234567890123456789012345678901212345678901234
123456789012345678901234567890121234567890123456789012345678901212345678901234
123456789012345678901234567890121234567890123456789012345678901212345678901234
123456789012345678901234567890121234567890123456789012345678901212345678901234
123456789012345678901234567890121234567890123456789012345678901212345678901234
123456789012345678901234567890121234567890123456789012345678901212345678901234
123456789012345678901234567890121234567890123456789012345678901212345678901234
123456789012345678901234567890121234567890123456789012345678901212345678901234
123456789012345678901234567890121234567890123456789012345678901212345678901234
123456789012345678901234567890121234567890123456789012345678901212345678901234
123456789012345678901234567890121234567890123456789012345678901212345678901234
123456789012345678901234567890121234567890123456789012345678901212345678901234
123456789012345678901234567890121234567890123456789012345678901212345678901234
123456789012345678901234567890121234567890123456789012345678901212345678901234
123456789012345678901234567890121234567890123456789012345678901212345678901234
123456789012345678901234567890121234567890123456789012345678901212345678901234
123456789012345678901234567890121234567890123456789012345678901212345678901234
123456789012345678901234567890121234567890123456789012345678901212345678901234
123456789012345678901234567890121234567890123456789012345678901212345678901234
123456789012345678901234567890121234567890123456789012345678901212345678901234
123456789012345678901234567890121234567890123456789012345678901212345678901234
123456789012345678901234567890121234567890123456789012345678901212345678901234
123456789012345678901234567890121234567890123456789012345678901212345678901234
123456789012345678901234567890121234567890123456789012345678901212345678901234
123456789012345678901234567890121234567890123456789012345678901212345678901234
123456789012345678901234567890121234567890123456789012345678901212345678901234
123456789012345678901234567890121234567890123456789012345678901212345678901234
123456789012345678901234567890121234567890123456789012345678901212345678901234
123456789012345678901234567890121234567890123456789012345678901212345678901234
123456789012345678901234567890121234567890123456789012345678901212345678901234
123456789012345678901234567890121234567890123456789012345678901212345678901234
123456789012345678901234567890121234567890123456789012345678901212345678901234
123456789012345678901234567890121234567890123456789012345678901212345678901234
Assembly Instructions
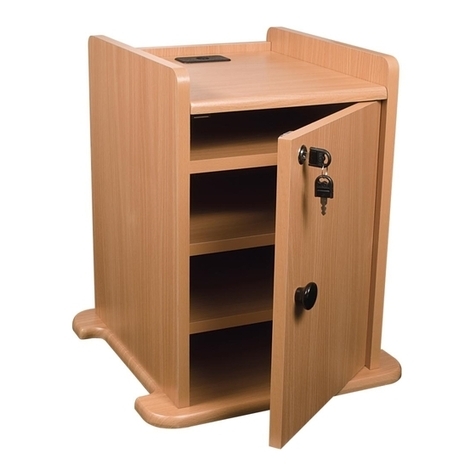
iFlex Cabinet
BLT-90005, BLT-90061
2
Part Drawing Description Qty Part Drawing Description Qty
WOW
iFlex Cabinet
Do not use unless all screws are tight. At least every six months, check all screws to be sure
they are tight. If parts are missing, broken, damaged, or worn, stop use of the product
until repairs are made by your dealer using factory authorized parts.
Should you require assistance during assembly,
please call our Customer Service Department
Monday - Friday 8 a.m. - 5 p.m.
Central Standard Time 1-800-749-2258
Missing Parts or UPS Damaged Parts
ForYourConvenience youcan
EMAILus at
[email protected]
24HOURS 7 DAYSAWEEK
Hardware List
P1
P2
P3
P4
P5
P6
P7
P8
P9
P10
Top Panel 1 EA
Right Side Panel 1 EA
Left Side Panel 1 EA
Back Panel 1 EA
Bottom Panel 1 EA
Small Drawer Front 2 EA
Large Drawer Front 1 EA
Drawer Bottom 3 EA
Small Drawer Side 4 EA
Small Drawer Back 2 EA
A Cam 8 EA
B Campost 8 EA
C Caster Screw 16 EA
D Locking Caster 2 EA
E Non-locking Caster 2 EA
F Drawer Screw 24 EA
3
Part Drawing Description Qty Part Drawing Description Qty
Hardware List
iFlex Cabinet
P11
P12
P13
P14 Large Drawer Corner 4 EA
Large Drawer Back 1 EA
Large Drawer Side 2 EA
Small Drawer Corner 8 EA G Drawer Handle 3 EA
H Drawer Handle Screw 6 EA
J Long Wood Screw 4 EA
K Drawer Stop 6 EA
LHanger Top Bar 2 EA
M Hanger Foot 2 EA
N Hanger Rail 2 EA
O Hanger Screw 4 EA
PAllen Wrench 1 EA
4
1.)
R
EAD
T
HROUGH
I
NSTRUCTIONS
FROM
BEGINNING
TO
END
BEFORE
STARTING
TO
ASSEMBLE
UNIT
.
IdentifyandSeparateall the Partsand Hardware.
iFlex Cabinet
Assembly Instructions
Illustration # 1
2.)
Illustration # 2
3.)
B
P1
B
PlaceTop Panel (P-1) upside down on work table and screw in four Camposts (B) into the predrilled holes as
shown in Illustration # 1. Place this assembly to the side.
P2
A
B
InserttwoCams (A)intothelarge
predrilledholesin the RightSide
Panel(P2). Makesure thearrowon
each cam is pointed up. Screw in
twoCamposts(B) into thepredrilled
holesinthe Right SidePanel(P2)
asshown inIllustration #2.
5
Illustration # 3
4.)
Illustration # 4
5.)
A
P3
InserttwoCams (A)intothe largepredrilled
holes in Left Side Panel (P3). Make sure the
arrow on each cam is pointed up. Screw in
twoCamposts(B) into thepredrilledholes in
theLeftSidePanel (P3) as shownin
Illustration#3.
Insert fourCams(A) intothelarge predrilledholes
intheBack Panel (P4). Makesurethe arrow on
each Cam (A) is point to the hole in the nearest
edgeasshowninIllustration #4.
A
P4
B
6
6.) InserttheCamposts (B)onthe RightSidePanel (P2)assemblyinto thepredrilledholes inthe
edge of the Back Panel (P4) assembly. Turn the Cams (A) clockwise 90 degrees to lock the
twopanelstogether. Repeatthis stepwiththeLeftSidePanel (P3)assemblylockingit tothe
BackPanel(P4) asshownin Illustratiion#5.
Illustration # 5
P2
P4
A
B
P3
7.) Placetheassemblyfrom Step#6 upsidedownon the assembly fromStep # 2. Insertthe
Camposts (B) of theTop Panel (P1) into the predrilled holes in the top edges of the Left Side Panel
(P3), Right Side Panel (P2) and the Back Panel (P4). Turn the Cams (A) clockwise 90 degrees to
locktheTopPanel totheSides and Backasshown inIllustration# 6.
BP1
P2 P3
P4
A
Illustration # 6
7
8.) Attachthe Bottom Panel(P5)to the assemblyfromStep#7 using fourLongWood Screws(J).
Makesurethe predrilledholesfor theCastersinthe BottomPanel(P5) areshowingon thebottom.
Attachtwo LockingCasters (D) tothefront of theBottomPanel (P5)usingeightCaster
Screws(C). Attach twoNon-LockingCasters (E) totheback holes intheBottom Panel (P5)using
eightCasterScrews (C)asshown inIllustration# 7.
Illustration # 7
P5
J
D
E
C
8
SMALL DRAWER ASSEMBLYSTEPS:
Slide on two Small Drawer Sides (P9) onto the Small Drawer Front ‘s brackets (P6). Make sure
theDrawerBottom groove istothe insideandat the bottomofthe drawerasshown in thedrawing.
Thelockingtabs ontheSmall DrawerFront‘s brackets(P6)willsnap intothe smallcut-outsin the
sides of the Small Drawer Sides (P9). Snap-in four Small Drawer Corners (P11) into the Small
Drawer Back (P10) . Make sure the Small Drawer Back has the Drawer Bottom groove down and
ontheinside. The SmallDrawerCorner’slocking tabsshould faceoutand snapintothe small cut-
outsintheSmall Drawer Back(P10). Slidethe Drawer Bottom (P8)withthe gray sideupintothe
drawerbottomgroove in theSmallDrawer Sides(P9)anddown intothedrawer bottom groovein
theSmallDrawer Front’s back. Snap-intheSmall DrawerBackassembly into theSmallDrawer
Sides. Attachthe DrawerHandle(G) totheSmall DrawerFront(P6) usingtwoDrawer Handle
Screws(H). Push-intwo Drawer Stops (K)intothe rear predrilledholesin the SmallDrawerSides
(P9)asshowninIllustration #8.
10.) Repeat Step # 9 to assemble the second Small Drawer.
9.)
Illustration # 8
P6
P9
P10
GH
P11
P8
P9
Gray Side Up
K
K
SmallDrawerFront’s Brackets
9
11.) LARGE DRAWER ASSEMBLYSTEPS:
Slide on two Large Drawer Sides (P12) onto the Large Drawer Front’s brackets (P7). Make
suretheDrawer Bottom grooveisto the insideandat the bottomofthe drawer asshownin
thedrawing. Thelocking tabsontheLarge DrawerFront’sbrackets (P7)willsnapinto the
smallcut-outsinthe sides of theLargeDrawer Sides (P12). Snap-in fourLargeDrawer
Corners (P14) into the Large Drawer Back (P14). Make sure the Large Drawer Back has the
Drawer Bottom groove down and on the inside. The Large Drawer Corner’s locking tabs
shouldfaceout andsnapinto the thesmallcut-outs intheLarge DrawerBack(P13). Slide the
DrawerBottom(P8) with thegrayside upintothedrawer bottomgroovesin the LargeDrawer
Sides (P12) and down into the drawer bottom groove in the Large Drawer Front’s back.
Snap-in the Large Drawer Back assembly into the Large Drawer Sides. Attach the Drawer
Handle(G)to theLargeDrawer Front(P7)using twoDrawerHandle Screws(H). Push-intwo
Drawer Stops (K) into the rear predrilled holes in the Large Drawer Sides (P12) as shown in
Illustration#9.
Illustration # 9
G
P12
P7
P14
K
Gray Side Up
H
P12
P13
P8
K
10
12.) Installthetwo Small Drawerassembliesin thetoptwo openings. Make surethecabinet’s slide
fitsinto the channelinthe sideofeachdrawer. Placethe Largedrawerin the bottomopeningas
shownin Illustration#10.
13.)
Illustration # 10
90005, 90061_9-24-10
LARGE DRAWER FILE HANGER:
Attachthe HangerTopBar(L) tothe
HangerFoot(M) usingtwoHanger Screws
(O). Fingertightenonlyatthispoint. Insert
andflushtheHangerRail(N)betweenthe
HangerTopBar (N)andthe Hanger Foot
(M)makingsure theHangerRail fitsinto
thenotches. Tightentheassemblyusing
theAllenWrench(P). Repeatthis stepfor
allfour cornersasshowninIllustration#12.
Placetheassembled File Hangerinthe
LargeDrawer.M
N
O
L
11
iFlex Cabinet
26 1/2”
19 3/4”
13”

This manual suits for next models

1

Other Balt Indoor Furnishing manuals

Balt Single Floor Carrel 89830 User manual

Balt

Balt Single Floor Carrel 89830 User manual

Balt BLT-27565 User manual

Balt

Balt BLT-27565 User manual

Balt Lumina Room Divider BLT-27578 User manual

Balt

Balt Lumina Room Divider BLT-27578 User manual

Balt BLT-27502 User manual

Balt

Balt BLT-27502 User manual

Balt 89891 H-Carrel User manual

Balt

Balt 89891 H-Carrel User manual

Balt Study Carrel 89788 User manual

Balt

Balt Study Carrel 89788 User manual

Balt Single Floor Carrel 89830 User manual

Balt

Balt Single Floor Carrel 89830 User manual

Balt 89904 Fold-N-Stow User manual

Balt

Balt 89904 Fold-N-Stow User manual

Balt 66626 User manual

Balt

Balt 66626 User manual

Balt Modesty User manual

Balt

Balt Modesty User manual

Balt 42551 Alekto-3 User manual

Balt

Balt 42551 Alekto-3 User manual

Balt 27666 User manual

Balt

Balt 27666 User manual

Balt 89833 User manual

Balt

Balt 89833 User manual

Balt Spine Align Chair 34556 User manual

Balt

Balt Spine Align Chair 34556 User manual

Balt 66627 User manual

Balt

Balt 66627 User manual

Balt ROLZ-2 User manual

Balt

Balt ROLZ-2 User manual

Balt NIDO User manual

Balt

Balt NIDO User manual

Balt 89855 Champ User manual

Balt

Balt 89855 Champ User manual

Balt Lumina Flipper-60 User manual

Balt

Balt Lumina Flipper-60 User manual

Balt 27508 User manual

Balt

Balt 27508 User manual

Balt True Adjust POP User manual

Balt

Balt True Adjust POP User manual

Balt 27547 User manual

Balt

Balt 27547 User manual

Balt 27531 User manual

Balt

Balt 27531 User manual

Balt 89949 User manual

Balt

Balt 89949 User manual

Popular Indoor Furnishing manuals by other brands

LF allen+roth Dellinger 1195-2 manual

LF

LF allen+roth Dellinger 1195-2 manual

American Standard ChinaLux 1000 RF installation instructions

American Standard

American Standard ChinaLux 1000 RF installation instructions

Seconique NEVADA Assembly instructions

Seconique

Seconique NEVADA Assembly instructions

Altair Gavino 557048-LB-GW-NM manual

Altair

Altair Gavino 557048-LB-GW-NM manual

PAIDI YVO Assembly instructions

PAIDI

PAIDI YVO Assembly instructions

Knight Cubit 1200H Assembly instructions

Knight

Knight Cubit 1200H Assembly instructions

TaoTronics TT-SD005 user guide

TaoTronics

TaoTronics TT-SD005 user guide

GALA MEBLE K02-D90N Assembly manual

GALA MEBLE

GALA MEBLE K02-D90N Assembly manual

LEVITAS ST625 Series instruction manual

LEVITAS

LEVITAS ST625 Series instruction manual

INOSIGN Paris TOKYO 11 Assembly instruction

INOSIGN

INOSIGN Paris TOKYO 11 Assembly instruction

Rauch M2067 Assembly instructions

Rauch

Rauch M2067 Assembly instructions

Fontanot Genius 010 2:Easy Assembly instructions

Fontanot

Fontanot Genius 010 2:Easy Assembly instructions

Ameriwood HOME Farmington 1795866COM Instruction booklet

Ameriwood HOME

Ameriwood HOME Farmington 1795866COM Instruction booklet

Desalto HEXAGON Assembly instruction

Desalto

Desalto HEXAGON Assembly instruction

SelectBlinds CORDLESS LIFT SYSTEM HONEYCOMB SHADE installation instructions

SelectBlinds

SelectBlinds CORDLESS LIFT SYSTEM HONEYCOMB SHADE installation instructions

BARCALOUNGER 8001-403 Use and care guide

BARCALOUNGER

BARCALOUNGER 8001-403 Use and care guide

Next 386842 Assembly instructions

Next

Next 386842 Assembly instructions

Livoo DOS183 instruction manual

Livoo

Livoo DOS183 instruction manual

manuals.online logo
manuals.online logoBrands
  • About & Mission
  • Contact us
  • Privacy Policy
  • Terms and Conditions

Copyright 2025 Manuals.Online. All Rights Reserved.