basIP AA-12 Series User manual

AA-12
AA-12
Exported on 07/11/2019

– 2
Table of Contents
Device description................................................................................................ 6
Apperance ...................................................................................................................................... 6
Technical parameters...........................................................................................7
Main features ..................................................................................................................................7
Functionality ...................................................................................................................................7
Configuration through graphical interface ................................................. 8
Main screen .................................................................................................................................... 8
Device settings ............................................................................................................................. 9
Network settings.......................................................................................................................... 11
Access settings............................................................................................................................ 12
Additional settings ..................................................................................................................... 13
About system ...............................................................................................................................14
Configuration trough web interface.............................................................15
Login ................................................................................................................................................ 15
Dashboard .....................................................................................................................................16
Network information ................................................................................................................................................. 17
Network .......................................................................................................................................... 17
Network settings......................................................................................................................................................... 17
Custom NTP.................................................................................................................................................................. 18
Management system ................................................................................................................................................. 18
Panel ................................................................................................................................................18
Apartment Settings.................................................................................................................................................... 18
SIP settings.................................................................................................................................................................... 19
Call settings..................................................................................................................................................................20
Device settings ...........................................................................................................................................................20
Apartments ................................................................................................................................... 21
New apartment........................................................................................................................................................... 22
Access management ................................................................................................................ 23
Common settings....................................................................................................................................................... 24
Locks management................................................................................................................................................... 24

– 3
Open lock...................................................................................................................................................................... 25
Additional settings .................................................................................................................................................... 25
Server manage access ............................................................................................................................................. 26
Identifiers ...................................................................................................................................................................... 26
New identifier .............................................................................................................................................................. 26
Access restrictions .................................................................................................................................................... 27
New restriction ........................................................................................................................................................... 28
Forward .........................................................................................................................................30
New forward queue ................................................................................................................................................... 31
Advanced...................................................................................................................................... 32
Announcement ........................................................................................................................................................... 32
RTSP Feed .................................................................................................................................................................... 32
Custom notifications ................................................................................................................................................ 33
Logs.................................................................................................................................................36
Security..........................................................................................................................................36
System ........................................................................................................................................... 37
Settings.......................................................................................................................................................................... 38
Export/Import data................................................................................................................................................... 38
Device language......................................................................................................................................................... 39
Software upgrade...................................................................................................................................................... 39
Reboot ...........................................................................................................................................................................40
Installation and connection..............................................................................41
Completeness check of the product...................................................................................41
Electrical connection.................................................................................................................41
Mechanical mounting ...............................................................................................................45
Connection of additional modules......................................................................................46
Device usage ........................................................................................................47
UKEY mobile access .................................................................................................................47
Description ................................................................................................................................................................... 47
Working principle ...................................................................................................................................................... 47
Mobile access with UKEY applicationhttps://wiki.bas-ip.com/basipidapp ........................................ 47
Triple-clicking setup in UKEY Cfg application ............................................................................................... 48
Ways to get themobile ID and access card ................................................................................................... 48

Device description– 6
Device description
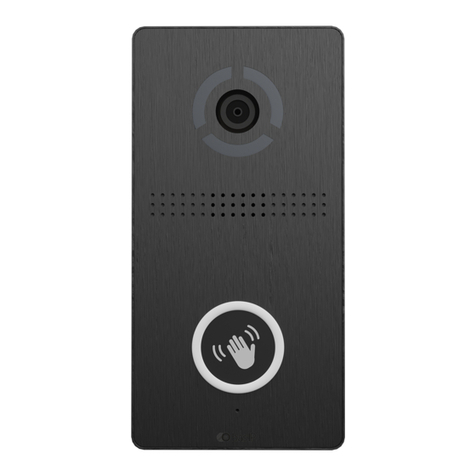
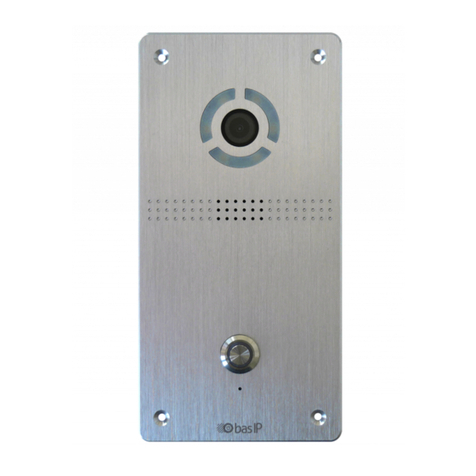
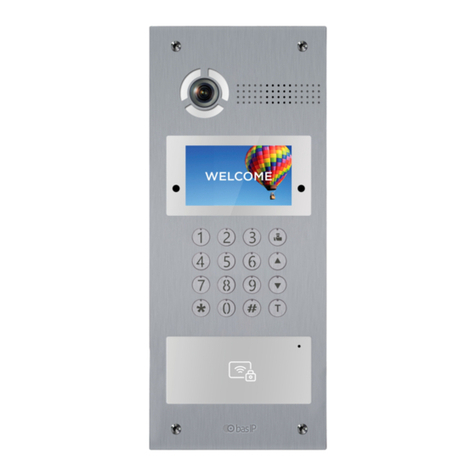
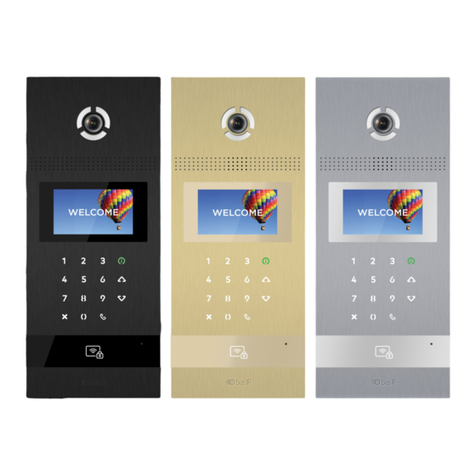
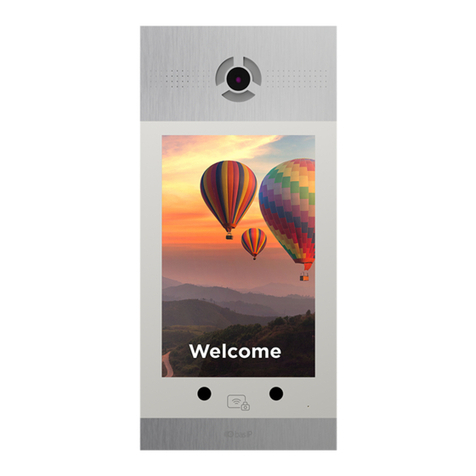
Modern design and well-thought out functionality of this panel makes it an ideal solution for
business and elite buildings. AA-12B is available in gold, silver, and black, and also it supports
BAS-IP UKEY mobile access.
There is a separate button to call concierge or emergency services.
Apperance

Technical parameters– 7
Technical parameters
Main features
Panel type:Multi apartment
Screen:4,3 TFT, color with backlight
Camera:1/4, camera direction adjustment
Angle:117° horizontal x 62° vertical
Camera resolution:1 MP
Output Video:HD (1280x720), H.264 Main Profile
Night backlight:6 LEDs
Minimum illumination:0,01 LuX
Protection class:IP65
Operating temperature:-40 - +65 °С
Power consumption:6,5 W, standby - 3,6 W
Power:+12V
Body:Aluninium alloy
Colors:Silver, Gold, Black
Dimensions for installation:141× 359× 58mm
Size of the panel:158× 379× 49mm
Installation Type:Flush
Keypad:Backlight piezo buttons
Functionality
Interface:Russian/English, WEB interface
Opening the lock:From the monitor, by code, by card, from the BAS-IP Intercom application,
UKEY
Access control integration:WIEGAND-26 output
Shortcut buttons:Concierge button
Number of call melodies:4 polyphonic melodies, ability to customize melodies for different
actions
Authentication:Separate password for settings, WEB – interface
Talk mode:Duplex
Optional:SIP P2P, Built-in Relay

Configuration through graphical interface– 8
1 https://wiki.bas-ip.com/aa07v4/en/apartments-14058107.html
Configuration through graphical interface
•Main screen(see page 8)
•Device settings(see page 9)
•Network settings(see page 11)
•Access settings(see page 12)
•Additional settings(see page 13)
•About system(see page 14)
Main screen
Call: to call the apartment required, you need to enter from 4 to 10 digits depending on the
current mode of the panel.
Concierge: to call concierge you should enter 0000 or press separate call button on the
keypad.
Open: to go to the Access Code menu, press " ", enter the access code and press " " to
confirm.
To cancel an action or navigate through the menu you should press " ".
Address book:A list of contacts to search for and call residents if the exact logical address of
the monitor is unknown.
Address book is available if the option is enabled in the settings of the web interface in the
"Apartments1" section.

Configuration through graphical interface– 9
2 https://wiki.bas-ip.com/aa07v4/en/advanced-8552667.html
The address book is opened by clicking on the arrow buttons or andcall is made by pressing
the " ".
The exit to the main screen is carried out by pressing " " or automatically, after 30 seconds of
inactivity.
The tips displayed on the main screen can be changed in the "Advanced →Custom
Notifications2"section.
Device settings
To enter the system settings, press the " " button twice:
Next you need to enter 6 digits of the password to enter the call panel settings (default
password: 123456) and press " ".
Apartments are sorted by name.
By default, address book is disabled.

Configuration through graphical interface– 10
The "2" button moves the cursor up, the "8" button moves the cursor down. To confirm the
values, press the " " button and the " " button to go back.
Mode: select operation mode of the panel.

Configuration through graphical interface– 11
Language: Select interface language.
Building: Number of the building.
Unit:Unit number.
Index:Device number of the outdoor panel.
Password: System password to enter settings or WEB interface.
Volume: Loudspeaker volume of the outdoor panel.
Size:Select the camera stream resolution of the outdoor panel.
Network settings
Main network settings are configured in this tab.
Information about operation modes
If you select the "Wall" mode, you must enter 4 digits of the building number, 2 digits of
the unit number, 2 digits of the floor number, and 2 digits of the apartment number to
call the desired monitor.
If you select the "Unit" mode, youmust enter only 2 digits of the floor number and2
digits of the apartment number to call the desired monitor.
You shouldn't select individual opreration mode for these panels. It is used only for
individual panels.
The number of the building and the unit should correspond to values of the internal
monitor that willreceive an incoming call from the outdoor panel. If you have several
outdoor panels with the same logical address, then in the Index field you should specify
values 2, 3, 4, 5 etc., up to 9. If the logical addressing of the outdoor panel corresponds
to the address of the monitor, and the IP addresses of the devices are in the same
network segment, the devices will find each other and the call will be correct.

Configuration through graphical interface– 12
DHCP: Enable/disable mode to get network settings automatically.
IP: IP address ofoutdoor panel.
Mask: Subnet mask.
Gateway: Default gateway.
DNS: Address of the DNS server.
Server:IP address of your PC or server, where Management Software or Link software is
installed.
Access settings
When you switch to Access settings menu, the following interface will be displayed:
By default the outdoor panel can have a static IP address 192.168.68.90 or 192.168.1.90.

Configuration through graphical interface– 13
Timeout: Time when contacts of the panel relay will be closed or open.
Delay: Time after which contacts of the panel relay will be closed or open (delay before
unlocking).
Elev Refer: Floor number where the panel is installed (using elevator control module EVRC-IP,
optional).
Password: Password to open the lock by entering the unlocking code on the panel keypad. To
enter the password input mode, press the " " key, type the password and press " " again.
Additional settings
When you switch to Additional settings, the following interface will be displayed:

Configuration through graphical interface– 14
RoomNum: Apartment number to which access card must be linked.
Reboot:Restart outdoor panel. To restart outdoor panel, it is necessary to enter" ", press"1",
and then press " " again.
Default: Reset panel settings to factory settings. To reset outdoor panel, it is necessary to enter"
", press"1", and then press" "again.
About system
Unable to render include or excerpt-include. Could not retrieve page.
Adding cards through graphical interface:
Enter the desired apartment number and wave the card in front of the area of the
reader. A signal will sound from the panel, confirming that the card is registered, and a
card number will be displayed in theCard field.
Note that all cards will be removed from the panel memory when it is factory reset.

Configuration trough web interface– 15
Configuration trough web interface
•Login(see page 15)
•Dashboard(see page 16)
•Network(see page 17)
•Panel(see page 18)
•Apartments(see page 21)
•Access management(see page 23)
•Identifiers(see page 26)
•Access restrictions(see page 27)
•Forward(see page 30)
•Advanced(see page 32)
•Logs(see page 36)
•Security(see page 36)
•System(see page 37)
Login
To configure the outdoor panel remotely through the Web-interface, you need to connect to it
via an internet browser on the PC. The panel must be connected to the same network segment
as the PC from which you plan to configure.
In the Internet browser, you must enter the IP address of the panel into the address input line. A
window will then appear to enter the username and password.
Username to enter settings:adminormanager.
Administrator- has full access to all panel settings.
Manager- has access to the panel settings, but he has limited access to the access control
menu. Such access is provided to installation organizations to install and configure the system.
Username: Select a user to change the password.
Default values:
The default administrator password is 123456.
The default password for the manager is 1234.

Configuration trough web interface– 16
Dashboard
After successful authorization, the following interface will be displayed:
Framework: Firmware version.
Launcher: Launcher version.
Hybrid Mode: The current connection mode of the hybrid adapter.
Hybrid Version: Hybrid adapter version.
Serial number:Serial number of the device.
Device name: Name of the device.

Configuration trough web interface– 17
Network information
DHCP: The current state of the DHCP connection.
IP Address: The current IP address of the panel.
Subnet Mask: Subnet Mask.
Gateway Address: The address of the main gateway.
DNS server: DNS server address.
MAC address: MAC address of the panel.
Network
Network settings
DHCP:Enable/disable mode to get network settings automatically.
IP:Outdoor panel IP address.
Mask: Subnet Mask.
Gateway: The main gateway.
Default values
By default, the outdoor panel can have a static IP address 192.168.1.90 or 192.168.1.91.

Configuration trough web interface– 18
DNS: DNS server address.
Custom NTP
NTP: Enable/disable the use of a custom NTP server.
URL: The input field for the user NTP server address.
Time Zone: Select the time zone.
Management system
Mode: Selects the operation mode of the panel control system.
URL: Management server address.
Password: Access password.
Send realtime logs to server: Enable/disable panel logging to server.
Send status to server: Enable/disable sending current panel status to server.
Panel
Apartment Settings
Mode:select operation mode of the panel.

Configuration trough web interface– 19
Building:Number of the building.
Unit:Unit number.
Device number:Device number of the outdoor panel.
SIP settings
Enable/Disable: Enable/disable SIP registration.
Proxy: A proxy SIP server that can be represented by both an IP address and a domain name.
Server: SIP server address.
STUN IP: STUN server address.
Information about operation modes
If you select the "Wall" mode, you must enter 4 digits of the building number, 2 digits of
the unit number, 2 digits of the floor number, and 2 digits of the apartment number to
call the desired monitor.
If you select the "Unit" mode, youmust enter only 2 digits of the floor number and2
digits of the apartment number to call the desired monitor.
If you have more than one outdoor panel you need to specify their device numbers,
starting from 1to 9.
Data format:
Before the proxy address, you must specify "sip:".
Data format:
Сan be represented by both an IP address and a domain name.

Configuration trough web interface– 20
STUN port: The port of the STUN server.
Password: Password of SIP number.
Call settings
Concierge: Enable / disable the function to call the specified number in the "Number" line when
pressing the concierge button.
Number: The direction to which the call will be made when pressing the concierge button.
Call max time: A time interval after which the panel automatically ends an outgoing call if there
is no answer.
Talk max time: The time interval after which the panel automatically ends the outgoing
conversation.
Auto call after N digits: The function of automatic dialing after entering the digits specified in
the line "Number of digits".
Number of digits: Select the number of digits, which, when pressed, will automatically call from
the panel.
Device settings
Example:
stun.l.google.com.
Example:
For google STUN server 19302 port is used.
If the function is not enabled, the concierge is called via an internal protocol. If the
system has concierge monitors, the call will go to the main monitor. If he does not
answer, the call will be transferred to the other monitors in the system.
This manual suits for next models
1
Table of contents
Other basIP Intercom System manuals
basIP
basIP AA-09 Series User manual
basIP
basIP AA-14FBS User manual
basIP
basIP AA-14FB User manual
basIP
basIP AU-04LA User manual
basIP
basIP AT-07L User manual
basIP
basIP AV-08FB User manual
basIP
basIP AA-07FB User manual
basIP
basIP SP-03F User manual
basIP
basIP AV-05FD User manual
basIP
basIP SP-03 User manual


