manuals.online logo
Brands
  1. Home
  2. •
  3. Brands
  4. •
  5. Bticino
  6. •
  7. Intercom System
  8. •
  9. Bticino Sfera video kit User manual

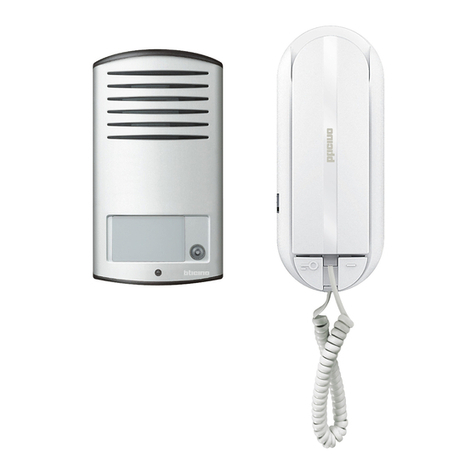
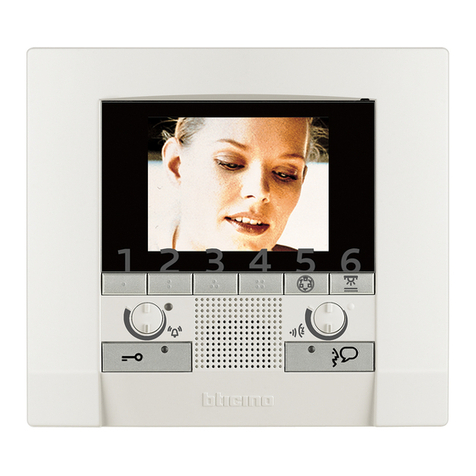
Bticino Sfera video kit User manual

PART. B9192E
Kit
bifamiliare
video sfera
362521
362522
®
03/03 DT
Istruzioni d’uso
Gebrauchsanweisungen
Notice d’emploi
Instructions for use
Instrucciones de uso
Gebruiksaanwijzing
Istruções para o uso
230V~
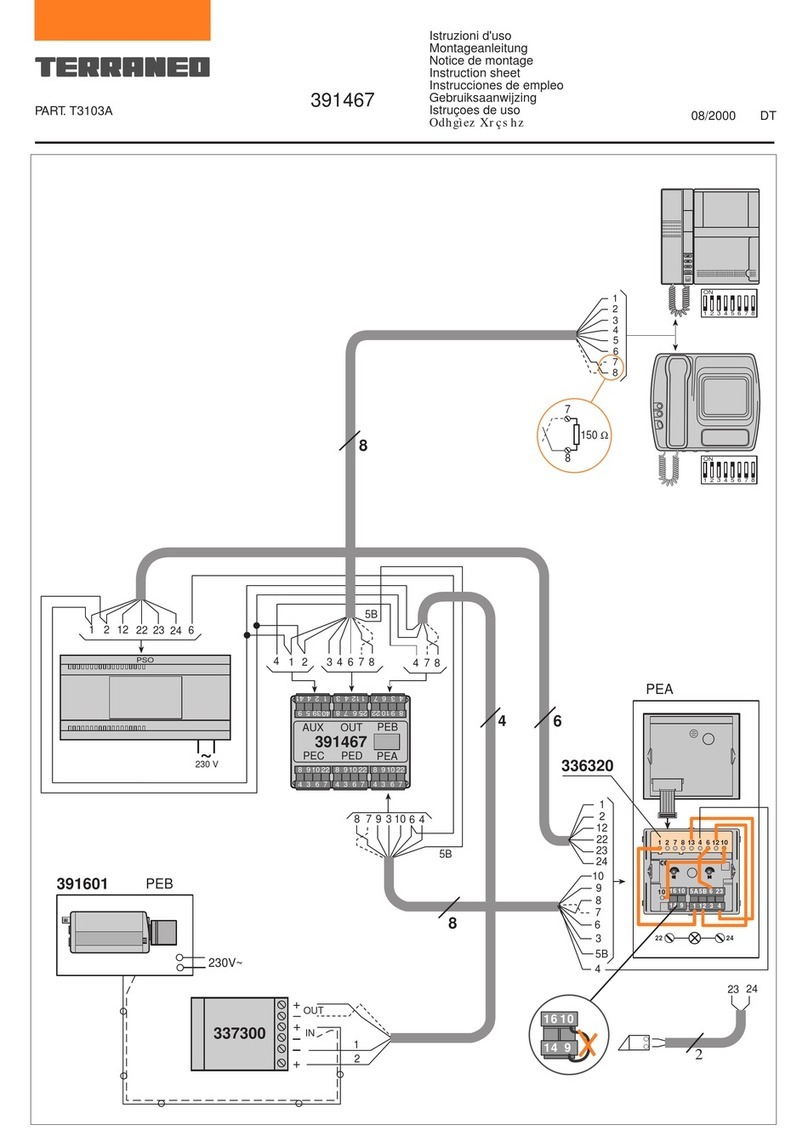
Kit 2
5A
5B
3
7
4
22
12
6
2
8
1
24
23
24
23
2
5A
5B
10
1012641387
2
1
22 24
22 24
1016
914
2365A5B
1 12 43
1
5A
5B
68
2
7
4
3
22
12
23
24
7 8
7
8
8
7
1
2
336810
1 2 3 46
OUT
IN PI
78
5 5
8
7
2
1
3
4
6
5
7
8
1
2
3
4
6
5
13
9
78
150Ω
A= Pulsante apertura serratura.
Schalter Türöffner.
Poussoir d'ouverture serrure.
Door lock pushbutton.
Pulsador apertura cerradura.
Drukknop opening.
Botão para abertura do trinco.
A
*
*
PSO
MAX 50m
Terraneo 3
230V~
5A
5B
3
7
4
22
12
6
2
8
1
24
23
24
23
2
5A
5B
10
1012641387
2
1
22 24
22 24
1016
914
2365A5B
1 12 43
7 8
7
8
8
7
1
2
336810
1 2 3 4 6
OUT
IN PI
7 85 5
8
7
2
1
3
4
6
5
7
8
1
2
3
4
6
5
1 2 6 12 22 23 24
7
9
78
150Ω
A=
Pulsante apertura serratura.
Schalter Türöffner.
Poussoir d'ouverture serrure.
Door lock pushbutton.
Pulsador apertura cerradura.
Drukknop opening.
Botão para abertura do trinco.
A
*
*PSO
MAX 50m
Kit 4
2
cm
160 - 165
1
1
2
3
1 2
L < 300m
1 2
300 < L < 600m
1 2
600 < L < 1000m
1 2
L = distanza tra la telecamera e il posto
interno più lontano (in impianti senza
derivatore di montante art. 346100).
Distanza tra la telecamera ed il primo
derivatore di montante art. 346100.
I
D
GB
E
NL
F
L= distance between the camera and
the furthest away internal unit (in
systems without riser distribution block
Item 346100).
Distance between the camera and the
first riser distribution block Item 346100.
L= distance entre la télécamera et le poste
interne le plus éloigné (dans des installations
sans dérivateur de colonne montante réf.
346100).
Distance entre la télécamera et le premier
dérivateur de colonne montante réf. 346100.
L= afstand tussen de camera en het
verst afgelegen interne toestel (in
installaties zonder vertakkingsdoos voor
stijgleidingen art. 346100).
Afstand tussen de camera en de eerste
vertakkingsdoos voor stijgleidingen art.
346100.
L= Abstand zwischen Kamera und der
entferntesten Hausstation (bei Anlagen ohne
Steigleitungsabzweigung Art. 346100).
Abstand zwischen Kamera und der ersten
Steigleitungsabzweigung Art. 346100.
L= distancia entre la telecámara y la
unidad interior más lejana (en
instalaciones sin derivador de montante
Art. 346100).
Distancia entre telecámara y primer
derivador de montante Art. 346100.
Terraneo 5
6
2
3
1
7
2
1
2
45
20°
20°
2
-20°÷+20°
-20°÷+20°
1
3
1
Kit 6
1
2
2
3
9
8
2
1
10 11
Terraneo 7
13
Comando luci
Lichtschalter
Commande éclairages
Lights on
Mando luces
Verlichting aan/uit
Comando das luzes
Apriporta
Türöffner
Ouvre-porte
Door opener
Dispositivo para abrir la puerta
Deuropener
Comando de abertura da porta
Regolazione suoneria
Klingeleinstellung
Réglage sonnerie
Bell regulator
Ajuste soneria
Afstelling geluidsterkte bel
Regulação do toque
Accensione monitor
Einschalten des monitors
Allumage moniteur
Monitor on
Encendido monitor
Monitor aan/uit
Activação do monitor
Regolazione contrasto
Kontrasteinstellung
Réglage contraste
Contrast control
Ajuste contraste
Afstelling contrast
Regulação do contraste
Regolazione luminosità
Helligkeitsregelung
Réglage luminosité
Brightness control
Ajuste brillo
Afstelling lichtsterkte
Regulação da luminosidade
12
Kit 8
1211
Regolazione del volume:
Se si manifestasse il disturbo del fischio,
(effetto Larsen), ridurre prima la potenza del
microfono, agendo con un cacciavite sul
potenziometro corrispondente, fino ad un livello
accettabile.Qualora il fenomeno persista, agire sul
potenziometro dell'altoparlante in modo da eliminare
l'inconveniente. Se il volume è troppo basso,
aumentare prima il volume dell'altoparlante ed
eventualmente anche quello del microfono, tenendo
presente che è preferibile una trasmissione chiara
e priva di disturbi, che una al limite dell'innesco
(Larsen).
Einstellung der Lautstärke:
Beim etwaigen Auftreten eines Pfeiftones
(Larsen-Effekt), zuerst die Lautstärke des
Mikrophones bis auf einen annehmbaren Wert
herabsetzen, indem man das entsprechende
Potentiometer mit einem Schraubendreher einstellt.
Sollte die Störung weiterhin bestehen, dann das
Potentiometer des Lautsprechers bis zur Beseitigung
des Pfeiftones einstellen.Ist die Lautstärke nun zu
niedrig, dann zuerst die des Lautsprechers und erst
danach evtl. auch die des Mikrophones erhohen,
wobei ein deutlicher und störungsfreier Empfang
einem an der Störungsgrenze liegendem (Larsen-
Effekt) vorzuziehen ist.
Réglage du volume:
Lors de sifflement (effet de larsen), réduire à
l’aide d’un tournevis le puissance du micro en
agissant sur le potentiomètre correspondant, jusqu’
à l’obtention d’un niveau satisfaisant.
Si le sifflement persiste, régler le potentiomètre du
haut parleur jusqu’ à l’élimination de celui-ci.
Si le volume est trop faible, augmenter la puissance
du haut-parleur puis éventuellement celle du micro,
en considérant qu’une réception claire et sans
parasite est préférable à une communication à la
limite de l’accrochage (effet de larsen).
I
D
F
NL
E
Adjustment volume:
In case of a whistle (Larsen effect), first reduce
the microphones power, adjusting the corresponding
potentiometers with a screw driver, until an
acceptable level is reached. Should the whistle
persist, adjust the loudspeakers volume in order to
eliminate the trouble. If the volume is too low level
GB
then, increase first the potentiometer of the
loudspeaker and secondly the one for the
microphone, bearing in mind that a clear and noise
free reception is preferable than one just before
whistling (Larsen).
Regulación del volumen:
Si se manifesta el silbido de acoplamiento,
(efecto Larsen), reducir primero la potencia del
micrófono, girando con un destornillador el
potenciómetro correspondiente, hasta obtener un
nivel aceptable. Si el fenómeno persistiera, regular
el potenciómetro del altavoz hasta eliminar la
interferencia. Si el volumen es demasiado bajo,
aumentar primero el volumen del altavoz y
eventualmente también el del micrófono, teniendo
en cuenta que es preferible una transmissión clara
y limpia de interferencias, que una al limite del
acoplo (Larsen).
De geluidssterkte regelen:
Als er een fluittoon hoorbaar is (effect van
Larsen): verminder eerst het vermogen van de
microfoon door met behulp van een
schroevendraaier zijn stroomregelaar zo te regelen
dat de geluidssterkte van het gefluit aanvaardbaar
is. Als het
verschijnsel niet verdwijnt, dan moet u ook de
stroomregelaar van de luidspreker bijstellen. Als de
geluidssterkte nu te klein is, verhoog dan eerst de
geluidssterkte van de luidspreker en daarna
eventueel ook die van de microfoon, en denk er bij
het bijstellen aan dat een duidelijk hoorbaar en
ongestoord geluid beter is dan een harder geluid
op de grens van het Larsen effect.
Regulação do volume:
Se se manifestar uma interferência no som (efeito
de Larsen), começar por diminuir a potência do
microfone, rodando o potenciómetro correspondente
com uma chave de parafusos, até obter um nível
aceitável. Se o fenómeno persistir, regular o
potenciómetro do altifalante de modo a eliminar o
problema. Se o volume estiver demasiado baixo,
começar por aumentar o volume do altifalante e depois,
se necessário, o do microfone, tendo presente que é
melhor ter uma transmissão clara e sem interferências,
que uma no limiar de início de efeitos Larsen.
P
Terraneo 9
I
D
F
GB
Attenzione:
l’alimentatore deve rispettare le seguenti regole installative:
•deve essere installato solo in ambienti interni
•deve essere installato nei centralini predisposti per apparecchi DIN
•non deve essere esposto a stillicidio o a spruzzi d’acqua
•non ostruire le aperture di ventilazione dell’alimentatore
•Installare e collegare gli apparecchi come indicato nello schema.Assicurarsi che durante le operazioni di montaggio
degli apparecchi l'alimentatore non sia collegato alla rete pubblica.
•Prima di alimentare l'impianto verificare l'esattezza del cablaggio ed accertarsi che la tensione di rete sia compatibile
con quella dell'alimentatore.
•Posare i cavi seguendo lo schema riportato nelle pagine precedenti in cui è indicato il numero dei cavi da predisporre
e la dislocazione fisica degli apparecchi che compongono l'impianto.
•La tabella seguente indica la sezione minima dei cavi in funzione della distanza tra posto esterno e posto interno.
Achtung:
das Speisegerät muss unter Beachtung folgender Regeln installiert werden:
•darf nur im Inneren installiert werden
•muss in Zentralen installiert werden, die für DIN Geräte geeignet sind
•darf nicht Wassertropfen oder -spritzer ausgesetzt werden
•belüftungsschlitze des Speisegeräts nicht verstopfen
•Die Geräte laut Plan installieren und anschließen. Bei der Montage der Geräte darf das Speisegerät nicht am
Hauptnetz angeschlossen sein.
•Bevor die Anlage mit Strom versorgt wird, kontrollieren ob die Vernebelung richtig vorgenommen worden ist und
ob die Netzspannung mit der des Speisegeräts kompatibel ist.
•Die Kabel entsprechend dem Plan auf den vorhergehenden Seiten, in dem die Kabelnummer sowie die Position
der einzelnen Anlagengeräte angegeben ist, verlegen.
•Nachstehende Tabelle gibt den Mindestwert des Kabelschnitts im Verhältnis zur Distanz zwischen Tür- und
Hausstation an.
Attention:
l’alimentation doit respecter les règles d’installation suivantes:
•elle doit être montée seulement à l’intérieur
•elle doit être montée dans des standards prévus pour appareils DIN
•elle ne doit pas être exposée à des suintements ou à des éclaboussures
•ne pas boucher les ouvertures d'aération de l'alimentation
•Poser les câbles d'après le schéma qui se trouve dans les pages précédentes, sur lequel est indiqué le nombre
de câbles à placer et la localisation physique des appareils qui forment l'installation.
•Le tableau suivant indique la section minimale des câbles en fonction de la distance entre le poste externe et le
poste interne.
•Monter et brancher les appareils comme indiqué sur le schéma. S'assurer que pendant les opérations d'installation
des appareils, l'alimentation n'est pas raccordée au réseau public.
•Avant d'alimenter l'installation, vérifier que le câblage est correct et s'assurer que la tension du réseau est compatible
avec celle de l'alimentation.
•
Caution:
the power supply must respect the following installation rules:
•it must only be installed indoors
•it must be installed in exchanges set up for DIN appliances
•it must not be exposed to water drops or splashes
•do not block the power supply ventilation openings
•Install and connect the devices as indicated in the diagram. Make sure that when the devices are mounted the
power supply is not connected to the public electric power line.
•Before energizing the installation check that cabling is correct and make sure that line voltage is compatible with
power supply voltage
•Lay cables according to diagram shown in the previous pages, which indicates the number of cables to be arranged
and the layout of devices that make up the installation.
•The table below shows the minimum conductor cross-section according to the distance between inside and outside
station.
Kit 10
NL
E
Atención:
el alimentador debe respetar las siguientes normas de instalación:
•se debe instalar sólo al cubierto
•se debe instalar en centralitas predispuestas para aparatos DIN
•no debe estar expuesto a goteo o salpicones de agua
•no tape las aberturas de ventilación del alimentador
•Instalar y conectar los aparatos como se indica en el esquema. Asegurarse de que durante las operaciones de
montaje de los aparatos, el alimentador no está conectado a la red pública.
•Antes de alimentar la instalación, comprobar que el cableado es correcto y asegurarse de que la tensión de red
es compatible con la del alimentador.
•Colocar los cables siguiendo el esquema que se da en las páginas anteriores en las que se ha indicado el número
de los cables que hay que predisponer y la colocación física de los aparatos que componen la instalación.
•La tabla siguiente indica la sección mínima de los cables en función de la distancia entre la unidad exterior y la
unidad interior.
Let op:
bij de installatie van de voeding moet men de volgende voorschriften in acht nemen:
•binnenshuis installeren
•niet in een DIN-kast installeren
•niet aan waterdruppels en -stralen blootstellen
•niet de ventilatieopeningen van de voeding versperren
•Leg de kabels aan volgens het schema op de volgende bladzijden waarin het nummer van de kabels en de plaatsing
van de apparaten is aangegeven.
•In de volgende tabel zijn de minimumdoorsneden van de kabels bij verschillende afstanden tussen de binnenplaats
en de buitenplaats vermeld.
•Installeer en verbind de apparatuur zoals aangegeven in het schema. Vergewis u ervan dat de voeding niet op
het lichtnet is aangesloten tijdens de installatie.
•Controleer voordat u de installatie aansluit op het lichtnet of de bekabeling goed is aangelegd en of de netspanning
geschikt is voor de voeding.
Atenção:
o alimentador deve respeitar as seguintes regras para ser instalado.
•deve ser instalado somente internamente
•deve ser instalado nas centrais predispostas para aparelhos DIN
•não deve ser exposto a estilicídio ou borrifos de água
•não obstrua as aberturas de ventilação do alimentador
•Instalar e ligar os aparelhos conforme indicado no esquema. Assegurar-se de que durante as operações de
montagem dos aparelhos, o alimentador não está ligado à rede pública.
•Antes de ligar a corrente na instalação verificar se os cabos são correctos e certificar-se de que a tensão de rede
é compatível com a do alimentador.
•Colocar os cabos seguindo o esquema das páginas anteriores onde se indica o número dos cabos a preparar e
a disposição física dos aparelhos que formam o sistema.
•A tabela abaixo indica a secção mínima dos cabos em função da distância entre a unidade exterior e a unidade interior.
P
Terraneo 11
PSO
2-1 24V ; 0,9A 1' on - 3' off
12-1 12V ; 0,2A 1' on - 3' off
24-23 12V~ ; 3A impulsivi per serratura - intermittierendes Schloßsignal -
door lock impulses - impulsifs pour serrure - impulsos para cerradura -
pulsgenerators voor sloten.
24-22 12V~ ; 0,8A lampadine - Leuchten - lamps - lampes - bombillas - lampjes.
6 ; ingresso comando relé serratura - Eingang für Schloß-Steuerrelais -
door lock relay control input - entrée commande relais serrure -
entrada mando relé cerradura - ingang besturing relais v.h. slot.
Dati di targa alimentatore - Schilddaten Speisegerät - Rating power supply -
Données de plaque alimentation - Datos de placa alimentador -
Technische gegevens voeding.
Primario - Primär - Primaire - Primary - Primario - Primair
230V~ ±10% 50Hz 65VA
AC
B
Attenzione: per distanze superiori a quelle riportate
nella tabella, fare riferimento al notiziario tecnico.
Attention: for distances greater than those given
in the table, refer to the technical bulletin.
Cuidado: para distancias superiores a las indicadas
en la tabla, se remite al Boletín Técnico.
Achtung: bei größerenAbständen als in der Tabelle
angegeben, beziehen Sie sich bitte auf die
technischen Informationen.
Attention: pour des distances supérieures à celles
reportées sur le tableau, se référer à la notice
technique.
Let op: raadpleeg de technische bijlage voor
afstanden groter dan die in de tabel.
Atenção: para as distâncias superiores àquelas
citadas na tabela, consulte as informações
técnicas.
0,28 mm20,28 mm20,75 mm20,75 mm2
DISTANZA - DISTANCE - DISTANCIA
DISTANZ - DISTANCE - AFSTAND - DISTÀNCIA
25 m 50 m 100 m 150 m
1 - 2
7 - 8
3 - 4 - 5A - 5B
A-B
A-C
1 - 2 - 12 - 6
B-C
A-C
6
A-B 0,28 mm2
0,28 mm2
22 - 23 - 24
B-C 0,28 mm20,5 mm21 mm21,5 mm2
0,28 mm2
0,28 mm2
CONDUTTORE - CONDUCTOR
CONDUCTOR - LEITER - KABEL
CONDUCTEURS - CONDUTOR
BTicino s.p.a.
Via Messina, 38
20154 Milano - Italia
Call Center “Servizio Clienti” 199.145.145
[email protected]
www.bticino.it
®
C
E
R
T
I
F
I
E
D
Q
U
A
L
I
T
Y
S
Y
S
T
E
M
CERTIFICAZIONE DEI SISTEMI
QUALITÀ DELLE AZIENDE
UNI - EN - ISO 9000

Other manuals for Sfera video kit

3

This manual suits for next models

2

Other Bticino Intercom System manuals

Bticino 332851 Operating manual

Bticino

Bticino 332851 Operating manual

Bticino 344842 User manual

Bticino

Bticino 344842 User manual

Bticino Iryde Touch Phone User manual

Bticino

Bticino Iryde Touch Phone User manual

Bticino Polyx Memory Display User manual

Bticino

Bticino Polyx Memory Display User manual

Bticino Classe100 V16B User manual

Bticino

Bticino Classe100 V16B User manual

Bticino 344282 User manual

Bticino

Bticino 344282 User manual

Bticino 344682 User manual

Bticino

Bticino 344682 User manual

Bticino TERRANEO-KIT User manual

Bticino

Bticino TERRANEO-KIT User manual

Bticino D45 User manual

Bticino

Bticino D45 User manual

Bticino 344642 User manual

Bticino

Bticino 344642 User manual

Bticino Terraneo 342170 User manual

Bticino

Bticino Terraneo 342170 User manual

Bticino 346310 User manual

Bticino

Bticino 346310 User manual

Bticino 363925 User manual

Bticino

Bticino 363925 User manual

Bticino 322011 User manual

Bticino

Bticino 322011 User manual

Bticino 374003 User manual

Bticino

Bticino 374003 User manual

Bticino 374005 User manual

Bticino

Bticino 374005 User manual

Bticino 313271 User manual

Bticino

Bticino 313271 User manual

Bticino B9576C User manual

Bticino

Bticino B9576C User manual

Bticino 364614 User manual

Bticino

Bticino 364614 User manual

Bticino 342630 User manual

Bticino

Bticino 342630 User manual

Bticino TI 369711 User manual

Bticino

Bticino TI 369711 User manual

Bticino SCS 346833 User manual

Bticino

Bticino SCS 346833 User manual

Bticino 369911 User manual

Bticino

Bticino 369911 User manual

Bticino 374006 User manual

Bticino

Bticino 374006 User manual

Popular Intercom System manuals by other brands

HIK VISION DS-KV8413-WME1(B) manual

HIK VISION

HIK VISION DS-KV8413-WME1(B) manual

V-Tec 37TD7-V1 user manual

V-Tec

V-Tec 37TD7-V1 user manual

V-Tec 27SDTD7-V1 user manual

V-Tec

V-Tec 27SDTD7-V1 user manual

Cellularline Interphone URBAN user guide

Cellularline

Cellularline Interphone URBAN user guide

Clear-Com RS-700 Series QUICK REFERNCE GUIDE

Clear-Com

Clear-Com RS-700 Series QUICK REFERNCE GUIDE

HIK VISION DS-KV8202-IM user manual

HIK VISION

HIK VISION DS-KV8202-IM user manual

HIK VISION ADS-24S-12 1224GPCN quick start guide

HIK VISION

HIK VISION ADS-24S-12 1224GPCN quick start guide

Clear-Com EclipseHX user guide

Clear-Com

Clear-Com EclipseHX user guide

V-tech IP-MR18S user manual

V-tech

V-tech IP-MR18S user manual

HIK VISION DS-KIS202 manual

HIK VISION

HIK VISION DS-KIS202 manual

HIK VISION DS-KD9633-E6-WBE6 user manual

HIK VISION

HIK VISION DS-KD9633-E6-WBE6 user manual

HIK VISION DS-KD9613-FE6 user manual

HIK VISION

HIK VISION DS-KD9613-FE6 user manual

basIP AA-07FB user manual

basIP

basIP AA-07FB user manual

Silvercrest KH206-06 operating instructions

Silvercrest

Silvercrest KH206-06 operating instructions

HIK VISION DS-TVL224 user manual

HIK VISION

HIK VISION DS-TVL224 user manual

OneTech 2D-STAEXTU user manual

OneTech

OneTech 2D-STAEXTU user manual

Sentryus GSM-DE2123 user manual

Sentryus

Sentryus GSM-DE2123 user manual

GSM Activate e-com manual

GSM Activate

GSM Activate e-com manual

manuals.online logo
manuals.online logoBrands
  • About & Mission
  • Contact us
  • Privacy Policy
  • Terms and Conditions

Copyright 2025 Manuals.Online. All Rights Reserved.