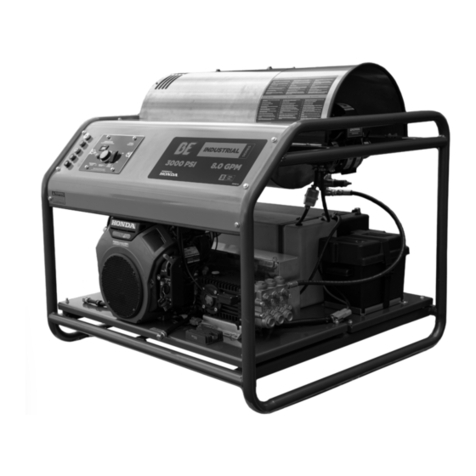
BE Power Equipment HW152EMD User manual

User Manual
ELECTRIC
HOT WATER
HW152EMD
HW204EMD
PRESSURE WASHER

2 3
Safety
6 Safety Rules
7 Safety Warnings
Features
13 Features
Installation & Preparation
14 Attire
14 Set-Up
15 Power Cord Connection
17 Burner Fuel Tank
17 Nozzle Review
18 Nozzle Connection
19 Water Supply
20 Unloader
20 Thermal Relief Valve
20 Pre-Start Inspection Procedures
Operation
21 Flushing the System
21 Start-Up/Cold Water Operation
23 Hot Water Operation
23 Steam Operation
24 Cleaning with Detergents
25 Shutdown
Maintenance
26 Specific Maintenance
27 Winterizing
29 Maintenance Chart
Troubleshooting
30 Troubleshooting Chart
Parts List
34 Specifications
36 Flow Chart
37 Operation Theory
38 Frame Assembly
40 Motor/Pump Assembly
42 Pump Assembly
45 Unloader
47 Pressure Switch (22-0171)
48 Coil Drain Plug (850-0218)
49 Heat Exchanger/Blower Motor
51 Boiler Assembly
53 Gun/Wand/Hose Assembly
54 Fuel Tank
55 Fuel Pump
55 Fuel Solenoid
56 Electric Box Assembly for HW1115EMD and
HW152EMD
58 Electric Box Assembly for HW204EMD
60 Wire Schematic for HW1115EMD and
HW152EMD
61 Wire Diagram for HW1115EMD and
HW152EMD
62 Wire Schematic for HW204EMD
63 Wire Diagram for HW204EMD
64 Statement of Warranty
65 Warranty Exclusions
TABLE OF CONTENTS TABLE OF CONTENTS

4 5
Using the Operator’s manual
The operating manual is an important part of your Pressure Washer. It
should be read thoroughly before initial use, and referred to often to make
sure adequate safety and service concerns are being addressed.
Reading the owner’s manual thoroughly will help avoid any personal injury
or damage to your pump. By knowing how best to operate this machine
you will be better positioned to show others who may also operate the
unit.
You can refer back to the manual at any time to help troubleshoot any
specific operating functions, so store it with the machine at all times.
Attention: Read through the complete
manual prior to the initial use of your
Pressure Washer
Record Identification Numbers
Pressure Washer
If you need to contact an Authorized Dealer or Customer Service line (1-
866-850-6662) for information on servicing, always provide the
product model and identification numbers.
You will need to locate the model and serial number for the pump and
record the information in the places provided below.
Date of Purchase:
Dealer Name:
Dealer Phone:
Product Identification Numbers
Model Number:
Serial Number:
INTRODUCTION PRODUCT IDENTIFICATION

6 7
The safety alert symbol ( ) is used with a signal word (DANGER,
CAUTION, WARNING), a pictorial and/or a safety message to alert you
to hazards.
DANGER indicates a hazard which, if not avoided, will result in death
or serious injury.
WARNING indicates a hazard which, if not avoided, could result in
death or serious injury.
CAUTION indicates a hazard which, if not avoided, might result in
minor or moderate injury.
NOTICE indicates a situation that could result in equipment damage.
Follow safety messages to avoid or reduce the risk of injury or death.
Hazard Symbols and Meanings
Save these Instructions
SAFETY RULES
This is the safety alert symbol. It is used
to alert you to potential personal injury
hazards. Obey all safety messages that
follow this symbol to avoid possible injury
or death.
explosion fire
toxic fumes
hot surface
flying objects injection
moving parts
electric
shock
WARNING
Serious injury or death could occur if the pressure
washer is not properly grounded. Your pressure washer
is powered by electricity and may cause electric shock
or electrocution if not used properly.
Electrical shock may occur from electrical cord.
Electrical shock may occur if pressure washer is not
operated properly.
Serious injury or death may occur if electrical repairs are
attempted by unqualified persons.
• This product must be grounded. Make sure the pressure washer is
equipped with a GFCI built into the power supply cord. If this is not
available, the pressure washer must be plugged into a receptacle that
is protected by a GFCI. Disconnect when not in use.
• If your unit is equipped with a GFCI, DO NOT drop the GFCI as
damage could result. If the GFCI is accidentally dropped, be certain
to test the GFCI before using to ensure it is working properly. (Follow
instructions on GFCI for test procedures.) Always be certain the unit
is receiving proper voltage. Before plugging the unit into a compatible
power source, be certain the switch is in the “OFF” position.
Disconnect when not in use.
• Do not modify plug provided with the product. If it will not fit the
outlet, have a proper outlet installed by a qualified electrician. Do not
use any type of adapter.
• Check power cord for signs of crushing, cutting or heat damage. If
replacement of plug or cord is needed, use only identical replacement
parts.
• Do not use extension cords with this pressure washer.
• Keep all connections dry and off the ground. Do not allow electrical
cords to lay in water or in such a position where water could come in
contact with them. Do not touch plug with wet hands.
• Do not pull on the electrical cord to disconnect from the outlet.
• Do not direct spray on or into electrical installations of any kind! This
includes electrical outlets, light bulbs, fuse boxes, transformers, the
unit itself, etc.
• Do not allow metal components of the pressure washer to come in
contact with live electrical components.
• Never operate the pressure washer with safety guards/covers
removed or damaged.
SAFETY SAFETY

8 9
WARNING
Serious injury or death may occur from normal sparks in
the multiple ignition sources or burner exhaust.
Injury or death may occur as a result of improper fueling.
Serious injury or death may occur if system safety’s are
not properly maintained.
• Always operate pressure washer in a well ventilated area free of
flammable vapors, combustible dust, gases or other combustible
materials.
• Do not store the pressure washer near an open flame or any
equipment such as a stove, furnace, water heater, etc., which utilizes
a pilot light or sparking device.
• Do not use this pressure washer to spray flammable material!
• Do not smoke while filling burner fuel tank.
• Never fill the burner fuel tank while the pressure washer is running or
hot. Allow to cool two minutes before refueling.
• Always refuel slowly to avoid the possibility of spilled fuel which may
cause a risk of fire.
• Do not refuel indoors or in a poorly ventilated area.
Burner Fuel Tank:
• Use No. 1 or No. 2 fuel oil/diesel or kerosene. Do not use gasoline,
crankcase drainings or oil containing gasoline or solvents.
• Do not operate the unit if diesel fuel is spilled. Wipe the pressure
washer clean and move it away from the spill. Avoid creating any
ignition until the diesel fuel has evaporated.
• This pressure washer has a Safety Relief device which should never
be altered, modified, removed or made inoperative. If the device fails,
replace immediately with only genuine manufacturer replacement part.
• Any electrical wiring or repairs performed on this pressure washer
should be done by Authorized Service Personnel in accordance with
National and Local electrical codes.
• Before opening any electrical enclosure, always shut off the pressure
washer, relieve pressure and unplug the pressure washer from the
power source. Allow the pressure washer to cool down. Never
assume the pressure washer is safe to work on just because it is not
operating. It could restart at any time! Service in a clean, dry, flat area.
WARNING
Serious injury or death may occur from inhaling burner
exhaust or dangerous vapors.
• Never operate this pressure washer in an enclosed area. Always make
certain there is adequate ventilation (fresh outside air) for breathing
and combustion. This will prevent the buildup of dangerous carbon
monoxide gases. Beware of poorly ventilated areas, or areas with
exhaust fans which can cause poor air exchange.
• Follow all safety instructions provided with the materials you are
spraying. Use of a respirator may be required when working with
some materials. Do not use this pressure washer to dispense
hazardous detergents.
WARNING
Serious injury or death could occur from high pressure
spray penetrating the skin.
• Keep clear of nozzle and spray! Never put your hand, fingers or body
directly over the spray nozzle.
• Do not direct discharge stream at persons or self.
• This product is to be used only by trained operators.
• Always keep operating area clear of all persons.
• Close supervision is necessary when used near children. DO NOT
allow children to operate this unit!
• SEEK EMERGENCY MEDICAL CARE if the spray appears to have
penetrated the skin! DO NOT TREAT AS A SIMPLE CUT!!
• High pressure hoses and fuel lines should be inspected daily for signs
of wear. If evidence of failure exists, promptly replace all suspect
hoses and fuel lines to prevent the possibility of injury from the high
pressure spray. If a hose or fitting is leaking, NEVER PLACE YOUR
HAND DIRECTLY ON THE LEAK.
• NEVER operate the gun with the trigger wired in the open position.
To prevent accidental discharge, the trigger gun should be securely
locked when not in use.
• Before removing the spray nozzle or servicing the unit, ALWAYS shut
off the unit and trigger the gun to release trapped pressure. (Even af-
ter you shut off the unit, there is high pressure water left in the pump,
hose and gun until you release it by triggering the gun.)
SAFETY SAFETY
This manual suits for next models
1
Table of contents
Other BE Power Equipment Pressure Washer manuals

BE Power Equipment
BE Power Equipment P2115EN User manual

BE Power Equipment
BE Power Equipment P1815EN User manual
BE Power Equipment
BE Power Equipment P1515EPNW User manual

BE Power Equipment
BE Power Equipment HW4013HBG Manual

BE Power Equipment
BE Power Equipment 96393-LJ User manual
BE Power Equipment
BE Power Equipment P1515EPN User manual

BE Power Equipment
BE Power Equipment HW4013HBG Service manual

BE Power Equipment
BE Power Equipment HW2765HG User manual

BE Power Equipment
BE Power Equipment P1915EN User manual

BE Power Equipment
BE Power Equipment COMMERCIAL Series User manual
