BE Power Equipment HW4013HBG Manual

MODEL:HW4013HBG
START-UP PROCEDURE
HOT WATER PRESSURE WASHER

2
TABLE OF CONTENTS
HEAT MANAGEMENT....................................................................................... 3
FUEL AND OIL TYPES...................................................................................... 4
PRE-OPERATION.............................................................................................. 5
ENGINESTARTUP..............................................................................................6
BURNER START AND STOP PROCEDURE.................................................7
ENGINE SHUT DOWN ......................................................................................8
ATTENTION: Read through the complete manual prior
to the initial use of your pressure washer.

3
Do not let your machine overheat. Failure to do so will result in damage, void warranty, or cause
injury.
Gas engines and electric motors are air-cooled. Always ensure that the machine is operated in a
well-ventilated area where it can draw a steady supply of fresh air. If the motor overheats, it may
shut down, rapidly burn oil, and result in component failure. The arrows below show an example of
locations for air intake on an engine.
Pumps are cooled on the front end by having fresh water run into the pump, then spray out of the
gun wand. To maintain the water flow, keep the trigger of the gun depressed to keep spraying out
water. Do not let the machine run for more than 30 seconds without pressing down on the trigger.
If the pump is left to overheat (not spraying water), it may experience thermal shock when cold
water is introduced to the system once water is sprayed out again. This thermal shock can result in
multiple component failures.
Most pumps are protected by a thermal valve. The thermal valve releases water if a pump starts to
run too hot. It will prevent catastrophic heat failure. However, the pump may have suffered damage
and need maintenance, repair, or replacement. The thermal valve will need to be replaced once it is
triggered.
The back end of the pump is cooled by maintaining the proper level and quality of pump oil. Always
check the oil level on the back of the pump by using the dipstick or sight gauge. Use 30w non-
detergent oil if it needs to be added or replaced.
Engine
PRESSURE WASHER COOLING SYSTEM
DO NOT OVERHEAT YOUR MACHINE
Triplex Pump
Threaded into
pump with teflon
tape
Leaks water to
prevent overheating

4
FUEL AND OIL TYPES
ENGINE FUEL TYPE
Use only regular unleaded gasoline rated at 86 octane or higher. The best fuel to use will have a
0% ethanol blend. However, the engine can use a fuel with an ethanol blend of up to 10%.
ENGINE OIL TYPE
Use only SAE 10W30 motor oil for the engine. To check the oil, unscrew the engine dipstick. Then,
wipe off the oil with a clean rag and dip it back into the engine. The oil should be well within the oil
level markings.
Note* the engine will have two oil caps. Only one will have a dipstick.
PUMP OIL TYPE
For pressure washer pumps, use only SAE 30W non-detergent oil. Never use motor oil in your
pressure washer pump because it will destroy the seals.
Never overfill the pump.
• If your pump has a sight glass, then ll halfway up to the middle of the red dot.
• If your pump has a dipstick, then ll to the mark on the dipstick.
BURNER FUEL TYPE
• The fuel tank for the burner is the black plastic container located under the engine.
• ONLY use No.1 or No.2 Diesel or kerosene in the black plastic fuel tank.
• NEVER put gasoline in the burner fuel tank. Gasoline is more volatile and burners hotter than
diesel. Using gasoline is extremely dangerous and will lead to component failures.
• NEVER put diesel into the Honda, Vanguard or Powerease engine.
• DO NOT let the fuel get completely used up before relling. Running the fuel dry is hard on all
the components and may lead to more dicult startups.
ENGINE TYPE FUEL TANK CAPACITY OIL CAPACITY
Honda GX390 6.1 L / 1.6 US Gal 1.1 L / 1.16 US qt
MODEL TYPE BURNER FUEL TANK
CAPACITY FUEL TYPE
HW4013HBG 37.8 L / 10 US GAL No.1 or No.2 Diesel or Kerosene

5
PRE-OPERATION
1. Before operating the pressure washer, ensure you are familiar with all the warnings and safety
recommendations.
2. Wear proper clothing and eye protection.
3. Always setup the machine where:
3.1 It is on a level surface. If the machine is not level, it may not start or cause failures.
3.2 There is sucient ventilation.
3.3 There are no signs of oil or gas leaks, including gas vapors.
3.4 The machine is not exposed to rain, snow or freezing temperatures. These harsh conditions can
lead to component failure causing damage or injury
4. Ensure that oil levels for the engine and pump are correct.
4.1 Use 10W30 oil to ll the engine if needed.
4.2 Use 30W non-detergent oil to ll the pump if needed.
5. If the pump has an oil cap dipstick, make sure it is the breathing oil cap instead of the sealed
travel oil cap. If the sealed travel oil cap is left in, the pump will over pressurize and blow it out.
6. Inspect the overall condition of the unit. Make sure there are no fuel or oil leaks or damaged
parts. If any leaks or damaged parts are detected DO NOT start the pressure washer until it is
xed.
7. Connect the high-pressure hose to the pump and the gun wand assembly to the other end of the
hose.
8. Connect the garden hose to the pump. NEVER run without water.
8.1 Ensure the inlet lter on the pump is present, intact, and clean before connecting the garden
hose.
WATER SUPPLY MUST BE SUFFICIENT TO SUPPLY THE PUMP ADEQUATELY.
Every pressure washer has a Gallons Per Minute (GPM)/ Liters Per Minute (LPM) rating that must
be adhered to. If the pump does not get enough water, it will cavitate (starve for water). This will
cause internal damage and pending failure.
To measure your water source GPM/ LPM, you will need a container that you know the exact size
such as a 5-gallon/20-Liter bucket. When you’re ready, start lling it from your water source while
timing it for one minute. The amount of water in the 5-gallon/20-liter bucket after one minute is the
GPM/LPM rating.
The water source GPM/ LPM should exceed the GPM/ LPM rating of the machine by one GPM/
LPM to account for any uctuations from the water source.
The water source should have 20 to 60 PSI/1.38 to 4.1 BAR pressure going into the pump. Do not
use a hose longer than 50ft/15m to the water source.
PRIME THE PUMP WITH WATER
Once all the hoses are connected, turn on your water supply and hold down the spray gun’s trigger.
Let water ow through it until all the air bubbles are worked through, and there is a constant stream
of water coming out the nozzle.
Insert the color spray nozzle that you plan to use. Make sure the nozzle is clean with no damage or
blockages.

6
ENGINE START UP PROCEDURE
SET UP
1. Fill the engine fuel tank with gasoline.
2. Do not overll the fuel tank. Always leave a space to allow the tank to breathe and the fuel to
expand.
3. Set to full throttle by moving the lever all the way to the LEFT.
4. Turn the fuel valve to the ON position. Move the fuel valve lever all the way to the RIGHT.
5. Activate choke if the engine is cold. Move the choke lever all the way to the LEFT.
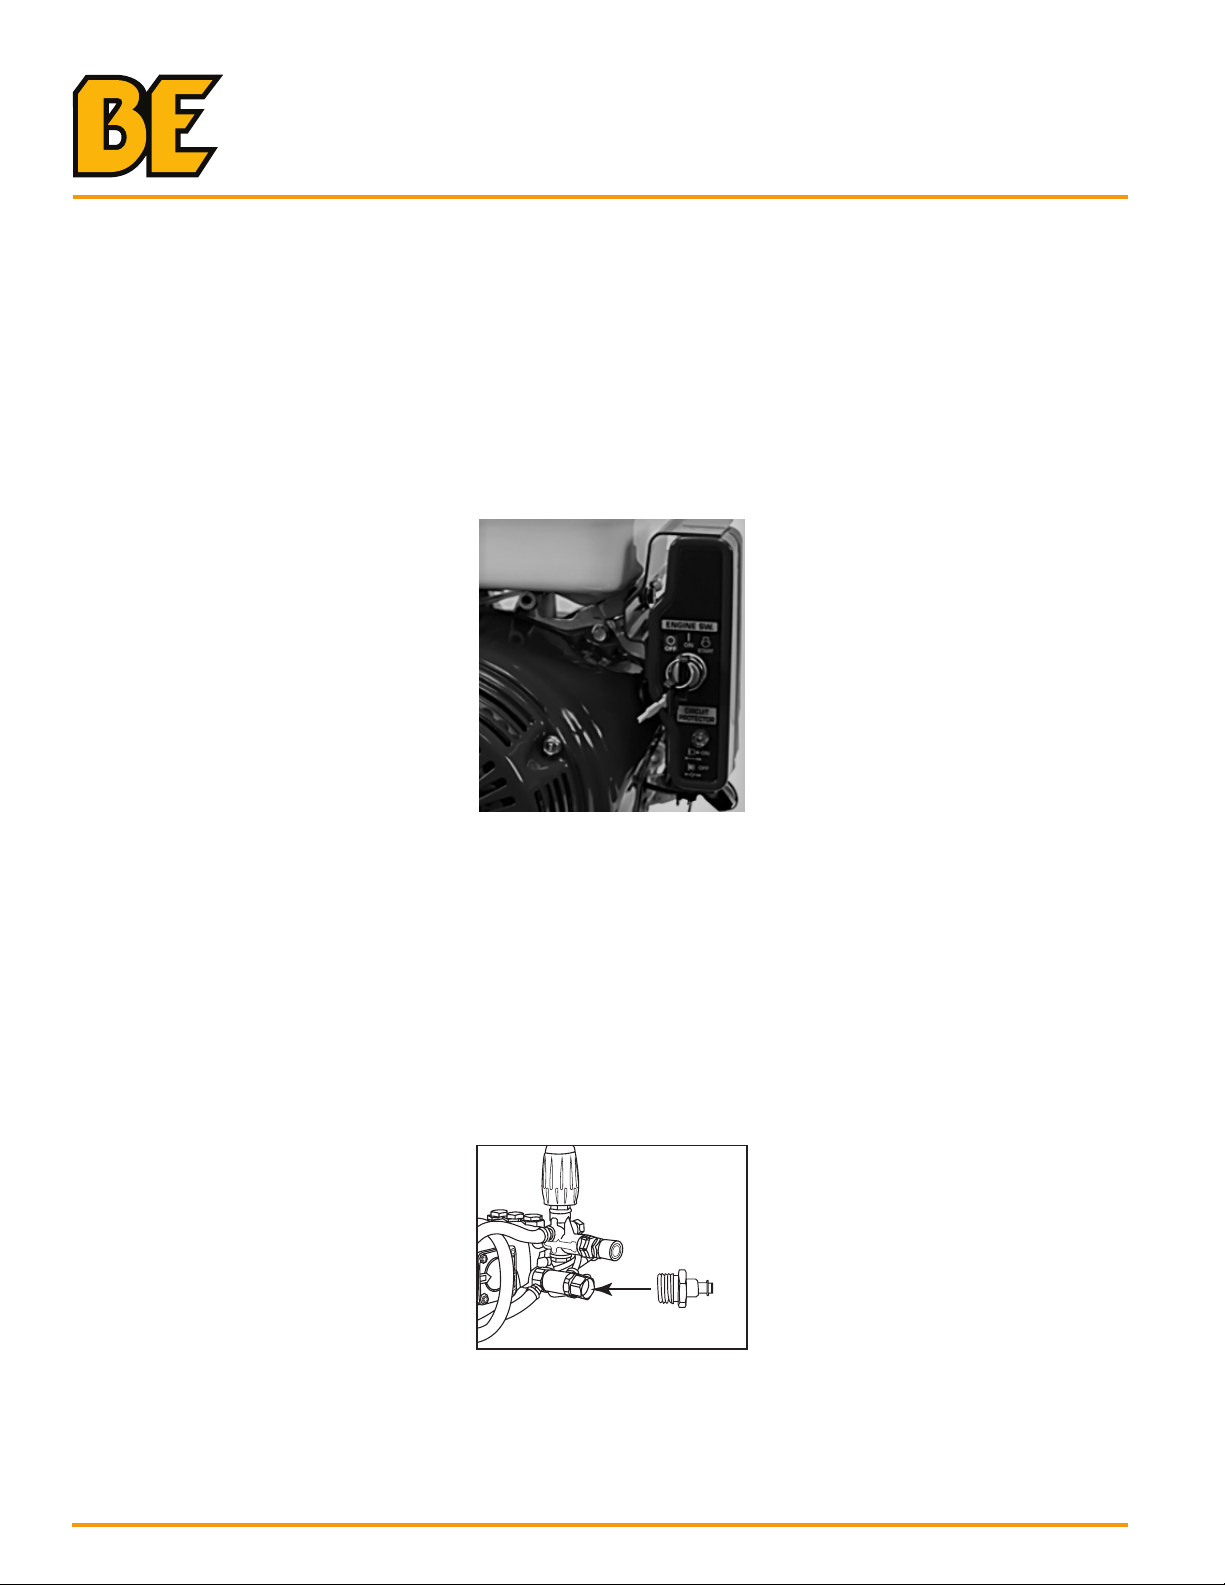
6. Move the key to the ON position. The switch will be on the side of the engine.
7. PULL START: With one hand, squeeze the trigger of the spray gun open, so the water is
owing. Brace the pressure washer with your foot. With the other hand, grip the recoil handle
and slowly pull it out until you feel resistance. Pull briskly on the recoil. You may have to pull it
several times before it starts running.
8. ELECTRIC START: Ensure the battery is connected and fully charged. With one hand, squeeze
the trigger of the spray gun so the water is owing. With the other hand, turn the key on the
engine to the ‘START’ position to start the engine. Release the key once the engine starts.
9. Once the engine has warmed up, disengage the choke lever by moving the lever to the right
to smooth out the engine. If it stalls, then it needs to get warmer before the choke is turned o.
Restart the engine, let it warm up, and then try turning the choke o again.
Important Note: The pressure washer has been designed to run at full throttle. If you lower the throttle then the
load-to-power ratio between the engine and pump will be incorrect. This will cause undue strain on the system while
pressure washing, causing parts to wear quicker and may lead to unsafe operating conditions.
3
5
4
7
HOT WATER BURNER START PROCEDURE
1. Fill the black fuel tank with Diesel or Kerosene (No.1 or No.2 grade)
2. The battery must be plugged in and fully charged to start the heater.
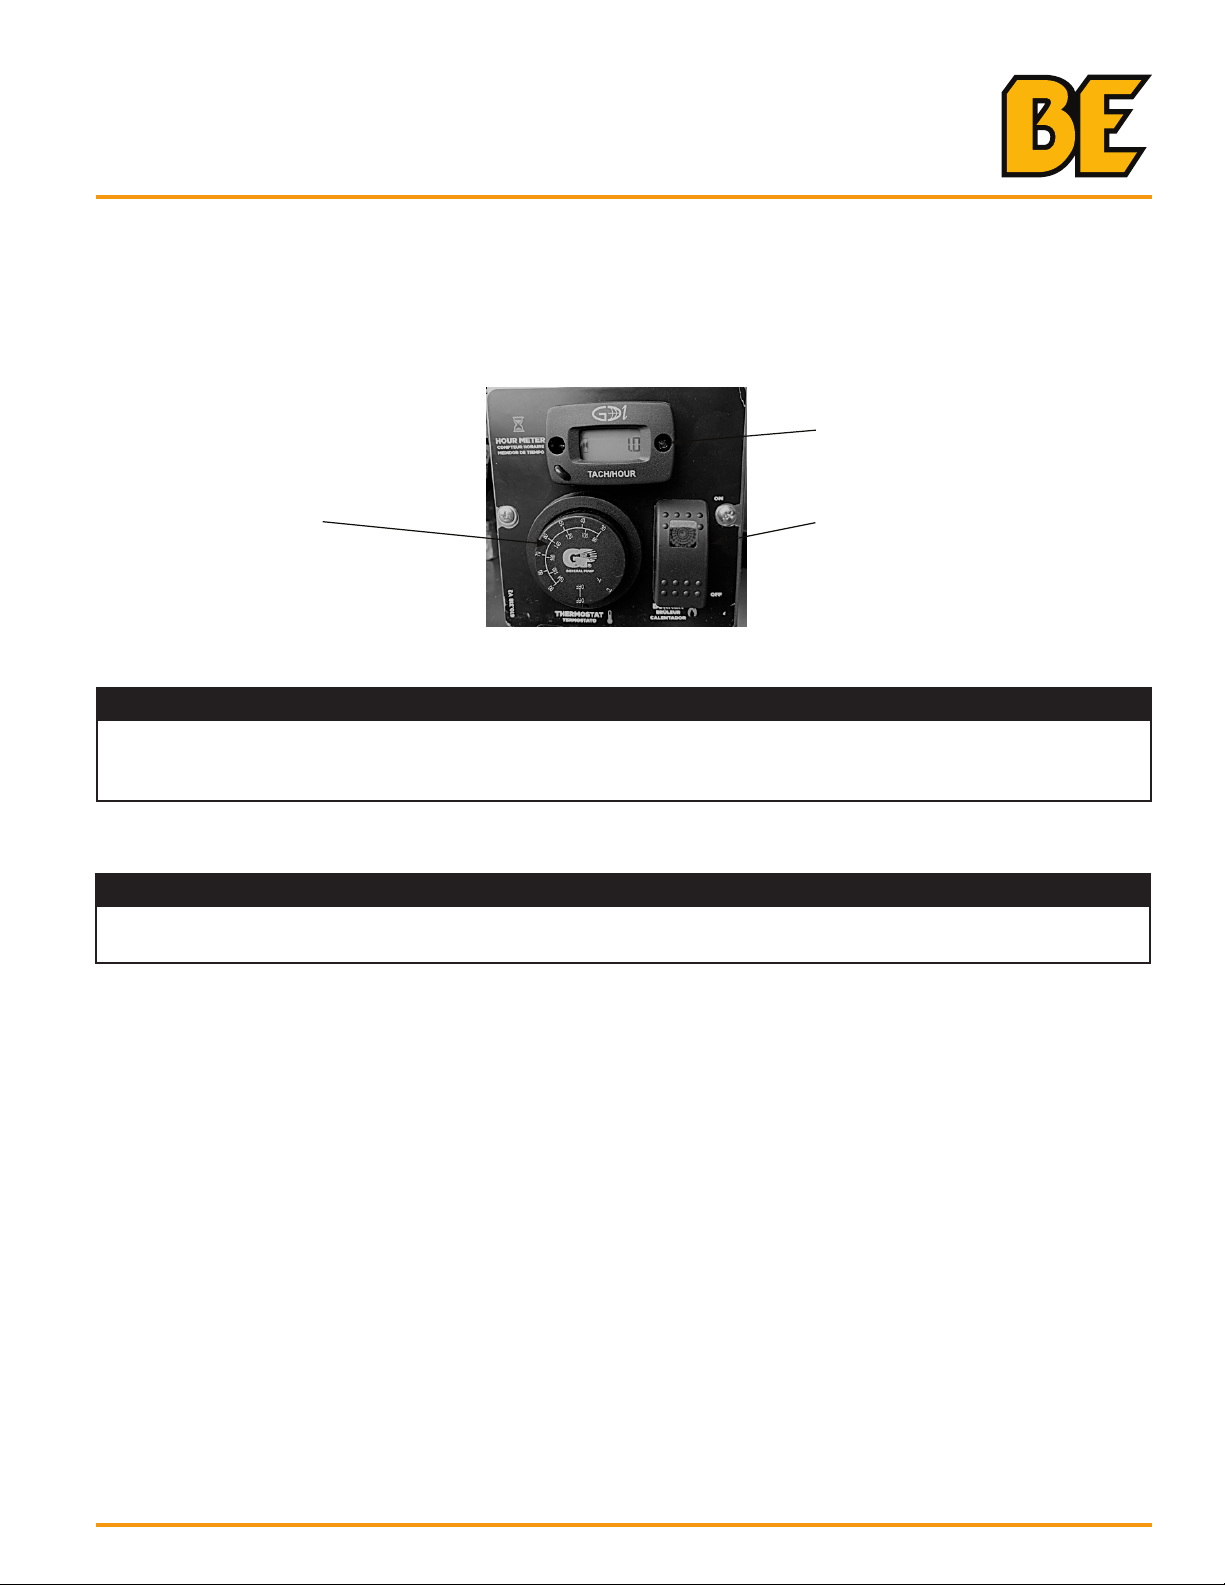
2. Once the engine is running, push the burner toggle switch to the ON position and
adjust the thermostat to the desired temperature.
NOTICE
Once the heater has been started, the water will begin heating up in about 20 seconds. It will
reach maximum temperature within 2.5 minutes of continuous spraying through the gun. The
burner will not re when the trigger is released.
HOT WATER BURNER START AND STOP PROCEDURE
HOT WATER BURNER STOP PROCEDURE
1. To turn o, push the burner toggle switch to the OFF posistion.
2. Once the heater is o, squeeze the trigger and discharge the water for three minutes to
cool the heat exchanger and high pressure hose. Insucient cool-down periods for the high
pressure hose will cause excessive wear and eventual rupture of the hose.
WARNING
The water temperature can become extremely hot during operation.
Use caution when operating the spray gun.
ON/OFF
Toggle Switch
TACH/HOUR Meter
Thermostat
8
ENGINE STOP PROCEDUE
1. Throttle down the engine.
2. While holding the spray gun trigger, turn o the engine by moving the key to the OFF position.
3. Turn the fuel valve to the OFF position.
Emergency Stop: Switch the engine to the OFF position immediately. This will stop the engine
right away, but may trap pressure in the system, which may prevent restarts or the ability to remove
the hose or spray gun.
4. Turn o the water source, and squeeze the trigger again to release pressure and water before
disconnecting the hoses.
5. Drain the water out of the hoses before putting into storage.
ENGINE STOP PROCEDURE
If you need technical assitance call:
1-866-850-6662
(8:00am - 4:30pm PST, Mon - Fri)
FLUSH WATER OUT OF THE HEATER COIL
It is recommended to blow out the water out of the heater coil by using the brass blow out tool. This
will help minimize scale and rust build up in the heater coil, especially when putting it into storage.
An air compressor will be needed to perform this function.
1. Thread the blow out tool into the inlet of the pump.
2. Ensure air compressor regulator is set to 60 PSI or less.
3. Connect air line from air compressor to blow out tool.
4. Squeeze trigger of the pressure washer gun. Water will blow out of it from the applied air
pressure.
5. Once there is no more water coming out of the tip of the gun, disconnect the
airline from the blow out tool, squeeze trigger of the pressure washer gun to relieve
any remaining air pressure.
PUMP INLET
Table of contents
Other BE Power Equipment Pressure Washer manuals

BE Power Equipment
BE Power Equipment HW2765HG User manual

BE Power Equipment
BE Power Equipment HW3024HG12V User manual

BE Power Equipment
BE Power Equipment COMMERCIAL Series User manual

BE Power Equipment
BE Power Equipment P2115EN User manual

BE Power Equipment
BE Power Equipment HW4013HBG Service manual

BE Power Equipment
BE Power Equipment P1515EPN User manual

BE Power Equipment
BE Power Equipment P1815EN User manual

BE Power Equipment
BE Power Equipment 96393-LJ User manual

BE Power Equipment
BE Power Equipment HW152EMD User manual

BE Power Equipment
BE Power Equipment P1915EN User manual


