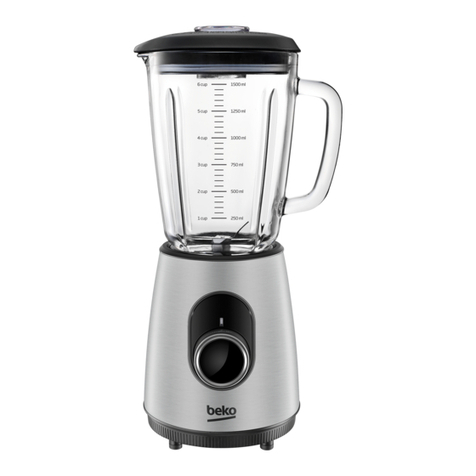
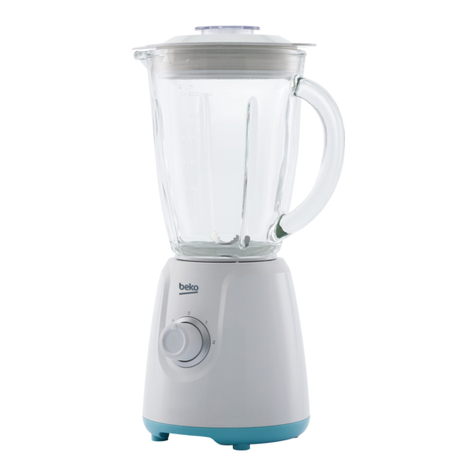
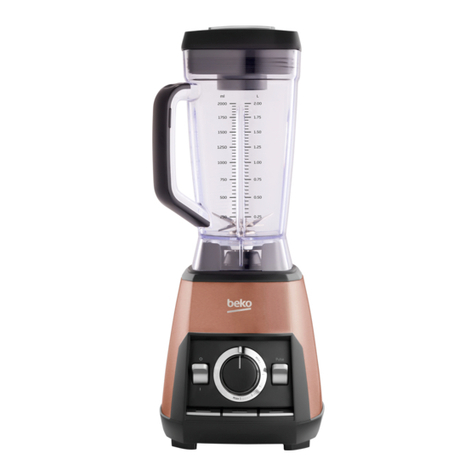
Beko BKK 2166 User manual

Washing Machine
User Manual
D1 9122 ES
D1 9124 EX
www.beko.com
BKK 2166
Grater Hand Blender
User Manual
BKK 2166_EN.indd 1 01.06.2011 10:17

Please read this manual first!
Dear Customers!
We hope that your product which has been manufactured in modern facilities
and passed through strict quality control procedures will give you the best
results.
For this, read through this manual carefully before using your product and keep it
for future reference.
User manual will help you use the product in a fast and safe way.
• Read the user manual before installing and operating the product.
• Particularly follow the instructions related to safety.
• Keep the user manual within easy reach as you may also need it in the future.
• Also, please read all additional documents supplied with this appliance.
Please note that this user manual may be applicable for several other models.
Differences between models will be identified clearly in the user manual.
This product has been produced in environmentally friendly, modern facilities.
It complies with EEE Directive.
BKK 2166_EN.indd 2 01.06.2011 10:17

EN1
1 Safety Warnings 2
2 Technical Specifications of the Appliance 3
3 Using the Appliance 4
4 Cleaning and Care 11
CONTENTS
BKK 2166_EN.indd 1 01.06.2011 10:17

EN2
1Safety Warnings
• Please read the user manual before
installing parts and operating the
appliance.
• Your appliance is intended for only
household use. It is not a professional
appliance.
• Keep the appliance out of reach of
children.
• Unplug the appliance during cleaning
and when it is not in use.
• Cutter blade is very sharp. Hold it
carefully from the plastic part while
unpacking, during use, after use and
while cleaning.
• When using the graters, always use
pushers to feed in the foods to be
grated; NEVER DO this by hand or by
using any other tool.
• Before the first use, please read
cleaning and care section of this user
manual and clean your appliance.
• Do not operate you appliance's
accessories when the appliance is
empty or when there is no food in it.
• Your appliance is only compatible with
the supplied accessories. Never use
accessories of other appliances.
• Never put the processor and the
measuring cups in a microwave oven.
• Do not operate your appliance for
a long time, operate it with short
intervals.
• Ifpowercableisdamaged,it
shouldbereplacedbyauthorized
service.
• Your appliance must not be used
by persons (including children) with
reduced physical (aural or visual),
sensory or mental capabilities, or lack
of experience and knowledge, unless
they have been given supervision by a
person responsible for their safety.
• Children must be supervised when
they are using the appliance and they
should not be allowed to tamper with
it.
Caution!
Before replacing the accessories or
reaching the movable parts when the
appliance is in use, you must remove
your hand from the operating button
of the appliance, wait for the motor
to stop completely and unplug the
appliance.
Read the user manual completely and
thoroughly including warranty section
before starting to use your appliance.
Please keep the original invoice or
its photocopy for future reference
regarding warranty issues.
This appliance is intended for domestic
use.
BKK 2166_EN.indd 2 01.06.2011 10:17

EN3
2Technical Specifications of the Appliance
1- Motor body
2- Turbo operation button
3- Operating switch
4- Metal blending shaft
5- Whisker operating cap
6- Whisker
7- Beaker
8- Processor container
9- Processor container's lockable cover
10- Locking tabs
11- Locking tab release buttons
12- Motor body locking button
13a- Middle cover
13b- Middle cover sealing
14- Accessory carrier pin
15a- Blade sheath
15b- Cutter blade
16- Grater carrier disc
17- Grating blade
18- Slicing blade
19- Large pusher
20- Small pusher
Voltage : 230V~ 50 Hz
Insulationclass :
Dimensions : ø 205 x ø 205
x 395 mm.
Power : 400 W max.
The capacity
of processor’s
container
: 1,500 ml. max.
Beaker capacity : 800 ml. max.
Net weight :2318 g
•Markings on the appliance or the
values stated in print documents
supplied with the appliance are values
obtained under laboratory conditions
as per relevant standards. These
values may vary according to the
usage of the appliance and ambient
conditions.
BKK 2166_EN.indd 3 01.06.2011 10:17

EN4
3Using the Appliance
Chopping and Blending in the
Processor Container with the
Cutter Blade
• Foryoursafety,yourappliance
will not operate unless the
processor container cover is
seated well in its place.
Toattachthemotorbody:
1. Align the position marks “▼” on the
body and “ ” on the cover to place it
on the cover.
2. Rotate the motor body clockwise until
a locking sound is heard. In this case,
the “▼” position mark on the body
will align with the “ “ position mark on
the cover.
Todetachthemotorbody:
1. Unplug the product.
2. Press and hold with one hand
the “ ” locking button on the
cover and rotate the motor body
counterclockwise with the other hand
to the “ ” position mark. Remove the
motor body.
3. To detach the food processor’s
cover, press the buttons indicated by
arrows.
NEVERpullthelockingtabsto
open them; always use the release
buttons.
Caution!
Read the “Maintenance and Cleaning”
part before using your product and
wash and dry carefully the detachable
and washable parts with lukewarm
soapy water. Never immerse the motor
part in water. You can wipe and clean
it with a slightly damped cloth.
When using your appliance, operate it
shortly (running intermittently in short
intervals) in “Turbo” position. Foods
you wish to chop or blend will blend
better and will be chopped to pieces
at the same sizes.
WARNING: Your appliance is
designed to operate continuously for
maximum 10 seconds. Care should
be paid not to exceed this time when
preparing the foods. Otherwise, your
appliance may be damaged. Wait for
some 1 minute in every 10 seconds
until the appliance cools down.
BKK 2166_EN.indd 4 01.06.2011 10:17

EN5
TurboButton
Turbo button allows pulse operation
and maximum power usage. With the
turbo function, you can get especially
the chopping result you wish easier.
Press the button in short intervals also
when using the turbo function.
Pleasefollowtheorderbelowfor
use.
• Place the processor container on a
flat and stable surface. Then, seat the
accessory carrier pin on the centering
pin in the processor container.
• Take the metal cutter blade out of its
sheath and place it on the accessory
carrier pin.
• Put the food you wish to chop in the
container at equal height and as not
to heap up at one side. Do not put
more food than the recommended
quantities; appliance may be
damaged.
• Place the transparent middle cover
on the processor’s container. Place
also the processor container’s
lockable cover carefully and lock the
tabs. The “click” sound will indicate
that the tabs are seated and locked.
• Align the position marks “▼” on the
body and “ ” on the cover to place it
on the cover. Rotate the motor body
clockwise until a locking sound is
heard. In this case, the “▼” position
mark on the body will align with the “
“ position mark on the cover.
BKK 2166_EN.indd 5 01.06.2011 10:17

EN6
WARNING:Your appliance will not
operate until the processer container’s
lockable cover and/or the motor body
are fully seated and locked into their
places.
• Plug in the appliance.
• You may start the chopping process
by pressing the operation button or
the turbo button on the motor body.
• The “TURBO” button allows pulse
operation and maximum power
usage. With the turbo function, you
can both get especially the chopping
result you wish easier and also you
will extend the service life of the
appliance.
• Thoughthechoppingand
blendingrecommendationsare
the results of tests that have
beencarriedout,youmayalso
determine the ways and times of
operation according to your own
taste.
• Seed the fruits such as peach,
apricot, plum, etc. and shell the
dried fruits and nuts such as
almond, hazelnut, walnut, etc. before
processing them in your appliance.
Use the meat as boneless, fatless
and without sinews.
Caution!
1- When operating your appliance,
do not detach the motor body and
the lockable cover from the food
processor’s container to control
or finish the work unless the motor
comes to a full stop and the appliance
is disconnected.
2- First of all, remove the blade
together with the accessory carrier
pin carefully to get the foods you have
chopped.
Chopping recommendations are given
in the table on page 7.
Toremovethemotorbody,
apply the steps explained on page
4.
BKK 2166_EN.indd 6 01.06.2011 10:17

EN7
GratingandSlicinginthe
Processor's Container
Pleasefollowtheorderbelowfor
use.
• Place the processor's container on a
flat and stable surface. Then, seat the
accessory carrier pin on the centering
pin in the processor's container.
• For slicing or grating process,
hold the carrier disc as the disc side
pointing upwards, first place the
projecting part of the grater or the
slicing blade in its place and press
the other side slightly. (To remove the
grater and slicing blades from the disc,
push slightly from bottom. ) If the blade
is at the same level with the surface of
the disc and not moving when pressed
down from top, it has seated in its
place.
• Place the disc on the accessory
carrier pin.
• Place the transparent middle cover
on the processor container. Place also
the processor container's lockable
cover carefully and lock the tabs. The
"click" sound will indicate that the tabs
are seated and locked.
FOODTYPE CAPACITY OPERATIONMODE
Meat 400 g Turbo
Onion / Garlic (cut into pieces) 500 g On-Turbo (for momentary
operations)
Fruits (cut into pieces) 700 g Turbo
Parsley 100 g On-Turbo
Hazelnut / Almond / Walnut 300 g On-Turbo
Cheese 300 g Turbo
Biscuit 300 g On-Turbo
BKK 2166_EN.indd 7 01.06.2011 10:17

EN8
• Align the position marks “▼” on the
body and “ ” on the cover to place it
on the cover. Rotate the motor body
clockwise until a locking sound is
heard. In this case, the “▼” position
mark on the body will align with the “ “
position mark on the cover.
• For your safety, feed the food into
the container with its pusher; pushers
must be in their place when the
appliance is operating. There are two
types of pushers according to the
thickness of the food: big and small.
You may select the pusher according
to the piece you will put. Never use
your fingers, fork, spoon and tools
alike instead of a pusher.
When grating process is over, it
is recommended that the disc be
operated as to rotate for several cycles
more to grate the smaller items that
might have remained between the
carrier disc and the cover.
Grating and slicing recommendations
are given in the table on page 9.
WARNING: Your appliance will not
operate until the processer container's
lockable cover and/or the motor body
are fully seated and locked into their
places.
• Plug in the appliance.
• You may start the grating or slicing
process by pressing the operation
button on the motor body. Do not
operate the appliance in turbo mode
when performing grating or slicing
processes.
•Toremovethemotorbody
apply the steps explained on page
4.
BKK 2166_EN.indd 8 01.06.2011 10:17

EN9
FOODTYPE CAPACITY OPERATIONMODE
Cucumber 800 g On
Carrot 400 g On
Potato 400 g On
Courgette 800 g On
Radish 400 g On
Blending and chopping with the
metal blending shaft:
Caution!
Please take the following into
consideration before using, while using
and after using the blending shaft;
Operate the metal shaft in a container
and only when there is food in the
container. It is dangerous to operate it
outside of container or with an empty
container.
Please follow the order below for
use.
Before plugging in the appliance,
fix the metal blending shaft to the
motor body by turning it towards the
direction of arrow.
Stop turning when the metal blending
shaft’s upper edge is fixed to the
motor body; if you tighten more, this
may cause abrasion in screw threads.
To get better results with metal
blending shaft, please use the supplied
beaker or a deep bowl.
Cut the food into pieces before placing
them in the beaker. Dip the metal
blending shaft into the beaker, plug
and operate the appliance. Do not
operate your appliance for a long
time, operate it with short intervals.
When operating, you may move the
metal shaft upwards and downwards
to ensure better blending. When you
finish blending, unplug the appliance
and remove the metal shaft from the
main body.
Whisking and blending with the
whisker:
You can easily prepare cake, omelets,
pancake and mayonnaise with the
help of whisker operating cap and the
whisker.
Please take the following into
consideration before using, while using
and after using the whisker;
• Always operate the appliance in
upright position.
• Do not operate the appliance in an
empty bowl or outside the bowl.
• To ensure an efficient whisking,
move the whisker up and down and in
BKK 2166_EN.indd 9 01.06.2011 10:17

EN10
circular motions.
• Make sure that the whisker is
completely fixed in place.
Pleasefollowtheorderbelowfor
use;
First insert the whisker into the whisker
operating cap by pushing it and make
sure that it is securely fastened.
Screw the whisker operating cap on
the main body; do not tighten too
much to avoid abrasion in screw
threads.
Dip the whisker into the supplied
beaker or a deep bowl containing the
food, plug the appliance and complete
the whisking.
When you are done, stop and unplug
the appliance. Take the main body out
of the beaker. Unscrew the whisker by
turning towards opposite direction to
remove it from the operating cap. Pull
out the whisker.
•Itisrecommendedthatthe
whiskerbeusedtogetherwiththe
suppliedbeakerorwithadeep
container.
BKK 2166_EN.indd 10 01.06.2011 10:17

EN11
4Cleaning and Care
• Always unplug the appliance before
cleaning.
• For easy cleaning, it is recommended
to wash and dry the accessories
immediately after use.
• Particularly, wash and dry the cutter
blade immediately after the use.
• Do not immerse motor body,
processor container's lockable cover
and whisker operating cap into
water and do not wash them under
running water or dishwasher. Wipe
them with a lukewarm damp cloth
(recommended washing up liquids
might be used) and dry.
• You may wash the beaker, processor
container, transparent middle cover,
pushers, whisker, blade and the
grating blades on the upper rack of a
dishwasher.
• You may wash metal blending shaft
in lukewarm detergent water or wipe
it with a damp cloth. However, you
have to avoid water getting into the
inner part of blending shaft. In such a
case, turn the shaft upside down and
shake and dry it up; do not wash the
shaft in dishwasher.
• Be careful when washing stainless
blades, grater and slicing blades.
These parts are sharp. Keep the
metal blade in its protective plastic
sheath when not in use.
• You may remove the sealing on
the transparent middle cover and
reattach it after cleaning and drying.
BKK 2166_EN.indd 11 01.06.2011 10:17

48 9049 0000/AF
EN-FR-DE-EL
Washing Machine
User Manual
D1 9122 ES
D1 9124 EX
www.beko.com
BKK 2166_EN.indd 12 01.06.2011 10:17
Table of contents
Other Beko Blender manuals

Beko
Beko HBS5550W User manual

Beko
Beko TBV8104BX User manual

Beko
Beko HBS7750X User manual

Beko
Beko SMM888BX User manual

Beko
Beko 01M-8816073200-2619-01 User manual

Beko
Beko HBS6600W User manual

Beko
Beko HBS6702W User manual

Beko
Beko HBS5550W User manual

Beko
Beko HBA6702 User manual

Beko
Beko TBP5300 User manual