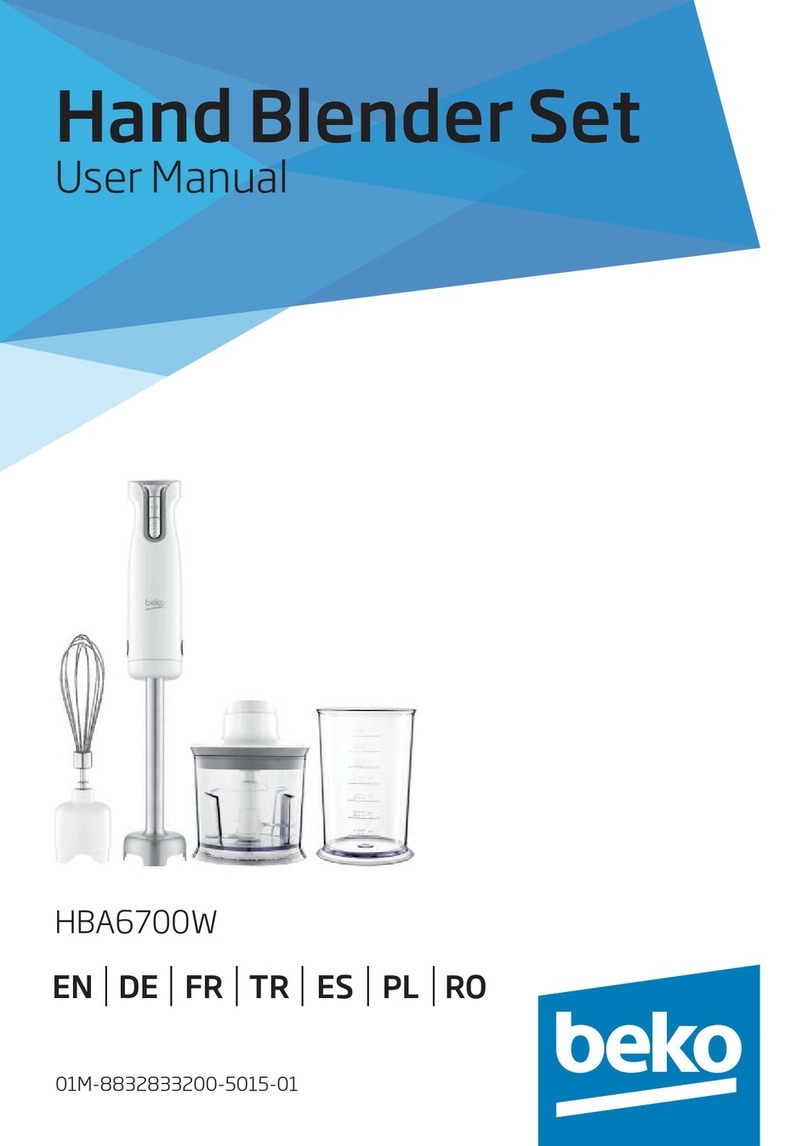
Beko HBA6700W User manual

HBA6700W
Hand Blender Set
User Manual
01M-8832833200-1617-05
EN DE FR TR ES PL RO IT

Please read ths user manual frst!
Dear Customers,
Thank you for selectng an Beko product. We hope that you get the best results from
your product whch has been manufactured wth hgh qualty and state-of-the-art
technology. Therefore, please read ths entre user manual and all other accompanyng
documents carefully before usng the product and keep t as a reference for future
use. If you handover the product to someone else, gve the user manual as well. Follow
all warnngs and nformaton n the user manual.
Meanngs of the symbols
Followng symbols are used n the varous secton of ths manual:
C
Important information and useful
hints about usage.
AWARNING:
Warnings for
dangerous situations concerning the
safety of life and property.
Materials are intended to be in
contact with food.
Do not immerse the appliance,
power cord or power plug in water or
in other liquids.
Potection class against electric
shock
Ths product has been produced n envronmentally-frendly, state-of-the-art facltes.
Comples wth the WEEE Drectve. It does not contan PCB.
Made n P.R.C.

3 / EN
Hand Blender Set / User Manual
CONTENTS
ENGLISH 4-10
DEUTSCH 11-20
FRANÇAIS 21-29
TÜRKÇE 30-37
ESPAÑOL 38-48
POLSKI 49-61
ROMANIAN 62-72
ITALIANO 73-82

4 / EN Hand Blender Set / User Manual
This section contains safety
instructions that will help protect
from risk of personal injury or
property damage.
Failure to follow these instructions
invalidates the granted warranty.
1.1 General safety
• This appliance complies with the
international safety standards.
• This appliance may be used
by children and the people
whose physical, perceptive
or mental skills are impaired
or who are inexperienced or
not knowledgeable about the
appliance as long as they are
supervised or informed and made
understood the safe use of the
appliance and the encountered
dangers. Children should not play
with the appliance.
• This appliance shall not be used by
children.
• Keep the appliance and its cord
out of the reach of children.
• Do not use it if the power cable,
blades or the appliance itself is
damaged. Contact an authorised
service.
• Only use the original parts or
parts recommended by the
manufacturer.
• Do not attempt to dismantle the
appliance.
• Your mains power supply should
comply with the information
supplied on the rating plate of the
appliance.
• Do not use the appliance with an
extension cord.
• Do not pull the power cable when
unplugging the appliance.
• Wait for moving accessories to
stop and unplug the appliance
when left attended, while
installing/removing accessories
or before cleaning.
• Do not touch the plug of the
appliance with damp or wet hands.
• Do not use the device for hot food.
• To prevent overheating, do not
use the appliance continuously
for more than10 seconds. Leave to
cool for 1 minute in between each
10 seconds of operation.
• Use the appliance only with the
supplied rubber base and glass
container.
1Important nstructons for safety and
envronment

5 / EN
Hand Blender Set / User Manual
• Do not operate the appliance
without the ingredients in the
bowl.
• Remove bones and stones from
food to prevent the blades and the
appliance from getting damaged.
• This appliance is not suitable for
dry or hard foods as this willquickly
cause the blades to become dull.
• Follow all warnings to prevent
injuries due to incorrect use.
• When emptying the container,
during cleaning and grabbing
chopping blades with bare hands
serious injuries could result
due to incorrect use. Use the
plastic section trying to hold the
chopping blade.
• After cleaning, dry the appliance
and all parts before connecting
it to mains supply and before
attaching the parts.
• Do not immerse the appliance,
power cable, or power plug in
water or any other liquids.
• Do not operate or place any part
of this appliance or its parts on or
near hot surfaces.
• If you keep the packaging
materials, store them out of the
reach of children.
1.2 Compliance with the WEEE
Directive and Disposing of the
Waste Product:
This product complies with EU WEEE Directive
(2012/19/EU). This product bears a classification
symbol for waste electrical and electronic
equipment (WEEE).
This product has been manufactured
with high quality parts and materials
which can be reused and are suitable
for recycling. Do not dispose of the
waste product with normal domestic
and other wastes at the end of its service life. Take
it to the collection center for the recycling of
electrical and electronic equipment. Please
consult your local authorities to learn about these
collection centers.
1.3 Compliance with RoHS
Directive
The product you have purchased complies with EU
RoHS Directive (2011/65/EU). It does not contain
harmful and prohibited materials specified in the
Directive.
1.4 Package information
Packaging materials of the product are
manufactured from recyclable
materials in accordance with our
National Environment Regulations. Do
not dispose of the packaging materials together
with the domestic or other wastes. Take them to
the packaging material collection points
designated by the local authorities.
1.5 Things to do for energy
saving
Follow the times recommended in the manual
during use. Unplug the appliance after use.
1Important nstructons for safety and
envronment
6 / EN Hand Blender Set / User Manual
2 Hand Blender Set
2.1 Overview
The values whch are declared n the markngs axed on your applance or the other prnted documents suppled wth t represent the values
whch were obtaned n the laboratores pursuant to the pertnent standards. These values may vary accordng to the usage of the applance and
ambent condtons.
1. On/Off button
2. Turbo button
3. Motor unit
4. Attachment release buttons
5. Blending attachment
6. Chopping lid
7. Chopping blade
8. Chopping bowl
9. Whisk holder
10. Measuring beaker
11. Balloon whisk
2.2 Technical data
Power supply:
220-240 V~, 50/60 Hz
Power:
700 W
Technical and design modifications reserved.
10
8
6
7
1
2
3
4
5
11
9

7 / EN
Hand Blender Set / User Manual
3 Operation
3.1 Preparation
1. Remove all packaging and sticker materials and
dispose of them according to the applicable
legal regulations.
2. Before using the appliance for the first time,
clean parts which come into contact with food
(see the “Cleaning and care” section).
3. Cut the food into small pieces before processing
with the appliance.
3.2 Maximum quantities and
processing time
Ingredients Maximum
quantities Processing
time
Meat/Fish 200g 10-15 seconds
Herbs 20g 20 seconds
Nuts 200g 15 seconds
Cheese 150g 15 seconds
Bread 1 slice 20 seconds
Eggs
(hard-boiled) 2 eggs 5 seconds
Onions
(cut in 8 pieces) 100 g 10 seconds
3.3 Blending
1. Put the food that you would like to puree or mix
in the measuring beaker (10) or a similar bowl.
2. Attach the blending attachment (5) to the
motor unit (3) by pushing the attachment to
the motor until it locks. Make sure the blending
attachment is properly attached to the motor
unit.
3. Insert the plug into the wall socket.
4. Immerse the blending attachment (5) in the
measuring beaker (10), that contains the
ingredients to be blended.
C
To prevent the ingredients from
splashing, do not press the On/Off
button (1) or turbo button (2) until
the blending attachment has been
immersed in the ingredients.
5. Press and hold down the On/Off button (1).
– The appliance starts operating.
6. Use the speed control to select a speed or press
and hold the turbo button (2).
– The speed indicator LED illuminates
according to the desired speed 1-6.
C
When you use the turbo button the
appliance operates at maximum
speed. In this case you cannot adjust
the speed with the speed control.
C
While using the turbo button (2), all
speed indicator LEDs illuminate.
7. Move the appliance slowly up and down and in
circles to blend the ingredients.
C
Always switch off the appliance
before taking out the processed
food.
8. Release the On/Off button (1) or turbo button
(2) when you are finished and disconnect the
power plug from the wall socket. Remove the
mixture from the measuring beaker (10).
9. Disassemble the blending attachment (5) only
by pushing the attachment release buttons (4)
at the sides of the appliance and pulling it off
from the motor unit.
C
To prevent overheating do not
operate the appliance continuously
for more than 10 seconds.
C
Never switch on the appliance
for longer than necessary for
processing the food.

8 / EN Hand Blender Set / User Manual
C
To prevent overflowing of the
mixture do not overfill the
measuring beaker (10) or bowl.
Smaller amounts are easier to
process.
C
To prevent any accidents use the
beaker lid as anti-slip rubber pad by
putting the beaker base on the lid.
C
If you would like to use the blending
attachment directly in the pot, first
take the pot off the stove to prevent
the blending attachment from
overheating.
3.4 Chopping
C
Do not chop extremely hard items
such as coffee beans, ice cubes,
nutmeg, grains or bones. Remove
stalks from herbs, shells from nuts
and bones, tendons and gristle from
meat.
C
Cut the food in small pieces.
1. Put the chopping bowl (8) on an even surface.
2. Place the chopping blade (7) onto the fixed
shaft in the chopping bowl (8).
AWARNING:
Be careful when
inserting the chopping blade (7) as it
is very sharp.
AWARNING:
Do not touch the
chopping blade with bare hands.
3. Place the ingredients in the chopping bowl (8).
4. Put the chopping lid (6) on the chopping bowl
(8). Make sure that the claws on the chopping lid
are firmly locked on the bowl.
A
WARNING:
Never operate the
appliance if the chopping lid is not
properly seated on the chopping
bowl, as this could damage the
chopping blade.
5. Put the motor unit (3) on the chopping lid (6).
Push the motor unit so that it is firmly locked
in place. Make sure the motor unit is securely
attached to the chopping lid.
C
During operation always hold the
chopping bowl with one hand to
prevent it from tipping over.
6. Insert the plug into the wall socket.
7. Press and hold down the On/Off button (1).
– The appliance starts operating.
8. Press and hold the turbo button (2).
C
Do not use the appliance
continuously for more than 10
seconds.
C
To achieve the best results press
the On/Off button or turbo button
intermittently.
9. Release the On/Off button (1) or turbo button
(4) when you finish the process and disconnect
the power plug from the wall socket. Remove
the motor unit (3) from the chopping lid (8) by
pushing the attachment release buttons (4)
at the sides of the appliance and pulling it off.
Take the chopping lid (6) off. Take the chopping
blade (7) out of the chopping bowl (8) carefully
prior to removing the chopped food.
3 Operation

9 / EN
Hand Blender Set / User Manual
Mixture Butter + Honey
Butter taken from the freezer (should be kept in the
freezer for min. 4 hrs. and cut into pieces of sizes
approximately 10-15 mm x 35-40 mm) and honey
taken from the refrigerator (should be kept in the
refrigerator min. 1 day).
3.5 Whisking
•You can use the balloon whisk (11) for whipping
cream and beating eggs.
•Never process more than 4 egg whites or 200 ml
cream.
1. Insert the balloon whisk (11) into the whisk holder
(9) until it clicks into place.
2. Connect the motor unit (3) to the whisk holder (9)
by putting the whisk holder onto the motor unit.
Push the whisk holder to the motor unit. Make
sure that the whisk holder is securely attached to
the motor unit.
3. Put the ingredients that you would like to process
in the measuring beaker (10) or a similar bowl.
4. Insert the power plug into the wall socket.
5. Hold the balloon whisk (11) into the mixture to be
processed.
6. Press and hold the On/Off button (1).
– The appliance starts operating.
7. Press and hold the turbo button (2).
8. Move the appliance slowly up and down and in
circles to whisk the ingredients.
9. Release the On/Off button (1) or turbo button
(2) when you are finished and disconnect the
power plug from the wall socket. Remove the
mixture from the measuring beaker (10). Remove
the motor unit (3) from the whisk holder (9) by
pushing the attachment release buttons (4) at the
two sides of the appliance and pulling it off.
3 Operation

10 / EN Hand Blender Set / User Manual
4 Informaton
4.1 Cleaning and care
AWARNING:
Never use petrol
solvents, abrasive cleaners, metal
objects or hard brushes to clean the
appliance.
AWARNING:
Do not touch the
chopping blades with your bare
hands. The blades are very sharp.
Use a brush!
AWARNING:
Never put the motor
unit (3) or power cord in water or any
other liquids and never hold them
under running water.
1. Turn the appliance off and disconnect it from
the wall socket.
2. Let the appliance cool down completely.
3. Use a damp soft cloth to clean the motor unit
(3).
4. Immediately after using, clean the blending
attachment (5) and measuring beaker (10) with
warm, soapy water and dry them thoroughly.
Never wash them in dishwasher.
C
Before using or storing the appliance
after cleaning, dry all parts carefully
using a soft cloth.
4.2 Storage
•If you do not plan to use the appliance for a long
period of time, please store it carefully. Make
sure the appliance is unplugged and completely
dry.
•Store the appliance in a cool, dry place. Make
sure the appliance is kept out of the reach of
children.
4.3 Handling and
transportation
•During handling and transportation, carry
the appliance in its original packaging. The
packaging of the appliance protects it against
physical damages.
•Do not place heavy loads on the appliance or the
packaging. The appliance may be damaged.
•Dropping the appliance will render it non-
operational or cause permanent damage.

Btte lesen Se zuerst dese Anletung!
Sehr geehrte Kundn, sehr geehrter Kunde,
Velen Dank, dass Se sch für en Beko-Produkt entscheden haben. Wr hoffen,
dass Se mt desem Produkt, das mt den höchsten Qualtätsanforderungen und der
modernsten Technologe hergestellt wurde, beste Ergebnsse erzelen. Btte lesen Se
de gesamte Bedenungsanletung und alle anderen Begletdokumente aufmerksam,
bevor Se das Produkt verwenden; bewahren Se se zum künftgen Nachschlagen
scher auf. Wenn Se das Produkt an enen Drtten wetergeben, händgen Se btte
auch dese Anletung aus. Befolgen Se alle Warnhnwese und Informatonen n deser
Anletung.
Symbole
Folgende Symbole werden n den verschedenen Abschntten deser Anletung
verwendet:
C
Wichtige Informationen und
nützliche Tipps in Bezug auf die
Verwendung.
AWARNUNG:
Warnhinweise
zu gefährlichen Situationen im
Hinblick auf die Sicherheit von Leib,
Leben und Eigentum.
Für den Kontakt mit Lebensmitteln
geeignet.
Gerät, Netzkabel sowie Netzstecker
nicht in Wasser oder andere
Flüssigkeiten tauchen.
Schutzklasse gegen Stromschlag
Deses Produkt wurde n umweltfreundlchen, hochmodernen Enrchtungen hergestellt
Das Gerät erfüllt de Vorgaben
der WEEE-Rchtlne. Es enthält ken PCB.
Hergestellt n: P.R.C.

12 / DE Stabmixer-Set / Bedienungsanleitung
Dieser Abschnitt erklärt
Sicherheitsanweisungen, die
beim Schutz vor Personen- und
Sachschäden helfen.
Bei Nichtbeachtung dieser
Anweisungen erlischt die gewährte
Garantie.
1.1 Allgemene
Scherhet
• Dieses Gerät erfüllt die internatio-
nalen Sicherheitsstandards.
• Dieses Gerät kann von Personen
mit eingeschränkten körperli-
chen, sensoriellen oder mentalen
Fähigkeiten oder ohne spezielles
Wissen oder Erfahrung verwendet
werden, sofern sie beaufsichtigt
werden oder die Anweisungen
zum sicheren Umgang mit dem
Produkt und dessen potenzielle
Gefahren verstehen. Kinder dür-
fen nicht mit dem Gerät spielen.
• Das Gerät darf von Kindern nicht
benutzt werden.
• Gerät und Netzkabel immer von
Kindern fernhalten.
1Wchtge Anwesungen zu Scherhet
und Umwelt
• Verwenden Sie das Produkt nicht,
falls Netzkabel, Klingen oder Gerät
selbst beschädigt sind. Wenden
Sie sich dann an einen autorisier-
ten Serviceanbieter.
• Nur Originalteile und vom Herstel-
ler empfohlene Teile verwenden.
• Nicht versuchen, das Gerät zu de-
montieren.
• Die Stromversorgung muss mit
den Angaben am Typenschild des
Gerätes übereinstimmen.
• Das Gerät nicht mit einem Verlän-
gerungskabel verwenden.
• Beim Trennen des Gerätes nicht
am Netzkabel selbst ziehen.
• Warten Sie, bis bewegliches Zube-
hör zu einem vollständigen Still-
stand gekommen ist, und ziehen
Sie den Netzstecker, bevor Sie Zu-
behör installieren/entfernen, das
Produkt reinigen oder unbeauf-
sichtigt zurücklassen.
• Berühren Sie Stecker und Gerät
nicht mit feuchten oder nassen
Händen.
• Das Gerät nicht mit heißen Le-
bensmitteln benutzen.

13 / DE
Stabmixer-Set / Bedienungsanleitung
• Das Gerät und sämtliche Zubehör-
teile nach der Reinigung gründlich
trocknen, bevor es mit der Strom-
versorgung verbunden wird und
bevor Teile abgenommen oder
angebracht werden.
• Gerät, Netzkabel sowie Netzste-
cker nicht in Wasser oder andere
Flüssigkeiten tauchen.
• Das Gerät und dessen Zubehör
nicht auf oder in der Nähe von hei-
ßen Oberflächen betreiben oder
platzieren.
• Falls Sie die Verpackungsma-
terialien aufheben möchten,
bewahren Sie sie außerhalb der
Reichweite von Kindern auf.
1.2 Entsorgung von
Altgeräten:
Dieses Produkt erfüllt die Vorgaben der EU-WEEE-
Direktive (2012/19/EU). Das Produkt wurde mit
einem Klassifizierungssymbol für elektrische und
elektronische Altgeräte (WEEE) gekennzeichnet.
Dieses Gerät wurde aus hochwertigen
Materialien hergestellt, die wiederver-
wendet und recycelt werden können.
Entsorgen Sie das Gerät am Ende sei-
ner Einsatzzeit nicht mit dem regulären
Hausmüll; geben Sie es stattdessen bei einer
Sammelstelle zur Wiederverwertung von elektri-
schen und elektronischen Altgeräten ab. Ihre
Stadtverwaltung informiert Sie gerne über geeig-
nete Sammelstellen in Ihrer Nähe.
1Wchtge Anwesungen zu Scherhet
und Umwelt
• Das Gerät zur Vermeidung einer
Überhitzung nicht länger als 10
Sekunden in Folge benutzen. Zwi-
schen 10-sekündigen Einsätzen 1
Minute abkühlen lassen.
• Verwenden Sie das Gerät nur mit
der mitgelieferten Gummibasis
und dem Glasbehälter.
• Das Gerät nicht ohne Zutaten in
der Schüssel betätigen.
• Knochen und Steine zur Vermei-
dung von Schäden an Klingen und
Gerät aus Lebensmitteln entfer-
nen.
• Dieses Gerät eignet sich nicht für
trockene oder harte Lebensmit-
tel, da diese die Klingen schnell
stumpf werden lassen können.
• Zur Vermeidung von Verletzungen
aufgrund unsachgemäßer Benut-
zung alle Warnungen befolgen.
• Beim Leeren des Behälters, wäh-
rend der Reinigung und bei der
Handhabung der Klingen mit bloßen
Händen können in Folge unsachge-
mäßer Benutzung ernsthafte Ver-
letzungen auftreten. Halten Sie die
Klinge am Kunststoffteil.

14 / DE Stabmixer-Set / Bedienungsanleitung
1.3 Einhaltung von RoHS-
Vorgaben:
Das von Ihnen erworbene Produkt erfüllt die
Vorgaben der EU-RoHS Direktive (2011/65/EU).
Es enthält keine in der Direktive angegebenen ge-
fährlichen und unzulässigen Materialien.
1.4 Informationen zur
Verpackung
Die Verpackung des Produkts wurde
gemäß unserer nationalen
Gesetzgebung aus recyclingfähigen
Materialien hergestellt. Entsorgen Sie
die Verpackungsmaterialien nicht mit dem
Hausmüll oder anderem Müll. Bringen Sie sie zu
einer von der Stadtverwaltung bereitgestellten
Sammelstelle für Verpackungsmaterial.
1.5 Hinweise zum
Energiesparen
Befolgen Sie während der Benutzung die in
der Anleitung empfohlenen Zeiten. Nach der
Benutzung den Netzstecker ziehen.
1Wchtge Anwesungen zu Scherhet
und Umwelt

15 / DE
Stabmixer-Set / Bedienungsanleitung
2 Stabmxer-Set
2.1 Übersicht
De am Gerät oder n der Dokumentaton angegebenen Werte wurden nach maßgeblchen Standards unter Laborbedngungen
ermttelt. Dese Werte können je nach Ensatz- und Umgebungsbedngungen vareren.
1. En-/Austaste
2. Turbo-Taste
3. Motorenhet
4. Aufsatz-Fregabetasten
5. Mxfuß
6. Deckel
7. Klnge
8. Arbetsbehälter für den Zerklenerer
9. Schneebesenhalter
10. Messbecher
11. Schneebesen
2.2 Technische Daten
Spannung:
220-240 V~, 50/60 Hz
Leistung:
700 W
Technische und optische Änderungen vorbehal-
ten
10
8
6
7
1
2
3
4
5
11
9

16 / DE Stabmixer-Set / Bedienungsanleitung
3 Betreb
3.1 Vorbereitung
1. Alle Verpackungsmaterialien und Aufkleber
entfernen und diese entsprechend den
gesetzlichen Vorschriften entsorgen.
2. Vor dem Gebrauch sorgfältg alle Tele, de mt
Lebensmtteln n Kontakt kommen, rengen
(sehe Abschntt „Rengung und Pflege“).
3. Lebensmttel vor der Verarbetung mt dem
Gerät, n klene Stücke schneden.
3.2 Maximalmengen und
Verarbeitungszeit
Zutaten Maximal-
menge Verarbeitungszeit
Fleisch/Fisch 200 g 10 – 15 Sekunden
Kräuter 20 g 20 Sekunden
Nüsse 200 g 15 Sekunden
Käse 150 g 15 Sekunden
Brot 1
Scheibe 20 Sekunden
Eier
(hartgekocht) 2 Eier 5 Sekunden
Zwiebeln
(geachtelt) 100 g 10 Sekunden
3.3 Mixen
1. Zu pürierende oder zerkleinernde Lebensmittel
in den Messbecher (10) oder eine vergleichbare
Schüssel geben.
2. Mxfuß (5) an der Motorenhet (3) anbrngen;
dabe den Aufsatz bs zum Enrasten n de
Motorenhet drücken. Scherstellen, dass der
Mxfuß rchtg an der Motorenhet angebracht
st.
3. Netzstecker n de Steckdose stecken.
4. Mxfuß (5) n den Messbecher (10) tauchen, der
de zu vermschenden Zutaten enthält.
C
Damit Zutaten nicht herausspritzen:
Ein-/Austaste (1) oder Turbo-Taste
(4) erst drücken, wenn Mixfuß in die
Zutaten eingetaucht wurde.
5. En-/Austaste (1) gedrückt halten.
-Das Gerät startet den Betrieb.
6. Geschwndgketsregler zur Auswahl ener
Geschwndgket verwenden bzw. Turbo-Taste
(4) gedrückt halten.
-Die Geschwindigkeitsanzeige-LED
leuchtet entsprechend der gewünschten
Geschwindigkeitsstufe 1 – 6.
C
Beim Einsatz der Turbo-Taste ar-
beitet das Gerät bei maximaler
Geschwindigkeit. In diesem Fall kann
die Geschwindigkeit nicht über den
Geschwindigkeitsregler angepasst
werden.
C
Bei Einsatz der Turbo-Taste
(2) leuchten alle LEDs der
Geschwindigkeitsanzeige.
7. Gerät zum Vermschen der Zutaten langsam n
Kresen auf- und abwärts bewegen.
C
Bei Einsatz der Turbo-Taste
(2) leuchten alle LEDs der
Geschwindigkeitsanzeige.
8. Herfür En-/Austaste (1) oder Turbo-Taste
(2) loslassen, Netzstecker aus der Steckdose
zehen. Verarbetete Lebensmttel aus dem
Messbecher (10) entfernen.
9. Mxfuß (5) durch Drücken der Aufsatz-
Fregabetasten (6) an den Geräteseten lösen
und von der Bass abzehen.
C
Gerät zur Vermeidung von
Überhitzung nicht länger als 10
Sekunden in Folge benutzen.

17 / DE
Stabmixer-Set / Bedienungsanleitung
C
Gerät niemals länger eingeschal-
tet lassen als zur Zubereitung der
Lebensmittel erforderlich.
C
Messbecher (10) oder Schüssel
nicht überfüllen, damit die Mischung
nicht überläuft. Kleinere Mengen
sind einfacher zu verarbeiten.
C
Becherdeckel zur Vermeidung
von Unfällen, als rutschsiche-
re Gummiunterlage verwenden;
Messbecher (10) auf Deckel stellen.
C
Wenn der Mixfuß direkt im Topf ver-
wendet werden soll, den Topf zuerst
vom Herd nehmen, damit der Mixfuß
nicht überhitzt.
3.4 Zerkleinern
C
Keine extrem harten Lebensmittel,
wie Kaffeebohnen, Eiswürfel,
Muskatnuss, Getreide oder Knochen
zerkleinern. Kräuter von Stängeln,
Nüsse von Schale und Fleisch von
Knochen, Sehnen und Knorpel be-
freien.
C
Lebensmittel in kleine Stücke
schneiden.
1. Arbeitsbehälter (8) auf einen ebenen
Untergrund stellen.
2. Klnge (7) an den Schaft n der Schüssel
anbrngen.
AWARNUNG:
Beim Einsetzen der
Klinge (9) sehr vorsichtig sein; sie ist
sehr scharf.
AWARNUNG:
Klinge nicht mit blo-
ßen Händen berühren.
3. Zutaten n den Arbetsbehälter (8) geben.
4. Deckel (6) am Arbetsbehälter (8) anbrngen.
Scherstellen, dass der Deckel scher an der
Schüssel befestgt snd.
A
WARNUNG:
Gerät niemals ver-
wenden, wenn der Deckel nicht
richtig auf der Schüssel sitzt; an-
dernfalls kann die Klinge beschädigt
werden.
A
WARNUNG:
Motoreinheit (3)
auf den Deckel (6) drücken, bis sie
einrastet. Sicherstellen, dass die
Motoreinheit sicher am Deckel be-
festigt ist.
5. Motorenhet (3) auf den Deckel (6) drücken,
bs se enrastet. Scherstellen, dass de
Motorenhet scher am Deckel befestgt st.
C
Schüssel während des Betriebs im-
mer mit einer Hand halten, damit sie
nicht umkippt.
6. Netzstecker n de Steckdose stecken.
7. En-/Austaste (1) gedrückt halten.
-Das Gerät startet den Betrieb.
8. Turbo-Taste (2) gedrückt halten.
C
Gerät nicht länger als 10 Sekunden
in Folge benutzen.
C
Ein-/Austaste oder Turbo-Taste
zur Erzielung optimaler Ergebnisse
stoßweise drücken.
9. Nach der Verarbetung de En-/Austaste (1)
oder Turbo-Taste (2) loslassen, Netzstecker
aus der Steckdose zehen. Motorenhet (3)
vom Deckel (6) entfernen; dazu de Aufsatz-
Fregabetasten (4) an den Geräteseten
drücken und den Aufsatz abzehen. Deckel
(6) abnehmen. Vor dem Entnehmen der
zerklenerten Lebensmttel de Klnge (7)
vorschtg aus der Schüssel (10) entfernen.
3 Betreb

18 / DE Stabmixer-Set / Bedienungsanleitung
Rezeptidee: Mischung Butter +
Honig
Butter aus dem Gefrierschrank (sollte mindestens
4 Stunden im Gefrierschrank aufbewahrt und in
Stücke von ca. 10 – 15 mm x 35 - 40 mm geschnit-
ten werden) und Honig aus dem Kühlschrank (soll-
te mindestens 1 Tag im Kühlschrank aufbewahrt
werden).
3.5 Quirlen
•Mt dem Schneebesen (11) können Schlagsahne
zuberetet und Eer schaumg geschlagen
werden.
•Nemals mehr als 4 Eweß bzw. 200 ml Sahne
verarbeten.
1. Schneebesen (11) in den Schneebesenhalter
(9) einstecken, bis er einrastet.
2. Motoreinheit (3) mit dem Schneebesenhalter
(9) verbinden; dazu den Schneebesenhalter
an de Motorenhet drücken bs er enrastet.
Scherstellen, dass der Schneebesenhalter
scher an der Bass befestgt st.
3. Zu verarbetende Zutaten n den Messbecher
(10) oder ene verglechbare Schüssel geben.
4. Netzstecker n de Steckdose stecken.
5. Schneebesen (11) n de zu verarbetenden
Lebensmttel halten.
6. En-/Austaste (1) gedrückt halten.
-Das Gerät startet den Betrieb.
7. Turbo-Taste (2) gedrückt halten.
8. Gerät zum Verqurlen der Zutaten langsam n
Kresen auf- und abwärts bewegen.
9. Anschleßend En-/Austaste (1) oder Turbo-
Taste (2) loslassen, Netzstecker aus der
Steckdose zehen. Verarbetete Lebensmttel
aus dem Messbecher (10) entfernen. Bass
(5)vom Schneebesenhalter (9) entfernen;
dazu de Aufsatz-Fregabetasten (4) an
den Geräteseten drücken, und den Aufsatz
abzehen.
3 Betreb

19 / DE
Stabmixer-Set / Bedienungsanleitung
4 Informatonen
4.1 Reinigung und Pflege
AWARNUNG:
Zur Reinigung
des Gerätes niemals Benzin,
Lösungsmittel, Scheuermittel oder
harte Bürsten verwenden.
AWARNUNG:
Klingen nicht mit
bloßen Händen berühren. Die
Klingen sind sehr scharf. Bürste
verwenden!
A
WARNUNG:
Motoreinheit (3)
sowie Netzkabel niemals in Wasser
oder andere Flüssigkeiten tauchen,
niemals unter fließendes Wasser
halten.
1. Gerät ausschalten und Netzstecker aus der
Steckdose ziehen.
2. Das Gerät vollständg abkühlen lassen.
3. Motorenhet (3) mt enem feuchten, wechen
Tuch abwschen.
4. Mxfuß (5) und Messbecher (6) drekt nach dem
Ensatz mt warmem Sefenwasser rengen
und anschleßend gründlch trocknen. Nemals
m Geschrrspüler rengen.
C
Nach der Reinigung und vor der
Benutzung oder Lagerung des
Gerätes alle Teile sorgfältig mit ei-
nem weichen Tuch trocknen.
4.2 Lagerung
•Wenn das Gerät längere Zet ncht benutzt wrd,
sollte es sorgfältg aufbewahrt werden. Darauf
achten, dass der Netzstecker gezogen wrd und
das Gerät komplett trocken st.
•Das Gerät an enem kühlen, trockenen Ort
lagern. Das Gerät sollte sch mmer außerhalb
der Rechwete von Kndern befnden.
4.3 Handhabung und
Transport
•Transporteren Se das Gerät n sener
Orgnalverpackung. De Verpackung schützt
das Gerät vor Sachschäden.
•Legen Se kene schweren Gegenstände auf
dem Gerät oder der Verpackung ab. Andernfalls
könnte das Gerät beschädgt werden.
•Falls das Gerät herunterfällt, st es
möglcherwese ncht mehr funktonsfähg oder
west dauerhafte Schäden auf.

20 / DE Stabmixer-Set / Bedienungsanleitung
Vertriebsniederlassung Österreich für Beko Kleingeräte:
Elektra Bregenz AG
Pfarrgasse 77
A-1230, Wien
http://at.beko.com/
Sehr geehrter Kunde!
Vielen Dank, dass Sie sich für ein Qualitätsprodukt von Beko entschieden haben!
Unsere Geräte werden nach den neuesten technischen Erkenntnissen entwickelt, produziert und
geprüft.
Sollte trotzdem eine Störung auftreten, so bitten wir Sie, sich mit Ihrem Fachhändler bzw. mit der
Verkaufsstelle in Verbindung zu setzen.
Gewährleistungsansprüche können nicht direkt bei Beko geltend gemacht werden! Behalten Sie
deshalb immer Ihre Verkaufsquittung als Beleg.
Wir danken Ihnen, für Ihr Vertrauen und wünschen Ihnen viel Freude mit Ihrem neuen Produkt!
5 Garante
Other manuals for HBA6700W
2
Table of contents
Languages:
Other Beko Blender manuals

Beko
Beko TBN5400 User manual

Beko
Beko HBS6700W User manual

Beko
Beko HBS6700W User manual

Beko
Beko 01M-8813893200-2518-01 User manual

Beko
Beko SMM888BX User manual

Beko
Beko HBA7753X User manual

Beko
Beko 01M-8833963200-1847-05 User manual

Beko
Beko HBS7600B User manual

Beko
Beko TBV8106BX User manual

Beko
Beko HBA7752X User manual

Beko
Beko 01M-8832833200-5015-01 User manual

Beko
Beko BKK 1304 User manual

Beko
Beko BKK 3030 TB User manual

Beko
Beko TBN7400W User manual

Beko
Beko HBG5150W User manual

Beko
Beko SMM888BX User manual

Beko
Beko HBA7602W User manual

Beko
Beko HBS6600W User manual

Beko
Beko TBP5300 User manual

Beko
Beko 01M-8816073200-2619-01 User manual