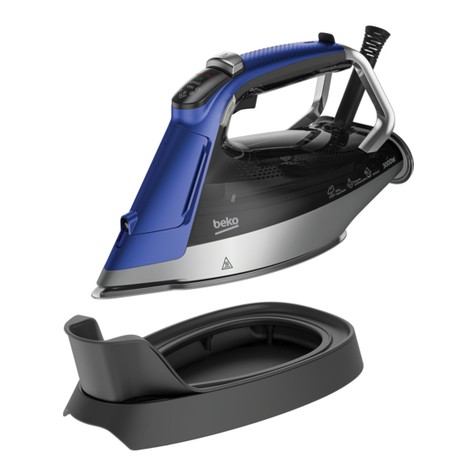
Beko SGA7126P User manual

SGA7126P
SGA7124B
Steam Staton
User Manual
01M-8834133200-2817-07
01M-8834593200-2817-07
EN EE LT

Please read this manual first!
Dear Customer,
Thank you for preferring this Beko product. We hope that you get the best results
from your product which has been manufactured with high quality and state-of-the-
art technology. Therefore, please read this user manual and all other accompanying
documents carefully before using the product and keep it as a reference for future use.
If you handover the product to someone else, give the user manual as well. Follow all
warnings and information in the user manual.
Meanings of the symbols
Following symbols are used in the various sections of this manual:
C
Important nformaton and useful
hnts about usage.
AWARNING:
Warnngs aganst
dangerous stuatons concernng the
securty of lfe and property.
This product has been manufactured in environmental friendly modern plants without giving any harm
to the nature.
It does not contan PCB.
Made n: P.R.C.

3 / 32 EN
Steam Station / User Manual
Ths secton contans safety
nstructons that wll help
protect from rsk of personal
njury or materal damage.
Falure to follow these
nstructons nvaldates the
granted warranty.
1.1 General safety
•Ths applance compleswth the
nternatonal safety standards.
•Ths applance can be used the
chldren who are at the age
of 8 and above and by people
who have lmted physcal,
sensory or mental capacty or
who do not have knowledge
and experence, provded that
they are supervsed or they
understand the nstructons
wth regard to safe use of the
product and potental dangers.
Chldren should not play wth
the applance. Cleanng and user
mantenance procedures should
not be performed by chldren
unless they are supervsed by
an older person.
•Do not leave the applance
unattended whle t s plugged
n.
•Unplug the applance before
fllng the water reservor wth
water.
•Do not open the water refll hole
durng usage.
•Operate and store the applance
on a stable surface.
•When the applance s placed
on ts base plate, ensure that
the surface beneath the plate
s level.
•Always rest your ron on the
base.
•If the applance s dropped or
leaks water orhas other falures,
contact the authorsed servce.
Do not use the applance untl t
s repared.
•When the applance s n use
or left to cool down, keep the
applance and power cable out
of reach of chldren under 8
years old.
•The applance s not sutable for
outdoor use.
•Only use the orgnal parts or
parts recommended by the
manufacturer.
•Use the applance only when t
s connected to the steam ron
staton.
1Important safety and envronmental nstructons

4 / 32 EN Steam Station / User Manual
•Do not dsmantle the applance.
•Your mans power supply should
comply wth the nformaton
suppled on the ratng plate of
the applance.
•The mans supply of the
applance should be secured
wth a 16 A fuse mnmum.
•Use the applance wth a
grounded outlet.
•Do not use the applance wth
an extenson cable.
•Do not pull the power cable
when unpluggng the applance.
•If the power cable s damaged,
t should be repared or
replaced by the dealer, servce
center, or a specalsed and
authorsed servce wth smlar
qualfcatons.
•Unplug the applance before
cleanng.
•Do not wrap the cable around
the applance.
•Do not touch the applance or
ts plug wth damp or wet hands
when the applance s plugged n.
•The soleplate and the steam
staton surface may get
overheated. Contact wth hot
surfaces may cause burns.
1Important safety and envronmental nstructons
•Do not use the applance
n or near the areas where
combustble or nflammable
places and materals exst.
•If you keep the packagng
materals, store them out of the
reach of chldren.
1.2 Complance wth WEEE
Drectve and Dsposng of the
Waste Product
Ths product comples wth EU WEEE
Drectve (2012/19/EU). Ths product
bears a classfcaton symbol for waste
electrcal and electronc equpment
(WEEE).Ths product has been manufactured wth
hgh qualty parts and materals whch can be
reused and are sutable for recyclng. Do not
dspose of the waste product wth normal
domestc and other wastes at the end of ts
servce lfe. Take t to the collecton center for the
recyclng of electrcal and electronc equpment.
Please consult your local authortes to learn
about these collecton centers.
1.3 Complance wth RoHS
Drectve
The product you have purchased comples wth EU
RoHS Drectve (2011/65/EU). It does not contan
harmful and prohbted materals specfed n the
Drectve.
1.4 Package nformaton
Packagng materals of the product are
manufactured from recyclable materals
n accordance wth our Natonal
Envronment Regulatons. Do not dspose
of the packagng materals together wth the
domestc or other wastes. Take them to the
packagng materal collecton ponts desgnated
by the local authortes.
5 / 32 EN
Steam Station / User Manual
2.1 Overvew
2Your steam staton
1. Lme collectng cartrdge
2. Steam staton
3. Cable wndng slot wth bracket
4. Water reservor removal latch
5. Removable water reservor
6. Water refll ld
7. Steam staton surface
8. Soleplate
9. Transport lock
10. Control panel
11. On/off and control button
12. Steam trgger
2.2 Techncal data
Power supply :
220-240V~,50-60Hz
Power consumption :
2190-2600 W
Pump pressure :
6 bar
Flash steam amount:
Up to 110 g/min.
Techncal and desgn modfcaton rghts are
reserved.
The values whch are declared n the markngs affxed on your product or the other prnted documents suppled wth t represent
the values whch have been obtaned n the laboratores pursuant to the pertnent standards. These values may vary accordng to
the usage of the applance and ambent condtons.
2
1
3
4
5
6
7
8
9
10
11 12

6 / 32 EN Steam Station / User Manual
2Your steam staton
Control panel Symbols Descrptons
Water reservoir is empty
Steam level
Lime collecting cartridge should
be replaced
Temperature settings
Automatic shutdown
Self-cleaning
Smart - ECO mode

7 / 32 EN
Steam Station / User Manual
3Operaton
3.1 Intended use
Ths applance s ntended only for household use
and ronng; t s not sutable for professonal use.
3.2 Intal use
1. Remove the package on the lme collectng
cartrdge (1) whch s placed separately n the box.
2. Soak the lme collectng cartrdge (1) n the
water for 1 mnute n order to enhance ts
performance.
3. Then push the cartrdge (1) n ts slot.
4. Pror to ntal use, fll the water reservor (5)
wth water (see 3.6) and evaporate the water
twce n order to remove the manufacturng
resdues.
C
A lght odour may arse durng the
ntal use. Ths condton wll return
to normal after several uses.
3.3 Ironng tps
•The applance gets heated n a short tme; ron
fabrcs such as synthetc, slk etc. usng low
temperature settngs.
•Iron fabrcs that may luster (slk etc.) by turnng
them nsde out or usng the applance n Smart-
ECO mode.
•Use very lttle pressure when ronng fabrcs
such as velvet and ron them towards one sngle
drecton.
•Steam usage may cause stans on coloured slk
fabrcs. Do not use steam.
•100% pure woolen clothes can be roned by
usng steam.
•Ironng woolen clothes may cause luster. Iron by
turnng them nsde out.
AWARNING:
Do not allow the ron
to contact wth metal parts such as
zppers and rvets. Ths may damage
the soleplate of the ron.
3.4 Temperature settng
Set the approprate temperature for the fabrc to
be roned by usng the control button (11).
Fabrc
Type
Tempe-
rature
Settng
Steam
Settng
Synthetic
•
Without
steam
Silk
••
With Steam
Cotton
•••
With Steam
Linen - Jean Max With Steam

8 / 32 EN Steam Station / User Manual
C
Smart-ECO mode of your applance
s sutable for all types of fabrcs that
can be roned. You can ron securely.
You can do steam ronng by usng
the steam trgger (12) n ths mode.
AWARNING:
You can do steam
ronng at all temperature levels
except for “•” Press the steam
trgger (12) for steam ronng.
AWARNING:
Take the ronng
nstructons specfed on the label
of the fabrc nto consderaton for
ronng.
3.5 Dry ronng
Your applance wll not rase steam as long as you
do not press the steam trgger (12).
In order to use dry ronng, do not press the steam
trgger (12).
3.6 Fllng the water reservor
A
WARNING:
When fllng the
water reservor wth water wthout
removng the ron from the steam
staton, ensure that the applance s
unplugged.
1. Press the on/off button (11), swtch off and
unplug the applance.
2. Remove the water reservor (5) by pressng the
water reservor removal latch placed under the
water reservor.
3. Open the water refll ld (6) and fll water up to
the MAX level.
C
Your applance s sutable for usng
wth tap water. If your tap water s
excessvely hard, we recommend
you to use a mxture of tap water
and potable water.
4. Place the water reservor (5) n ts place.
– You wll hear a clck when the water reservor
fts nto ts place.
3.7 Steam ronng
1. Fll the water reservor (5) wth water (see 3.6).
2. Place the applance on the steam staton
surface (7).
3. Plug n the applance.
– You wll hear a beepng sound when the
applance starts to operate.
– Control panel (10) flashes once and then goes off.
4. Press the on/off button (11).
C
Operaton of the pump may make
some nose durng the water
drawng process; ths s normal.
C
The applance starts n Smart-ECO
mode n the ntal use. Ths level
offers safe temperature and steam
amount for all the fabrcs that can
be roned.
5. You can set temperature levels other than the
Smart - ECO mode by usng the control button
3Operaton

9 / 32 EN
Steam Station / User Manual
(11) (see 3.4).
AWARNING:
Yourselectonshould
be suted for the fabrc to be roned.
6. Whenthesymboloftheselectedsettngflashes
consstently on the dsplay, your applance s
ready to ron.
AWARNING:
If the symbol on the
dsplay blnks, ths means that the
soleplate temperature settng s not
at the desred level.
C
You can do steam ronng by
usng the steam trgger (12) at all
temperature levels except for “•”.
7. When the applance s ready for steam ronng,
move the ron horzontally on the fabrc to be
roned and press the steam trgger (12). Your
ron wll rase steam from ts soleplate (8) as
long as you hold the steam trgger pressed.
8. When the ronng process s over, press the on/
off button (11) for a few seconds.
– The lghts on the control panel wll go off.
9. Unplug the applance and leave t to cool.
3.8 Vertcal steam
You can also use the steam n uprght poston
(see 3.7). You can ron your curtans and hanged
garments thanks to the vertcal steam feature.
Keep the applance 15-30 cm away from the
garment and curtans.
WARNING:
Never drect the
steam to people or pets.
3.9 Automatc Shutdown
(Auto-Off)
If you do not move the applance or press any of
ts buttons for 10 mnutes, t wll be shut down
automatcally.
•If you move the applance horzontally or press
any of ts buttons, t wll start to operate.
C
It may take 60 seconds for the
soleplate (8) to reach the prevous
temperature level.
3Operaton

10 / 32 EN Steam Station / User Manual
4Cleanng and care
4.1 Cleanng
A
WARNING:
Do not soak the
steam staton (2) n water or other
lquds. Never put vnegar, descalng
agent, laundry starch, perfume or
other auxlary products that help
ronng nto the applance.
AWARNING:
Do not use gasolne,
solvent and abrasve cleanng
agents or hard brush to clean the
applance.
BWARNING:
Do not wash your
applance under runnng water or do
not soak t n water or other lquds.
AWARNING:
Do not use abrasve
cleanng agents to clean the
soleplate (8).
Swtch off and unplug the applance before
cleanng.
1. Wat for the applance to cool completely.
2. Use a slghtly damp cloth to clean the exteror of
the applance. Then wat for t to dry completely.
3. Wpe the sedments and resdues on the
soleplate (8) wth a slghtly damp cloth or wth
a soft, nonabrasve lqud cleaner f necessary.
4.2 Replacng the lme
collectng cartrdge
AWARNING:
Do not use any
descalng agents! They may damage
the applance.
A
WARNING:
Do not purchase
cartrdge from places other than
the dealers and servce centers. If
you do ths, the cartrdge wll not ft
nto the cartrdge slot and wll not
operate. Ths causes a breakdown
n your applance. Faults arsng
from usng wrong cartrdge are not
covered under warranty.
1. “ ” symbol will flash on the control panel (10)
when the cartrdge needs to be replaced.
C
Thecartrdgemustbe replaced after
consumng about 30 lters of water.
2. Soak the new cartrdge n water for 1 mnute n
order to enhance ts performance.
3. Before removng the old cartrdge from ts slot,
make sure that the sectons surroundng the
cartrdge s cold.
4. Slghtly press and release to replace the
cartrdge.
5. Remove the new cartrdge from ts package,
soak t n the water for 1 mnute and push t n
ts slot.

11 / 32 EN
Steam Station / User Manual
4Cleanng and care
4.3 Lme removng feature
(Self-Clean)
1. When the “ ” lime removing (self-clean)
symbol flashes on the control panel, (10) ths
means that t s tme for lme removng.
2. Fll the water reservor (5) (see 3.6).
3. Plug n the applance.
4. Hold and press the control button (11) and
steam trgger (12) together for 3 seconds.
C
The “ ” symbol will constantly
blnk on the control panel (10) when
the applance swtches to lme
removng (self-clean) mode.
5. Then press the control button (11) once.
– “” symbol will flash on the control panel
(10) permanently.
6. Keep the applance over the snk horzontally
and shake t whle pressng and holdng the
steam trgger (12).
7. When the lme removng (self-clean) s over, the
applance automatcally returns to the mode
before the lme removng process.
4.4 Transport lock
1. Turn the transport lock (9) n order to be able to
move/transport your applance easly and store
t securely.
2. Turn the lock agan to unlock the transport lock.
4.5 Storage
•If you do not ntend to use the applance for a
long tme, store t carefully.
•Unplug the applance and wat for t to cool
completely before storng t.
•Dscharge the water n the water reservor (5).
•Wrap the cable around the cable wndng slot
wth bracket (3) and fx t n order to store the
steam staton.
•Store t n a cool and dry place.
•Keep the applance out of the reach of chldren.

12 / 32 EN Steam Station / User Manual
4Cleanng and care
4.6 Movng and transportaton
•Carry the applance n ts orgnal packagng
durng movng and transportaton. The
packagng of the applance protects t aganst
physcal damages.
•Do not place heavy loads on the applance or the
packagng. The applance may be damaged.
•Droppng the applance may render t non-
operatonal or cause permanent damage.

Lugege kõigepealt kasutusjuhendit!
Austatud kliendid!
Täname Teid firma Beko toote valimise eest. Loodame, et see toode, mis on valmistatud
kvaliteetseid uusimaid tehnoloogiaid kasutades, pakub Teile parimaid tulemusi. Enne
seadme kasutamist lugege tähelepanelikult läbi kasutusjuhend ja sellega kaasnevad
dokumendid ning säilitatage need hilisemaks kasutamiseks. Kui annate toote edasi
teisele kasutajale, edastage talle ka käesolev kasutusjuhend. Järgige kõiki käesolevas
juhendis sisalduvaid hoiatusi ja teavet.
Sümbolite tähendus
Käesolevas juhendis kasutatakse järgnevaid sümboleid:
C
Tähts teave ja kasulkud juhsed
seadme kasutamse kohta.
A
HOIATUS! Turvalsust, elu ja vara
kahjustavad olukord
Seade on toodetud keskkonnasõbralikes, kaasaegsetes tehastes ilma keskkonda mõjutamata. Seade
on vastavuses järgmiste EL direktiividega:
E ssalda polükloortud bfenüüle (PCB).
Pärtolumaa: HRV

Triikimissüsteem / User Manual
14 / 32 EE
See punkt sisaldab
ohutusjuhiseid, mis aitavad hoida
ära kehavigastuste või varalise
kahju teket.
Kasutusjuhendieiraminemuudab
antud garantii kehtetuks.
1.1 Üldised ohutusjuhised
•Seade on vastavuses
rahvusvaheliste ohutusalaste
standarditega.
•Seda seadet võivad kasutada
8-aastased ja vanemad
lapsed ning piiratud füüsiliste,
sensoorsete või vaimsete
võimetega isikud või vastavate
kogemuste ja teadmisteta
isikud juhul, kui nad tegutsevad
järelevalve all või neid on
juhendatud seadme ohutu
kasutamiseosas janad saavadaru
sellega kaasnevatest ohtudest.
Lapsed ei tohi selle seadmega
mängida. Lapsed ei tohi seda
seadet hooldada, kui nad ei tee
seda täiskasvanu järelvalve all.
•Ärge jätke seadet järelevalveta,
kui see on toitevõrku lülitatud.
•Enne veepaagi täitmist tuleb
seade toitevõrgust välja võtta.
•Seadme kasutamise ajal ei tohi
veetäiteava avada.
•Seadet tuleb kasutada ja
hoiundada stabiilsel alusel.
•Kui seade on alusele pandud,
peab selle all olev pind olema
ühetasane.
•Kui seade on maha kukkunud,
sellest valgub vett või
esinevad muud avariid, tuleb
kontakteeruda volitatud
teeninduspunktiga. Seadet ei
tohi kasutada enne, kui see on
parandatud.
•Kui seadet ei kasutata või
see on jäetud jahtuma, tuleb
seda koos toitejuhtmega
hoida alla 8-aastastele lastele
kättesaamatus kohas.
•Seadet ei tohi kasutada
välitingimustes.
•Tuleb kasutada üksnes
originaalvaruosasid või tootja
poolt soovitatud varuosasid.
•Seadet tuleb kasutada üksnes
pärast selle ühendamist
triikrauaga.
•Seadet ei tohi lahti võtta.
1Tähtsad ohutust ja keskkonda puudutavad
juhsed

Triikimissüsteem / User Manual 15 / 32 EE
•Koduse elektrivõrgu toide peaks
vastamaselleseadmeandmesildil
märgitud teabele.
•Elektrivõrk peab olema kaitstud
vähemalt 16 A kaitsega.
•Seadet võib kasutada üksnes
juhul, kui see on ühendatud
maandatud seinakontakti.
•Selle seadmega ei tohi kasutada
pikendusjuhtmeid.
•Ärge võtke pistikut seinast
toitejuhtmest tõmmates.
•Kahjustatud toitejuhe tuleb
parandada või välja vahetada
müüja, teeninduspunkti
või spetsiaalse sarnase
kvalifikatsiooniga volitatud
teeninduse poolt.
•Enne seadme puhastamist võtke
pistik seinakontaktist välja.
•Toitejuhet ei tohi keerata ümber
seadme.
•Ärge puudutage seadet või selle
toitejuhet märgade või niiskete
kätega, kui see on seinakontaktis.
•Triikimistald ja triikimissüsteemi
pind võivad kuumeneda.
Kokkupuude kuumade pindadega
võib põhjustada põletusi.
1Tähtsad ohutust ja keskkonda puudutavad
juhsed
•Ärge kasutage seadet kergesti
süttivate või põlevate esemete
või materjalide läheduses.
•Seadme pakendit tuleb säilitada
lastele kättesaamatus kohas.
1.2 Vastavus WEEE direktiivile
ja kasutatud seadmete
kõrvaldamine
See seade ei sisalda kahjulikke või keelatud
materjale, mida on mainitud keskkonna- ja
linnaplaneemise ministeeriumi poolt välja
antud määruses
kasutatud elektri- ja elektroonikaseadmete
järelevalve kohta. Seade on vastavuses WEEE
direktiiviga. Seade on valmistatud kvaliteetsetest
osadest ja materjalidest, mida on võimalik ringlusse
võtta ja kasutada teiseste materjalidena. Seoses
sellega ei tohi seadet pärast kasutamise lõpetamist
ära visata koos olme- või muu prügiga. Seade
tuleb anda üle taaskasutamiseks kogutavate
elektri- ja elektroonikaseadmete kogumispunkti.
Teavet selliste kogumispunktide kohta on võimalik
saada kohalikelt omavalitsustelt. Saades teiseseid
tooraineid kasutatud seadmetest, aitate kaitsta
keskkonda.
1.3 Seadme pakend
Seadme pakend on valmistatud
taaskasutatavatestmaterjalidest. Pakend
tuleb kõrvaldada vastavalt kohalikele
asjakohastele keskkonnakaitse
eeskirjadele nii, et kõik materjalid võetaks uuesti
ringlusse.

16 / 32 EE Triikimissüsteem / User Manual
2.1 Üldne krjeldus
2Trkmssüsteem
1. Katlakv eemaldaja
2. Trkmssüsteem pnd
3. Kaablkermspesa koos haardega.
4. Rv veemahut väljavõtmseks
5. Väljavõetav veepaak
6. Veepaag kaas
7. Trkmssüsteem
8. Trkmstald
9. Transpordkatse
10. Juhtpaneel
11. Totenupp ja juhtnupp
12. Auru päästk
2.2 Tehnlsed andmed
Toode on kooskõlas Euroopa Ldu
drektvdega 2004/108/EÜ 2006/95/EÜ,
2009/125/EÜ ja 2011/65/EL.
Pinge: 220–240 V~, 50/60 Hz
Energiakulu: 2190–2600 W
Pumba rõhk: 6 bar
Auruvoo tugevus: kuni 110 g/min
Tootja jätab endale õguse konstruktsoon
muudatuste tegemseks ja tehnlste andmete
muutmseks.
Antud seadmele võ sellega koos tarntud trüktud materjaldele märgtud väärtused on saadud labortngmustes ja kooskõlas
kehtvate standardtega. Väärtused võvad erneda sõltuvalt seadme kasutamsest ja selle ümbruses valtsevatest tngmustest.
2
1
3
4
5
6
7
8
9
10
11 12

17 / 32 EE
Triikimissüsteem / User Manual
2Trkmssüsteem
Juhtpaneel Sümbol Krjeldus
Veepaak on tühi
Auru tase
Katlakivi emaldaja tuleb välja
hetada
Temperatuuri seadistused
Automaatne väljalülitus
Isepuhastus
Nutikas ÖKO režiim

18 / 32 EE Triikimissüsteem / User Manual
3Kasutamne
3.1 Kasutusalad
Seade on mõeldud kasutamseks ja trkmseks
kodumajapdamses. Seda e toh kasutada
ärotstarbel.
3.2 Esmakordne kasutamne
1. Võtke pakendst välja katlakveemaldaja (1),
ms on erald karbs.
2. Pange katlakv eemaldav vahend (1) 5 mnutks
vette, et suurendada selle tõhusust.
3. Seejärel pange vahend (1) pesasse.
Enne seadme esmakordset kasutamst tätke
veepaak (5) veega (vt punkt 3.6) ja laske sellel
aurustada kahel korral, et eemaldada tootmsp-
rotsess jäägd
C
Seadme esmakordsel kasutamsel
võb esneda tuntavat lõhna.
Lõhn kaob pärast seadme paar
kasutuskorda.
3.3 Trkmst puudutavad
juhsed
•Seade kuumeneb krest. Sünteetls, sdst jms
kangadtuleb trkda madalama temperatuurga.
•Läkvad kangad (nt sd) tuleb trkda pahemalt
poolt võ nutkal ÖKO režml.
•Samet ja sarnaste kangaste korral
tuleb kasutada väkest survet ja trkda
ühesuunalselt.
•100% vllased rded võb trkda auruga.
•Trkmne võb vllaste kangaste puhul läget
põhjustada. Trkda tuleb pahemalt poolt.
•Aur võb värvtud sdkangale plekke tektada.
Ärge kasutage auru.
A
HOIATUS! Vältge trkraua
kokkupuudet metallelementdega,
nt tõmblukud ja needd. See
võb põhjustada seadme talla
vgastamst.
3.4Temperatuur
seadstamne
Seadstage juhtnupu (11) abl trgtavale kangale
sobv temperatuur.
Kanga lk
Tempera-
tuur sea-
dstamne
Auru
seads-
tamne
Sünteetiline
•
Auruta
Siid
••
Auruga
Puuvillane
•••
Auruga
Linane —
teksad Max Auruga
C
Seadme nutkas ÖKO režm sobb
kasutamseks kõkde kangaste
puhul, mda võb trkda. Sellel
nutkal režml trkmne on ohutu.
Nutkal režml trkdes võb trkda
auruga, kasutades auru päästkut
(12).
A
HOIATUS!Aurugatrkmneonvõmalk
ga temperatuur seadstusega, v.a
“•”. Auruga triikimiseks vajutage auru
päästkule (12).
A
HOIATUS! Trkmse ajal
tuleb järgda rde sldl olevad
trkmsjuhsed.
3.5 Kuvtrkmne

19 / 32 EE
Triikimissüsteem / User Manual
Seade e genereer auru kun auru päästku (12)
vajutamse hetken.
Kuvtrkmsel e toh kasutada auru päästkut (12).
3.6 Veepaag tätmne
A
HOIATUS! Ku te e võta
trkrauda veepaag tätmsel
aurugeneraatorlt, tuleb kontrollda,
kas seade on välja lültatud.
1. Vajutage totelültle (11), lültage seade välja ja
võtke pstk pesast.
2. Võtke veepaak (5) välja, vajutades selle all
olevale rvle.
3. Avage veepaag kaas (6) ja tätke paak tasemen
MAX.
C
Your applance s sutable for usng
wth tap water. If your tap water s
excessvely hard, we recommend
you to use a mxture of tap water
and potable water.
4. Place the water reservor (5) n ts place.
– You wll hear a clck when the water reservor
fts nto ts place.
3.7 Steam ronng
1. Fll the water reservor (5) wth water (see 3.6).
2. Place the applance on the steam staton
surface (7).
3. Plug n the applance.
– You wll hear a beepng sound when the
applance starts to operate.
– Control panel (10) flashes once and then goes off.
4. Press the on/off button (11).
C
Operaton of the pump may make
some nose durng the water
drawng process; ths s normal.
C
The applance starts n Smart-ECO
mode n the ntal use. Ths level
offers safe temperature and steam
amount for all the fabrcs that can
be roned.
5. You can set temperature levels other than the
Smart - ECO mode by usng the control button
(11) (see 3.4).
AWARNING:
Yourselectonshould
be suted for the fabrc to be roned.
6. Whenthesymbolof the selected settng flashes
consstently on the dsplay, your applance s
ready to ron.
AWARNING:
If the symbol on the
dsplay blnks, ths means that the
soleplate temperature settng s not
at the desred level.
C
You can do steam ronng by
usng the steam trgger (12) at all
temperature levels except for “•”.
7. When the applance s ready for steam ronng,
move the ron horzontally on the fabrc to be
roned and press the steam trgger (12). Your
3Kasutamne

20 / 32 EE Triikimissüsteem / User Manual
ron wll rase steam from ts soleplate (8) as
long as you hold the steam trgger pressed.
8. When the ronng process s over, press the on/
off button (11) for a few seconds.
– The lghts on the control panel wll go off.
9. Unplug the applance and leave t to cool.
3.8 Vertcal steam
You can also use the steam n uprght poston
(see 3.7). You can ron your curtans and hanged
garments thanks to the vertcal steam feature.
Keep the applance 15-30 cm away from the
garment and curtans.
WARNING:
Never drect the
steam to people or pets.
3.9 Automatc Shutdown
(Auto-Off)
If you do not move the applance or press any of
ts buttons for 10 mnutes, t wll be shut down
automatcally.
•If you move the applance horzontally or press
any of ts buttons, t wll start to operate.
C
It may take 60 seconds for the
soleplate (8) to reach the prevous
temperature level.
3Kasutamne
Other manuals for SGA7126P
2
This manual suits for next models
3
Table of contents
Languages:
Other Beko Iron manuals

Beko
Beko SIM 3124 D User manual

Beko
Beko BKK 2127 P User manual

Beko
Beko SPA 9130 B User manual

Beko
Beko SGA8328B User manual

Beko
Beko SIM4126B User manual

Beko
Beko SIM4622 User manual

Beko
Beko SIM4118NS User manual

Beko
Beko SIM 3122 T User manual

Beko
Beko SIM 3126 R User manual

Beko
Beko SIM7124B User manual