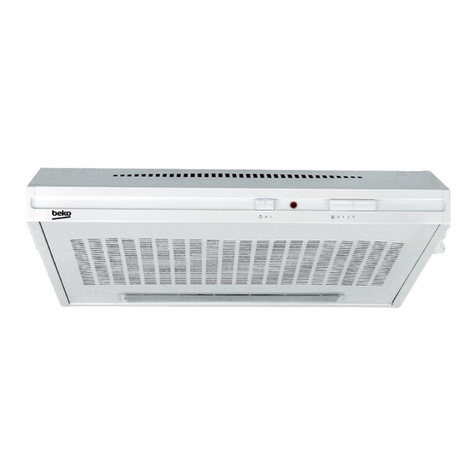
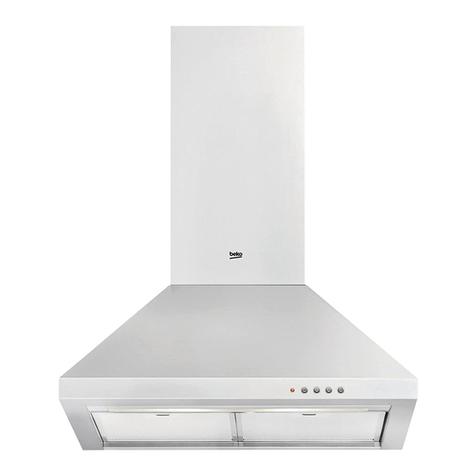
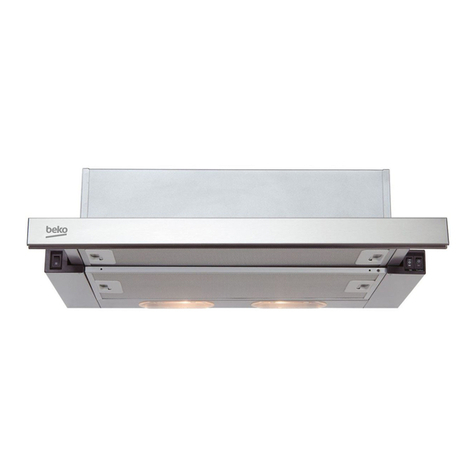
Beko HCA91844XH User manual

Hood
User Manual
PL
DEEN FR
PT RU
CZ
IT SK
NL
HCA91844XH
HCA91731X
HCA61731X

Complies with the WEEE Directive.
This product was manufactured using the latest technology in environmentally friendly conditions.
Please read this user manual first!
Dear Customer,
Thank you for preferring a Beko product. We hope that you get the best results from
your product which has been manufactured with high quality and state-of-the-art tech-
nology. Therefore, please read this entire user manual and all other accompanying
documents carefully before using the product and keep it as a reference for future use.
If you handover the product to someone else, give the user manual as well. Follow all
warnings and information in the user manual.
Remember that this user manual is also applicable for several other models. Differ-
ences between models will be identified in the manual.
Explanation of symbols
Throughout this user manual the following symbols are used:
C
Important information or useful hints
about usage.
A
Warning for hazardous situations
with regard to life and property.
B
Warning for electric shock.
Does not contain PCB.

3 / 123 EN
Hood / User Manual
TABLE OF CONTENTS
1 Important instructions for safety
and environment 9-11
1.1 General safety...........................................................9
1.2 Intended use .............................................................11
1.3 Compliance with WEEE regulation and disposal of
the waste product .........................................................11
1.4 Package information..............................................11
2 Installation instructions 12-13
Electric Connection........................................................12
Wall fixing ..........................................................................12
Installation of models without decorative ducts -
extractor hood.................................................................13
Optional accessories.....................................................13
Installation of models with decorative ducts.....13
Filter hood.........................................................................13
3 Use and maintenance 14-16
Commands (Fig.16)........................................................14
Saturation Active carbon/Anti-grease filters.....15
Commands (Fig.17)........................................................15
Saturation Active carbon/Anti-grease filters.....16
01M-8849283200-2415-01
01M-8849303200-2415-01
01M-8849293200-2415-01

Fig.1
Fig.2
Fig.4.1 Fig.4.2
Fig.3

Fig.4.3
Fig.4.4
Fig.6 Fig.7

Fig.8
Fig.9

Fig.10
Fig.11

Fig.12
Fig.14
Fig.16 Fig.17
Fig.15
Fig.13

9 / 123 EN
Hood / User Manual
1Important instructions for safety and
environment
This section contains safety
instructions that will help protect
from risk of personal injury or
property damage. All warranties
will become void if you do not follow
these instructions.
1.1 General safety
•Always have the installation and
repairing procedures carried out
by the Authorised Service Agent.
Manufacturer shall not be held
responsible for damages arising
from procedures carried out by
unauthorised persons.
•This appliance is not intended
for use by persons (including
children) with reduced physical,
sensory or mental capabilities, or
lack of experience and knowledge.
Children should be supervised to
ensure that they do not play with
the appliance.
1.1.1 Electrcal safety
•Disconnect the product from
the mains during installation,
maintenance, cleaning and
repairing procedures.
•If the power cable is damaged,
it must be replaced by the
manufacturer, after sales service
or a similarly qualified person
(preferably an electrician) or
someone designated by the
importer in order to avoid possible
risks.
•Operating voltage is 220 to 240
volts.
•If the appliance has a failure, it
should not be operated unless
it is repaired by the Authorised
Service Agent. There is the risk of
electric shock!
•Do not route power cable close to
hobs. Otherwise power cable may
cause fire since it melts down
easily.
•Never plug the hood before
installation is completed.
•In order to obtain the best
performance, external conductor
must not be longer than 4 m. It
must not contain more than 2
perpendicular (90°) angles and its
diameter must be min. ø120 mm.
•Disconnect the appliance before
any intervention to the internal
parts of the appliance.

Hood / User Manual
10 / 123 EN
1Important instructions for safety and
environment
1.1.2 Product safety
•You can use a pipe with a diameter
of 120 mm or 150 mm on the flue
connection of the hood.
•Do not make connections to the
flues connected with stoves,
exhaust shafts or flues with rising
flames. Observe the rules set by
authorities on the discharge of
exhaust air.
•The height between the lower
surface of the hood and upper
surface of the stove/oven should
not be less than 65 cm.
•Do not operate the hood without
aluminum filters and do not remove
the filters while it is operated.
•Never touch the hood's lamp after
they operated for a long time. Hot
lamps may burn your hand.
•Avoid big flames beneath the
product. Otherwise, particles on
oil filter may ignite and lead to a
fire.
•Turn on the hobs after placing
pans or pots on it. Otherwise,
rising temperature may deform
certain parts of your product.
•Turn off the hobs before taking
away pans or pots.
•Avoid inflammable materials
under the hood.
•Oil may ignite while frying foods.
Therefore, be careful about cloths
and curtains.
•Never leave the cooker
unattended when frying foods;
otherwise boiled oil may cause
fire.
•There is the risk of fire if your hood
is not cleaned in the specified
periods.
•Be extremely careful and wear
gloves when cleaning the hood.
•We advise you to operate the
appliance a few minutes before
starting to cook in order to
increase the suction power. Thus,
you shall have a continuous and
stable suction power when the
vapors arises.
•Operate your hood for 15 minutes
more after the end of cooking or
frying in order to remove smell
cooking vapour in the kitchen.
•When the hood is in use, especially
together with gas cookers,
make sure that environment is
ventilated with clean air.
11 / 123 EN
Hood / User Manual
1Important instructions for safety and
environment
•Pay attention not to connect
the appliance to the flues used
by non-electrical devices. (E.g.:
Heater flue).
•When a non-electrical device is
concurrently used in the same
room together with the hood,
the negative pressure in the
room must be maximum 0.4 mbar
in order to prevent hood from
sucking other device's exhaust
into the room.
1.1.3 Chldren's safety
•Packaging materials are
dangerous to children. Keep
packaging materials in a safe place
out of reach of children.
•Electrical appliances are
dangerous to children. Keep
children away from the product.
Do not allow children play with the
appliance.
1.2 Intended use
•This appliance is intended for
domestic use. It is not suitable for
commercial use and it must not be
used out of its intended use.
•The manufacturer shall not be
liable for any damage caused by
improper use or handling.
•Service life of your appliance is 10
years. This is the period required
for availability of spare parts for
functioning of the product.
1.3 Compliance with WEEE
regulation and disposal of the
waste product
This product does not contain harmful
and forbidden materials described in the
"Directive on the Restriction of the Use
of Certain Hazardous Substances in
Waste Electrical and Electronic
Equipment" (WEEE) issued by the T.R. Ministry of
Environment and Urbanization.
Complies with the WEEE Directive.
This product has been manufactured with high
quality parts and materials which can be reused
and are suitable for recycling. Therefore, do not
dispose the product with normal domestic waste
at the end of its service life. Take it to a collection
point for the recycling of electrical and electronic
equipment. Please consult your local authorities
to learn the nearest collection point. Help protect
the environment and natural resources by
recycling used products.
1.4 Package information
Ni-MH
The product package is made of
recyclable material as per the National
Legislation. Do not dispose of the
package waste together with the
household waste or other waste and deliver them
to the package collection points indicated by the
local authority.

12 / 123 EN Hood / User Manual
2 Installation instructions
•Assembly and electrical connections must be
carried out by specialised personnel.
•Wear protective gloves before proceeding with
the installation.
Electric Connection
Insulation class II
•The appliance has been manufactured as a class
II, therefore no earth cable is necessary.
The plug must be easily accessible after the
installation of the appliance.
If the appliance is equipped with power cord
without plug, a suitably dimensioned omnipolar
switch with 3 mm minimum opening between
contacts must be fitted between the appliance
and the electricity supply in compliance with the
load and current regulations.
•The distance between the supporting surface
of the cooking appliance on which the cooking
recipients are placed and the lower part of the
kitchen hood must be a minimum of 45 cm,
whether it is an electric hob, a gas hob or an
induction hob. If a connection tube composed
of two parts is used, the upper part must be
placed outside the lower part. Do not connect
the cooker hood exhaust to the same conductor
used to circulate hot air or for evacuating fumes
from other appliances generated by other than
an electrical source.
•In the case of assembly of the appliance in the
suction version prepare the hole for evacuation
of the air.
•We recommend the use of an air exhaust tube
which has the same diameter as the air exhaust
outlet hole. If a pipe with a smaller diameter is
used, the efficiency of the product may be
reduced and its operation may become noisier.
•Before starting to fix the hood, disconnect the
anti-grease filter B (Fig.6) for easier appliance
handling.
Before this operation, perform the following steps
depending on the model purchased:
Model 1
Remove the 3 panels A as shown in Fig.4.1.
Pull handle B as shown in Fig.6.
Model 2
Open panel C as shown in Fig.4.2.
Pull handle B as shown in Fig.6.
Model 3
Remove the 3 panels D as shown in Fig.4.3
Pull handle B as shown in Fig.6.
When closing the panel, make sure that it is
perfectly hooked on to the fastening pins G fig.4.3.
Model 4
If one owns the version with three A panels
release them from the fixing pins by pulling
outwards (Fig.4.4) and then remove them from
safety pins N (Fig.4.4) placed inside the hood.
Pull handle B as shown in Fig.6. To put them back
perform the operation in reverse order.
A
ATTENTION: During this
disassembly and assembly
operation ensure to hold the panel
securely to prevent accidental falls.
•If the appliance has a lid, remove it by removing
the 4 screws B as shown in Fig.9A.
Wall fixing
Mark the position of the lower side of the hood on
the wall (Fig.2A). Maintain the minimum distance
required from the hob as shown in Fig.2B.
•Position the fixing template on the wall, making
sure that the line coincides with the line
previously made on the wall.
•Mark the fixing holes and cut them into the
material (Fig.3).

13 / 123 EN
Hood / User Manual
2 Installation instructions
•Fix the 2 top screws K and screw anchors (Fig.3),
without tightening them completely.
•Place the appliance against the wall, align it in
horizontal position and tighten screws K (Fig.7).
•Once the adjustment has been completed, fix
the hood using the 2 screws C (Fig.8).
•When carrying out the fixing operations,
use only screws and screw anchors suited
to the type of wall (e.g. reinforced concrete,
plasterboard etc.).
•If the screws and screw anchors are supplied
with the appliance, make sure that they are
suited to the type of wall to which the hood
must be fixed.
Installation of models without
decorative ducts - extractor
hood
•Remove the 4 screws B as shown in (Fig.9 A).
•Remove both grid E on the air outlet hole and lid
M as shown in (Fig.9 B).
•Connect the hood to the flexible hose (not
supplied) and the hose to the air exhaust hole
previously prepared (Fig.9 C).
•Fix the lid once again by using the 4 screws
previously removed in (Fig.9 A).
Optional accessories
•This model may have decorative ducts as
optional accessories - ask your retailer for
information.
•Before fixing the decorative ducts, remove
both the 4 screws B and lid M, as shown in
(Fig.10A-B).
•A sound-absorbing kit is also available (to be
ordered as an OPTIONAL accessory) in order
to increase the quietness level of the hood.
The sound-absorbing layer must be applied
to the back of the decorative panel. For fixing
operations, refer to the instructions supplied
with the kit.
Installation of models with
decorative ducts
Make sure the electrical power supply is within
the measurements of the decorative connector.
Adjust the width of the support bracket of the
top connector (Fig.11C). Then fix it to the ceiling
so that it is on the same axis as the hood using
screws A (Fig.11C) adhering to the distance from
the ceiling shown in (Fig.11B). Connect flange
C to the air exhaust hole using flexible hose L
(Fig.11D).
Slide the top duct into the bottom duct. Fix the
bottom duct to the hood using screws B (supplied)
(Fig.11E).
Pull out the top duct as far as the bracket and fix it
using screws F (Fig.11C).
Filter hood
Please note:
The filters should be ordered as accessories from
your retailer.
We offer 2 different types of kit which can be used
to transform the EXTRACTOR hood into a FILTER
hood, in accordance with the type of appliance
model purchased. One kit contains extractable
filters (fig. 10) and the other contains circular
filters (fig. 15).
1. If you find a bracket (such as the one indicated
in fig. 14) included in the product packaging,
this should be fixed to the hood using the 6
screws supplied.
To replace the active carbon filters pull lever B
outwards as shown in (Fig.10).
2. If your product is not supplied with a bracket,
this means that the active carbon filter is a
circular version (fig. 15).
The filters should be fitted to the extraction
assembly inside the hood, by centring them
and rotating them 90 degrees, until they click
into place (Fig. 15).

14 / 123 EN Hood / User Manual
3 Use and maintenance
•We recommend that the cooker hood is
switched on before any food is cooked. We also
recommend that the appliance is left running
for 15 minutes after the food is cooked, in order
to thoroughly eliminate all contaminated air.
The effective performance of the cooker hood
depends on constant maintenance; the anti-
grease filter and the active carbon filter both
require special attention.
•The anti-grease filter is responsible retaining
the grease particles suspended in the air,
therefore it is subject to clogging with variable
frequency according to the use of the appliance.
•To prevent the danger of possible fires, at least
every 2 months one must wash the anti-grease
filters by hand using non-abrasive neutral
liquid detergents or in the dishwasher at low
temperatures and on short cycles.
•After a few washes, colour alterations may
occur. This does not give the right to claim their
replacement.
•The active carbon filters are used to purify
the air that is sent back into the room and its
function is to mitigate the unpleasant odours
produced by cooking.
•The non-regenerable active carbon filters
must be replaced at least every 4 months. The
saturation of the active charcoal depends on
the more or less prolonged use of the appliance,
on the type of kitchen and on the frequency
with which anti-grease filter is cleaned.
•Regenerable active charcoal filters must be
washed by hand, with non abrasive neutral
detergents, or in the dishwasher at a maximum
temperature of 65°C (the washing cycle must
be complete without dishware). Remove excess
water without damaging the filter, remove the
plastic parts, and let the mat dry in the oven for
at least 15 minutes approximately at a maximum
temperature of 100°C. To keep the regenerable
charcoal filter functioning efficient this
operation must be repeated every 2 months.
These must be replaced at least every 3 years or
when the mat is damaged.
•Before remounting the anti-grease filters and
the regenerable active charcoal filters it is
important that they are completely dry.
•Clean the hood frequently, both internally and
externally, using a cloth dampened with water
or non-abrasive neutral liquid detergents.
•The lighting .system is designed for use during
cooking and not for the prolonged general
lighting of the room. The prolonged use of the
lighting system significantly decreases the
average duration of the bulbs.
•If the appliance is equipped with courtesy lights
it is possible to use them for general room
lighting for a prolonged amount of time.
A
ATTENTION: The non compliance
with the hood cleaning warnings
and with the replacement and
cleaning of the filters entails risk of
fires. One therefore recommends
keeping to the suggested
instructions.
Commands (Fig.16)
A = ON/OFF key
Turns the hood on/off.
By pressing key A the LED flashes for 2 sec. then
remains fixed and the equipment starts in 1°
speed.
To turn the hood off press key A again, the LED
flashes for 2 sec. then it turns off.
B = FIRST SPEED KEY
C = SECOND SPEED Key/TIMER
function
•Key C also activates the TIMER function.
•The key flashes for the full duration of the
TIMER.

15 / 123 EN
Hood / User Manual
3 Use and maintenance
•With any speed entered (excluding Intense
speed where applicable) by pressing C for about
3 seconds the TIMER function is activated for 15
min. At the end of the count the hood turns off
(motor and any lights that are on).
•To deactivate the Timer function, before the
pre-set time, press any key except the F key for
ON/OFF Lights.
D = THIRD SPEED key/ INTENSE
SPEED Function
•Key D also activates the INTENSE SPEED
function.
•The key flashes for the full duration of the
INTENSE SPEED function.
•By pressing the key for 3 seconds the INTENSE
function comes on for 6 minutes.
•At the end of the minutes the engine will start
operating at the previously set speed.
To deactivate the intense speed, before the
pre-set time, press any key except the F key for
ON/OFF Lights.
A
ATTENTION: Some models only
work up to the 3rd speed and,
therefore, do not have the intense
function.
E = ON/OFF LIGHTS key
Saturation Active carbon/
Anti-grease filters
•When the hood is on the LED corresponding to
the A and B keys flash, the anti-grease filters
must be washed.
Once the clean filter is put back the electronic
memory must be reset, with the hood off press
A for 5 sec. , the reset is confirmed by a flashing
of the LED A and B.
•When the hood is on the LED corresponding to C
and E flash, the carbon filters must be washed.
Once the clean filter is put back the electronic
memory must be reset, with the hood off press A
for 5 sec. , the reset is confirmed by a flashing of
the LED C and E.
Commands (Fig.17)
A = Light Key
Turn on/off lights.
B = ON/OFF Key
Turn on/off the hood.
The equipment switches on at the 1st speed.
To turn off the hood press key B.
C = Display
Indicates the speed of the selected
motor and activation of the timer.
D = Key
Increases and decreases the speed of
the motor with a cyclical pattern, 1°-2°- 3° ... 1°-
2°- 3° speed.
By pressing the key for 3 seconds the INTENSE
function comes into operation for 6 minutes, on
the C display the number 4 starts flashing.
At the end of the minutes the engine will start
operating at the previously set speed.
To deactivate the intense speed, before the set
time, press the B key and the hood turns off, but
not if the lights are on.
E = Timer key
With any speed entered
(excluding Intense speed) by pressing the key the
timer function is activated for 15 min. At the end
of the count the hood turns off (motor and any
lights that are on).
To turn off the Timer function, before the pre-set
time, press the B key and the hood turns off, or by
pressing the timer key again it turns off but the
hood continues to operate.

16 / 123 EN Hood / User Manual
3 Use and maintenance
Saturation Active carbon/
Anti-grease filters
•After 30 h of operation, with the hood ON on
display C , the letter F starts to flash which
means that the anti-grease filters have to be
washed.
Once the clean filter is replaced you must reset
the electronic memory, with the hood off press
key B and D for 5 sec. until the display C shows
the letter F fixed for 2 sec.
•After 120 h of operation, with the hood ON on
display C the letter C starts to flash which means
that the carbon filters have to be washed or
replaced.
Once the clean filter is replaced you must do a
double re-set so with the hood off press key B
and D for 5 sec. until the display C shows the
letter F fixed for 2 sec.
Repeat and press key B and D for 5 sec. until
display C shows the letter C fixed for 2 sec. .
The manufacturer declines all
responsibility for eventual damages
caused by breaching the above
warnings.

Dieses Produkt wurde in umweltfreundlichen, modernen Einrichtungen ohne schädliche Auswirkungen auf die Natur
hergestellt.
Dieses Gerät stimmt mit der WEEE-Richtlinie überein. Es enthält kein PCB.
Bitte zunächst diese Anleitung lesen!
Sehr geehrte Kundin, sehr geehrter Kunde,
Danke, dass Sie sich für ein Produkt der Marke Beko entschieden haben. Wir hoffen, dass Sie mit diesem
Produkt, das mit den höchsten Qualitätsanforderungen und der modernsten Technologie hergestellt
wurde, beste Ergebnisse erzielen. Bitte lesen Sie diese gesamte Bedienungsanleitung und alle anderen
Begleitdokumente aufmerksam, bevor Sie das Produkt verwenden; bewahren Sie sie zum künftigen
Nachschlagen sicher auf. Wenn Sie das Produkt an einen Dritten weitergeben, händigen Sie bitte auch
diese Anleitung aus. Befolgen Sie alle Warnhinweise und Informationen in dieser Anleitung.
BittedenkenSiedaran,dassdieseAnleitungauch füreinige andereModelleerstelltwurde.Unterschiede
zwischen den Modellen werden in der Anleitung klar und deutlich beschrieben.
Bedeutung der Symbole
Folgende Symbole werden in den verschiedenen Abschnitten dieser Anleitung verwendet:
C
Wichtige Informationen und nützliche Tipps in
Bezug auf die Verwendung.
A
WARNUNG: Warnhinweise zu gefährlichen
Situationen im Hinblick auf die Sicherheit von
Leib, Leben und Eigentum.
B
Warnung vor Stromschlägen.
Warnung vor heißen Flächen.

18 / 123 DE Dunstabzugshaube / Bedienungsanleitung
CONTENTS
1 Wichtige Sicherheits- und
Umweltanweisungen 19-22
1.1 Allgemeine Sicherheit...........................................19
1.1.1 Elektrische Sicherheit ........................................19
1.1.2 Produktsicherheit................................................20
1.1.3 Sicherheit von Kindern......................................21
1.2 Zweckmäßiger Gebrauch.....................................22
1.3 Konformität mit WEEE-Richtlinie und Entsorgung von
Altgeräten .........................................................................22
1.4 Informationen zur Verpackung .........................22
2 Installationshinweise 23-25
Elektrischer Anschluss.................................................23
Wandmontage.................................................................24
Installation von Modellen ohne dekorative Schächte - Dun-
stabzugshaube................................................................24
Optionales Zubehör ......................................................24
Installation von Modellen mit dekorativen Schächten
24
Filterhaube .......................................................................25
3 Nutzung und Wartung 228
Befehle (Abb. 16)............................................................26
Sättigung der Aktivkohle-/Fettfilter......................27
Befehle (Abb. 17) ............................................................27
Sättigung der Aktivkohle-/Fettfilter......................28

19 / 123 DE
Dunstabzugshaube / Bedienungsanleitung
1Wichtige Sicherheits- und
Umweltanweisungen
Dieser Abschnitt enthält
Sicherheitsanweisungen, die
beim Schutz vor Personen-
und Sachschäden helfen.
Bei Nichtbeachtung dieser
Anweisungen erlischt die gewähr-
te Garantie.
1.1 Allgemeine
Sicherheit
•Lassen Sie Installations- und Re-
paraturarbeiten immer von einem
autorisierten Servicedienst durch-
führen. Der Hersteller übernimmt
keine Haftung für Schäden, die von
unautorisierten Personen verur-
sacht wurden.
•Dieses Gerät darf nicht von Perso-
nen (einschließlich Kindern) benutzt
werden, die unter körperlichen oder
geistigen Einschränkungen leiden
oder denen es an der nötigen Erfah-
rung im Umgang mit solchen Gerä-
ten mangelt. Kinder sollten soweit
beaufsichtigt werden, dass sie nicht
mit dem Gerät spielen.
1.1.1 Elektrische
Sicherheit
•Trennen Sie das Gerät bei Installa-
tions-, Wartungs-, Reinigungs- und
Reparaturarbeiten immer von der
Stromversorgung.
•Falls das Netzkabel defekt ist, sollte
es vom Hersteller, Kundendienst
oder einer ähnlich qualifizierten Per-
son (idealerweise einem Elektriker)
bzw. einer vom Importeur genann-
ten Person ersetzt werden.
•Die Betriebsspannung beträgt 220
bis 240 Volt.
•Falls das Gerät einen Fehler auf-
weist, darf es erst nach Reparatur
durch den autorisierten Service-
dienst wieder in Betrieb genommen
werden. Es besteht Stromschlagge-
fahr!
•Netzkabel nicht in der Nähe von
Kochfeldern verlegen. Andernfalls
kann das Netzkabel einen Brand ver-
ursachen, da es leicht schmilzt.
•Die Dunstabzugshaube niemals vor
Abschluss der Installation an die
Stromversorgung anschließen.
•Zur Erzielung optimaler Leistung
darf der Abzug nicht länger als 4 m
sein. Er darf nicht mehr als 2 rechte
Winkel (90 °) zählen und sein Durch-
messer muss mind. ø 120 mm betra-
gen.
•Trennen Sie das Gerät vor jegli-
cher Handhabung der internen
Teile des Gerätes von der Strom-
versorgung.

20 / 123 DE Dunstabzugshaube / Bedienungsanleitung
1Wichtige Sicherheits- und
Umweltanweisungen
•Verwenden Sie das Gerät nur mit
einer geerdeten Steckdose.
1.1.2 Produktsicherheit
•Sie können ein Rohr mit einem
Durchmesser von 120 oder 150
mm am Abluftanschluss der
Dunstabzugshaube verwenden.
•Keine Verbindungen zu Schäch-
ten herstellen, die mit Öfen, Ab-
luftschächten oder Kaminen mit
aufsteigenden Flammen verbun-
den sind. Beachten Sie behördli-
che Richtlinien zur Ableitung von
Abluft.
•Der Abstand zwischen der Unter-
kante der Dunstabzugshaube und
der Oberkante des Herdes/Ofens
sollte nicht weniger als 50 cm bei
Gasherden und 45 cm bei Elektro-
herden betragen.
•Dunstabzugshaube nicht ohne Alu-
miniumfilter betreiben; Filter nicht
entfernen, während die Dunstab-
zugshaube in Betrieb ist.
•Lampen der Dunstabzugshaube nie-
mals berühren, wenn sich das Gerät
bereits längere Zeit in Betrieb befin-
det. Die Lampen können heiß sein
und Verbrennungen verursachen.
•Vermeiden Sie hohe Flammen unter
dem Gerät. Andernfalls können sich
im Aluminiumfilter gesammelte Par-
tikel entzünden und einen Brand
verursachen.
•Schalten Sie Kochfelder erst ein,
nachdem Sie Kochgeschirr darauf
gestellt haben. Andernfalls kann die
steigende Temperatur bestimmte
Teile Ihres Produktes verformen.
•Schalten Sie die Kochfelder ab, bevor
Sie das Kochgeschirr herunterneh-
men.
•Vermeiden Sie entflammbare Mate-
rialien unter der Dunstabzugshaube.
•Öl kann sich beim Braten entzünden.
Achten Sie daher besonders auf
Kleidung und Vorhänge.
•Lassen Sie das Kochgerät niemals
unbeaufsichtigt, während Sie bra-
ten; heißes Öl kann Feuer fangen.
•Falls die Dunstabzugshaube nicht in
den angegebenen Intervallen gerei-
nigt wird, besteht Brandgefahr.
•Seien Sie bei der Reinigung der
Dunstabzugshaube extrem vorsich-
tig, tragen Sie Handschuhe.
•Zur Steigerung der Saugleistung
empfehlen wir Ihnen, das Gerät ei-
nige Minuten vor Beginn des Ko-
chens oder Bratens in Betrieb zu
nehmen.
This manual suits for next models
2
Table of contents
Languages:
Other Beko Ventilation Hood manuals

Beko
Beko BHCB66641BBHS User manual

Beko
Beko CTB 6250 W User manual

Beko
Beko HCF61620X User manual

Beko
Beko BHCB 61632 XH User manual

Beko
Beko HNT 62210 B User manual

Beko
Beko HCA62321B User manual

Beko
Beko HCB93041XB User manual

Beko
Beko HCA92641WH User manual

Beko
Beko CFB 6310 W User manual

Beko
Beko CTB 6253X User manual

Beko
Beko CWB 9610 X User manual

Beko
Beko CFB 6310 W User manual

Beko
Beko HCP 61310 I User manual

Beko
Beko BU 1153 N User manual

Beko
Beko BHCA66641BBHS User manual

Beko
Beko HBG 60 X User manual

Beko
Beko HNT61630X User manual

Beko
Beko HNT62340B User manual

Beko
Beko CWB 6420 X User manual

Beko
Beko BHCB66641BBBHS User manual