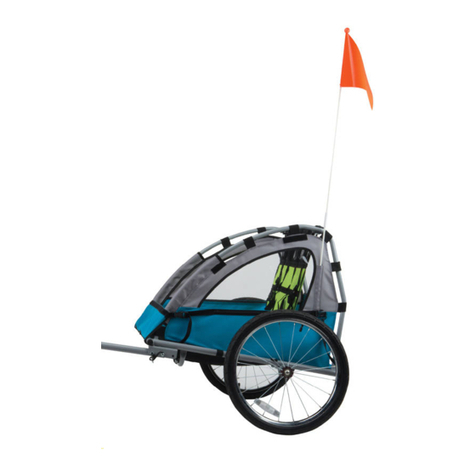
Bell WALLABY User manual

CHILD TRAILER
WALLABY
WARNING: Read manual carefully before
use, and save to read again regularly.
Please keep these instructions
for future reference.
FITS
TWO
KIDS
EASY
ASSEMBLY
DOWNLOAD THE FREE APP
Bell Wallaby 2 Child Trailer-Manual_EN_V2.indd 1 8/30/17 3:11 PM

WARNINGS
Important! It is your responsibility to use your best discretion while
assembling and using your trailer to ensure the safety of your
children, yourself, and those around you. Failure to comply with
the manufacturer’s instructions can lead to serious injury or death
of the passenger/rider. If you have any questions about the assembly
or use of this trailer, call our customer service department at
1-800-456-BELL.
For the safety of your child, carefully read and follow these
instructions and safety rules before operating your trailer.
Not for use with infants under 12 months of age.
The load limit for storage compartment and/or passengers is 100 lbs
(45 kg). More than 100 lbs (45 kg) may cause excessive wear and
stress on the trailer and cause unstable hazardous conditions. Always
position loads as low as possible and as close to the center of the
trailer as feasible — both front to rear and left to right. Do not use
with children that exceed the weight limitations.
Be certain that the bicycle used to tow the trailer is in good working
condition. Make no modifications to the trailer.
When assembling the trailer, be certain the wheels are attached
correctly as described in this manual. If unfamiliar with these types of
wheels, have a reputable bike shop inspect and attach them.
Attach the hitch clamp securely to the bicycle’s frame at the rear
wheel. Ensure that the nut is fastened securely. Always loop the
safety strap around the chainstay at the same point and reattach to
the D-Ring on the hitch arm. Check the hitch clamp and safety strap
before each ride or every ten miles, whichever comes first.
Do not install a car seat or any seating device not approved by the
manufacturer inside the trailer.
Do not allow any of the child’s clothing, shoelaces, or toys to come in
contact with moving parts.
Some bicycles are not fit to carry a trailer — if you notice any
interference issues between the hitch arm and wheel, any
deformation in the bicycle frame from the hitch, and/or any contact
between the bicycle’s wheel and the trailer do not use it!
Bell Wallaby 2 Child Trailer-Manual_EN_V2.indd 2 8/30/17 3:11 PM

Always fasten the harnesses to help reduce the chance of serious
injury or death. The child’s seated height should remain below the
upper crossbar. Make sure that under no circumstances can your
child touch a moving wheel or the roadway. Also make sure your
child cannot press the trailer fabric against the tire or wheel, which
can cause burns.
Never leave children unattended in or around this product.
We recommend that children always be fitted with a certified bicycle
helmet while a passenger in this trailer. The child must be able to
hold his/her head upright.
Check with a pediatrician to confirm that the child’s development
level is suitable for this trailer.
From time to time, check your trailer for loose hardware, worn parts,
torn material or stitching. Repair or replace parts as needed.
Over or under inflation of tires may cause handling issues for the
trailer. Replace tires only with street tread and not with BMX or
knobby tread.
The product will become unstable if a parcel bag or rack is used
where there is no provision for one.
Care must be taken when folding and unfolding to prevent
finger entrapment.
Safe and proper use of your trailer: Pulling this trailer alters the
operation of a bicycle. Stopping, starting, and turning are affected,
depending on the weight of the cargo. To become familiar with such
changes, we recommend loading the trailer to capacity and practicing
in a safe area. Practice stopping, starting, and turning.
Do not use the trailer in traffic or on public paths until you feel
comfortable with it.
Always instruct your child not to bounce or lean while a passenger
in this trailer; such movements may cause the trailer to move
unexpectedly.
Never exceed a safe speed — we recommend no speed over 15
miles per hour (24 km/h) and slowing to less than 5 mph (9 km/h)
when turning. Take sharp turns such as into or out of a driveway
carefully and at slow speeds.
1
Bell Wallaby 2 Child Trailer-Manual_EN_V2.indd 1 8/30/17 3:11 PM

Always ride defensively. Never assume you have the right of way.
Do not travel on highways, very busy streets, or in areas unsafe for
bicycling.
A reflector that complies with CPSC regulations shall be visible on the
rear of the trailer.
Before each ride ensure the attached trailer does not interfere with
the braking, pedaling, or steering of the bike.
Never ride a bike at night without adequate lighting. Obey all local
legal requirements for lighting.
Avoid pulling over curbs, holes, or other obstructions on the road.
They may damage the wheels or frame of your trailer.
Never put more than two children in the trailer. if a single child is
carried in the trailer, they can sit on either side if they weigh less than
50 pounds. If a single child is carried who weighs over 50 pounds,
position them in the center of the trailer. See additional information in
this manual for proper seat belt use in these positions.
Passengers in trailer are susceptible to wind chill due to inactivity.
Ensure that passengers stay warm in cool or cold weather. In warmer
temperatures, make sure passengers have adequate ventilation
and hydration.
Remove passengers or cargo carefully, only when trailer and bicycle
are in a safe area away from traffic, and on level ground. Always
secure the parking brake before loading or unloading the trailer.
Lift with your legs, not your back.
Remove trailer from bicycle only while on level ground, only after
securing the parking brake, and only in a safe area away from traffic.
Start by removing the safety strap from the chainstay. Then remove
the spring clip from the quick release clamp and remove the trailer.
Re-fasten QR clamp to the trailer arm, QR mount may stay on the
bicycle.
When storing trailer, keep it out of sun, with tires inflated. Do not store
trailer near a source of ozone such as an electric motor or heater.
Do not store the trailer in temperatures less than 30 degrees F
(-1 degree C) or higher than 100 degrees F (38 degrees C).
Do not use cleaning solvents. Clean only with mild soap and water.
2
Bell Wallaby 2 Child Trailer-Manual_EN_V2.indd 2 8/30/17 3:11 PM
3
This procedure will show you how to assemble
your Wallaby Child Trailer. To complete, you will
need an adjustable wrench unless your rear
bicycle wheel has a quick release feature.
STEP 1
Remove the
packaging and any
hardware bags from
the box. Set aside
the wheels and
the canopy.
STEP 2
Rotate one of the
side panel support
posts to the upright
position and secure
with the tethered
locking pin.
PART LIST
Chassis
Canopy
Mounting Bracket
Wheels
Safety Flag
Upper Cross Bar
Bell Wallaby 2 Child Trailer-Manual_EN_V2.indd 3 8/30/17 3:11 PM

4
STEP 5
Rotate the trailer chassis on
its side. Place your foot on the
underside of the frame to steady.
Place your hands on the front
and rear support posts and
gently pull up to expand the
frame until you hear the click of
both spring loaded buttons lock
into place.
STEP 6
Rotate the trailer chassis back
to the upright position.
STEP 7
Lift the seat and upper cross bar
from the bottom of the trailer. Insert
the cross bar into the U-shaped
brackets on both side panels.
STEP 3
Repeat the previous step for the
other three support posts.
STEP 4
Rotate side panel to the upright
position. Gently depress the two
spring loaded buttons on the front
and back, and insert the panel arms
into the support posts until you hear
a click. Repeat on the other side.
Bell Wallaby 2 Child Trailer-Manual_EN_V2.indd 4 8/30/17 3:11 PM

5
STEP 8
Rotate the cross bar to align
the pin holes with the holes in
the brackets. Use the tethered
locking pins to secure the
cross bar by passing them
through the aligned holes,
then secure the locking pins
in place.
STEP 9
Lift the front panel of the
foot bed into place, then
pass the hook and loop
strap through the buckle on
the side panel. Pull tight and
fix into place. Repeat on the
other side.
STEP 10
Rotate the trailer chassis on
its side.
STEP 11
Remove the locking
pin from the hitch and
rotate the tow bar
outward to its extended
position. Lock the tow
bar by inserting the
locking pin through the
front hole and secure it
in place.
buckle
locking pin
tow bar
rotate
Bell Wallaby 2 Child Trailer-Manual_EN_V2.indd 5 8/30/17 3:11 PM

6
STEP 12
With the trailer still on its side,
insert one of the wheels into the
axle hole. Push it gently until you
hear it click into place.
STEP 13
Rotate the trailer chassis to the
opposite side.
STEP 14
Insert the remaining wheel into the
axle hole. Push it gently until you
hear it click into place.
WARNING: Do not operate the
trailer if the wheels fail to lock
into the axle. Loss of control and/
or injury to the passenger and/or
operator may result.
STEP 15
Rotate the trailer chassis back to
the upright position.
Bell Wallaby 2 Child Trailer-Manual_EN_V2.indd 6 8/30/17 3:11 PM

7
STEP 19
A two piece safety flag is
included with the trailer. The
flag should always be used
whenever you tow the trailer.
Assemble the safety flag by
inserting the ends of each
section like shown.
STEP 16
Position the canopy over the
top of the trailer, making sure
the reflector is to the rear of
the trailer and the mesh screen
window is to the front.
STEP 17
Pass the hook and loop strap
on the rear of the side panel
through the buckle on the
bottom of the canopy.
Pull tight and fix the hook and
loop strap in place. Repeat on
the other side.
STEP 18
Work the rest of the canopy
forward until it is fully
covering the trailer. Press
hook and loop material on
canopy and front panel to
holdin place as shown.
buckle
Bell Wallaby 2 Child Trailer-Manual_EN_V2.indd 7 8/30/17 3:11 PM

8
STEP 20
Insert the safety flag into its sleeve
on the rear corner of the trailer
“through canopy eyelet”
STEP 21
Remove the black, quick release
mounting bracket from the tow bar
by disconnecting the locking pin.
STEP 22
Remove the rear wheel bolt
from your bike and place
the mounting bracket onto
the axle, then re-secure the
wheel bolt.
STEP 23
Slide the tow bar onto the
mounting bracket and secure
it with the locking pin.
Bell Wallaby 2 Child Trailer-Manual_EN_V2.indd 8 8/30/17 3:11 PM

9
STEP 24
The trailer is equipped with a
safety strap that should always
be used while towing the trailer.
This is essential for the safety
of your child. To use the safety
strap, unclip it from the D-Ring
and wrap it around the bike
frame at its closest point, then
securely hook the strap back
onto the D-Ring.
STEP 25
The trailer is also equipped
with a parking brake strap that
must be used while loading or
unloading your child, or when
the trailer is fully assembled and
stored. To use the brake strap,
unclip it from the D-Ring and
wrap it around the wheel at its
closest point, then securely hook
the strap back onto the D-Ring.
STEP 26
In hot weather, the front window
can be rolled up and secured
with the loop straps to allow
for ventilation.
NOTE: Never use the trailer
without the front screen in place.
The front screen protects your
child’s face from debris and
spray from the back wheel.
Bell Wallaby 2 Child Trailer-Manual_EN_V2.indd 9 8/30/17 3:11 PM

10
USING THE
SAFETY HARNESS
There are two sets of shoulder harnesses
positioned side by side on the seat back.
The two sets of shoulder harnesses are
comprised of four separate shoulder
straps (Straps A, B, C, and D) and three
separate center straps (Straps 1, 2, and 3).
For two child passengers, use shoulder
straps A and B with center strap 1 for one
of the children. Use shoulder straps C and
D with center strap 2 for the other child.
This will position the two child passengers
side by side.
For a single child passenger weighing
more than 50 pounds, the child must
sit in the center using shoulder straps
B, and C, and center strap 3. To do so,
disconnect shoulder strap B from center
strap 1 and connect it to center strap 3.
Disconnect shoulder strap C from center
strap 2 and connect it to center strap 3.
If child weighs less than 50 pounds, they
may sit in the center or either side of the
trailer.
STEP 27
Your child’s height will determine
the position of his or her respective
shoulder straps. The shoulder strap
height may be adjusted by routing
the straps above (for taller children),
or through (for smaller children),
the horizontal loops. Make sure all
the straps are snug and secure for
the safety of your children and the
stability of the trailer. Always use
the seat belt across your child’s lap.
Note: If a single child is carried in the trailer, they can sit on either
side if they weigh less than 50 pounds. If a single child is carried who
weighs over 50 pounds, position them in the center of the trailer. See
following details for proper seat belt use in these positions.
Bell Wallaby 2 Child Trailer-Manual_EN_V2.indd 10 8/30/17 3:11 PM

11
If desired, the wheels can
be removed. To remove
the wheels, gently pull the
quick release lever and
pull the wheel out of the
axle. When reinstalling the
wheels, be sure you hear
an audible click as they
lock into place.
Congratulations!
You’ve now completed the assembly
of your Bell Wallaby Child Trailer!
REMOVING THE QUICK
RELEASE WHEELS
Lever
Bell Wallaby 2 Child Trailer-Manual_EN_V2.indd 11 8/30/17 3:11 PM

WWW.THEBELLGARAGE.COM
© 2017 BELL SPORTS INC. / 1-800-456-BELL
1001 INNOVATION ROAD / RANTOUL, IL 61866 USA
MADE IN CHINA
Bell Wallaby 2 Child Trailer-Manual_EN_V2.indd 12 8/30/17 3:11 PM
Table of contents
Other Bell Bicycle Accessories manuals

Bell
Bell SMOOTH SAILER Series User manual

Bell
Bell cocoon 500 User manual

Bell
Bell Platinum series User manual

Bell
Bell FreeFit User manual

Bell
Bell Dark Flyer User manual

Bell
Bell BICYCLE HELMET User manual

Bell
Bell COCOON 300 Series User manual

Bell
Bell TotalFit User manual

Bell
Bell COCOON 300 User manual

Bell
Bell Dashboard 300 User manual
Popular Bicycle Accessories manuals by other brands

Rixen & Kaul
Rixen & Kaul KLICKfix Freepack Sport Rucksack quick start guide

Shimano
Shimano TIAGRA ST-4500 - TECHNICAL Service instructions

Livall
Livall BH51 Series quick start guide

Burley
Burley d'lite Owner's instruction and safety manual

Burley
Burley Nomad Cargo Rack Owner's instruction & safety manual

Sigma
Sigma BC 1106 DTS manual