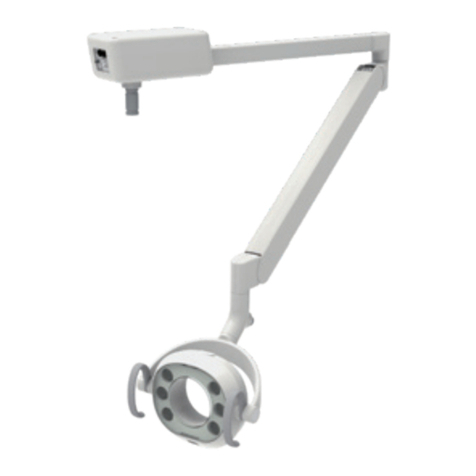
Belmont PHOT-X IIs 505 User manual

R
Wall Mount Type...............WK
DENTAL X-RAY
INSTRUCTIONS
INSTALLATION
WARNING
This x-ray equipment may be dangerous to patient and operator unless safe exposure factors,
operating instructions and maintenance schedules are observed.
CAUTION
This manual provides information and instructions for theinstallation, assembly, calibration and
certification procedures for BELMONT PHOT-X IIs 505 dental x-ray.
The instructions contained in this book should be thoroughly read and understood by dealer service
personal before attempting to install the X-ray unit. After installation is completed, owners should
file this manual and refer back to it to schedule periodic maintenance.
If this manual is lost or cannot be read by a damage, order themanual by the book number written
on the last page.
505


INDEX
PAGE
SECTION 1: TECHNICAL DATA
[1] ELECTRICAL AND RADIATION DATA--------------------------------------------------------2
[2] PHYSICAL DIMENSIONS-------------------------------------------------------------------------3
[3] TUBE HEAD THERMAL CHARACTERISTICS-----------------------------------------------4
SECTION 2: PRE-INSTALLATION INSTRUCTIONS
[1] SUPPORT REQUIREMENTS----------------------------------------------------------------------5
[2] ELECTRICAL REQUIREMENTS-----------------------------------------------------------------5
[3] LOCATION OF COMPONENTS------------------------------------------------------------------6
SECTION 3: INSTALLATION INSTRUCTIONS
[1] INSTALLATION REQUIREMENTS--------------------------------------------------------------7
[2] UNPAC ING------------------------------------------------------------------------------------------7
[3] MAIN CONTROLLER AND ARM INSTALLATION------------------------------------------8
[4] HEAD ASSEMBLY INSTALLATION-----------------------------------------------------------12
[5] SUB CONTROLLER INSTALLATION---------------------------------------------------------14
[6] HAND EXPOSURE SWITCH (OPTION)------------------------------------------------------15
[7] EXTERNAL INTERLOC S (NOT SUPPLIED) ----------------------------------------------15
SECTION 4: POST INSTALLATION INSPECTION
[1] ARM ASSEMBLY-----------------------------------------------------------------------------------16
[2] BALANCE ARM TENSION ADJUSTMENT--------------------------------------------------16
[3] HEAD POSITIONING-----------------------------------------------------------------------------16
SECTION 5: CONTROL IDENTIFICATION AND OPERATION
[1] MAJOR COMPONENTS AND CONTROL DENTIFICATION-----------------------------17
[2] FUNCTION OF CONTROLS---------------------------------------------------------------------18
[3] OPERATING PROCEDURES--------------------------------------------------------------------21
[4] ESTIMATED AIR ERMA-----------------------------------------------------------------------21
[5] OPTIONAL HAND EXPOSURE SWITCH----------------------------------------------------21
[6] ERROR CODES------------------------------------------------------------------------------------22
[7] MAINTENANCE-----------------------------------------------------------------------------------23
[8] DISPOSAL-------------------------------------------------------------------------------------------23
SECTION 6: POST INSTALLATION CONFIRMATION
[1] CONFIRMATION OF POWER SUPPLY VOLTAGE-----------------------------------------24
[2] CONFIRMATION OF TUBE POTENTIAL COMPENSATION VALUE------------------24
[3] MA ADJUSTMENT --------------------------------------------------------------------------------24
[4] CONFIRMATION OF V AND MA------------------------------------------------------------25
[5] CONFIRMATION OF EXPOSURE WARNING & BUZZER-------------------------------25
[6] CONFIRMATION OF LINE VOLTAGE REGULATION------------------------------------25
SECTION 7: INITIAL SETTING
[1] SPEED SETTING FOR FILM AND DIGITAL IMAGING-----------------------------------26
[2] PRIORITY OF SELECTIONS--------------------------------------------------------------------27
[3] ELECTRONIC CHIME ON-OFF-----------------------------------------------------------------27
[4] ESTIMATED AIR ERMA DISPLAY SETTING---------------------------------------------27
APPENDIX 1: CIRCUIT DIAGRAM ----------------------------------------------------------------28
APPENDIX 2: MAINTENANCE CHECK LIST---------------------------------------------------29
APPENDIX 3: PARTS IDENTIFICATION
[1] CONTROLLER ASSEMBLY--------- ------------------------------------------------------------30
[2] ARM AND HEAD ASSEMBLY------------------------------------------------------------------32
-1-

Rated Line Voltage [Vac]
100
110
120
220
230
240
Minimum Line Voltage [Vac]
90
99
108
198
207
216
Maximum Line Voltage [Vac]
110
121
132
242
253
264
Rated Line Power [kVA]
[kV
A
]
1.1
1.2
1.2
1.4
1.4
1.4
Rated Line Current at 70kV, 6mA [Aac
] 11.0
10.5 10.0 6.4 6.2 6.0
Maximum Line Current at 70kV, 6mA
[Aac] 12.1 11.6 11.0 7.0 6.8 6.6
Maximum Apparent Resistance [Ω]
0.39
0.45
0.52
0.91
0.98
1.06
Range of Line Valtage Regulation [%]
0 ~ 5
0 ~ 5
0 ~ 5
0 ~ 3
0 ~ 3
0 ~ 3
Over Current Release [
Aac]
≧ 15
≧ 10
SECTION 1 : TECHNICALDATA
[ 1 ] ELECTRICAL AND RADIATION DATA
1. X-ray tube -------------------------------------------------- Toshiba D-046 (Stationary Anode)
a. Nominal focal spot value ------------------------------ 0.4 (IEC60336)
b. Target Material ------------------------------------------ Tungsten
c. Target angle --------------------------------------------- 12.5°
d. Maximum anode heat content ------------------------ 4.3kJ (6.1kHU)
2. Maximum x-ray tube assembly heat content ---------- 293kJ (413kHU)
3. Rated peak tube potential -------------------------------- 60 kV / 70 kV selectable
4. Rated tube current ----------------------------------------- 3 mA / 6 mA selectable
5. Maximum rated peak tube potential -------------------- 70 kV
6.
7. Power line frequency ------------------------------------- 50 / 60Hz, Single Phase
8. Exposure time ---------------------------------------------- 0.01 ~ 2.0 sec.
9. Inherent filtration ------------------------------------------ 1.7 mm Al Equivalent
10. Added filtration ------------------------------------------- 0.3 mm Al
11. Minimum filtration permanently in useful beam ----- 2.0 mm Al Equivalent at 70 kV
12. Nominal roentgen output 60 kV 70 kV
3 mA 6 mA 3 mA 6 mA
a. Distal end of regular cone ----------------------------- 4.6 9.1 5.9 11.8 mGy/sec. ± 40%
b. Distal end of long cone -------------------------------- 2.0 4.1 2.6 5.2 mGy/sec. ± 40%
(Data obtained by direct measurement in the useful beam)
13. Nominal electrical output of H.V. generator ---------- 0.42 kW at 70 kV, 6 mA
14. Cone Source to skin distance Field size
a. Regular cone -------------------------------------------- 203 mm 58 mm dia., circular
b. Long cone (option) ------------------------------------- 305 mm 58 mm dia., circular
c. Rectangular colimator (option) ----------------------- SSD of cone + 40mm 32 x 40 mm, rectangular
15. Maximum symmetrical radiation field ---------------- 60 mm dia. at distal end of cone
16. Leaking technique factor -------------------------------- 70 kV / 0.19 mA (697mAs at 1 hour)
17. Duty cycle ------------------------------------------------- 1 : 30 (0.5 sec. exposure with 15 sec. interval)
18. Maximum deviation of tube potential, tube current and exposure time
a. Below 0.1 sec. setting ---------------------------------- ±10 kV, ±2 mA, ±5 msec.
b. 0.1 sec. setting & up ----------------------------------- ±5 kV, ±1 mA, ±10 msec.
19. Measurement base of technique factors
a. peak tube potential ------------------------------------- Average of peak tube potentials during
one exposure
b. tube current ---------------------------------------------- Average of tube current during one exposure
c. exposure time ------------------------------------------- Time period during x-ray is emitted
20. Half value layer ------------------------------------------- 1.5 mm Al over
21. Source to the base of cone distance -------------------- 94 mm
22. Environmental condition for storage ------------------- -20 ~ 70°C, 10 ~ 100%, 500 ~ 1060hPa
23. Environmental condition for operation ---------------- 10 ~ 40°C, 30 ~ 70%, 700 ~ 1060hPa
24. Rotation angle of head ----------------------------------- Horizontal 0 ~ 600° , Vertical 0 ~ 300°
25. Service Life -----------------------------------------------
-2-
10 Years

142
46
8
220
600
90
90
300
(See Max. Reach Chart)
Max.1190 80
Stroke 1100
58
9
0
116
1
Location for Power Cable
21
5
4
80 ~ 15
80
143
5 ~
1
985
(to bottom of
enclos
ure
)
(to bottom of w
all pl
ate
)
8
76
853
800
2122mm with 1000mm arm
1922mm with 800mm arm
1622mm with 500mm arm
1422mm with 300mm arm
Maximum Reach
185
1
15
PHOT-X IIs Sub Controller
34 mm Front-to-Back Box Thickness
P
150
178
211
7
7
23
100
6
1
130
1
16
0
1
29
4
85
2
31
50
973
1023
1243
Short Cone
Long Cone
)
Cabinet Frame
for X-ray
w/ 800mm arm
Focal Spot Marking
Reference Axis
SSD
SSD + 158
1
60
SSD (Source to Skin Distance) :
a. Regular cone -------- 203mm
b. Long cone ---------- 305mm
Note : Installation of rectangular collimator
(p/# 1S01WEA0) increases SSD by
40 mm from above value.
Fig. 1-1 Dimensions
11
5
361
463
[2]PHYSICAL DIMENSIONS
-3-
unit : mm

-4-
[ 3 ] TUBE HEAD THERMAL CHARACTERISTICS
A. Interval between each exposure
The temperature inside of the tube head rises when an exposure is made. The value of the heat
generated is measured in Heat Units (HU), which is the product of tube potential, tube current
and exposure time. Excessive heat will accumulate inside of the tube head if the x-ray is used
without a proper cool down interval between each exposure. The excessive heat may damage the
x-ray tube, high voltage generator or both.
B. Duty cycle
A cool down interval of 30 seconds or more must be allowed between each 1 second exposure.
(a 15 second cool down must be allowed between each 0.5 second exposure.) This will avoid
the accumulation of excess heat and prolong the tube head life.
C. Tube head cooling curve
Time in Minutes
Load Time (sec.)
Time in Seconds
Heat Storage (k H.U.)
Tube Current (mA)
Heat Storage (J)
3. Maximum rating chart
1. Tube Hosung cooling curve 2. Anode thermal characteristics
0
50
100
150
200
250
300
350
400
450 4500
4000
3500
3000
2500
2000
1500
1000
500
12
10
8
6
4
2
0
0.1 0.2 0.3 0.5 0.7 1 2 3 5 7 10
0
050
100W
50W
50kV
60kV
70kV
COOL DOWN
HEAT UP
100 150 200 250 300
0 20 40 60 80 100

-5-
[ 1 ] SUPPORTREQUIREMENTS
Main Controller :
The main controller of model 505 is designed for mounting
on wood studs with three lag screws (ø 9 x 75mm). The wall
and mounting hardware must be sufficient to withstand a 45kg
shear load and a 200kg withdrawal force at each of the three
mounting screws. When using concealed wiring, a flush mounted
junction box with the necessory conduit and wirong must be
pre-installed at 1165mm from the floor.
Sub Controller :
When mounting the model 505 sub controller, the wall and mounting
hardware must be sufficient to withstand a 4.5kg shear load.
If the PHOT-X IIs505 is to be mounted in a manner other than
what is specified in this manual or if the hardware to be used is other
than what is supplied, the support capability of the wall and the
strength of the hardware must be checked and verified to be adequate.
[ 2 ] ELECTRICAL REQUIREMENTS
Power supply :
The model 505 x-ray system is operated on a power supply of rated line voltage ±10% with a thre
wire (hot, neutral, earth) circuit, separately connected to the central distribution panel with an
over current protection device. Use a flexible cable approved by CEE (13) 52 or 53 consists of
0.75 mm2 or 1 mm2 conductors. Diameter of the sheath of cable should be 6 ~ 7.5 mm diameter.
Line voltage regulation should be within the range of 0 ~ 5% (for 100V, 110V, 120V type) or
0 ~ 3% (for 220V, 230V, 240V type) at rated current.
Interconnecting wiring between main controller and sub controller :
4 conductors, 0.5 mm2, 300V is recommended. Maximum wire run distance is 10m.
Concealed wiring :
Route conduit and wires through wall and into (2) flush mounted junction boxes located (1)
behind the main controller and (1) behind the sub controller. Recommended heights above the
finished floor for the flush junction boxes are : 1165mm for the main controller and 1310mm
for the sub controller. Wiring done in this manner should extend 300mm beyond the wall surface
to allow sufficient wire for connections.
Note : All connections, workmanship and materials used must comply with the local codes.
SECTION 2 : PRE-INSTALLATION INSTRUCTIONS
CAUTION
Fig.2-1 Main Controller
Fig.2-2 Sub Controller
Fig.2-3 Concealed Wiring
C
T1 T5
T2 T3 T4
FD
P
kV
60 70
mA
ab
47
INC
INC
CUS
&
PM
CUS
&
PM
MLR OCC
MLR
BW
Junction
Boxes
FROM
POWER
SOURCE
Terminal Block
in Main Controller
Terminal Block
in Sub Controller
(1) (2)
WALL
12 3 4
L N
43 2
1
3P 4P
4P
Interconnecting Wire

-6-
[ 3 ] LOCATION OF COMPONENTS
A. Main Controller, Arm and Head Assemblies :
Using the information provided in Fig.2-4, determine the correct location for the main
controller.
NOTE : National and local requirements supersede guide lines indicated below.
B. Sub controller
When determining the location for the sub controller, the following radiation requirements
concerning the operator's positioning must be considered.
The operater must :
1. have full view of the patient.
2. have means for audio and visual communications with the patient.
3. have full view of kV, mA, timer selections and exposure warning light.
4. be at least 2 m away from the x-ray head and patient and out of the path of the x-ray beam
or be positioned behind a protective device.
Fig.2-4 Radius of Activity for X-ray Head
58
3
80
(
480
)
192
2
(
1
820
)
220
1864
(1
762
)
(
110
8)
10
06
( ) : WITH LONG CONE

SECTION 3 : INSTALLATION INSTRUCTIONS
[ 1 ] INSTALLATION REQUIREMENTS
Tools :
Standard tool kit including 1.5 mm, 2 mm, 3 mm and 5 mm allen keys.
Instruments :
-Digital multimeter with an accuracy of 1%, capable of measuring 300 V AC, and capable
of indicating true RMS value within 1 sec.
-Standard calculator.
Power Supply :
Prior to starting the installation, inspect the power supply and confirm that it is rated line
voltage ±10%, and a 3 wire GROUNDED circuit, separately connected to the circuit breakerl
panel with an over current protection device rated for 15 A (for 100V, 110V, 120V type) or
10A (for 220V, 230V, 240V type). (Refer to Page 5, [2] ELECTRICAL REQUIREMENTS)
[ 2 ] UNPACKING
Unpack the entire contents of the shipping carton. Included within the shipping carton are :
Hardware Quantity
Head with Regular Cone ----------------------------------------------------------- 1
Main Controller---------------------------------------------------------------------- 1
Screw for chassis (M4 x 10 mm) -------------------------------------------------- 4
Screw for chassis (M4 x 20 mm) -------------------------------------------------- 1
Stopper Ring ------------------------------------------------------------------------- 1
Front cover seal ---------------------------------------------------------------------- 4
Lag Screws for Arm Mounting Bracket (φ 9 x 75 mm)------------------------ 3
Arm Mounting Bracket ------------------------------------------------------------- 1
Sub Controller ----------------------------------------------------------------------- 1
Sub Controller Mounting wood screw (φ 4.1 x 20 mm)-----------------------
-
4
Head key------------------------------------------------------------------------------ 1
Arm collar ---------------------------------------------------------------------------- 1
Balance Arm ------------------------------------------------------------------------- 1
Balance Arm Wrench --------------------------------------------------------------- 1
Horizontal Arm W/2 x End Caps-------------------------------------------------- 1
Brake Screw (M6 x 6 mm) --------------------------------------------------------- 2
Brake Plug (Brass Plug φ 5 x 4 mm) --------------------------------------------
-
2
Retaining Bolt (M6 x 35 mm) ----------------------------------------------------- 2
Stopper Screw (M6 x 15 mm) ----------------------------------------------------- 1
Brake Spring (φ 5 x 11mm) -------------------------------------------------------- 1
Hook for side cover ----------------------------------------------------------------- 4
Screw for hook (M4 x 6mm) ----------------------------------------------------- 8
Documentation Quantity
Installation manual ------------------------------------------------------------------ 1
Operators manual-------------------------------------------------------------------- 1
Wall mounting Template ----------------------------------------------------------- 1
Inspect contents of shipping carton for damage or missing components.
-7-

-8-
[ 3 ] MAIN CONTROLLER AND ARM INSTALLATION
The instructions given below are for mounting the main controller assembly on wood studs.
Should the PHOT-XIIs 505 be mounted in a manner other than what is specified here, the
wall and the strength of the hardware used must be checked and verified as being adequate to
withstand a 45kg shear load and a 200kg withdrawal force at each of the three ( 9 x 75mm) lag
screws. When using concealed wiring, a flush mounted junction box with the necessary conduit
and wiring must be pre-installed at 1165mm from the floor.
A. ARM MOUNTING BRAKET
Make sure the power supply is turned OFF at the circuit breaker panel.
1. Tape the wall mounting template to the wall, positioning it so that the holes for mounting plate
lag screws are aligned with the vertical studs.
NOTE : Confirm that the location of concealed wiring matches to the access hole of wall plate
template.
2. Mark the hole locations for the arm mounting bracket lag screws.
3. Use a 3/16" (5mm) dia. drill to make a pilot hole approximately 50mm deep for each mounting
lag screws.
Do not use a drill larger than 5mm dia. for these holes.
4. Using three lag screws ( 9 x 75mm) with washers in
top mounting holes and in lower mounting hole, mount
the arm mounting bracket on the wood stud. (Fig.3-1)
WARNING
CAUTION
Fig.3-1 Arm Mounting Bracket
Installation
WALL PLATE INSTALATTION (OPTION)
1. Place the wire through the hole into the stud mount
wall plate and mount the plate to the stud with
four ( 9 x 75mm) lag screws.
DO NOT FULLY TIGHTEN.
2. Using three bolts (M8 x 20mm) with washers in top
mounting holes and in lower mounting hole, mount
arm mounting bracket to wall plate. (Fig.3-2)
Arm Mounting
Bracket
Wires ( 9 x 75)
Lag Screw
Fig.3-2 Arm Mounting Bracket Installation
on Wall Plate (Option)
ø
ø
ø
ø
Arm Mounting
Bracket
(M8x20)
Bolt
Flat Washer
Wires
Interconnecting
Interconnecting
Power Supply
Power Supply
Wires
Wires

-9-
B. CHASSIS OF MAIN CONTROLLER
1.Remove the restriction plate over the terminal
blocks by taking out two (M 4 x 8mm) screws.
(Fig.3-3)
2.Route electrical interconnecting wires and power
lower right corner s
supply wires through the access holes on chasis
and mount the chassis on the arm bracket with
three of four (M4 x 8mm) screws. (A screw at
hould be secured with a green
wire from arm at setp D 6. on page 10.) Secure
bottom corner of chassis with two (M4 x 8mm)
screws to the wall plate. (Fig.3-3)
3.Cut the wires to workable length and strip 3/8"
of insulation for power supply wires and 3/16"
for interconnecting wires for Sub Controller.
Connect power supply wires to 3P terminal
block and interconnecting wires to 4P terminal
block. (Fig.3-4)
4.Reattach the restriction plate.
(Fig.3-3)
C. HORIZONTAL ARM
1.Place a thrust washer over the hole on top of
the arm mounting bracket. (Fig.3-5)
Insert the cable of horizontal arm into the
hole, and mount to the arm mounting bracket,
as shown in Fig.3-5.
2.Insert two retaining bolts into the upper threaded
holes of the arm mounting bracket and tighten
securely with a Allen wrench. (Fig.3-6)
IMPORTANT :
The retaining bolts must be installed to ensure
that the horizontal arm can not lift out of the
arm mounting bracket.
3.Insert brake plug, brake spring and brake screw
(M6 x 6 mm) into the threaded hole of the hex
fitting located on the arm mounting bracket.
DO NOT FULLY TIGHTEN.
(Fig.3-6)
Fig.3-3 Attaching Chassis to Wall Plate
Restriction
Plate
Chassis
(M4x8)
Screw
(M4x8)
Screw
(M4x8)
Screw
Wires
Interconnecting
Wires
Fig.3-4 Wires Connection in Main Contoller
Horizontal Arm
Thrust Washer
Fig.3-5 Horizontal Arm Installation-1
Retaining Bolt
Retaining Bolt
Mats
Mats
Mats
Brake Plug
Hex Fitting
Horizontal Arm
Brake Spring
Brake Screw
Fig.3-6 Horizontal Arm
1 2 3 4
L
N
Power Supply
Wires
Interconnecting Wires
(to Sub Controller)
Power Supply
3P
Terminal
Block
4P
Terminal
Block

-10-
4.Place a level on the horizontal arm and confirm that the arm is level throughout its left and
right swing positions. (Fig.3-7)
NOTE : Final leveling of horizontal arm is described on Page 16.
5.Connect 2P and 8P connectors of horizontal arm cable to
the respective connectors on power PC Board. (Fig.3-8)
6. Secure the green wire of arm cable by a lower right corner
screw of four screws securing chassis to the arm bracket.
D. FRONT COVER
NOTE : The front cover for the main controller should not be closed until all installation
1.Set the pins located on the bottom of the front cover into holes on the bottom of metal chassis,
and then push the top side toward the wall to close. (Fig.3-9A)
2.Install two (M3 x 8mm) screws into the top of the cover and confirm that the cover is securely
attached. (Fig.3-9B)(M3x8) Screw
Front Cover
Front Cover Front Cover
Chassis Hole
Pin
Fig.3-9A Attaching Front Cover-1 Fig.3-9B Attaching Front Cover-2
Fig.3-7 Level confirmation
Horizontal
Arm
Level
Fig.3-8 Connecting 2P and 8P Connectors
on Power PC Board
and the post-installation inspections and confirmation are completed.
E. SIDE COVER (OPTION) ASSEMBRY
1. After the front cover of the main controller is
installed, attach four hooks to the wall plate
with (M4 x 6mm) screws supplied.
2.
Side Cover
Wall Plate
Hooks
(M4 x 6)
Coutersunk Screw
Slide in the side cover from right and left side
of the wall plate as the hooks catch the side
covers. (Fig.3-10)
Fig.3-10 Side Cover Installation
Power PC
Board
Connector
2P
Connector

-11-
F. BALANCE ARM ASSEMBLY
Do not release Arm holding band until the X-ray head
has been installed.
Balance arm assembly is spring loaded and can cause
equipment damage and injury if not handled in the
proper manner.
1. During this procedure, do not remove Arm holding
band.
2. Remove two (M3 x 8mm) screws from the underside
of the horizontal arm to open the bottom cover. (Fig.3-11)
3. Route the cable with 2P and 8P connectors from
the balance arm shaft through the horizontal arm.
Insert the balance arm into the horizontal arm.
The cable should be fed through the bottom cover
opening on the bottom of the horizontal arm. (Fig.3-12)
4. Secure 2 wires (Grounded wires) together with the
(M5 x 10mm) screw on the bottom cover. (Fig.3-13A)
Note : Two ring terminals should not protrude from a
chassis plate. (Fig.3-13A)
5. Secure the wires from the balance arm to the bottom cover with the nylon cable clamp to prevent
damage from twisting. (Fig.3-13B) Then connect the 2P and 8P connectors. (Fig.3-13C)
6. Re-attach the bottom cover to the horizontal arm with two screws. (Fig.3-12)
WARNING
Fig.3-11 Horizontal Arm Bottom Cover
Fig.3-12 Balance Arm Installation
Fig.3-13A Attaching Grounded Wires on
Bottom Cover
Fig.3-13B Attaching Balance Arm Cable
on Bottom Cover
Fig.3-13C Connection of Connectors
on Bottom Cover
Horizontal Arm
Bottom
Cover
(M3 x 8)
Screw
Mats
Mats
Mats
Mats
Mats
Cable from
Balance Arm
Chassis Plate
(M5 x 10)
Screw
Nylon
Clamp
(M5 x 10)
Screw
2P Connector
8P Connector
CAUTION !
DO NOT RELEASE
THIS BAND UNTIL
X-RAY HEAD IS
INSTALLED
Arm Holding
Band
Caution
Tag
Balance Arm
Shaft
Balance Arm
Cable from
Balance Arm
Mats
Mats
Mats
Mats
Mats
Mats
Mats

-12-
7. Insert the brake plug and brake screw (M6 x 6mm)
into the horizontal arm collar. (Fig.3-14)
Do not fully tighten.
8. Remove the end cap from horizontal arm.
Insert the stopper screw into upper threaded hole
inside horizontal arm and tighten securely.
Replace the end cap. (Fig.3-14)
If stopper screw is not tightened securely, the
Balance Arm can lift out of the horizontal arm.
[ 4 ] HEAD ASSEMBLY INSTALLATION
Do not release Arm holding band until the
X-ray head has been installed.
Balance arm assembly is spring loaded and
can cause equipment damage and injury
if not handled in the proper manner.
Refer to the Caution Tag on the band.
1. Remove the arm collar screw (M4 x 8mm) from
the arm collar. Slide the arm collar upward and
temporarily hold it in position with adhesive tape.
(Fig.3-15)
2. Open the yoke inside cover of x-ray head by
removing (M4 x15mm) cover screw.
(Fig.3-16)
CAUTION
WAR NIN G
Fig.3-14 Attaching Balance Arm
to Horizontal Arm
Fig.3-15 Setting Arm Collar on
Balance Arm
CAUTION !
DO NOT RELEASE
THIS BAND UNTIL
X-RAY HEAD IS
INSTALLED
CAUTION !
DO NOT RELEASE
THIS BAND UNTIL
X-RAY HEAD IS
INSTALLED
Arm Holding
Band
Caution Tag
Adhesive
Tape
Arm Collar
Screw
(M4 x 8)
UP-Mark
Arm
Collar
UP
Mats
Mats
Fig.3-16 Removing Yoke Inside Cover
Mats
Yoke
X-ray Head
CP Values Label
Cover
Yoke inslde
Cover Screw
(M4 x 15)
Screw Driver
Mats
Mats
Brake Screw
Horizontal
Arm
Horizontal
Arm Collar
Stopper
Screw
Arm End Cap
Brake Plug
Balance Arm

-13-
4. Insert the shaft of the balance arm into the
head yoke, and while holding the head in
position, insert the head key securely into the
retaining groove. (Fig.3-17)
5. Remove adhesive tape and slide the arm collar
downward. Fix it in place with the arm collar
screw.
Remove the UP-mark from the arm collar.
(Fig.3-17)
6. Loosen the (M5 x 10mm) screw and remove
the nylon cable clamp from the yoke housing.
Place cable clamp on the balance arm cable.
Connect the 10P connectors, and then attach
the balance arm cable to the yoke housing
with the nylon cable clamp. (Fig.3-18)
7. Reattach the yoke inside cover with the screw
(M4x 15mm). Before closing the cover,
note the CP values on the CP values label
inside of the yoke. (Fig.3-16)
8.Remove arm holding band.
Fig.3-17 X-ray Head Installation
CAUTION !
DO NOT RELEASE
THIS BAND UNTIL
X-RAY HEAD IS
INSTALLED
CAUTION !
DO NOT RELEASE
THIS BAND UNTIL
X-RAY HEAD IS
INSTALLED
Arm Holding
Band
Caution Tag
Arm Collar
Screw (M4 x 8)
Arm Collar
UP-Mark
Head Key
Stopper Ring
UP
Yoke
Head
Fig.3-18 Connection 10P Connector in Yoke
3. Making sure the stopper ring is placed on the
yoke, insert the wiring from the balance arm
assembly through the head shaft and into the
yoke. (Fig.3-17)
Nylon
Clamp
(M5 x10) Screw
10P
Connector
Yoke
Housing

[ 5 ] SUB CONTROLLER INSTALLATION
The wall and the strength of the hardware used must be checked and verified as being adequate to
withstand a 10 pound (4.5kg) shear load. A flush mounted junction box with the necessary conduit
and wiring should be pre-installed at 51-5/8" (1310mm) from the floor.
1. Remove two (M3 x8mm) screws from the under side
of the controller and open the front panel. (Fig.3-19)
2. Disconnect the 4P connector from the timer PC Board.
(Fig.3-20)
3. Route the interconnecting wires from the main
controller through access hole of chassis and
mount on the wall with four (ø4.1 x 20mm) wood
screws. (Fig.3-20)
4. Cut 4 interconnecting wires from main controller
to a workable length. Strip 3/16" insulation off
the wires and connect them to the 4P terminal
block.Terminal number for each wire should be
matched to the terminal number in the main
controller. (Fig.3-21)
Miswiring causes permanent damage to both
timer PC board and power PC board.
5. If wire length is too long, push it back into the access
hole of the wall. This will prevent mechanical damage
to the timer PC Board when replacing the front cover.
6. Reattach the 4P connector to the timer PC Board.
(Fig.3-20)
7. Set the pins located on the upper side of the front panel
into holes on the top of chassis and attach the front
cover to the chassis with two (M3 x 8mm) screws.
(Fig.3-19 & Fig.3-22)
-14-
Fig.3-19 Opening Front Panel
Front Panel
Screw (M3 x 8)
Fig.3-20 Attaching Sub Controller
Chassis
Fig.3-21 Interconnecting Wires Connection
in Sub Controller
Chassis
4P Terminal
Block
1 2 3 4
4 x Interconecting Wires
(From Main Controller)
Pin
Chassis
Hole
Front Panel
Fig.3-22 Upper side of Sub Controller
1234
Chassis
4P Connector
4P Terminal
Block
Front Panel
Timer PC
Board
Wood Screw
(
ø
4.1 x 20)
Interconnecting
wires
(From Main Controller)
CAUTION
Interconnecting
wires
1
2
3
4
1
2
3
4
Controller
Main
Block
4P Terminal
Block
4P Terminal
Controller
Sub

-15-
[ 6 ] HAND EXPOSURE SWITCH (OPTION)
An optional hand exposure switch can be connected
tothe sub controller. Since this exposure switch has a
coiled cord, operator can stand the most suitable
position forRperation.
The exposure switch on the front panel of sub
controller and this hand exposure switch can be used.
If local code prohibits use of both switches,
disconnect the connector of either one of the switches.
1. Confirm the contents of optional hand exposure
switchkit. (Fig.3-23)
Hand exposure switch ------------------------------ 1
Hook -------------------------------------------------- 1
Screw for hook (ø3 x 8mm Tapping screw) ----- 1
2.
3. Connect the connector at the end of hand
exposureswitch coil cord to CN3 connector on
the timerPC board. (Fig.3-24)
4. Insert the bushing of coil cord into the slot at the
bottom of the chassis, reattach the front cover
andsecure two (M3 x 8mm) screws again.
(Fig.3-24)
5. Place the hook on the top corner (right or left)
ofcontroller and attach it with the tapping
screw(ø3 x 8mm). (Fig.3-25)
Fig.3-23 Hand Exposure Switch Kit
Hand Exposure Switch
Hook
Tapping
Screw
(
ø
3 x 8
)
Fig.3-24 Connecting Hand Exposure
Switch
Timer
PC Board
Front Panel
CN3 CN2
CN3
Hand Exposure
Switch Connector
Bushing Bottom of Sub Contoller
Bushing
1234
Chassis
Fig.3-25 Attaching Hand Exposure
Switch Hook
D
P
mA
mA
47
Tapping
Screw
(
ø
3 x 8)
Hook
Remove two (M3 x8mm) screws from the under
side of the controller and open the front panel.
[ 7 ] EXTERNAL INTERLOCKS (NOT SUPPLIED)
If the external interlock for preventing from starting to
emit x-radiation or to stop emitting x-radiation is used, the
interlock switch should be inserted in #3 terminal of 4P
terminal block either in the main controller or in the sub
controller. If this interlock switch is opened, emittion will
bestopped. It is recommended to indicate the state of
this interORFNVZLWFK)LJ
Fig.3-26 Wiring for
External Interlock
Junction
Boxes
FROM
POWER
SOURCE
Terminal Block
in Main Controller
Terminal Block
in Sub Controller
(1) (2)
WALL
1234
L N 43 2 1
3P 4P 4P
Interconnecting Wire
Indication
Device
INTERLOCK

-16-
SECTION 4 : POST INSTALLATION INSPECTION
[ 1 ] ARM ASSEMBLY
1. Incorrect leveling of the wall plate and wall bracket can cause arm drift. First, check leveling
with horizontal arm in position #1. (Fig.4-1) If not correct, bracket must be adjusted by
placing shims behind the wall plate.
IMPORTANT :
If the end of the horizontal arm shown in position #1 is pitched below level, then the tube head
will drift away from the wall. If the end of the horizontal arm in position #1 is pitched above
level, then the arm will require only minimum adjustment of the brake screw. (Fig.3-13)
2. Check leveling in position #2. )f not correct,
adjustHorizontal Arm as follows : (Fig.4-1)
a. Slightly loosen two top mounting bolts for arm
mounting bracket.
b. Shift the bracket left or right until the arms are
accurately leveled.
c. Move the horizontal arm to position # 1.
d. Fully tighten two top mounting bolts.
e. Fully tighten bottom mounting bolt.
NOTE : Slight tendencies to drift can be corrected
by tightening brake screw in horizontal arm.
Do not tighten beyond what is required to
prevent drift.
[ 2 ] BALANCE ARM TENSION ADJUSTMENT
1. Place the balance arm assembly into position.
2. If either balance arm drifts higher or lower from
the set position, remove the spring adjuster cover
and adjust the balance arm spring tension with
the balance arm wrenchSUPPLIED. (Fig.4-2)
[ 3 ] HEAD POSITIONING
A. Place head into position.
B. If head drifts from the set position, adjust the
BRAKEscrews according to the following
procedures.(Fig.4-3)
1. Loosen the yoke side cap screw (ø3 x 8mm
tapping screw) and remove the yoke side cap.
2. Adjust the six brake screws using a screw driver.
3. After adjustment, reATtach the yoke side cap and screw.
Fig.4-1 Horizontal Arm Adjustment
Mats
Mats
Mats
Horizontal
Arm
Level
Level
Top Mounting
Bolt
Bottom Mounting
Bolt
#1
#2
Fig.4-2 Balance Arm Tension Adjustment
Balance
Arm
Balance Arm
Wrench
Spring Adjuster
Cover
Loosen
Tighten
Fig.4-3 Head Positioning
Mats
Mats
Mats
Mats
Mats
Mats
Yoke
Brake Screw
Yoke Side Cap
Yoke Side
Cap Screw
Tighten
Loosen

-17-
SECTION 5 : CONTROL IDENTIFICATION AND OPERATION
[ 1 ] MAJOR COMPONENTS AND CONTROL IDENTIFICATION
Fig.5-2
Fig.5-1
Control Identification
1
3
4
5
6
7
2
8
9
10 11 12 13 14
15
17
18
16
Major Components for WK7\SH
1 Main Power Switch 10 Cone Type Selection Switch
2 Ready Light 11 Film Speed Selection Switch
3 Exposure Time Adjusting Switch (Down) 12 Digital Imaging Switch
4 Exposure Time Adjusting Switch (Up) 13 kV Selection Switch
5 Tooth Selection Switch (T1) 14 mA Selection Switch
6 Tooth Selection Switch (T2) 15 Patient Size Selection Switch
7 Tooth Selection Switch (T3) 16 Exposure Time Display Window
8 Tooth Selection Switch (T4) 17 Exposure Warning Light
9 Tooth Selection Switch (T5) 18 Exposure Switch
P

18
>2@)81&7,212)&21752/6
0DLQ3RZHU6ZLWFK
3XVKLQJWKHXSSHUVLGHRIWKLVVZLWFKWRWKH21SRVLWLRQHQHUJL]HVWKH[UD\XQLW5HDG\OLJKW
DQGSUHVHOHFWOLJKWVIRUFRQHW\SHILOPRUGLJLWDON9P$DQGSDWLHQWVL]HLOOXPLQDWH
,WLVUHFRPPHQGHGWRNHHSWKLVVZLWFK2))ZKHQWKHXQLWLVQRWLQXVHLQRUGHUWRSUHYHQWDQ
DFFLGHQWDOH[SRVXUH
,03257$177RSUHYHQWWKHULVNRIDQDFFLGHQWDOH[SRVXUHSXVKWKHORZHUVLGH
RIWKLVVZLWFKWRWKH2))SRVLWLRQZKHQWKHXQLWLVQRWLQXVH
5HDG\/LJKW
7KLVOLJKWLOOXPLQDWHVZKHQWKHOLQHYROWDJHLVZLWKLQRSHUDEOHUDQJH5DWHGOLQHYROWDJH
:KHQWKLVOLJKWLVQRWRQH[SRVXUHFDQQRWEHPDGH
([SRVXUH7LPH$GMXVWLQJ6ZLWFKHV
%\PRPHQWDULO\SXVKLQJWKH RU VZLWFKWKHH[SRVXUHWLPHGLVSOD\HGLQFUHDVHVRU
GHFUHDVHVE\RQHLQFUHPHQW%\NHHSLQJWKHVZLWFKGHSUHVVHGPRUHVHFWKHH[SRVXUHWLPH
GLVSOD\HGLQFUHDVHVRUGHFUHDVHVFRQWLQXRXVO\XQWLOWKHVZLWFKLVUHOHDVHG
0RGHOKDVWKHIROORZLQJH[SRVXUHWLPHVHWWLQJV
VHF
a 7RRWK6HOHFWLRQ6ZLWFKHV7a7
3XVKLQJRQHRIWKHVHVZLWFKHVVHWVWKHH[SRVXUHWLPHDXWRPDWLFDOO\IRUWKHIROORZLQJ a
7,QFLVRURI0DQGLEOH
7,QFLVRURI0D[LOOD&XVSLG3UHPRODURI0DQGLEOH
7&XVSLG3UHPRODURI0D[LOOD0RODUVRI0DQGLEOH%LWHZLQJ
70RODURI0D[LOOD%LWHZLQJ0RODUV
72FFOXVDO
,IWKH7VZLWFK LVGHSUHVVHGPRUHWKDQVHFXQLWJRHVLQWR/RFN0RGH,QORFNPRGH
WKHRQO\IXQFWLRQDOVZLWFKLVWKHSRZHUVZLWFK7RH[LWIURPWKHORFNPRGHGHSUHVVWKH
7
VZLWFhPRUHWKDQVHFDJDLQ
&RQH7\SH6HOHFWLRQ6ZLWFK
By deSUHVVLQJWKLVVZLWFKIRUless than 2 sec., selected cone type can be confimed. If round
cone is selected, "rnd" is displayed. If the cone with rectangular collimator is selected, "rEC" is
displayed. Depressing this switch more than 2 sec. changes the cone type by the following order.
Short cone (Round) --> Short cone with rectangular collimator --> Long cone (Round) -->
Long cone with rectangular collimator --> Short cone (Round) --> continued
)LOP6SHHG6HOHFWLRQ6ZLWFK
D 3+27;,,VKDVILOPVSHHGVHWWLQJV)a)
7ZRVSHHGVHWWLQJVDUHSUHVHWDWWKHIDFWRU\DEDQGFDQEHVHOHFWHGZLWKVZLWFK
D )LOPVSHHG1R)HTXLYDOHQWWR,62VSHHGJURXS'RU.RGDN8OWUD6SHHGILOP
E )LOPVSHHG1R)HTXLYDOHQWWR,62VpHHGJURXS)(RU.RGDN,Q6LJKWILOP
Including these two speeds, PHOT-X IIs 505 x-ray can provide 16 different filmVSHHGV
(F.00 ~ F.15) and any two of them can be programmed for easy selection. If doctorXVHV
a different film speed, or prefers darker (or lighter) radiographs, the new speed can be
programmed as follows. Higher speed settings make films darker. If film speed is
increased by 1, exposure time becomes 25 % longer.
1. Keep the kV selection switch and mA selection switch depressed simultaneously for
more than 3 seconds. Release the switches if the ready light starts to flash.
Table of contents
Other Belmont Medical Equipment manuals

Belmont
Belmont Bel-Cypher N User manual

Belmont
Belmont 900 Series User manual

Belmont
Belmont Criticool 6.3 Quick start guide

Belmont
Belmont Phot-X II 303 User manual

Belmont
Belmont Phot-X II 303 User manual

Belmont
Belmont CliniLogger User manual

Belmont
Belmont buddy 2 User manual

Belmont
Belmont RI-2 User manual

Belmont
Belmont Phot-X II 303 DENTAL X-RAY Specifications

Belmont
Belmont Bel-Nova AL-D101G User manual