manuals.online logo
Brands
  1. Home
  2. •
  3. Brands
  4. •
  5. BEMKO
  6. •
  7. Security Sensor
  8. •
  9. BEMKO MS-HBP3 User manual

BEMKO MS-HBP3 User manual

Montaż czujnika / Installation of sensor
MIKROFALOWY CZUJNIK
RUCHU I ZMIERZCHU
MS-HBP3
ul. Bocznicowa 13
05-850 Jawczyce
www.bemko.eu
MICROWAVE MOTION SENSOR
PILOT RF DO OPRAW HBP3
Z MIKROFALOWYM CZUJNIKIEM RUCHU
RF-HBP3
REMOTE RF FOR HBP3
WITH MOTION SENSOR MV
1. Odkręć korek ochronny
gniazda czujnika
2. Zdejmij korek ochronny 3. Przykręć czujnik
1. Unscrew the protective
cap from sensor socket
Parametry Czujnika
Sensor Parameters
Typ czujnika
Sensor Principle
Częstotliwość pracy
Operating Frequency
Moc nadawania
Transmitting Power
Maksymalny zakres detekcji
Detection Range (Max)
Kąt detekcji
Detection Angle
Czujnik Mikrofalowy
Sensor Microwave
5.8GHz
<1mW(Max)
150° (montaż ścienny/wall mounting)
360° (montaż na sucie/ceiling mounting)
2. Remove the protective
cap
3. Screw the sensor
12m
Poziom detekcji czujnika= 100%
Czas pracy= 30s
Czas pracy w trybie czuwania= 10s
Poziom mocy w trybie czuwania= 30%
Czułość sensora= 300lx
Detection range= 100%
Hold time= 30s
Stand-by period= 10s
Stand-by dimmed level= 30%
Daylight sensor= 300lx
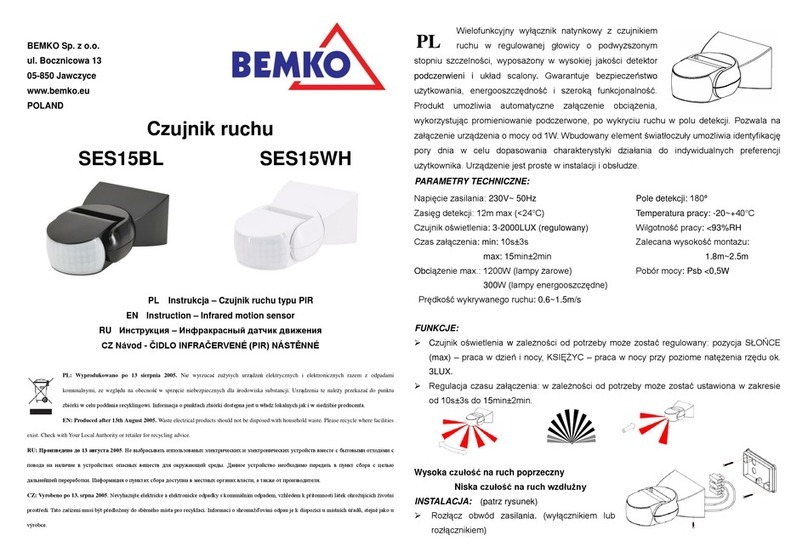
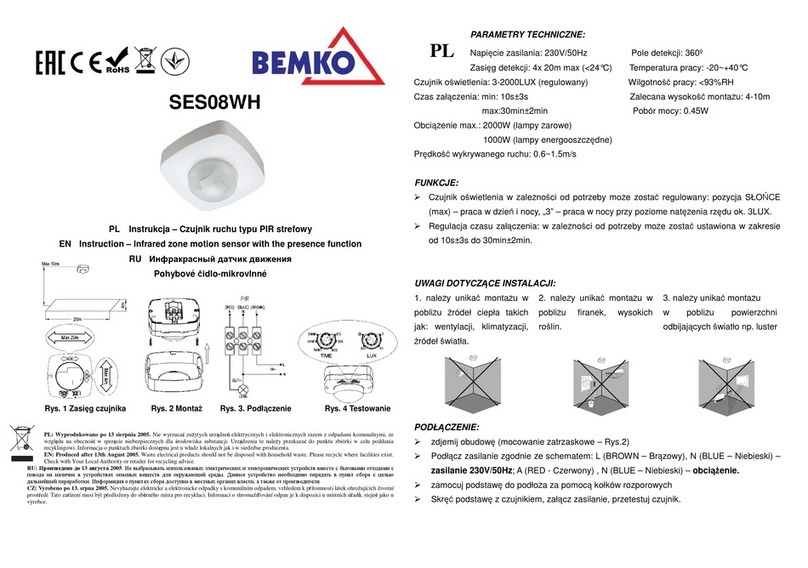
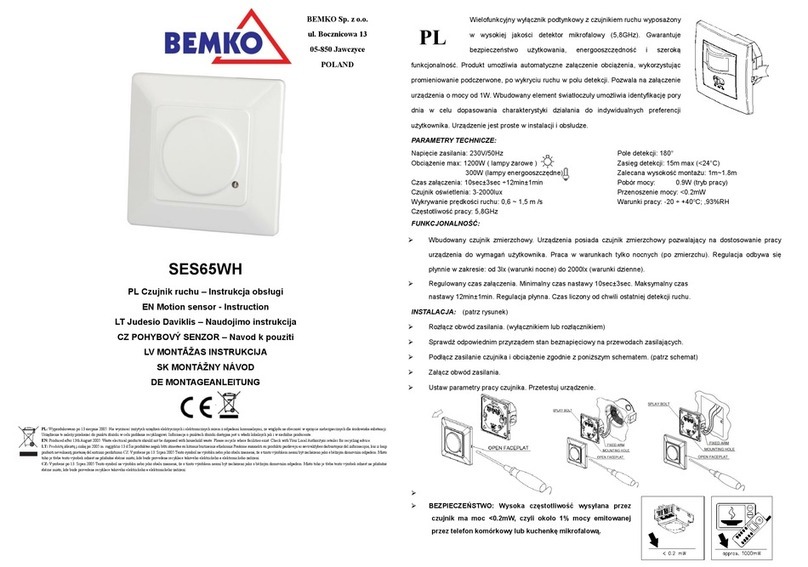
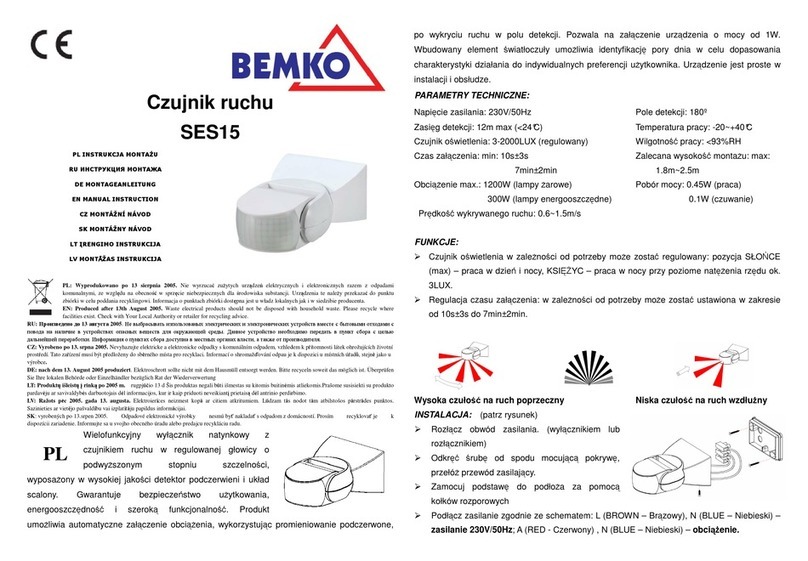
Po zamontawaniu czujnika i podłączeniu oprawy do zasilania, oprawa będzie działać z domyślnymi parametrami czujnika.
After installing sensor and connect to power xture, it will work by default setting of sensor.
DOMYŚLNE USTAWIENIA CZUJNIKA/DEFAULT SETTING OF SENSOR
ON/OFF Reset
Brightness
Detection Range
Stand-by dimming level
Stand-by period
Daylight sensor
Hold time
+
-
Auto
Mode
Start
Memory Apply
25%
5s
5min 10min 20min 30min
30s 1min 3min
50% 75% 100%
10%
0s
5min 10min 30min +∞
10s 30s 1min
20% 30% 50%
2Lux
80Lux 120Lux Disbale Test
(2s)
10Lux 30Lux 50Lux
Poziom detekcji czujnnika/Detection range: 25% | 50% | 75% | 100%
Czas pracy/Hold time: 5s | 30s | 1min | 3min | 10min | 20min | 30min
Poziom mocy w trybie czuwania/Stand-by dimming level:
10%
|
20%
|
30%
|
50%
Czas pracy w trybie czuwania/ Stand-by period:
0s, 10s, 30s, 1min, 5min, 10min, 30min, +∞
Czułość sensora/Daylight sensor:
2lx, 10lx, 30lx, 50lx, 80lx, 120lx Nieaktywny/Disable
2b
2a
2c
2d
2e
Naciśnij przycisk„Start”, aby rozpocząć
proces ustawiania parametrów pilota.
1
2
3
Reset
Start
Naciśnij przycisk„Memory”, aby zapisać
ustawienia na pilocie.
4
Memory
Następnie analogicznie, naciśnij przycisk
„Apply” aby wgrać ostatnio zapisane na
pilocie parametry.
Na pilocie mrugnie
zielona dioda w prawym górnym rogu, a
oprawa oprawa
się zaświeci (kiedy jest
wyłączona) lub mrugnie (kiedy jest
włączona)
.
Ustawienia zostaną wgrane do
opraw wskazanych przez pilot.
5
Apply
Zapisywanie parametrów na pilocie
Saving parameters on remoter
Do pilota należy włożyć dwie baterie typu AAA . Po każdym wciśnięciu przycisku, pilot potwierdza zaświeceniem się
czerwonej diody w lewym górnym rogu. W celu zaprogramowania pilota, należy wykonać następujące czynności:
Put two baterries AAA to remoter. After pressing button, remoter conrm to lighting red diode on top-left corner part. In
order to programming of remoter, need to do the following steps:
Naciśnij po kolei wybrane parametry.
Press the chosen parameters in turn.
Nakierowując pilot na oprawę oraz będąc w
zasięgu czujnika, naciśnij przycisk „Reset”, aby
oprawa działała w trybie czujnika. Na pilocie
mrugnie czerwona dioda w lewym górnym rogu,
a oprawa
się zaświeci (kiedy jest wyłączona) lub
mrugnie (kiedy jest włączona).
Directing remoter and being in sensor range,
press button „Reset” , the xture starts to
function with sensor mode. Red diode on
top-left corner remoter and xture
will light up
(when is turn o) or blink (when is turn on).
Similarly, press button„Apply”to send the saved
parameters to xture.
Green diode on top-right
corner remoter and xture
will light up (when is
turn o) or blink (when is turn on). Settings was
sent to xtures, which remote indicated.
Press button„Start”to start the setting parameters
of remoter process.
Press button„Memory” to save
settings on remoter.
Wgrywanie zapisanych parametrów do oprawy z czujnikiem
Uploading saved parameters to xture with sensor
Naciśnij przycisk„Auto Mode”, aby przywrócić ostatnio ustawione parametry w trybie czujnika. Oprawa się zaświeci (kiedy jest
wyłączona) lub mrugnie (kiedy jest włączona).
Press button„Auto Mode”to restore parameters in sensor mode. Fixture will light up (when is turn o) or blink (when is turn on).
Włączenie/wyłączenie
Turn on/turn o
Tryb testu
Test mode
Ustawienia Pilota
Remote Setting
Naciśnij przycisk „ON/OFF”. Światło przejdzie w stały tryb włączenia lub wyłączenia, a czujnik pozostanie wyłączony.
Naciśnij „+” lub „-”, aby dostosować poziom maksymalnego natężenia światła.
Nie resetuje się pomimo zmian trybu pracy oprawy (on-o / czujnik)
Press „+” lub „-” to adjust the level maximum intensity. It don’t reset, though
changing mode (on/o/ sensor).
Po naciśnięciu przycisku „Test” oprawa przejdzie w tryb testu (poziom detekcji czujnika 100%, czas pracy 2s, czujnik jest
nieaktywny, czas w trybie czuwania 0s, poziom mocy w trybie czuwania 10%). Ten tryb jest trybem czujnika, więc przy
wciśnięciu „Auto Mode” oprawa nadal będzie świeciła się w trybie testu.
Press the Key, the xture enter the test mode (Detection range at 100%, hold time at 2s, dalylight at disable,standy-by
period at 0s and stand-by dimming level at 10%) . It is also sensor mode and when „Auto Mode” button was pressed,
xture will be light up on Test Mode.
Press the „ON/OFF” button, the light goes to permanent on or permanent o mode, and the sensor is disabled.
Informacje dodatkowe: czujnik po odcięciu zasilania zapamiętuje ostatnio wybrany program
Additional information: after the power is cut o, the sensor remembers the last selected program
ON/OFF
Tryb automatyczny
Auto mode
Test
(2S)
+
-
Maksymalne
natężenie światła
Maximum
intensity
Auto
Mode
Tryb resetu
Reset mode
Reset
Naciśnij przycisk „Reset”, aby oprawa działała w trybie czujnika o parametrach: (poziom detekcji czujnika 100%,
czas pracy 5s, poziom mocy w trybie czuwania 0%, czas pracy w trybie czuwania 0s, czujnik jest nieaktywny).
Press button „Reset”, the xture starts to function with sensor mode by parameters:
(Detection Area 100%, Hold Time 5s, Standy-by-dimming 10%, Standy-by-period 0s, Daylight sensor dissabled).
This manual suits for next models

2

Other BEMKO Security Sensor manuals

BEMKO SES15BL User manual

BEMKO

BEMKO SES15BL User manual

BEMKO SES08WH User manual

BEMKO

BEMKO SES08WH User manual

BEMKO SES65WH User manual

BEMKO

BEMKO SES65WH User manual

BEMKO SES15 User manual

BEMKO

BEMKO SES15 User manual

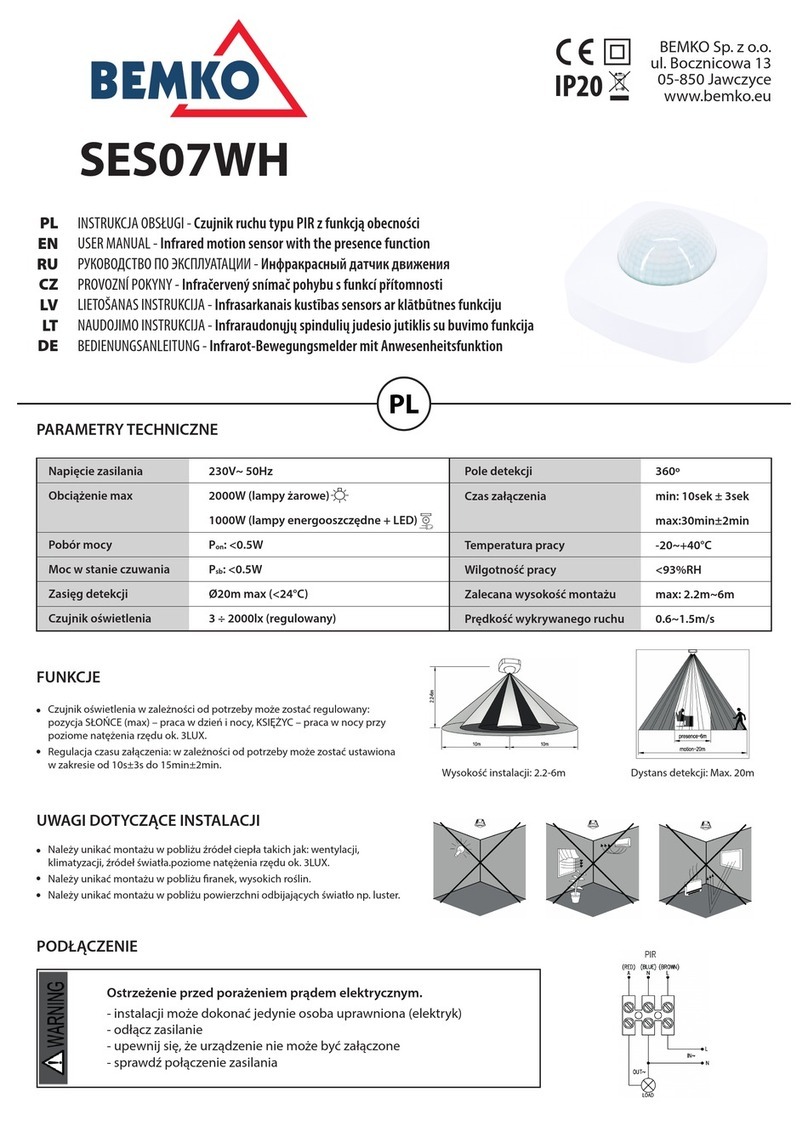
BEMKO SES07WH User manual

BEMKO

BEMKO SES07WH User manual

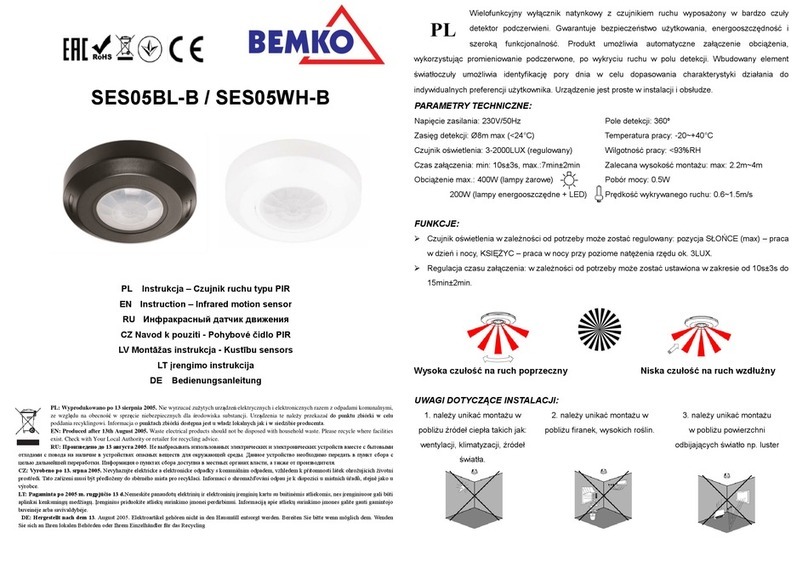
BEMKO SES05BL-B User manual

BEMKO

BEMKO SES05BL-B User manual

BEMKO PSF-ST72-MG User manual

BEMKO

BEMKO PSF-ST72-MG User manual

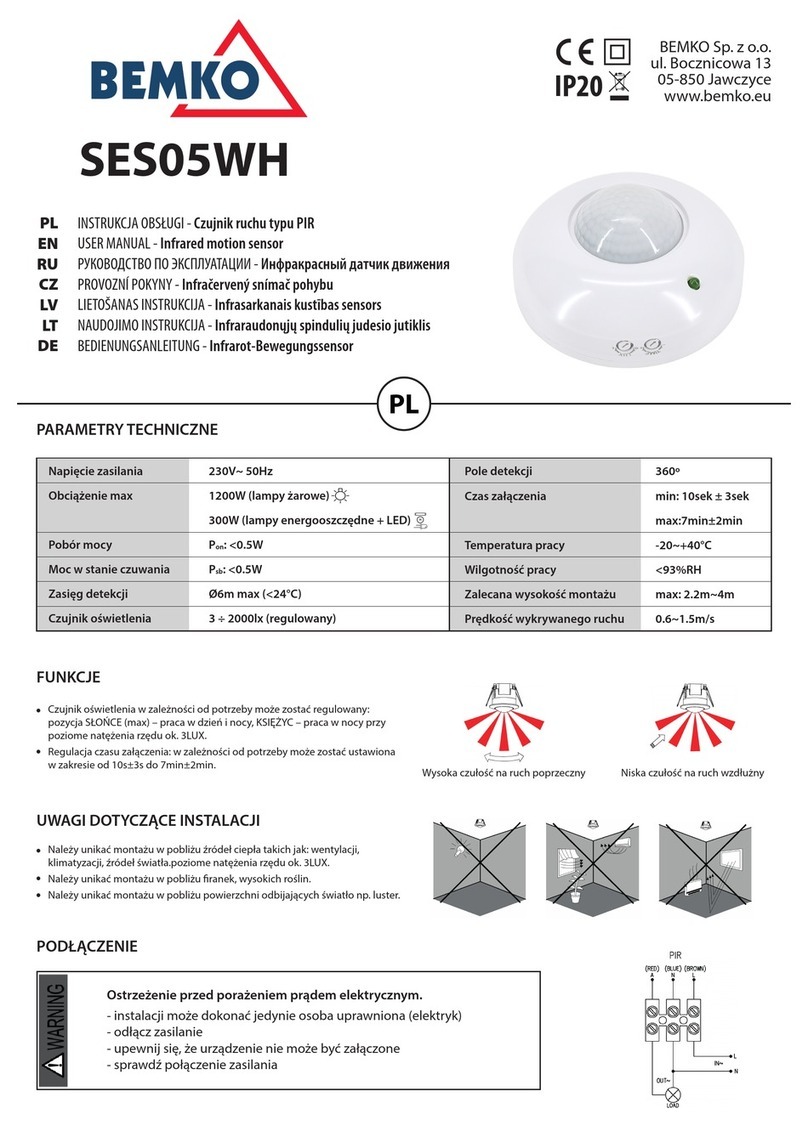
BEMKO SES05WH User manual

BEMKO

BEMKO SES05WH User manual

BEMKO SES24WH User manual

BEMKO

BEMKO SES24WH User manual

BEMKO SES75WH User manual

BEMKO

BEMKO SES75WH User manual

BEMKO SES05WH-A User manual

BEMKO

BEMKO SES05WH-A User manual

BEMKO SES24WH User manual

BEMKO

BEMKO SES24WH User manual

BEMKO SES12WH User manual

BEMKO

BEMKO SES12WH User manual

Popular Security Sensor manuals by other brands

Leuze electronic CML 720i Ex operating instructions

Leuze electronic

Leuze electronic CML 720i Ex operating instructions

Hilti PS 20 operating instructions

Hilti

Hilti PS 20 operating instructions

novotechnik TP1 CANopen user manual

novotechnik

novotechnik TP1 CANopen user manual

Sundstroms SR 63 operating instructions

Sundstroms

Sundstroms SR 63 operating instructions

Bentel Security FC450IB manual

Bentel Security

Bentel Security FC450IB manual

Bacharach GDC-350 Operation manual

Bacharach

Bacharach GDC-350 Operation manual

Et system MD2010 manual

Et system

Et system MD2010 manual

Zhuhai Taichuan Cloud Technology TC-U9AF-SJ/Z installation instructions

Zhuhai Taichuan Cloud Technology

Zhuhai Taichuan Cloud Technology TC-U9AF-SJ/Z installation instructions

Thermo Scientific Dionex UltiMate 3000 Series operating instructions

Thermo Scientific

Thermo Scientific Dionex UltiMate 3000 Series operating instructions

Riken Keiki FP-31 operating manual

Riken Keiki

Riken Keiki FP-31 operating manual

Overhead door RAPIDFLEX 990 instructions

Overhead door

Overhead door RAPIDFLEX 990 instructions

IRUDEK X2 instruction manual

IRUDEK

IRUDEK X2 instruction manual

Varex Imaging 2530C-G5 manual

Varex Imaging

Varex Imaging 2530C-G5 manual

ELRO AS80PR11 installation instructions

ELRO

ELRO AS80PR11 installation instructions

Leuze CML 730-PS operating instructions

Leuze

Leuze CML 730-PS operating instructions

Petzl SEQUOIA SRT manual

Petzl

Petzl SEQUOIA SRT manual

Fracarro WL04IR manual

Fracarro

Fracarro WL04IR manual

Motorline professional MR30 User's and installer's manual

Motorline professional

Motorline professional MR30 User's and installer's manual

manuals.online logo
manuals.online logoBrands
  • About & Mission
  • Contact us
  • Privacy Policy
  • Terms and Conditions

Copyright 2025 Manuals.Online. All Rights Reserved.