2
If,inthe case ofanemergencyorfor some other reasonthe
driver wishes an application of the trailer brakes, he pulls
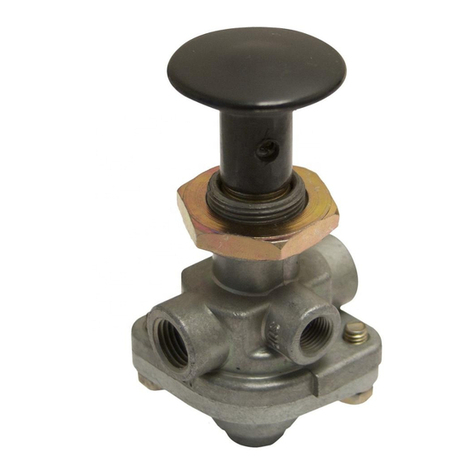
thePP-3™valve controlbuttonout.Emergencyline pressure
will exhaust out the PP-3™valve exhaust port causing an
application of the trailer brakes.Also, theTP-3™inlet valve
seatsandcloses the serviceline.ThePP-3™valvebutton is
pulledoutandleftoutduringbob-tailedoperationofthetractor.
In normal use the button is pulled out before uncoupling
fromthe trailer and pushed inaftercouplingto the trailer.
Shoulda condition occurresultinginair loss fromthetractor
or trailer system through leakage and the driver fails to
manually pull out the PP-3™valve button, the PP-3™valve
will automatically close at approximately 40 psi and seal
the tractor air lines. The driver cannot, in this condition,
overcomethe emergencyapplicationofthe trailerbrakesby
holding the PP-3™valve button in. If the driver should hold
thebuttonin as emergency line pressure bleeds downfrom
the 40 psi range to approximately 30 psi, the tripper piston
will move and open the tripper exhaust in the PP-3™valve.
Emergencylineairwillexhaustthroughthetripper exhaust
andholdthetrailer brakes applied.
PREVENTIVE MAINTENANCE
Important: Review the Bendix Warranty Policy before
performinganyintrusivemaintenanceprocedures.Awarranty
maybevoided if intrusive maintenance is performedduring
thewarrantyperiod.
No two vehicles operate under identical conditions, as a
result, maintenance intervals may vary. Experience is a
valuableguide in determiningthebestmaintenance interval
forairbrakesystemcomponents.Ata minimum, the PP-3™
valveshouldbeinspectedevery12monthsor3600operating
hours,whichever comes first, for properoperation. Should
the PP-3™valve not meet the elements of the operational
testsnotedinthisdocument,furtherinvestigationandservice
ofthevalve may be required.
OPERATING AND LEAKAGE CHECKS
To make the following operating and leakage checks, an
accurate test gauge installed in a spare hose coupling is
required. The vehicle dash gauge should be checked for
accuracyagainstthe test gaugepriortomaking these tests.
1. Block and/or hold the vehicle by ameansother than air
brakesduringthese tests.
2. Drain vehicle reservoir supply, then close drain cocks.
3. Connect assembled hose coupling and test gauge in
tractoremergency hosecoupling.Startengine andbuild
up system pressure.
4. As reservoir pressure builds up there should be no
pressurereading on testgauge.Whensystempressure
reaches the 30 to 40 psi range on dash gauge make
and hold a foot or hand valve application and observe
that no air escapes at the open trailer service hose
coupling.
5. When system pressure reaches approximately 60 psi,
the PP-3™valve button should be pushed in. System
pressure should show at once on the test gauge
connected in the emergency line and the button of the
PP-3™valveshouldremaininwithoutbeingheld.
6. Buildsystempressure uptoapproximately100 psi,then
stop engine. With engine stopped, wait momentarily,
then notice that dash gauge and test gauge pressure
readingequal.While still in this position, make a footor
handvalveapplicationandobservethat air is delivered
outtheopentrailerservicecoupling.
7. With PP-3™valve button still in, check for leakage at
PP-3™valveexhaust andtripperexhaust ports.Leakage
should not exceed a 1" bubble in 5 seconds at either
point.
8. WithPP-3™valvebutton still in, check for leakageatthe
TP-3™valveexhaustandopenservicecoupling.Leakage
should not be more than a 1" bubble in 5 seconds at
eitherpoint.
9. Pull the PP-3™valve button out: pressure on the test
gauge connected in the emergency line should drop to
zero.Makeandholdahandvalveapplicationandobserve
thatair delivered at the open service coupling does not
exceed a 1" bubble in 5 seconds. Release foot or hand
valveapplication.
NOTE:If thePP-3™valvedoes notfunctionasdescribed
or if leakage is excessive, it is recommended that it be
returnedtothe nearest Bendix authorized distributor for
a factory rebuilt valve. If this is not possible, the valve
shouldbe repaired usinggenuineBendixparts, inwhich
casethefollowing should prove helpful.
REMOVING AND INSTALLING
REMOVING
1. Blockand/orhold the vehicle by a means otherthanair
brakes. Drain air brake system.
2. DisconnectsupplyanddeliverylinesfromPP-3™valve.
3. DriveoutPP-3™valve buttonrollpinand remove button.
RemovePP-3™valve mounting nut,thenPP-3™valve.
INSTALLING
Wheninstallingthe PP-3™valve, refer to Figure2forproper
connectionsalongwithfollowingexplanations:
1. Supplylinefrom tractor reservoir is connectedtosupply
portof PP-3™valve.
2. DeliverylinefromPP-3™valvedeliveryport isconnected
totractoremergencyportofTP-3™valve.
3. PP-3™valve exhaust port and tripper exhaust must be
open.
4. Two(2)portsmarked“Del” onupperPP-3™controlvalve
bodyarepluggedandmustremainplugged.
