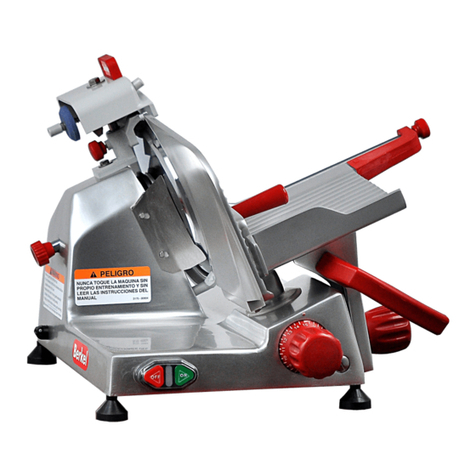
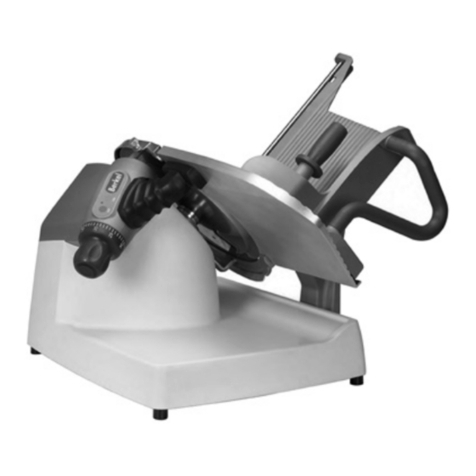
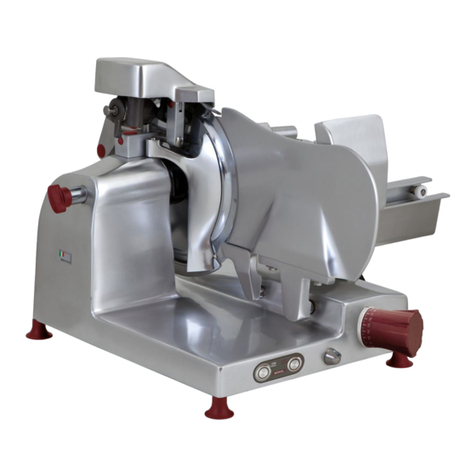
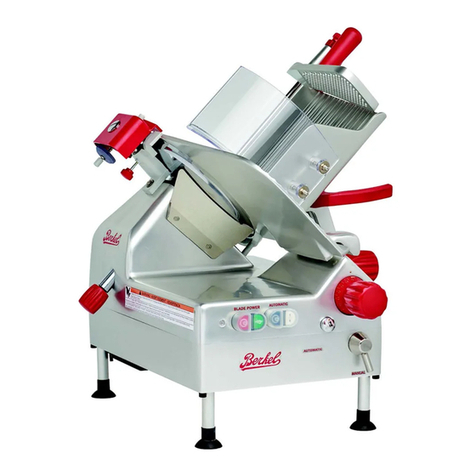
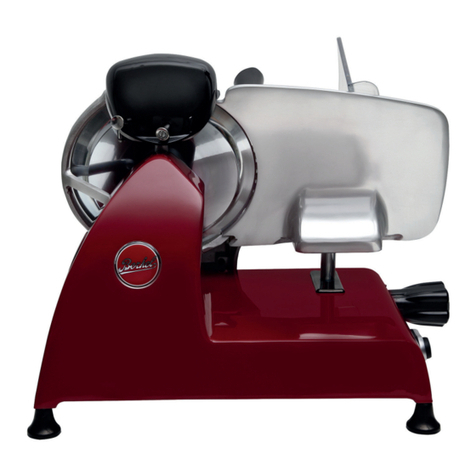
Berkel 823 User manual

SERVICE
MANUAL
823/825/827 SLICER
This manual contains IMPORTANT SAFETY
INSTRUCTIONS which must be STRICTLY
FOLLOWED when using this equipment.
Este manual contiene IMPORTANTES
_INTR.UCCIONES D SEGUPIDAD que deben
ser
-seguidas al pie de la letra cuando
·:!J

823
·,
'
PARTS
UST
. ·
....
. .
..
..
. . . -
'•
.
···.
~-
..

. '
FRAME
AND
PARTS
•
..
•:
10

. I
KNIFE
AND
GAUGE
PLATE
ASSEMBLY
,.
\
12

:
-:
FRAME
AND
PARTS
ITEM
ID~ON
PART
NUMBER
1
Fr.une
823-00001
11
Slice
Deflector
825•00011
35
Index
Knob
823-00035M
39
Switch,Rotarv
823-00039
Switch,
Rocker
823-00039-1
61
.·Screw
823~1
75
Center
P1ate
Knob
"
'82~o0075
78
Screw
823.()0018
91
Screw
8251J0@1
93
Ru;bber
Foot
82~93
96
Screw
.
823-0oo96
97
Cover
823-0009-7
127
IT
__
.....
__
Plate
·823-00127
198'
·
Guard
823-00198
216
Screw
823-00216
11

KNIFE
AND
GAUGE
PIATE
ASSEMBLY
\
ITEM
[DESCRIPTION
PART
NUMBER
2
Center
Plate
823-00002
3
G311Re
Plate
823-00003
4
ISunnort
823-00004
5
Screw
823-00005
6
W~her
823-oooo6
22
ISUooort
823-00022
24
.·
Snrfnll
825-00024
25
Cam
825-00025
26
Plate
825-00026
27
CamPin
825-00027
28
.
,:;.
•mScrew
923-00028
29
Nut
823-00029
30
Pin
.
823-00030
31
Screw
"825-00031
32
Screw·
825-00032
33
Nut
825-00033
. .
34·
.
Screw
825-00034
67
J(offe
Plillev,
Smooth
823-00067-1
KQJfe·
Puller,
Grooved
823-00067
68
Shaft
823-ooo68
69
-
823-00069
..
,·
71
"C"
Clip
823-00071
·
...
72
"C"
Clio
823-00072
73
Blade
823-00073
·'
74
Screw
825-0007,4
...
95
1~1.wv;
Washer
-.
825-<>®9.5'~
'
135
~.
Insert,
New
Style
.
s23-00135i
...
Imert,
Old
Stvle
323-00002
..
s
r----
..
13

MEAT TABLE
AND
CARRIAGE SUPPORT
ASSEMBLY
80
640
37
//
.,..-
14
\
-~
'
/""'-
r l
..•
,,
..
,=.--..
I

MEAT TABLE
AND
CARRIAGE SUPPORT ASSEMBLY
ITEM
DESCRIPTION
PART
NUMBER
7 Carriage Support 823-00007
8 Meat Table 823-00008
9 Pusher 823-00009
12
Carriae:e 823-00012
13
R,oundBar 823-00013
14 Square
Bar
823-00014
15
Bearing 825-00015
16
Spacer Included
in
17
Screw
Part#
18
Adjusting Screw 823-00012
20 Spring 825-00020
21
Screw 825-00021
37 Handle:.
....
825-00037
40
Knob
82S.00040
50 ·Screw 823-00050
54 Nut 823.;.00054·
79 Bushing · 825
..
00079
80 Handle .825-00080
82
Wear
Pad
823-00082 ..
84
Rod
823-00084
86 Grub Screw 825-00086
87 Screw 825-00087
89
Screw 825-00089
90 Washer 825-00090
131
Washer 823-00131
.15

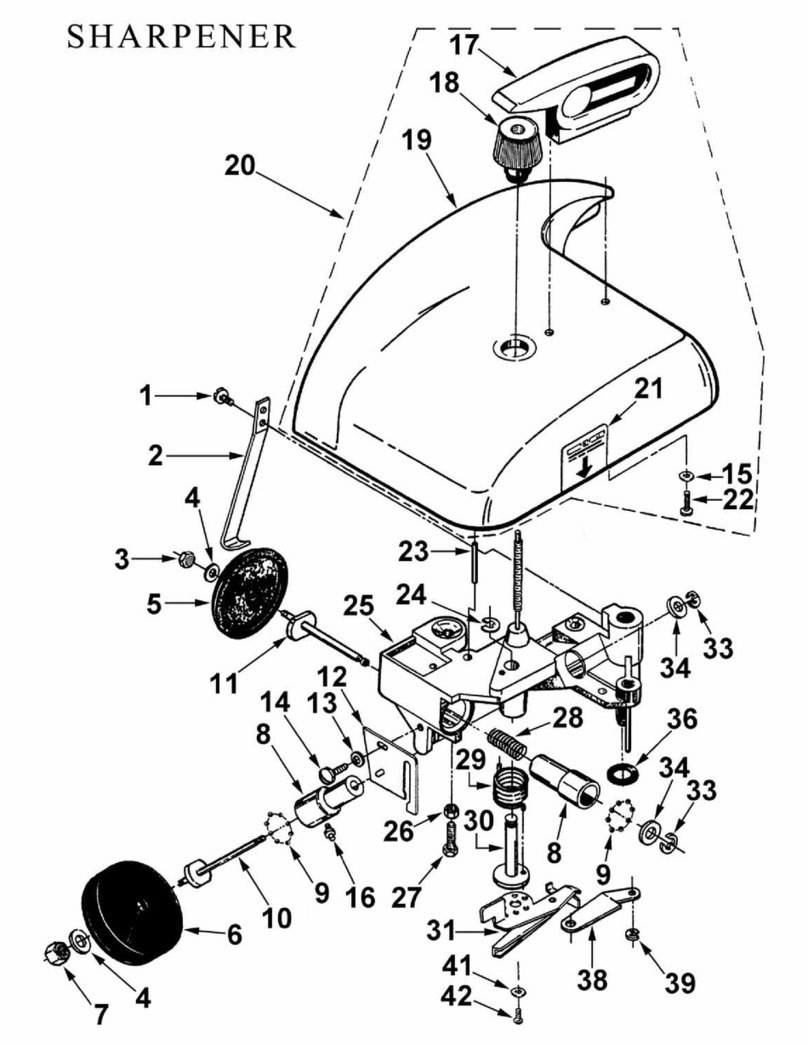
SHARPENER
ASSEMBLY
·;~·
: . ;
•.•
~.··it.:-.
..
"'
~.
·.
115-
100
16

SHARPENER
ASSEMBLY
ITEM
DF.SCRIPl'ION
PART
NUMBER
10
Cover
825-00010
100
:SUnnort
825-00100
101
Screw
823-00101
102
Washer
825-00102
103
Knob
825-00103
104
Shaft
827-00104
105
··
Adiustiru!
Screw
827-00105
106
Nut
21oi:~o1041
107
Nut
2101-~7049
.
108
Support
825:-00108
.
109
Wheel
Shaft
825~109·
110
Wheel
Shaft
825-00110
111
Stone
825-00112
,
112
Stone:
825~112:
··,
..
'
113
Nut
2175-00387
114
Washer
3301-03812
·.
115
~Push
Button
825-00115:.
,
....
:
·116
LJrKe
Push
Button
825-00U6
117
SDrinR
825:..00117
.
118
Screw
825-00118
119
Thrust
Ball
237~00i50
120
screw'
S-00781
'
122
Screw
825-00122
123
Washer.
823-00123
. . '
.11
.
·.··

' I
ELECTRICAL
SYSTEM
. ·:
...
.
......
",,....~
:r
I
)--
/
18

ELECTRICAL
SYSTEM
ITEM
.
0C>ESCR1PTION
42
Canacitor
44
Cable,
Standard
Cable,
ETL
Anoroved
48
Motor,
Smooth
Shaft
Motor,
Grooved
Shaft
52
·
Plate
53
TieRod
54
Nut
55
Plate
56
WinaNut
58
Screw
59
Screw
60
Pin.
64
Screw·
66
Belt,
"V"
StYle
·
-
Belt,.
Ribbed.
. .
..
-
.:.~.·
'
128
Soacer
133
Washer
:
~;.'
199
Bottom
Plate
203
Washer
204
Sq-ew
212
Nut
'
19
PART
NUMBER
823-00042
827-00044-S'ID
827-00044-ETL
823-00048
823-ooo4S.R
825-00052
825-00053
823-00054
825-00055
825-00056
823-00058
823-00059
825-00060
..
-
825-00064.
825-00066
823-00066-B
"
.
823-00128
823-00133
823-00199
823-00203
823-00204
823-00212
,;
..
I
\
'
'
\
?..
\~
·.··
..
..
..
.
~-
~
:.
:.:
:·;
·_._':·.
'
'

BEFORE USING THIS EQUIPMENT
Berkel's slicers are designed to slice meat and other
food
products safely and efficiently.
Unless
the
operatoris properly trained and supervised,
however,
there isthe possibility of
a serious
injury.
It is the responsibility of the owner
to
insure
that this slicer is used prop-
erly and
safely,
strictly following the instructions
contained
in
this manual and any require-
ments of
local
law.
No
oneshould use
or
service
this
slicer
without
propertraining
and
supervision.
All
operators
should
be
thoroughlyfamiliarwith the
procedures
contained
in
this manual. Even
so, Berkel cannotanticipate
ev_ery
circumstance or
environment
in which its slicers will be
used.
You,
the owner and operator, must remain alert
to
the
hazards posed by the func-
tion of a slicer
-.
particularly
the sharp rotating
blade
and
moving table. No one under
18years
of
age
should operatethis equipment.
If
you
are
uncertain about a particulartask,
ask your supervisor.
This
manual
contains a number of safe practices
in
the
General Safety
Instruction
Section. Additional warnings are placed throughout the
manual.
WARNINGS RELATED
TO
YOUR
PERSONAL SAFETY
ARE
INDICATED
BY:
A WARNING
OR
Berkel
also
has'provided a wall chart to be posted
by
the
slicer.
If any warning label, wall
chartor
manual
becomes misplaced, damaged or
illegible,
please
contactyour nearestdis-
..
__
tributs>r.
O!J3erkel
directly, f9r q,free replacement. ·
Remember,
however, THIS MANUAL
OR
THE
WARNING
LABELS DO NOTREPLACE
THE
NEED
TO
BE ALERTAND TO USE YOUR
COMMON
SENSE WHEN USING THIS
SLICER.

TABLE
OF
CONTENTS
I.
Installation
....
·..................................
1
II.
'l'est::l.ng
For
Operat::l.on
••...•........•...••..•...
;.
. 1
III.
Operating
Instruction.............................
2
IV.
Sharpening.
. . . . • . . . • . . . . . . . . . . . . . . . . . . . . . . . . . . . . . . 2 -3
V.
Sharpener
Maintenance.............................
3
VI.
Cleaning
'l'he
Sharpening
Stones....................
4-5
A.
l'atty
Build-Up,..
• • • • • • . • • • . • . . • . . . . . • • • • • • . . . • . 4
B.
Metallic
Build-Up.............................
. 5
VII.
Cleaning
and
Sanitizing
(Disassembly)............
5-6
VIII.
Cleaning
Knife.
. • . . • . . • . . . . . . . . . . . . . . . . . . • . . . . . . . 6
IX.
Reassembly
..••••.•••••••...••••...•.....•..
ti
• • • • • • • 7
X.
7'rouble
Sh:ooting.
• • • . • • • • • • • . • . • . • . . . . . . • • • . . • • . • . •
8-9
A.
B.
c.
D.
Product
Not
Slicing
Properly
.•......•..•.•.•••
Kz:&i
f e
Not
Sharpeni:a.g.
• • . • . . • . . . • • . . • • . . • • . . • . •
Ble.c:tric:al
Fai.J..ure·
•••••••••••.•.•••••••..•••••
'l'h:l.
clmess
Co:a.
t:rol
KDob Not:
Opera
t::l.ng
Gauge
l'lat:e
...•..•..•.........................
ZI.
DrawiZJgs
i&:.
Parts
•
••••••••••••••••••••••••••••.•••••
A.
B.
c.
823
Slicer
Parts/Drawings
•
.••..••..•••••
82~
Slicer
Parts/Drawings
.••...•..•.•••.
827
Slicer
Parts/Drawings
•
.••••••.•..•.••
10-19
20-29
30-39
7'BB
BB.RlCKli
GB.OUP
......
•
-.World's
Leadi12g
Ha12u.fact:urer
of
Sli.cers,
Food
Bquipme12f:
ud
Scales
BBRl"BJ'.
IBC.,
011B.
a•nr,
DJUVB
*
LU'ORD,
DD>rm
46350
(21.9J
326-7000
* .PAZ'
(21.9J
324-2928
ID
Cculada
8
8
9
9
10-39
• .Ber.lce1
l'rocfac:t:a
Co.,
Lt:d
•
rorcmt:o
-(41.tiJ
625-41.60}
* .F.Ar
(41.tiJ
625-33.66
Form
I
428ZIN
109!J
Part
# 3175-09077 BB.RrB'L INCO.Rl'ORA1'BD
l'RDITBD
IN
USA
·.·
....
·
..
·
..
·.

("-
..
I
I
!
SHARPENER ASSEMBl.Y
DEBURRING STONE
PUSH BUTTON
----:£,~1111
SHARPENER
l.OCK
KNOB
KNIFE
CENTER
PLATE
KNOB --1---
SHARPENING STONE
PUSH
BUTTON
/
GAUGE
PLATE
PRODUCT
TABLE
-HANDLE
THICKNESS
-CONTROL
KNOB

I.
INSTALLATION
1.
When
the
slicer
'has·=be~ri
unpa.cked
and
removed
from
its
shipping
carton,
i"t
·should
be
checked
carefully
for
any
damage
that
may
have
occurred.during
shipmen~.
DO
NOT
connect
the
power
cord
or
attempt
to
operate
the
slicer
prior
to
this
examination
•.
- .
2.
Carefully
check
all
slicer
components
such
as
the
product
table,
pusher,
sharpener,
slice
_thickness
index
knob,
etc.
,
to
make
certain
they
move
freely.
and
that
there
are
no
obstructions.
Lubricate
the
pusher·
slide
bar
(on
the
product·table)
and
the
square
and
round
table
support
rails.
(underside
of
slicer)
with
Berkel
Food
Machine
Oil.
NOTE:.
DO
NoT
USE
ANY.
OTHER TYPE.
OIL
ON
THIS
MACHINE,
BERKEL
FOOD
MACHINE OIL
IS
A
u.s.D.A
•.
:
ACCEPTED
FORMULA
FOR
FOOD
PROCESSING
EQUIPMENT.
NO
OTHER TYPE
OIL
IS
AUTHORIZED, BERKEL
FOOD
MACHINE
OIL
CAN
BE
PURCHASED
IN
PINTS
(PART
NUMBER
4675-0183)
OR
GALLONS
(PART
NUMBER
.4675-0184).
II.·
TESTING
FOR OPERATION
1.
Make
sure
that
the
ON-OFF
switch
is
in
the
OFF
position,
and
the
thickness
control
knob
is
turned
as
far
to
the
right
as
possible.
This
positions
the
gauge
plate
so
that
the
knife
is
not
exposed
during
testing.
2.
P'iug
power
cord
into
grounded
120V/AC
electrical
outlet,
·'
switch
ON.
3.
.
Slide
product
table
back
and
forth
holding
on
.
to
the
product
table·.
handle.
;tf
there
is
any~
rough
operation
or
obstructiqn,
shut
off
I
disconnect
power
cord
and
call
your
Berke!
serviceman~
(List
included
with
machine)
(1)

III.
OPERATING
INSTRUCTIONS
1.
Use
the
pusher
located
on
the
product
table,
not
your
hand.
The
pusher
will
feed
the
product
toward
the
knife
after
each
slice.
If
t,he
product
you're
slicing
is
long,
place
the
pushe~
on
top
of·
the
product.
2.
A
handle
is
provided
on
the
product
table
to
move
it
back
and
forth.
J.
Thickness
adjustment
allows
you
to
vary
the
thickness
of
the
slices
from
paper
thin
to
9/16".
To make
thinner
slices,
turn
~he
thickness
control
knob
to
the
right.
For
thick
slices,
turn
the
knob
to
the
left.
4.
After
each
use
of
the
slicer,
turn
the
thickness
control
knob
full
right.
This
places
the
gauge
plate
in
the
closed
position
and
covers
the
knife
edge.
IV
SHARPENING
1.
Knife
should
be
sharpened
on
a
daily
basis·
or
whenever
knife
is
dull.
DO
NOT
sharpen
a
knife
that
is
not
clean.
You
will
damage
the
sharpening
stones
and
be
unable
to
sharpen
the
knife.
:
2.
.switch
OFF
the
power.
3.
Turn
the
thickness
control
knob
to
the
right
to
place
the
gauge
plate
in
the
fully
closed
position.
'
4.
Remove
food
products
from
the
product
table
and
clean
both
sides:
of
the
knife.
5.
Loosen
the
sharpe~er
lock
knob and
raise
and
rotate
the
sharpener
until
the
stones
set
with
one
on
each
side
of
the
knife.
Retighten·the
knob
to
hold
the
sharpener
in
its
sharpening
position.
6 •
Switch
ON
the
power.
(2}
..
':
(
\
'·-
.
r-·

f\
7.
1:(ress
the'
sharpeni~g
stone
push~butt9~
·to
bring'.the
stone
against
the
knife
and
hold
it
for
s·to
10
seconds
and
release.
8.
Press
the
deburring
stone
push-button
to
bring
the
stone
against
the
knife
and
hold
it
for
2
or
3
seconds
and
release.
9.
Switch
OFF
the
power.
10.
Return
the
sharpener
to
its
stored
position
and
lock
in
pla~e.
11.
Clean
slicer
before
slicing
product
(See
Cleaning
and
Sanitizing),
Page
(5).
V.
SHARPENER
MAINTENANCE
1.
Loosen
sharpener
lock
knob
and
lift
off.
the
sharpener.
2.
Clean
the
cover
with
water
and
detergent.
Carefully
clean
around
the
stones.
.DO
NOT
wash
the
sharp~ner
·assembly._'
Shoul~.
the
assembly
accidently
get
wet,
dry
completely
and
oil
·the
assembly
.thoroughly
before
re-
installing
.
.
3.
Check
the
stones.
If
they
do
riot
turn
freely
or
are
greasy,
they
must
be
cleaned.
(See
Cleaning
the
.
Sharpening
Stones),
Page
t4)
4.
Oil
sharpener
shafts.
Place
a few
drops
of
Berkel
oil
on
each
shaft.
Move
the
sharpening
stone
push
buttons
back
and
forth
to
make
sure
that
the
stones
move
in
and
out
easily.
Also,
rotate
the
stones
to
make
sure
they
turn
freely.
5.
Oil
the
mounting
post.
6.
Replace
sharpener.
Sharpener
must
be
all
the
way
down
protecting
the
top
of
the
knife.
Lock
in
place.
(3)

VI
CLEANING
THE
SHARPENING
STONES
DIRTY
STONES
CANNOT
SHARPEN!
If
the
sharpening
stones
have
become
coated
with
food
fats
because
someone
has
neglected
to
clean
the
knife
blade
before
sharpening,
they
will
not
sharpen
effectively.
At
least
once
each
day
when
the
slicer
is
used,
the
sharpening
stones
should
be
examined
for
cleanliness.
If
dirty,
greasy
or
if
there
is
a
metallic
build-up
on
the
~harpening
surface,
clean
as
follows:
A.
FATTY
BUILD-UP
If
there
is
evidence
of
fatty
build-up
in
the
stones,.
they
must
be
cleaned.
Otherwise,
they
will
not
have
the
abrasive
quality
necessary
to
sharpen.
1.
Remove
the
stones
from
the
shafts.
. 2
~
.
Soak
the.. stonE:!s
in
a
solution
of
household
ammonia
and·
water.·
for
10
minute_s.
3.
Rinse
thoroughly.
4.
Shake
excess
water
out
and
pat
partially
dry
with
paper
toweling
or
a
clean
cloth
towel.
Set
aside
to
air
dry.
5.
once
the
stones
are
dry,
oil
both
stones
and
shafts
with
Berke!
food
machine
oil.
6.
Reassemble.
(.4)
(
(

B.
METALLIC
BUILD-UP
··:•I
• •
•I
.
-:.:
After
repeated
sharpenings
-
even
with
a
clean
knife
blade
-
you
may
get
a
metallic
build-up
on
the
face
of
the
stones.
This
is
caused
by
tiny
particles
of
metal
tilling
the
spaces
between
the
stone
grits.
This
appears
as
a
dark,
shi~y
coating
on
the
grinding
surface
of
the
stones.
To
remove
this
metallic
build~up,
we
recouunend
that
the
stones
be
scrubbed
a
stone
cleaning
tool
part#
4975-09237,
dipped
in
a
solution
of
water
and
household
ammonia.
Rinse,
dry
and
oil
as
previously
described.
In
heavy
duty
use,
we
recommend
that
a
spare
set
of
stones
be
kept
available
for
thorough
cleaning
procedures,
and
in
case
.of
breakage,
so
you
will
not
lose
your
sharpening
capabilities.
VII
CLEANING
AND
SANITIZING
(DISASSEMBLY}
1.
Turn
the
thickness
control
knob
all
the
way
to
the
right
to
close
the
gauge
plate.
2.
Turn
switch
to
OFF
and
unplug
the
power
cord
•
.
3..
Remove
..
the
product
table
locking
knob.
·4 • Remove
the
product
table.
5.
The
pushex::
can
slide
or
rotate,
so
REEP THE PRODUCT TABLE
LEVEL.··
6.
Remove
the
slice
deflector
which
is
attached
to
the
main
slicer
body.
(5)
This manual suits for next models
2
Table of contents
Other Berkel Kitchen Appliance manuals
Berkel
Berkel GMB Owner's manual

Berkel
Berkel 823E User manual

Berkel
Berkel 250 User manual

Berkel
Berkel ML-136212 User manual

Berkel
Berkel 180D User manual

Berkel
Berkel HOME LINE 200 User manual

Berkel
Berkel BF8T Operating instructions

Berkel
Berkel 909FS Owner's manual

Berkel
Berkel 909/1 User manual

Berkel
Berkel BM +32F User manual

Berkel
Berkel 823E-PLUS Owner's manual

Berkel
Berkel BG+30T User manual

Berkel
Berkel 250 User manual

Berkel
Berkel 829A Owner's manual

Berkel
Berkel HOME LINE Series User manual

Berkel
Berkel 909M User manual

Berkel
Berkel DOMINA Series User manual

Berkel
Berkel 818 User manual

Berkel
Berkel 827A User manual

Berkel
Berkel 330M User manual