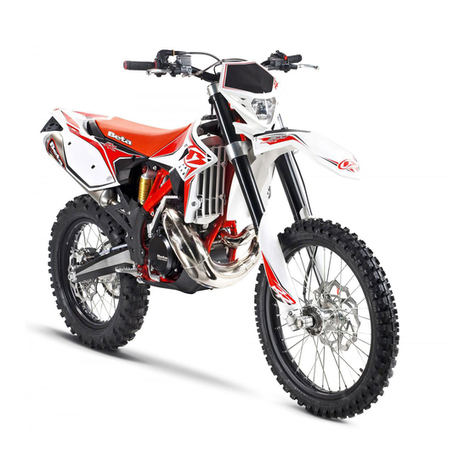
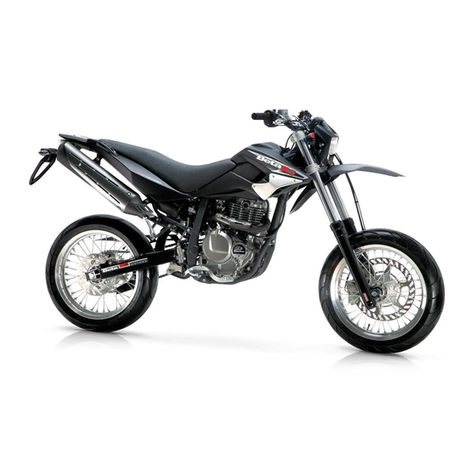
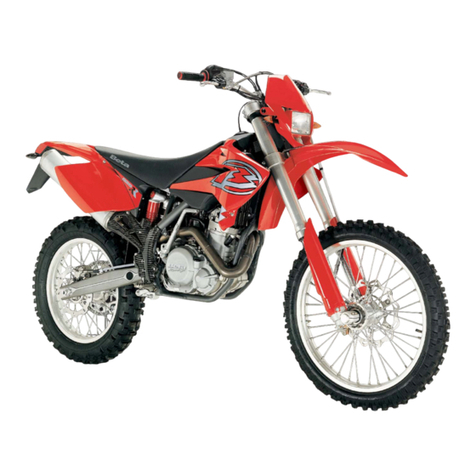
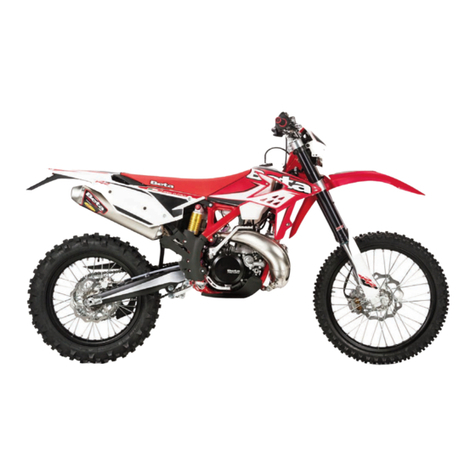
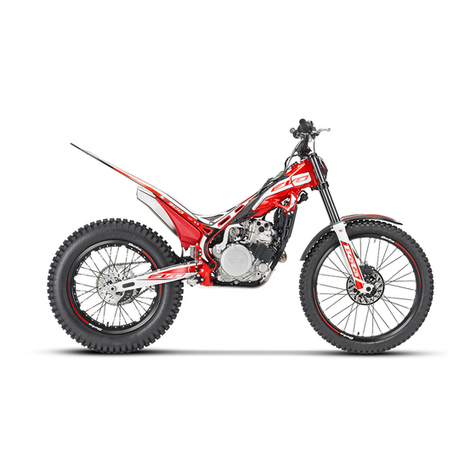
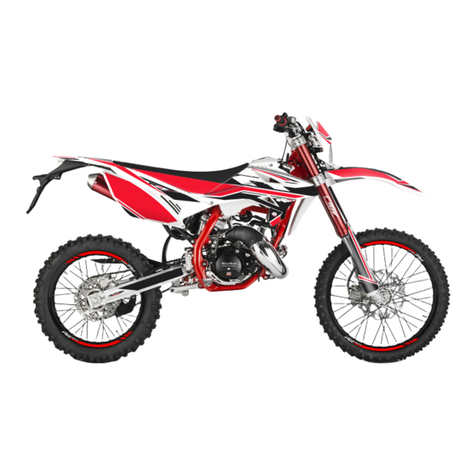
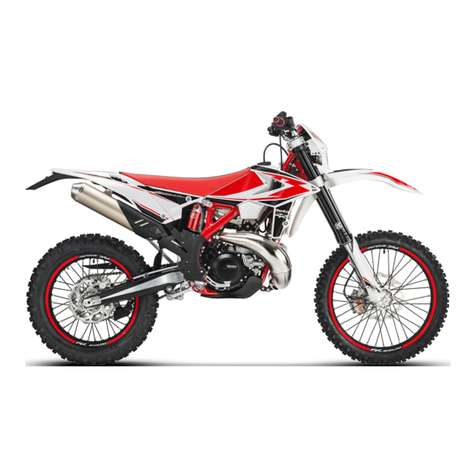
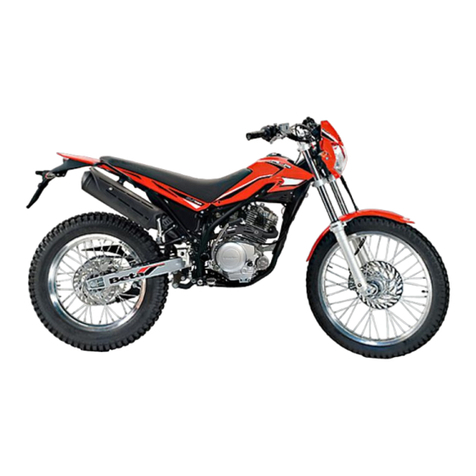
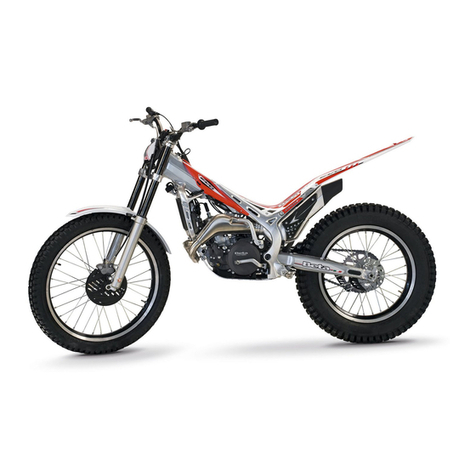
Beta RR 125 4T 2011 User manual

RR 125 4T
Service Manual
Holtvej 8-10, Høruphav, 6470 Sydals
Telefon: +45 73 15 11 00
Fax: +45 73 15 11 01
CVR: 27 73 31 07
www.betamotor.dk
Juli 2011

INDEX
INDICE
1
RR 125 cc L/C - ENDURO / MOTARD
Grazie per la fiducia accordata e buon divertimento.
Con questo manuale abbiamo voluto darle le informazioni necessarie
per un corretto uso e una buona manutenzione della sua moto.
RR 125 cc L/C - ENDURO / MOTARD
We would like to congratulate you on your purcase.
Let us also take this opportunity to thank you for putting your trust in us;
we will no let you down.

INFORMATIONS
INFORMAZIONI
2
GUIDA ECOLOGICA
Il rumore e l’inquinamento prodotto da ogni veicolo
dipende in larga misura da come è condotto.
Le raccomandiamo di guidare in maniera regolare, sen-
za forti accellerazioni e decelerazioni.
Nel rispetto dell’ambiente Betamotor monta su tutti i veicoli
un sistema di post-combustione che riduce le emissioni no-
cive.
GUIDA SICURA
• rispettare il codice stradale;
• indossare sempre casco omologato ed allacciato;
• mantenere sempre la visiera pulita;
• indossare indumenti senza le estremità penzolanti;
• non viaggiare con in tasca oggetti acuminati o fragili;
• regolare correttamente lo specchietto retrovisore;
• guidare sempre seduti e con entrambe le mani sul
manubrio ed i piedi sulle pedane;
• mai distrarsi o farsi distrarre durante la guida;
•
non mangiare, bere, usare il cellulare, ecc... durante la
guida;
• non ascoltare musica in “cuffia durante la guida”;
• non viaggiare mai appaiato ad altri veicoli;
• non trainare o farsi trainare da altri veicoli;
• mantenere sempre le distanze di sicurezza;
•
viaggiare con le luci anabbaglianti accese anche di
giorno;
• inpennate, serpentine, ondeggiamenti sono pericolo-
sissimi sia per il conducente che per gli altri e per la
moto;
• utilizzare entrambi i freni, facendo particolare attenzi-
one in caso di fondi scivolosi (pioggia, fango, guida in
fuoristrada ecc.);
• non avviare il motore in ambienti chiusi.
Guidare con prudenza, nel rispetto del codice stradale
e della natura che ci circonda, indossare sempre il cas-
co, sono dimostrazioni di profonda civiltà.
ECOLOGIC DRIVE
The noise and the pollution of every vehivle depends on
how it is driven.
We strongly recommend you to drive steadily, without
strong acceleration and deceleration.
To protect the environment, Betamotor fits all its models
with a post-combustion system which reduces noxious
emissions.
SAFE DRIVE
• obey traffic rules;
• always wear your safety helmet, correctly fastened;
• keep your visor clean;
• wear clothes which do not flap about;
• do not ride with fragile or pointed obyect in your
pocket;
• adjust your mirrors correctly;
• drive with your hands and feets in the correct drive
position;
• always concentrate when you drive;
• do not eat, smoke, use the cellular phone, etc. when
you drive;
• maintain a safe distance;
• always use the (low) lights, even in daylight;
• wheeling, windling and rocking are very dangerous;
• use both the brakes;
• take care when the road is wet, dirty, slippery;
• do not start the engine in enclosed spaces.
Drive carefully, to preserve your own and the other
lives. Respect the nature. Always wear the helmet.

INDEX
INDICE
3
CAP.1 CONOSCENZA DEL VEICOLO
Elementi principali.............................................6
Dati identificazione veicolo..............................7
Pneumatici..........................................................7
Comandi.............................................................8
Istruzioni di funzionamento contachilometri...9
Commutatore/Bloccasterzo...........................31
Dati tecnici........................................................32
Lubrificanti e liquidi consigliati.......................35
Schema elettrico..............................................36
Dispositivi elettrici.............................................38
CAP.2 FUNZIONAMENTO E UTILIZZO
Controlli e manutenzione prima
e dopo l’utilizzo ................................................44
Rifornimento carburante.................................45
Rodaggio..........................................................46
Avviamento del motore ..................................47
Cavalletto laterale...........................................48
CAP.3 MANUTENZIONE E CONTROLLI
Olio motore.......................................................50
Olio pompa freni .............................................52
Rimozione sella ............................................... 54
Pulizia/Sostituzione filtro aria ......................... 55
Candela............................................................56
Freno anteriore................................................. 57
Freno posteriore...............................................58
Smontaggio marmitta.....................................59
Rimozione delle plastiche ..............................60
Vano sottosella e borsa attrezzi......................61
Smontaggio serbatoio carburante ............... 62
SECTION 1 GENERAL INFORMATION
Main parts...........................................................6
Vehicle identification data ...............................7
Tyres .....................................................................7
Hand drive controls ........................................... 8
Speedometer operating instructions ..............9
Ignition switch/Steering Lock .........................31
Technical data .................................................32
Recommended lubricants and liquids.........35
Electrical diagram ...........................................36
Electrical devices.............................................38
SECTION 2 OPERATION AND USE
Checks and maintenance before
and after use ....................................................44
Fueling ..............................................................45
Breaking in........................................................ 46
Starting the engine ..........................................47
Side stand .........................................................48
SECTION 3 MAINTENANCE AND CHECKS
Engine oil ..........................................................50
Brake pump oil.................................................52
Removing the seat...........................................54
Air filter cleaning/Replacement ....................55
Spark plug.........................................................56
Front brake........................................................57
Rear brake ........................................................58
Removing the silencer.....................................59
Removing the plastics .....................................60
Under-saddle compartment and tool kit......61
Removing the fuel tank...................................62
INFORMATIONS
INFORMAZIONI
4
Smontaggio parafango posteriore...............63
Smontaggio parafango anteriore ................64
Liquido di raffreddamento .............................65
Manutenzione programmata ........................66
CAP.4 REGOLAZIONI
Regolazione freni.............................................70
Regolazione frizione ........................................71
Regolazione minimo.......................................72
Scarico vaschetta carburatore......................72
Regolazione gioco gas ..................................73
Controllo e regolazione gioco sterzo............74
Tensionamento catena...................................75
Regolazione ammortizzatore posteriore ......76
Regolazione fascio luminoso.........................77
CAP.5 SOSTITUZIONI
Sostituzione lampade faro anteriore.............80
Sostituzione fanalino posteriore.....................82
Sostituzione indicatori di direzione ................83
CAP.6 COSA FARE IN CASO DI EMERGENZA
Ricerca del guasto ..........................................86
INDICE ALFABETICO
Indice.................................................................89
Removing the rear mudguard.......................63
Removing the front mudguard ......................64
Coolant .............................................................65
Maintenance schedule .................................. 66
SECTION 4 ADJUSTMENTS
Adjustment of brake........................................70
Adjustment of clutch........................................71
Adjustment of idling speed ............................72
Unloading the carburetor float chamber.....72
Adjusting the throttle play...............................73
Check and adjustment of steering gear......74
Tightening the chain........................................75
Adjustment of rear shock absorber...............76
Adjusting the headlight...................................77
SECTION 5 REPLACEMENTS
Replacing the headlight bulbs ......................80
Replacing the rear light ..................................82
Replacing the indicators ................................83
SECTION 6 WHAT TO DO IN AN EMERGENCY
Trouble shooting...............................................86
ALPHABETICAL INDEX
Index..................................................................90
INDEX
INDICE
I dati e le caratteristiche indicate sul presente manuale non impegnano il costruttore che si riserva il diritto
di apportare modifiche ai propri modelli in qualsiasi momento.
The manifacturer reservs the right to change the data and features described in this manual and to modify
its products at any times.

5
1
GENERAL INFORMATION
CONOSCENZA DEL VEICOLO
CAPITOLO 1
SECTION 1
INDICE ARGOMENTI
Elementi principali
Dati identificazione veicolo
Pneumatici
Comandi
Indicazioni di funzionamento
contachilometri
Commutatore/Bloccasterzo
Dati tecnici
Lubrificanti e liquidi
consigliati
Schema elettrico
Dispositivi elettrici
INDEX
Main parts
Vehicle identification data
Tyres
Hand drive controls
Speedometer operating
instructions
Ignition switch/Steering lock
Technical data
Recommended lubricants
and liquids
Electrical diagram
Electrical devices

6
1
GENERAL INFORMATION
CONOSCENZA DEL VEICOLO
MAIN PARTS
1Plug tank
2Air filter
3Stand
4Fuel tap
5Fuel tank
6Silencer
7Radiator
8Muffler
ELEMENTI PRINCIPALI
1Tappo serbatoio
2Filtro aria
3Cavalletto
4Rubinetto carburante
5Serbatoio carburante
6Silenziatore
7Radiatore
8Marmitta
12
5
6
8
3
4
7

7
1
GENERAL INFORMATION
CONOSCENZA DEL VEICOLO
DATI IDENTIFICAZIONE VEICOLO
Identificazione telaio
Il codice identificazione telaio Aè
impresso sul cannotto di sterzo nel
lato destro.
Identificazione motore
Idatidiidentificazione del motoreB
sonoimpressisulsemicartersinistro.
PNEUMATICI
Attenzione:
Per una guida sicura controllare
frequentemente i pneumatici.
• Mantenere la pressione dei pneu-
matici entro i limiti indicati.
•Effettuareilcontrollodellapressio-
ne ogni 15 giorni.
•Verificare la pressione solamente
a pneumatici freddi.
Enduro ant. post.
Dimensioni 90/90-21110/80-18 corona z.60
120/80-18 corona z.60
120/90-18 corona z.60 o Z.63
Bar (fuori strada) 1 1
Bar (strada) 1,5 1,8
Motard ant. post.
Dimensioni 110/80-17
130/70-17 corona z.54 e Z.56
Bar
1,8 2
VEHICLE IDENTIFICATION DATA
Frame identification
Frame identification code Ais
stamped on the right side of the
steering head tube.
Motor identification
Motor identification data Bare
stamped on the l.h. side half crank-
case.
TYRE
Warning:
For your riding safety, frequently
check the tyres.
•Keep the tyre pressures within the
prescribed range.
•Check the tyre pressures every
other week.
•Always measure the inflating pres-
sures when the tyres are cold.
B
A
Pressure is too low Pressure is
correct Pressure is too
high
Pressione troppo
bassa Pressione
giusta Pressione
troppo alta
Enduro front rear
Size 90/90-21 110/80-18 ring gear z.60
120/80-18 ring gear z.60
120/90-18 ring gear z.60 or z.63
Bar (off-road) 1 1
Bar (road) 1,5 1,8
Motard front rear
Size
110/80-17
130/70-17
Bar 1,8 2

8
1
GENERAL INFORMATION
CONOSCENZA DEL VEICOLO
COMANDI HAND DRIVE
1LCD
2Tasto MODE
3Spia indicatori direzione
4Spiaaccensioneluciabba-
glianti
5Spia indicatore folle
6Spia cavalletto abbassato
7Leva comando frizione
8Pulsanteavvisatore acustico
9Commutatore luci
10 Pulsante abbaglianti
11 Pulsante indicatori di dire-
zione
12 Pulsante avviamento
13 Pulsante stop motore con
sicurezza (posizione ON-
OFF)
14 Leva comando freno ante-
riore
1LCD display
2MODE button
3Indicator warning light
4High beam warning light
5Neutral indicator
6Stand-down warning light
7Clutch lever
8Horn button
9Dip switch
10 High beam switch
11 Indicator switch
12 Start button
13 Engine stop button with
safety (ON-OFF position)
14 Front brake lever
= luci anabbaglianti
= luci abbaglianti
12
13
3
4
2
1
8
7
10
11
9
= Low light
=High light
5
6
14

9
1
GENERAL INFORMATION
CONOSCENZA DEL VEICOLO
ISTRUZIONI DI FUNZIONAMENTO CONTACHILOMETRI
Serie RR 125 cc Enduro - Motard
INDICE DEGLI ARGOMENTI
1 STRUMENTAZIONE DI BORDO
2 FUNZIONI STRUMENTAZIONE
2.1 Velocità istantanea
2.2 Distanza totale (TOTAL)
2.3 Distanza parziale (TD)
2.4 Cronometro (LAP)
2.5 Velocità massima (MAX)
2.6 Standby
2.7 Livello carica batteria
2.8 Orologio
2.8.1 Regolazione orologio
3 GESTIONE ALLARMI
3.1 Allarme temperatura
3.2 Allarme tensione batteria
4 SPIE DI SEGNALAZIONE E RETROILLUMINAZIONE
4.1 Spia Indicatori di direzione
4.2 Spia Abbaglianti
4.3 Spia Neutral
4.4 Retroilluminazione LCD e quadrante
5 MENU' DI SET-UP
5.1 Modifica unità di misura
6 PULSANTE
6.1 Successione delle funzioni rappresentate
7 START-UP (AVVIAMENTO DEL SISTEMA)
8 SLEEP-MODE E WAKE-UP
ODOMETER OPERATING INSTRUCTIONS
Series RR 125 cc Enduro - Motard
CONTENTS
1 ONBOARD INSTRUMENTS
2 INSTRUMENT FUNCTIONS
2.1 Instantaneous speed
2.2 Total distance (TOTAL)
2.3 Partial distance (TD)
2.4 Chronometer (LAP)
2.5 Maximum speed (MAX)
2.6 Standby
2.7 Battery charge level
2.8 Clock
2.8.1 Clock adjustment
3 ALARM MANAGEMENT
3.1 Temperature alarm
3.2 Battery voltage alarm
4 WARNING LIGHTS AND BACKLIGHTING
4.1 Direction indicator lights
4.2 Headlight indicator
4.3 Neutral indicator light
4.4 LCD and dial backlighting
5 SET-UP MENU
5.1 Change unit of measurement
6 PUSH-BUTTON
6.1 Sequence of functions represented
7 START-UP (SYSTEM START-UP)
8 SLEEP-MODE AND WAKE-UP

10
1
GENERAL INFORMATION
CONOSCENZA DEL VEICOLO
1. STRUMENTAZIONE DI BORDO 1. ONBOARD INSTRUMENTS
2
3
45
7
6
9
1
10
11
12
8
13

11
1
GENERAL INFORMATION
CONOSCENZA DEL VEICOLO
1Tachimetro
2Icona batteria
3TOTAL: chilometri totali percorsi
4TD: totalizzatore parziale
5TIME: orologio
6LAP: cronometro
7Pulsante Mode
8Spia cavalletto laterale
9Velocità istantanea
10 Spia Frecce
11 Spia luce abbaglianti
12 Spia folle
13 Icona temperatura acqua
1Tachometre
2Battery icon
3TOTAL: total kilometers driven
4TD: partial result register
5TIME: clock
6LAP: chronometer
7Mode button
8Side stand tell tale lamp
9Instantaneous speed
10 Direction indicator tell tale lamp
11 High beam tell tale lamp
12 Neutral tell tale lamp
13 Water temperature icon

12
1
GENERAL INFORMATION
CONOSCENZA DEL VEICOLO
2. FUNZIONI STRUMENTAZIONE
2.1 Velocità istantanea
L'informazione viene sempre visua-
lizzata sul digit 10÷12 (fig. 1 e fig. 2).
Se l'unità di misura selezionata è
Km/h (valore di default), viene vi-
sualizzatoillogorelativo;agendosul
pulsanteedaccedendo almenudi
Set-Up,èpossibilemodificare l'unità
di misura impostando mph (fig. 2).
L'aggiornamento del valore visua-
lizzato avviene ogni 0,5 secondi.
2. INSTRUMENT FUNCTIONS
2.1 Instantaneous speed
The speed is always displayed with
digits 10 -12 (fig. 1 and fig. 2).
If the selected unit of measurement
is Km/h (default unit), the relevant
logo is displayed; using the push-
button and accessing the Set-up
menu, it is possible to change the
unit of measurement to mph (fig.2).
The value displayed is updated
every 0.5 seconds.
Fig. 1
Fig. 2

13
1
GENERAL INFORMATION
CONOSCENZA DEL VEICOLO
2.2. Distanza totale (TOTAL)
L'informazione viene visualizzata
sul digit 1÷5 accompagnata dalla
scritta TOTAL, così come mostrato
in fig. 3.
Il dato viene memorizzato in modo
permanente in una memoria non
volatile (refresh di E2prom ad ogni
Km percorso).
Seinmemorianon èpresentealcun
dato, viene visualizzato il numero
00000.
L'informazionevienesempre calco-
lata in Km, tuttavia la sua visualiz-
zazione può essere espressa in Km
(valore di default) oppure in miglia.
La conversione dell'unità di misura
è possibile accedendo al menu di
Set-Up.
Non è possibile azzerare tale infor-
mazione in condizioni di normale
impiego della strumentazione.
2.2. Total distance (TOTAL)
Thetotaldistanceisdisplayedinthe
upper left corner (digits 1-5) and is
accompanied by the word TOTAL,
as shown in fig. 3.
The datum is stored permanently
in a non volatile memory ( E2prom
refresh after every Km).
If no data is stored in the memory,
the number 00000 is displayed.
Theinformationisalwayscalculated
inKm,butwhendisplayedit maybe
expressed in Km (the default value)
or in miles.
The unit of measurement can be
changed from the Set-Up Menu.
It is not possible to reset such infor-
mationduringconditionsofnormal
use of the instrument.
Fig. 3
Fig. 4

14
1
GENERAL INFORMATION
CONOSCENZA DEL VEICOLO
2.3 Distanza parziale (TD)
Questafunzionedescriveilfunziona-
mento/visualizzazionedeltotalizza-
tore parziale automatico di bordo.
Tale funzione viene sempre rappre-
sentata utilizzando i digit 1÷5 e la
scritta TD (fig. 5).
Il dato visualizzato rappresenta
la distanza percorsa dal veicolo
espressainmigliaoinKm (secondo
l'unità di misura selezionata), con
risoluzione 0,1 (miglia o Km).
Questo contatore si attiva auto-
maticamente con il primo impulso
proveniente dal sensore velocità.
Il dato non viene memorizzato in
modo permanente.
E' possibile azzerare il contatore
legato a questo parametro pre-
mendo (in corrispondenza della
funzione TD) il pulsante per circa 2
sec., sino a quando non compare
il valore 000.0.
L'azzeramento di TD è possibile sia
a veicolo fermo che in movimento.
Se il dato supera il numero 999.9 il si-
stema provvede all'azzeramento di
TDper poiricominciareilconteggio.
N.B. In assenza di alimentazione
il valore di TD viene irrimediabil-
mente perso.
2.3 Partial distance (TD)
This function describes the opera-
tion/display of the onboard auto-
matic partial totalizator.
This function is always shown using
digits 1-5 and the abbreviation TD
(fig. 5).
Thedatumdisplayedrepresentsthe
distance covered by the vehicle,
expressed in miles or Km (depend-
ing on the unit of measurement
selected), with 0.1 resolution (miles
or Km).
This counter is automatically acti-
vated at the first impulse given by
the speed sensor.
Thedatumisnotstoredpermanently.
The counter linked to this param-
eter can be reset by pressing (cor-
responding to the TD function) the
button for approx. 2 seconds, until
the value 000.0 appears.
TD can be reset when the vehicle is
stopped or moving.
If the number is higher than 999.9,
the system resets the TD and then
restarts the count.
Note: In the absence of mains
power, the TD value is irretriev-
ably lost.
Fig. 5

15
1
GENERAL INFORMATION
CONOSCENZA DEL VEICOLO
2.4 Cronometro (LAP)
Questa funzione descrive il fun-
zionamento/visualizzazione del
cronometro.
L'informazione viene visualizzata
utilizzando i digit 1÷5 e la scritta LAP.
Per accedere al menu del crono-
metro, bisogna tenere premuto il
pulsante in corrispondenza della
schermatacomemostratoinfigura
6finoallacomparsadelcronometro
(figure 7-8).
Il dato è visualizzato nel formato
mm:ssseore=0enelformatohh:mm
se ore >0.
Se ore>0, quando LAP è operativo
il simbolo - che separa le ore dai
minuti è mostrato lampeggiante,
mentreviene visualizzatofissoquan-
do LAP non è operativo.
Se ore=0, quando LAP è operativo
i simboli ' e " che separano i minuti
daisecondi,sonomostratilampeg-
gianti, mentre sono visualizzati fissi
quando LAP non è operativo.
Attivazione: è possibile attivare il
cronometro in due modi:
1) manualmente,tramite una pres-
sione breve (<2 sec.) del pulsante;
2) in automatico, se la velocità
diventa >0
2.4 Chronometer (LAP)
This function describes the opera-
tion/display of the chronometer.
The information is displayed using
digits 1-5 and the abbreviation LAP.
To access the chronometer menu,
pressandhold downthebuttonthat
correspondstothescreen,as shown
in figure 6, until the chronometer
appears (figures 7-8).
The time is displayed in the format
mm:ss se hours = 0 or in the format
hh:mm se hours >0
If hours >0,when LAP is operational,
thesymbol-thatseparatesthehours
from the minutes, is flashing; when
LAP is not operational, the symbol
is continuous.
If hours = 0,when LAP is operational,
the "e" symbols that separate the
minutesfromtheminutes,areshown
flashing; whenLAPisnotoperational
they are continuous.
Start-up: the chronometer can be
started in two ways:
1) manually, by pressing the button
briefly (<2 sec);
2) automatically, if the speed be-
comes >0
Fig. 6
Fig. 7
Fig. 8

16
1
GENERAL INFORMATION
CONOSCENZA DEL VEICOLO
Disattivazione: è possibile fermare
il cronometro nel seguente modo:
1) in automatico se la velocità = 0
Selavelocitàdiventa=0,ilcronome-
tro si ferma,anche se l'attivazione è
stata data da pulsante.
Azzeramento: è possibile azzerare il
cronometro tramite una pressione
lunga (>5 sec.) del pulsante.
Uscita: per uscire dalla modalità
cronometro, tenere premuto il pul-
sante per un tempo compreso tra
2 e 5 secondi con vel=0.
Se al momento dell'uscita il cro-
nometro è attivo, la scritta LAP
verrà mostrata lampeggiante in-
dipendentemente dalla funzione
visualizzata.
Se vel>0,non è possibile accedere
alla funzione LAP: la pressione del
pulsante causa il cambio della
funzione visualizzata.
Sevel>0,non èpossibileuscire dalla
funzioneLAP,lapressionedelpulsan-
te causa il reset del valore indicato
(se tempo perssione > 5 secondi).
Il dato non viene memorizzato in
modo permanente.
Se il dato supera il valore 23-59
(cioè 23h59'59"), il sistema provve-
de all'azzeramento di LAP per poi
ricominciare il conteggio.
N.B: In assenza di alimentazione
il valore di LAP viene irrimediabil-
mente perso.
Deactivation:thechronometercan
be stopped in the following way:
1) automatically, if the speed is = 0
If the speed is = 0, the chronometer
stops, even if it has been activated
using the button.
Resetting: The chronometer can be
resetbypressingand holdingdown
the button (> 5 sec).
Exit: to exit chronometer mode,
press and hold down the button for
approx.2to5secondswithspeed=0.
Ifthechronometerisoperatingatthe
momentofexiting,the abbreviation
LAPwillbeshownflashing,indepen-
dently of the function displayed.
If the speed is >0, the LAP function
cannot be accessed: pressing the
button causes the function displa-
yed to change.
If the speed is >0, it is not possible
to exit the LAP function: pressing the
button causes the value indicated
to be reset (if the button is pressed
for more than 5 seconds).
Thedatumisnotstoredpermanently.
If the datum is higher than 23-59
(that is,23h59'59"),the system resets
the LAP and then restarts the count.
Note: In the absence of mains
power, the LAP value is irretriev-
ably lost.

17
1
GENERAL INFORMATION
CONOSCENZA DEL VEICOLO
2.5 Velocità massima (MAX)
Questa funzione descrive il fun-
zionamento/visualizzazione della
funzione velocità massima.
L'informazione viene visualizzata
utilizzandoi digit2÷5elascrittaMAX,
come mostrato in fig. 9.
Il parametro identifica la velocità
massima raggiunta dal veicolo,
espressainKm/h oinmphsecondo
l'unità di misura selezionata.
E' possibile azzerare il contatore
legato a questo parametro pre-
mendo, in corrispondenza della
funzione MAX, il pulsante per circa
2sec.,sinoaquandononcompare
il valore 00.
L'azzeramentodiMAXèpossibilesia
a veicolo fermo che in movimento.
Cambiandounitàdimisura,ilvalore
viene azzerato.
Il dato non viene memorizzato in
modo permanente.
N.B. In assenza di alimentazione
il valore MAX viene irrimediabil-
mente perso.
2.5 Maximum speed (MAX)
This function describes the opera-
tion/displayofthemaximumspeed
function.
The information is displayed using
digits2-5andtheabbreviationMAX,
as shown in fig.9.
The parameter identifies the vehi-
cle's maximum speed reached,
expressed in Km/h or in mph, de-
pendingontheunitofmeasurement
selected.
Thecounterlinkedto thisparameter
can be reset by pressing the button,
near the MAX function,for approx.2
seconds,untilthevalue 00 appears.
MAX can be reset when the vehicle
is stopped or moving.
The value is reset when the unit of
measurement is changed.
Thedatumisnotstoredpermanently.
Note: In the absence of mains
power, the MAX value is irretrie-
vably lost.
Fig. 9

18
1
GENERAL INFORMATION
CONOSCENZA DEL VEICOLO
2.6 Standby
La funzione di standby è utilizzata
per la regolazione dell'orologio
(vedi par. 2.8.1).
L'informazione viene mostrata
come in figura 10.
2.6 Standby
The Stand-by function can be used
toadjusttheclock(seeparag.2.8.1).
The information is displayed as in
figure 10.
Fig. 10

19
1
GENERAL INFORMATION
CONOSCENZA DEL VEICOLO
2.7 Livello carica batteria
L'informazione viene visualizzata
ricorrendo alla barra grafica nella
parte inferiore sinistra, così come
mostrato in figura 11.
La barra grafica, aggiornata ogni
4 secondi,viene gestita secondo la
seguentetabella (tolleranza±0,2V):
2.7 Battery charge level
The information is displayed using
the digital bar graph in the lower
left part, as shown in fig. 11.
The bar graph, updated every 4 se-
conds,isorganisedaccordingtothe
following table (tolerance ±0.2 V):
Tensione/Voltage (Volt) Segmenti attivi/active segments
Fino a 9,99 Volt
Until 9.99 Volt 1
Da 10,00 V a 10,49 V
From 10.00 V to 10.49 V 2
Da 10,50 V a 10,99 V
From 10.50 V to 10.99 V 3
Da 11,00 V a 11,49 V
From 11.00 V to 11.49 V 4
Da 11,50 V a 11,99 V
From 11.50 V to 11.99 V 5
Da 12,00 V a 12,49 V
From 12.00 V to 12.49 V 6
Da 12,50 V a 12,99 V
From 12.50 V to 12.99 V 7
Oltre 13,00 Volt
Over 13.00 Volt 8
Fig. 11
Table of contents
Other Beta Motorcycle manuals

Beta
Beta RR 350 User manual

Beta
Beta evo 125SS 2022 User manual

Beta
Beta RR4T USA 400 User manual

Beta
Beta X-Trainer 300 2T User manual

Beta
Beta Rev 3 2006 User manual

Beta
Beta RR 4T ENDURO 2014 350 Guide

Beta
Beta EVO 2T User guide

Beta
Beta EVO 2T User manual

Beta
Beta MINITRIAL 50 User manual

Beta
Beta REV 80 User manual

Beta
Beta RR 400 User manual

Beta
Beta RR 300 2T User manual

Beta
Beta Minicross R 10 User manual

Beta
Beta 2008 URBAN 125cc User manual

Beta
Beta RR 50 cc ENDURO User manual

Beta
Beta RR 125 series User manual

Beta
Beta EVO 2T 2010 User manual

Beta
Beta RR 400 User manual

Beta
Beta 250-300 RR Manual

Beta
Beta TECHNO 250 User manual