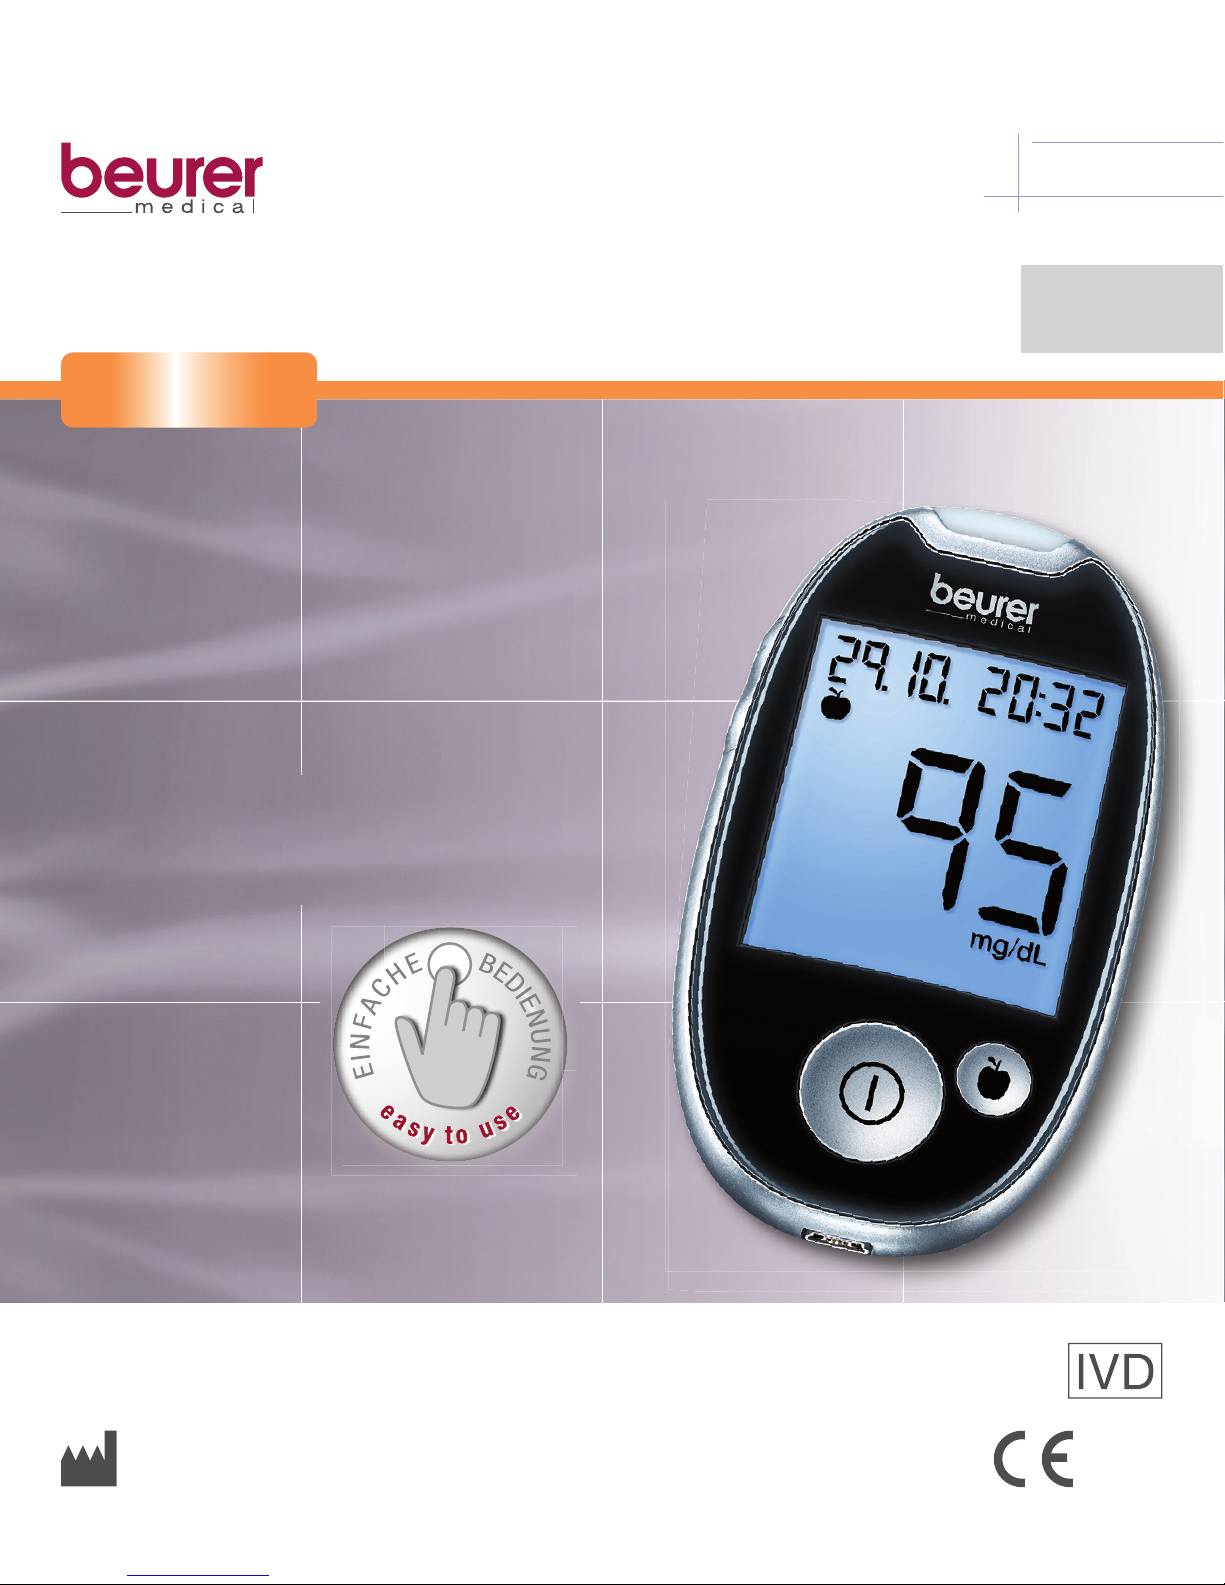
Beurer GL44 User manual

germanlengineering
Beurer GmbH •Söflinger Straße 218 •89077 Ulm, Germany
www.beurer-medical.de
0483
mg/dL
instructions for use
GL44
GB
Codefree
BLOOD GLUCOSE MONITOR
Step by step


Beurer GL44 mg/dL 3
Contents
1 Getting to know your instrument ................................................................................4
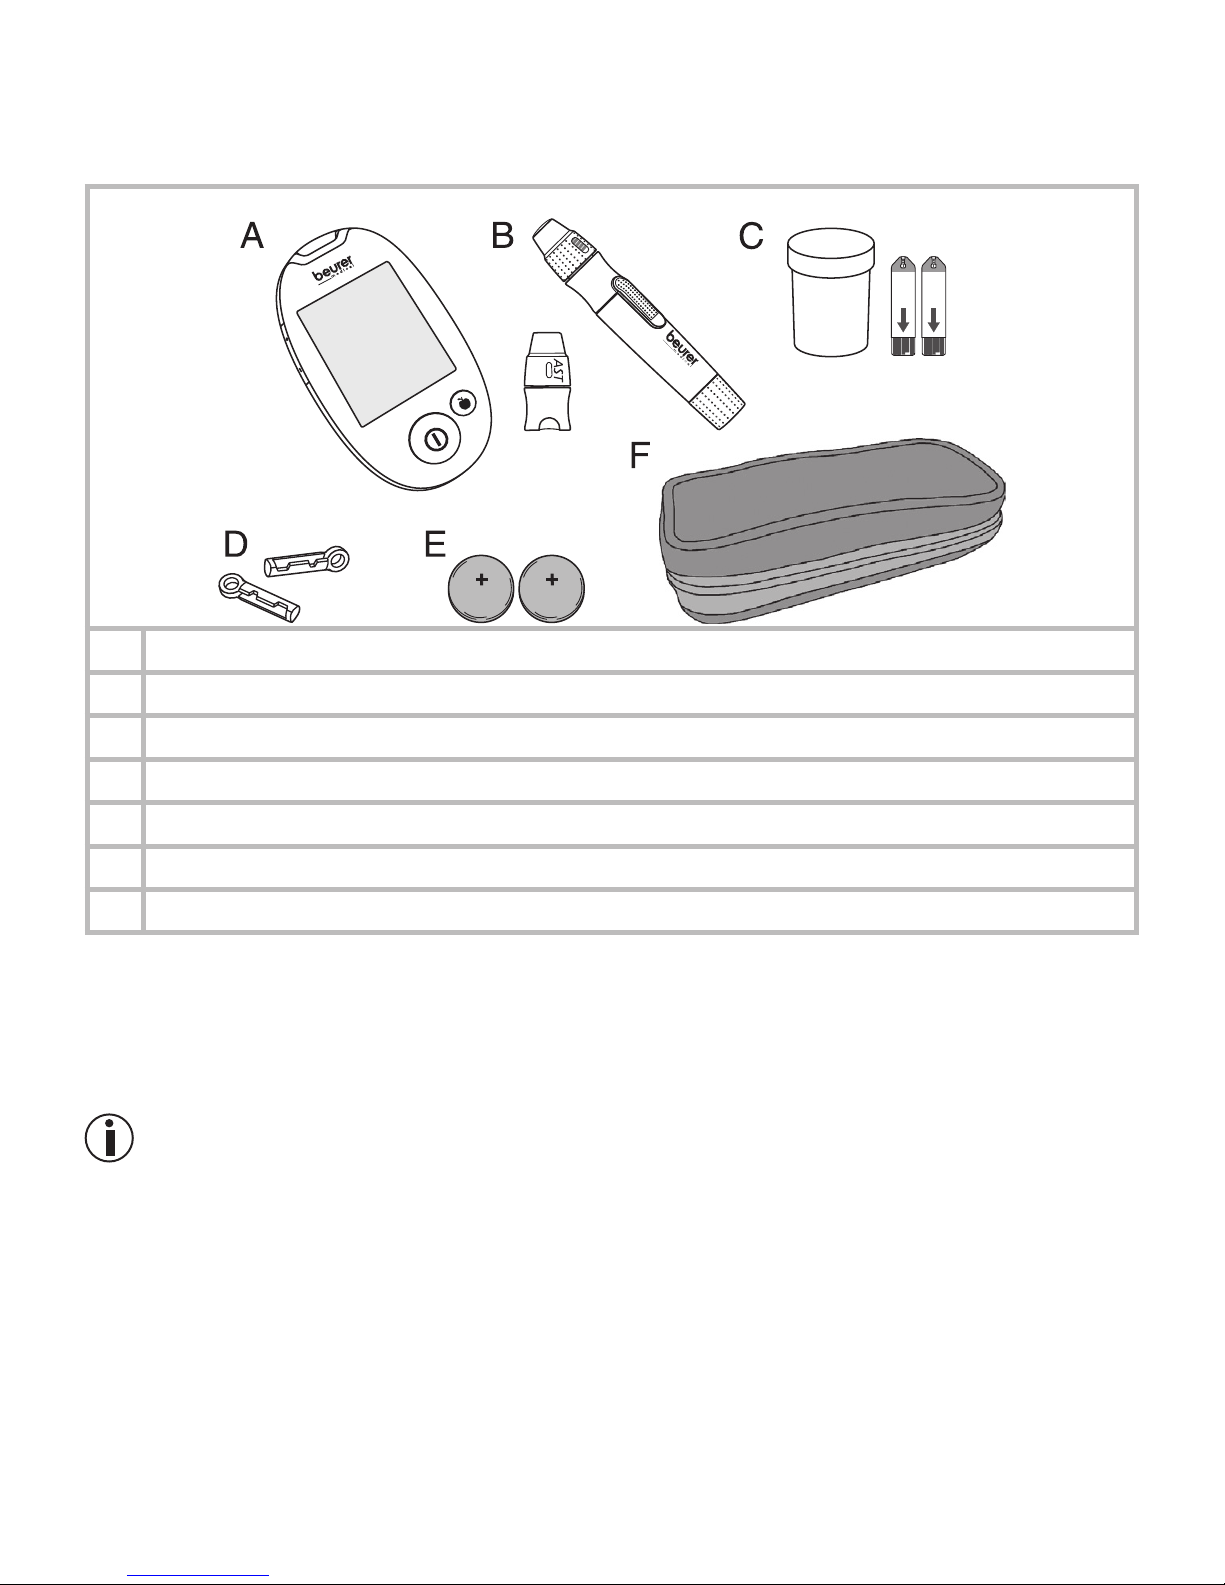
1.1 Delivery scope, replacements and accessories.....................................................................5
1.2 Functions of the device..........................................................................................................6
1.3 Signs and symbols................................................................................................................. 7
2 Warnings and safety notes ............................................................................................8
3 Description of units and accessories .....................................................................12
3.1 Blood glucose monitor.........................................................................................................12
3.2 Lancing aid and lancet needles ...........................................................................................12
3.3 Display symbols...................................................................................................................13
3.4 Test strips.............................................................................................................................14
4 Initial use and basic settings ...................................................................................... 15
4.1 Removing the battery insulation strips, replacing the batteries...........................................15
4.2 Making and changing basic settings ...................................................................................16
5 Measuring blood glucose values .............................................................................. 17
5.1 Preparing to take a blood sample ........................................................................................17
5.2 Taking a blood sample .........................................................................................................18
5.3 Reading out result and highlighting measurements ............................................................ 21
5.4 Post-processing and disposal .............................................................................................22
5.5 Evaluating measured blood glucose values ........................................................................23
5.6 Functional check with control solution ................................................................................24
6 Measurement memory...................................................................................................27
6.1 Displaying individual values .................................................................................................27
6.2 Displaying average blood glucose values............................................................................28
6.3 Displaying average blood glucose values for highlighted values ........................................ 29
6.4 Deleting individual measured values from the memory .......................................................30
6.5 Deleting the entire memory for measured values ................................................................31
6.6 Reset to basic settings ........................................................................................................ 31
6.7 Transferring measurements to a PC..................................................................................... 31
7 Storing, maintaining and disinfecting the device .............................................32
7.1 Cleaning ............................................................................................................................... 32
7.2 Disinfection .......................................................................................................................... 33
8 What if there are problems?........................................................................................33
9 Technical specifications................................................................................................35
10 Guarantee and customer service ............................................................................. 38

4 Beurer GL44 mg/dL
1 GettinG to know your instrument
Dear Customer,
Thank you for choosing one of our products. Our name stands for high-quality, thoroughly tested
products for applications in the areas of heat, weight, blood pressure, blood glucose measurement,
body temperature, pulse, gentle therapy, massage and air.
Please read these Instructions for Use carefully and keep them for later use, be sure to make them
accessible to other users and observe the notes they contain.
With kind regards
Your Beurer team.
Getting to know your instrument
The GL44 blood glucose monitor is intended for fast and simple blood glucose measurement of
fresh capillary blood samples, either for self-testing or in a clinical environment by trained personnel.
It enables quick and easy blood glucose measurement, measured values to be stored and the aver-
age of all measured values to be displayed to ideally assist you in monitoring diabetes. The test is
performed exclusively externally (IVD).
The large backlit display shows measured values clearly. The user-friendly design with handy test
strips and a reduction in the controls to a few buttons guarantee simple, yet reliable measurements.
The device can be connected to a PC using the optionally available PC kit (docking station, cable
and software). You can evaluate the measured values on your PC using special software and use the
results to monitor your blood glucose values.

Beurer GL44 mg/dL 5
1.1 Delivery scope, replacements and accessories
Check that the set packaging has not been tampered with and check the contents for completeness.
A1 Blood glucose monitor
B1 Lancing device with AST cap to take blood samples from alternative body parts
C10 test strips
D10 sterile lancet needles
E2 button cell batteries, 3 V CR2032 (already inserted)
F1 practical case
These Instructions for Use, additional information
•
If the packaging has sustained considerable damage or the contents are incomplete, please return
the system to your retailer.
•
The blood glucose monitor, test strips and additionally available control solutions have been specially
designed to complement each other. For this reason, use only test strips and control solutions that
have been approved for this blood glucose monitor.
Note
•
Use original manufacturer accessories only.

6 Beurer GL44 mg/dL
Follow-up purchases
You can also obtain test strips, control solution and lancet needles without a prescription.
Item REF
50 test strips REF 464.15
Control solution LEVEL 3 and 4 REF 464.16
100 lancet needles REF 457.01
Beurer GL44-PC kit (docking station,
cable and software)
REF 463.17
1.2 Functions of the device
This device is intended for measuring the blood glucose content in human blood. It is also suitable
for self-testing at home.
The blood glucose monitor enables you to quickly and simply:
•
Measure your blood glucose level,
•
Display, highlight and save measured values,
•
Display the average measured blood glucose value from the last 7, 14, 30 and 90 days,
•
Display the average of the highlighted measured blood glucose values from the last 7, 14, 30 and 90
days,
•
Set the time and date,
•
Transfer stored measured values to a PC for evaluation (additional accessories required).
The blood glucose monitor also includes the following monitoring functions:
•
Warning in the event of unsuitable temperatures.
•
Low battery display.
•
Low test strips warning.
Warning
•
Do not use the device to diagnose diabetes; it is intended for regular monitoring only.
•
Please consult your GP with regard to insulin doses.

Beurer GL44 mg/dL 7
1.3 Signs and symbols
The symbols on the packaging, type plate of the blood glucose monitor and accessories represent
the following:
In vitro diagnostics Manufacturer
Serial number Please observe the Instructions
for Use
Temperature limit
+2 °C to +30 °C PCT: certification symbol for
products that are exported to
the Russian Federation and
members of the CIS
Not for re-use/For single use
only
Use by
Green dot (Der Grüne Punkt):
German dual waste collection
system
Maximum shelf life after initial
opening in months Contents sucient for <n> tests
Batch designation /
Art.-Nr.
Order number
Sterilised by radiation (lancets) Unit of measurement for blood
glucose value
Warning, please observe ac-
companying documents Biohazard, risk of infection
In the Instructions for Use, the symbols represent the following:
Warning
Warning indicating a risk of injury or risk to your health/yourpatients’ health.
Important
Safety note indicating possible damage to the unit/accessory.
Note
Note on important information

8 Beurer GL44 mg/dL
2 warninGs and safety notes
Risk of infection
All components of the blood glucose monitor and its accessories may come into contact
with human blood and are therefore a possible source of infections.
Warning
•
This blood glucose monitor must display the blood glucose content in mg/dL. The unit of meas-
urement mg/dL accompanies each blood glucose value. Please contact our customer service
if the device does not display mg/dL. You risk damaging your health if you measure your blood
glucose value using a unit of measurement with which you are not familiar, misinterpret the
values and therefore take incorrect measures.
•
When using the blood glucose monitor for various persons, please observe the generally applicable
regulations regarding disinfection, safety and contamination.
•
Medical carers and others who use this system on several patients must be aware that all products
or objects that come into contact with human blood must be handled, even after cleaning, as though
they could transfer pathogens.
•
The lancing device is suitable for self-testing. Do not share the lancing aid or the lancet needles with
others or amongst various patients (risk of infection!).
•
Use a new, sterile lancet needle for each blood sample (for single use only).
General notes
Warning
Do not use the device in the vicinity of strong electromagnetic fields and keep it away from radio
systems or mobile telephones.
Measuring the blood glucose content
Warning
•
The measurements taken by you are for your information only – they are no substitute for a medical
examination! Regularly consult your GP regarding your measured values. Do not alter the procedures
prescribed by your GP.
•
Despite the simple usage of the Beurer GL44 monitor for self-monitoring of blood glucose levels, you
may possibly need to obtain instructions for using the system from your healthcare professional (for
example, your GP, chemist or diabetes consultant). Only proper use will guarantee exact measure-
ments.
•
A lack of water, high fluid loss, for example perspiration, frequent passing of water, severe hypoten-
sion (low blood pressure), shock or hyperosmolar hyperglycaemic non-ketotic coma may lead to
incorrect measured results.
•
An excessively high or low hematocrit value (proportion of red blood cells) may lead to incorrect
measurements. In the event of a very high hematocrit value (above 55%), the displayed blood glu-
cose value may be too low; in the event of a very low hematocrit value (below 30%), it may be too
high. Please consult your GP if you do not know your hematocrit value.

Beurer GL44 mg/dL 9
•
Do not use the test strips to measure blood glucose values on newborns.
•
Do not use NaF or potassium oxalate anticoagulants to prepare for venous blood samples.
•
Do not test any severely ill patients using this device.
•
Lipemia eects: High blood triglyceride values of up to 1000 mg/dL hardly influence the results.
However, triglyceride values above this level may aect the blood glucose test.
•
High blood cholesterol values of up to 500 mg/dL hardly influence the results. However, cholesterol
values above this level may aect the blood glucose test.
•
Use fresh capillary whole blood only. Do not use serum or plasma.
•
Use capillary blood without squeezing the penetration area. If the area is squeezed, the blood is di-
luted with tissue fluid and this may lead to an incorrect measuring result.
•
Do not use the test strips above an altitude of 3000 m.
•
Very high levels of humidity may influence the test results. Relative humidity of more than 90% may
lead to inexact results.
Note
•
The Beurer GL44 mg/dL measuring system is intended to measure capillary whole blood.
Storage and maintenance
Warning
•
Store the blood glucose monitor and its accessories out of the reach of small children and pets.
Small parts, such as lancet needles, parts of the lancing device, batteries or test strips may be life-
threatening when swallowed. If swallowed, immediately seek medical attention.
•
The test strip box contains desiccant, which may irritate the skin or eyes when inhaled or swallowed.
Keep the box out of the reach of children.
The blood glucose monitor is made from precision and electronic components. The accuracy of the
measurements and service life of the device depend on its careful handling:
•
Protect the device and its accessories from impacts, humidity, dirt, strong temperature fluctuations
and direct sunlight. Do not store the device, test strips and control solution in your vehicle, in the
bathroom or in a cooling appliance!
•
Do not drop the device.

10 Beurer GL44 mg/dL
Batteries/Saving measured values
Warning
•
Keep batteries out of the reach of children. Children may put batteries in their mouth and swallow
them. This may severely damage their health. If aected, immediately seek medical attention!
•
Normal batteries must not be charged, heated or thrown into an open fire (risk of explosion!).
Important
•
Do not disassemble or short-circuit the batteries.
•
Always replace all batteries at the same time and use batteries of the same type.
•
Leaking batteries may damage the device. If you do not intend to use the device for longer periods,
remove the batteries from the battery compartment.
Attention!
•
Leaked or damaged batteries may burn the skin. In this case, use suitable protective gloves.
Note
•
The stored blood glucose values are retained when the batteries are replaced. If applicable, the date
and time must be reset after replacing the batteries.
•
Use lithium-ion batteries only.
Repairs
Note
•
Do not open the device. Failure to comply will result in voiding of the warranty.
•
Do not repair the device. Faultless functionality can no longer be guaranteed in this case.
•
Do not dismantle the lancing device into individual parts, except in the steps described in these in-
structions.
•
Please contact our customer service for repairs.

Beurer GL44 mg/dL 11
Disposal
Warning
•
It is essential to comply with the generally applicable safety precautions for handling blood when
disposing of materials of the blood glucose monitor. Dispose of all blood samples and materials
with which you or your patients come into contact correctly in order to prevent injury and infection
of other persons.
•
After use, dispose of test strips and lancets in a puncture-proof container.
Note
Batteries must not be disposed of with the household waste. As a consumer, you are required by
law to recycle used batteries. You can recycle your old batteries at public collection points in your
community or wherever batteries of this type are sold.
The codes below are printed on batteries containing harmful substances:
•
Pb = Battery contains lead,
•
Cd = Battery contains cadmium,
•
Hg = Battery contains mercury.
For environmental reasons, do not dispose of the device with the household waste at the end
of its service life. Please dispose of the device in accordance with EC Directive 2002/96/EC –
WEEE (Waste Electrical and Electronic Equipment). If you have any questions, please contact
the local authorities responsible for waste disposal.

12 Beurer GL44 mg/dL
3 description of units and accessories
3.1 Blood glucose monitor
Front
1 Receptacle for test strips, illuminated
2 Display
3 Highlight button
4 On/O button
5 PC port
6 “+ –” rocker switch
Rear
1 Battery compartment
(bottom side)
2 Reset button
3.2 Lancing aid and lancet needles
1 Cap
2 AST CAP
3 Protective lancet disc
4 Sterile lancet needles
5 Lancet holder
6 Safety switch
7 Trigger
8 Tensioning device
1
4
2
3
5
6
reset
CR2032
CR2032
1
2
12
3
4
5
7
8
6

Beurer GL44 mg/dL 13
3.3 Display symbols
1 Date
2 Symbols for highlighting measurements
3 Measured value display, HI, LO display, average
blood glucose value, Err
4 Blood droplet symbol
5 Speaker symbol
6 Hand symbol
7 Test strip symbol
8 Blood glucose unit mmol/L – not functional
9 Blood glucose unit mg/dL
10 Replace battery symbol
11 Memory symbol
12 Temperature symbol
13 Time
Note
The blood glucose monitor is supplied with the following basic settings:
•
Blood glucose unit: mg/dL
•
Acoustic signal on
•
Backlighting on
1
2
3
4
5
68
9
10
11
12
13
7

14 Beurer GL44 mg/dL
3.4 Test strips
Front Rear
3
2
1
1 Gap for blood input
2 Handle
3 Contacts
You can identify the rear by the contact tracks.
Insert the test strip into the device so
that the contacts are pointing inside
the slot.
Please ensure that the front of the test
strip is facing you.
Note
Carefully read the following information on handling and storing your test strips. Please observe all
notes to ensure that the test strips supply accurate measured results.
Warning
Use each test strip only once and for one patient only!
Handling test strips
Note
•
Immediately securely close the test strip box after taking out a test strip.
•
Do not use the test strips if they have expired. The use of expired test strips may lead to incorrect
measurements. The expiry date is printed on the box next to the hourglass symbol .
•
Test strips expire three months after the box is opened. Make a note of the expiry date (opening date
+ 3 months ) on the label. The shelf life is limited to the expiry date (see date next to the hourglass
symbol ).

Beurer GL44 mg/dL 15
•
Do not use the test strips if one of the expiry dates has passed ( / ).
•
You can touch the test strip at any point with clean, dry hands.
•
Use the test strip for measurement immediately after removing it from the box.
•
Do not bend, cut or otherwise modify the test strips.
•
Do not use test strips that have come into contact with fluids.
Storing test strips
Note
•
Keep the test strips in a cool, dry place above +2 °C and below +30 °C. Do not expose the test strips
to direct sunlight or heat. Do not store in your vehicle, in the bathroom or in a cooling appliance.
•
Permitted relative air humidity below 90%.
•
Keep the test strips in the original box only – never use other containers.
4 initial use and basic settinGs
4.1 Removing the battery insulation strips, replacing the batteries
Note
•
Two batteries are included in the deliv-
ery scope of the blood glucose monitor.
These have already been inserted into
the battery compartment.
•
Remove the insulation strip before initial
use.
1
Remove the battery compartment lid on the bottom side of the device.
2
Remove all batteries when replacing batteries. The device retains the date and time as long
as one battery is still inserted. If applicable, reset the date and time (see “Making and chang-
ing basic settings” on page 16).
3
Insert two new CR 2032 3 V batteries. Make sure that the batteries are inserted with the cor-
rect polarity, according to the label. Please observe the graphic in the battery compartment.
4
Subsequently close the battery compartment lid carefully.
Note
•
The batteries are almost empty if the replace battery symbol appears. Replace both batteries
as soon as possible.
•
If “
LP
” appears on the display, the battery power level is so low that no more measurements are
possible.
reset
CR2032
CR2032

16 Beurer GL44 mg/dL
4.2 Making and changing basic settings
1
Remove the batteries and reinsert them. Alternatively, press the “+” button
and the On/O button for a minimum of five seconds.
An acoustic signal sounds.
The year display flashes.
2
Setting the date and time
Note
•
You must set the date and time. Otherwise, you will not be able to save your measured values
correctly with a date and time to retrieve them later.
•
The time is displayed in the 24-hour format.
Set the year (calendar to 2099) by pressing the “+” or “–” button. Confirm by pressing the On/
O button [4].
The day display flashes.
Proceed as described above for the month, day, hour and minute.
“” and “ ” will be displayed. The background of the display is simultaneously illumi-
nated for a few seconds.
3
Switch backlighting on/o
To switch the blue backlighting o, press the “+” or “–” button.
“” and “ ” will be displayed. Confirm by pressing the On/O button [4].
“
”, “ ” and the speaker symbol are displayed.
4
Switching the acoustic signal on/o
To switch the acoustic signal o, press the “+” or “–” button.
“
” and “ ” is displayed.
The speaker symbol is no longer shown in the display.
Confirm by pressing the On/O button [4].
“
Mem
” and “ ” are displayed.
5
Deleting stored values
Proceed as follows to delete stored values:
•
Press the
“+”
or
“–”
button. “Mem” and “ ” are displayed
•
Confirm by pressing the On/O button
[4]
. “Mem” and “ ” flash in the display.
•
To irreversibly delete your values, press the On/O button again to confirm. “Mem”, “ ” and
“ ” are displayed.
If you do not wish to delete your values, press the “+” or “–” button. “
Mem
” and “ ” are dis-
played again. Confirm by pressing the On/O button.
6
The blood glucose monitor is now ready for operation

Beurer GL44 mg/dL 17
5 measurinG blood Glucose values
Warning
If you have dropped the lancing aid with an inserted lancet needle, carefully pick it up and dispose
of the lancet.
Important
•
Use the lancing aid only with lancet needles by the same manufacturer. The use of other lancet nee-
dles may impede the functionality of the lancing aid.
•
If you are using a third-party lancing aid, please read the respective Instructions for Use.
5.1 Preparing to take a blood sample
1
Choose a part of the body from which to take a blood sample. The lancing aid is intended
for taking blood samples from the fingertip or other body parts such as the palm of the hand,
forearm or upper arm. We recommend taking blood samples from the fingertip. To make the
procedure as painless as possible, do not take samples directly from the centre of the finger-
tip, but slightly to either side.
Warning
•
In the event of suspected hypoglycaemia: take blood from the fingertip only.
Reason: changes to the blood glucose level can be determined quickly in blood samples taken
from the fingertip.
•
Blood samples from the fingertip and samples taken from another body part (AST) may lead
to completely dierent measured results. It is essential to seek medical advice before taking
measurements from other body parts.
2
Prepare the following items: blood glucose monitor, test strip box, lancing aid, sterile lancet
needle. You will also need the AST cap for measurements at other body parts.
3
Wash your hands with soap and warm water before taking a blood sample. This not only en-
sures optimal hygiene but also encourages good blood circulation at the puncture area on the
finger. Carefully dry your hands. Also ensure that the puncture area is hygienically clean when
taking blood samples from other body parts (AST).
Warning
If you have used alcohol for cleaning, ensure that the area has fully dried prior to measuring.

18 Beurer GL44 mg/dL
5.2 Taking a blood sample
Warning
•
Change the puncture area for each measurement, e.g. a dierent finger or the other hand. Repeat-
edly using the same area may cause inflammation, numbness or scarring.
•
Without the cap, there is a danger of injury from the exposed lancet.
•
Do not use the AST cap to take blood samples from the finger.
•
Do not squeeze your finger to obtain a larger drop of blood. If squeezed, the blood is diluted with
tissue fluid and this may lead to an incorrect measuring result.
•
Please note that insucient blood circulation at the puncture area, e.g. caused by cold temperatures
or illness, may lead to incorrect results.
Important
Do not apply any blood samples or control solutions to the test strips before placing these in the
measuring device.
1Remove the cap from the lancing device.
2
Place a sterile lancet needle into the lancing aid and secure the lancet.
3
Rotate the lancet to remove the protective disc while holding the shaft
of the lancet. Keep the protective disc to safely dispose of the used
lancet needle after taking a blood sample.
4
Use various caps depending on the area from which you take the
sample:
Fingertip: Cap
Other body parts: AST cap (transparent)
Place the selected cap on the lancing device.

Beurer GL44 mg/dL 19
5Setting the penetration depth
You can set seven dierent penetration depths on the lancing de-
vice. The penetration depth is displayed by the markings in the cap.
•
soft or thin skin
•
normal skin
•
thick or callous skin
Turn the moving upper part of the cap until the desired penetration
depth is displayed.
Note
When using the AST cap, penetration depth does not need to be set.
6Pull the tensioning device back until it audibly engages. Release the
tensioning device. This automatically snaps back into the default po-
sition. The lancing device is now ready for use.
7Put the already prepared lancing aid to one side and prepare the device for measurement.
8Take a test strip from the box and immediately close it again.
9Hold the blood glucose monitor so that the display is facing you.
10
Firmly insert a test strip into the device with the contacts first. Please
make sure that the front is facing you. You can touch the test strip at
any point with clean, dry hands.
Use the test strip within three minutes of taking it from the box.
11
The device automatically switches on and shows the start display. The device is ready for
measurement as soon as the hand and the droplet symbol flash.

20 Beurer GL44 mg/dL
12 You may now use the lancing aid to take a blood sample. Please en-
sure that the blood remains a droplet and is not spread. Immediately
use the blood droplet to take a measurement.
Blood sample from the fingertip
The best penetration areas are the middle finger and
the ring finger. Firmly position the lancing aid slightly
to the side of the centre of the fingertip. Press the
trigger. Remove the lancing aid from the finger. A
round drop of blood of at least 0.6 microlitres (cor-
responds to approx. 1.4 mm, original size: ) must have formed.
Blood samples from other body parts (AST)
Find a soft area away from bones, without any visible blood vessels
and with as little hair as possible. Warm the penetration area to en-
hance circulation by gently massaging the area. Press and hold the
lancing aid against the penetration area for a few seconds and sub-
sequently press the trigger.
Continue to hold the lancing aid against the skin until a round drop
of blood has formed under the cap. Maintain the pressure until the
drop of blood reaches a size of at least 0.6 microlitres (corresponds
to approx. 1.4 mm, original size: )
Carefully lift the lancing aid o the skin.
Note
Only take blood from other areas at the following times:
•
On an empty stomach (more than two hours after most recent meal).
•
At least two hours after administration of insulin.
•
At least two hours after physical activity.
Please also note the following:
•
If the blood glucose test results do not match how you feel, carry out another test using blood
from the fingertips.
•
DO NOT change your treatment purely on the basis of a measurement that was carried out
using blood taken from an alternative area. Carry out another test with blood from the finger-
tips in order to confirm the test result.
•
If you often fail to notice that you have a low blood glucose level, carry out a test using blood
from the fingertips.
13
If there is an insucient amount of blood, repeat steps 1 to 12 with a greater penetration depth.
Note
When using the AST cap, repeat measurement at dierent parts of the body.
Other manuals for GL44
1
Table of contents
Other Beurer Blood Glucose Meter manuals