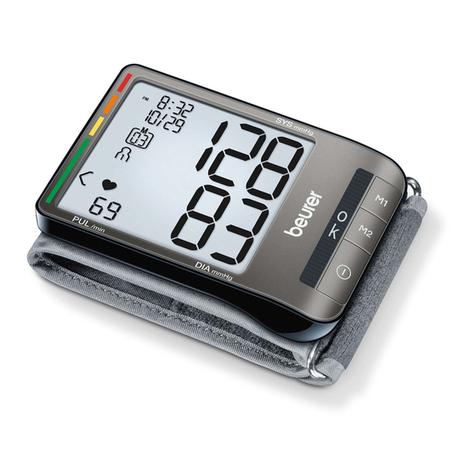
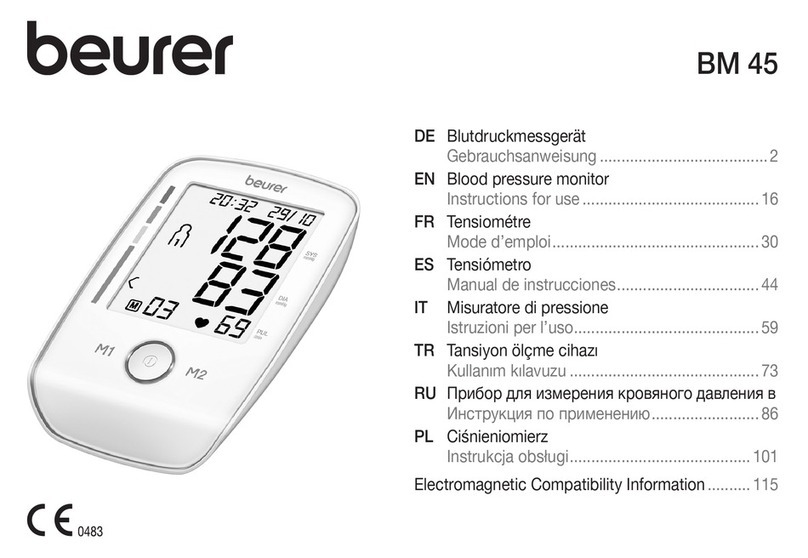
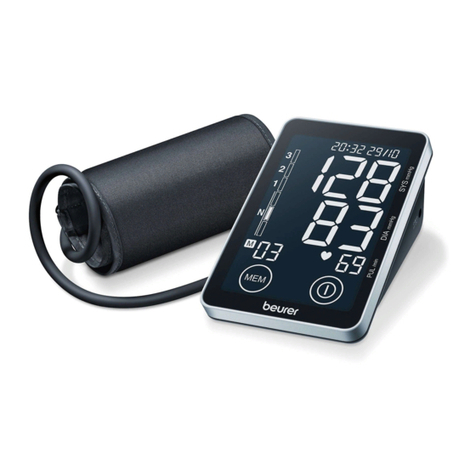
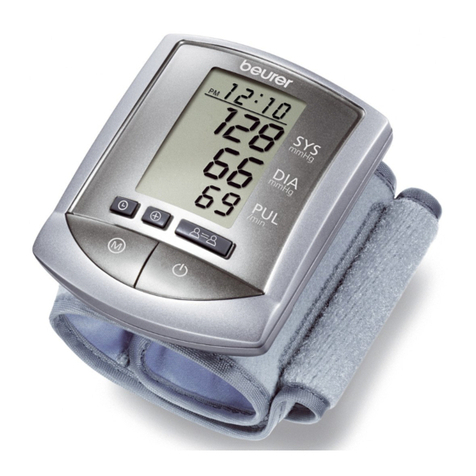
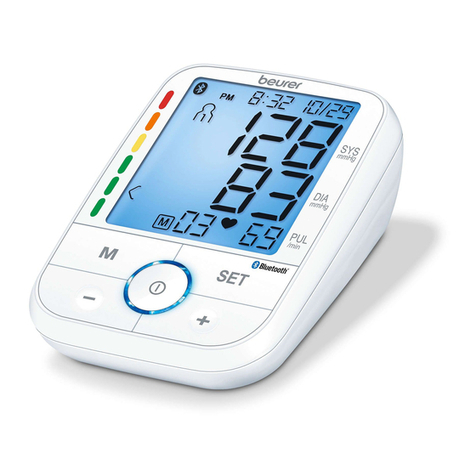
Beurer BC 54 User manual

EN Blood pressure monitor
Instructions for use
BC 54

2
ENGLISH
1. Included in delivery ....................................................3
2. Signs and symbols .....................................................3
3. Proper use ..................................................................4
4. Warnings and safety notes ........................................5
5. Device description......................................................7
6. Initial use ....................................................................8
7. Usage .....................................................................10
8. Cleaning and maintenance.....................................17
9. What if there are problems? ...................................17
10. Disposal..................................................................18
11. Technical specifications .........................................19
12. Warranty / Service ..................................................20
Table of contents
Read these instructions for use carefully and keep them for later
use, be sure to make them accessible to other users and observe
the information they contain.
Dear customer,
thank you for choosing a product from our range. Our name stands for high-quality, thoroughly tested products for
applications in the areas of heat, weight, blood pressure, body temperature, pulse, gentle therapy, massage, beauty
and air.
With kind regards,
your Beurer team

3
1. Included in delivery
Check that the exterior of the cardboard delivery
packaging is intact and make sure that all contents
are present. Before use, ensure that there is no visible
damage to the device or accessories and that all
packaging material has been removed. If you have any
doubts, do not use the device and contact your retailer or
the specified Customer Service address.
1 x Wrist blood pressure monitor with cu
1 x Instructions for use
1 x Quick Start Guide
1 x Storage box
2 x 1.5V AAA batteries LR03
2. Signs and symbols
The following symbols are used on the device, in these
instructions for use, on the packaging and on the type
plate for the device:
WARNING
Warning instruction indicating a risk of in-
jury or damage to health
CAUTION
Safety note indicating possible
damage to the device/accessory
Product information
Note on important information
Observe the instructions
Read the instructions before start-
ing work and/or operating devices or
machines
Isolation of applied parts
Type BF
Galvanically isolated application part (F
stands for “floating”); meets the require-
ments for leakage currents for type B
Direct current
The device is suitable for use with direct
current only
Disposal in accordance with the Waste
Electrical and Electronic Equipment EC
Directive – WEEE
Do not dispose of batteries containing
hazardous substances with household
waste
21
PAP
Dispose of packaging in an environmen-
tally friendly manner
Manufacturer

4
Temperature limit
The temperature limit values to which the
medical device can safely be exposed
are indicated.
Humidity, limit
Indicates the humidity range to which the
medical device can safely be exposed.
Atmospheric pressure, limit
Indicates the range of atmospheric pres-
sures to which the medical device can
be safely exposed
IP22
IP class
Device protected against foreign objects
≥ 12.5 mm and against water dripping
at an angle
S
N
Serial number
CE labelling
This product satisfies the requirements
of the applicable European and national
directives.
3. Proper use
Intended use
The blood pressure monitor is intended for the fully auto-
matic, non-invasive measurement of arterial blood pres-
sure and pulse values on the wrist.
Target group
It is designed for self-measurement by adults in the home
environment and is suitable for users whose wrist circum-
ference is within the range printed on the cu.
Indication/clinical benefits
The user can record their blood pressure and pulse val-
ues quickly and easily using the device. The recorded
values are classified according to internationally appli-
cable guidelines and evaluated graphically. Furthermore,
the device can detect any irregular heart beats that occur
during measurement and inform the user via a symbol
in the display. The device saves the recorded measure-
ments and can also output average values of previous
measurements.
The recorded data can provide healthcare service provid-
ers with support during the diagnosis and treatment of
blood pressure problems, and therefore plays a part in the
long-term monitoring of the user’s health.

5
4. Warnings and safety notes
Contraindications
•
D
o not use the blood pressure monitor on newborns,
children or pets.
•
P
eople with restricted physical, sensory or mental skills
should be supervised by a person responsible for their
safety and receive instructions from this person on how
to use the device.
•
I
f you have any of the following conditions, it is essen-
tial you consult your doctor before using the device:
cardiac arrhythmia, circulatory problems, diabetes,
pregnancy, pre-eclampsia, hypotension, chills, shak-
ing.
•
P
eople with pacemakers or other electrical implants
should consult their doctor before using the device.
•
T
he blood pressure monitor must not be used in con-
nection with a high-frequency surgical unit.
•
D
o not use the cu on people who have undergone a
mastectomy.
•
D
o not place the cu over wounds as this may cause
further injury.
•
M
ake sure that the cu is not placed on an arm in which
the arteries or veins are undergoing medical treatment,
e.g. intravascular access or intravascular therapy, or an
arteriovenous (AV) shunt.
General warnings
•
T
he measurements taken by you are for your informa-
tion only – they are no substitute for a medical examina-
tion! Discuss the measured values with your doctor and
never make your own medical decisions based on them
(e.g. regarding dosages of medicines).
•
T
he device is only intended for the purpose described
in these instructions for use. The manufacturer is not
liable for damage resulting from improper or incorrect
use.
•
U
sing the blood pressure monitor outside your home
environment or whilst on the move (e.g. whilst travelling
in a car, ambulance or helicopter, or whilst undertaking
physical activity such as playing sport) can influence
the measurement accuracy and cause incorrect meas-
urements.
•
C
ardiovascular diseases may lead to incorrect meas-
urements or have a detrimental eect on measurement
accuracy.
•
D
o not use the device at the same time as other medi-
cal electrical devices (ME equipment). This could lead
to a malfunction of the measuring device and/or an in-
accurate measurement.
•
D
o not use the device outside of the specified storage
and operating conditions. This could lead to incorrect
measurements.

6
• Only use the cus included in delivery or cus described
in these instructions for use for the device. Using another
cu may lead to measurement inaccuracies.
• Note that when inflating the cu, the functions of the limb
in question may be impaired.
• Do not perform measurements more frequently than nec-
essary. Due to the restriction of blood flow, some bruis-
ing may occur.
• During the blood pressure measurement, the blood circu-
lation must not be stopped for an unnecessarily long time.
If the device malfunctions remove the cu from the arm.
• Place the cu on your wrist only. Do not place the cu on
other parts of the body.
General precautions
•
T
he blood pressure monitor is made from precision and
electronic components. The accuracy of the measure-
ments and service life of the device depend on its care-
ful handling.
•
P
rotect the device from impacts, moisture, dirt, marked
temperature fluctuations and direct sunlight.
•
E
nsure the device is at room temperature before meas-
uring. If the measuring device has been stored close
to the maximum or minimum storage and transport
temperatures and is placed in an environment with a
temperature of 20°C, it is recommended that you wait
approx. 2 hours before using the measuring device.
•
D
o not drop the device.
•
D
o not use the device in the vicinity of strong electro-
magnetic fields and keep it away from radio systems or
mobile telephones.
•
W
e recommend that the batteries be removed if the
device will not be used for a prolonged period of time.
Measures for handling batteries
•
I
f your skin or eyes come into contact with battery
fluid, rinse the aected areas with water and seek
medical assistance.
•
C
hoking hazard! Small children may swallow
and choke on batteries. Therefore, store batteries
out of the reach of small children.
•
R
isk of explosion! Do not throw batteries into a
fire.
•
I
f a battery has leaked, put on protective gloves
and clean the battery compartment with a dry
cloth.
•
D
o not disassemble, open or crush the batteries.
•
O
bserve the plus (+) and minus (-) polarity signs.
•
P
rotect batteries from excessive heat.
•
D
o not charge or short-circuit batteries.
•
I
f the device is not to be used for a long period of
time, remove the batteries from the battery com-
partment.
7
•
U
se identical or equivalent battery types only.
•
A
lways replace all batteries at the same time.
• Do not use rechargeable batteries.
Notes on electromagnetic compatibility
• The device is suitable for use in all environments listed
in these instructions for use, including domestic envi-
ronments.
• The use of the device may be limited in the presence
of electromagnetic disturbances. This could result in
issues such as error messages or the failure of the dis-
play/device.
• Avoid using this device directly next to other devices
or stacked on top of other devices, as this could lead
to faulty operation. If, however, it is necessary to use
the device in the manner stated, this device as well as
the other devices must be monitored to ensure they are
working properly.
• The use of accessories other than those specified or
provided by the manufacturer of this device can lead to
an increase in electromagnetic emissions or a decrease
in the device’s electromagnetic immunity; this can re-
sult in faulty operation.
• Failure to comply with the above can impair the perfor-
mance of the device.
5. Device description
1. Display
2. START/STOP button
3. Memory button M1
4. Memory button M2
5. Wrist cu
6. Battery compartment lid
7. Risk indicator
3
1
2
4
5
6
7

8
Information on the display:
1. Risk indicator
2. Symbol for Bluetooth®transfer
3. Time and date
4. Systolic pressure
5. Diastolic pressure
6. Calculated pulse value
7. Cardiac arrhythmia symbol
Pulse symbol
8. Battery status indicator
9. Release air
10. User memory /
11. Memory space number/memory display
average value (A A ), morning (AM AM ), evening (PM PM )
1 2
3
4
5
6
7
8
9
10
11
1 2
3
4
5
6
7
8
9
10
11
6. Initial use
Inserting the batteries
• Remove the battery
compartment lid on
the left side of the
device.
• Insert two 1.5 V AAA
micro (alkaline type LR03) batteries. Make sure that the
batteries are inserted the correct way round. Do not use
rechargeable batteries.
•
C
lose the battery compartment lid again carefully.
Now set the date and time as described below.
If the battery change symbol is flashing and
4
appears, no further measurements are possible and you
must replace all batteries. Once the batteries have been
removed from the device, the date and time must be set
again. Any saved measured values are retained.
Making settings
You must make sure that the device has the correct set-
tings before use in order to be able to make full use of
all functions. Only by doing so can your measurements
with associated date and time be saved and accessed
later by you.

9
There are two dierent ways to access the menu
from which you can adjust the settings:
• Before initial use and after each time you replace
the battery:
When inserting batteries into the device, you will
be taken to the relevant menu automatically.
• If the batteries have already been inserted:
Press and hold the START/STOP button on the
device when switched o for approx. 5 seconds.
In this menu you can adjust the following settings in suc-
cession:
Hour
format ➔Date ➔Time ➔Bluetooth
®
It is essential to set the date and time. Otherwise, you will
not be able to save your measured values correctly with a
date and time and access them again later.
Hour format
The hour format now flashes on the
display.
•
S
elect the desired hour format us-
ing the memory button M1 or M2
and confirm with the START/STOP
button .
Date
The year flashes on the display.
•
S
elect the desired year using the
memory button M1 or M2 and con-
firm with the START/STOP button
.
The month flashes on the display.
•
S
elect the desired month using the
memory button M1 or M2 and con-
firm with the START/STOP button
.
The day flashes on the display.
•
S
elect the desired day using the
memory button M1 or M2 and con-
firm with the START/STOP button
.
If the hour format is set as , the day/month
display sequence is reversed.

10
Time
The hours flash on the display.
•
S
elect the desired hour using the
memory button M1 or M2 and con-
firm with the START/STOP button
.
The minutes flash on the display.
•
S
elect the desired minute using
the memory button M1 or M2 and
confirm with the START/STOP
button .
Bluetooth®
The Bluetooth
®
symbol is shown in the display.
•
U
se the memory button M1 or M2 to select
whether automatic Bluetooth
®
data transfer is
activated (Bluetooth
®
symbol is displayed) or de-
activated (Bluetooth
®
symbol is not shown) and
confirm with the START/STOP button .
Bluetooth
®
transfers will reduce the battery life.
7. Usage
General rules when measuring blood pressure
yourself
•
I
n order to generate as informative a profile of the
progression of your blood pressure as possible and
ensure that the measured values can be compared,
you should measure your blood pressure regularly
and always at the same times of day. It is recom-
mended that you measure your blood pressure
twice a day: once in the morning after getting up
and once in the evening.
•
Y
ou should always carry out the measurement when
you are suciently physically rested. You should
therefore avoid taking measurements during stress-
ful periods.
•
D
o not take a measurement within 30 minutes of
eating, drinking, smoking or exercising.
•
B
efore the initial blood pressure measurement,
make sure always to rest for about 5 minutes.
•
F
urthermore, if you want to take several measure-
ments in succession, make sure always to wait for
at least 1 minute between the individual measure-
ments.
•
R
epeat the measurement if you are unsure of the
measured value.

11
Attaching the cu
•
F
undamentally, blood pressure can be measured on
both arms. Certain deviations between the measured
blood pressure on the right arm and left arm are due
to physiological causes and completely normal. You
should always perform the measurement on the arm
with the highest blood pressure values. Before starting
self-measurement, consult your doctor in this regard.
From this point on, always take measurements on the
same arm.
•
T
he device may only be operated with the cu at-
tached when supplied. Before using the device, the
user should check the fit of the cu and, in doing so,
ensure that their wrist circumference is within the range
printed on the cu.
•
U
ncover your wrist. Ensure that the circulation of the
arm is not hindered by tight clothing or similar.
•
N
ow place the cu on the wrist so that the palm of your
hand and the device display are facing upwards.
•
P
osition the cu so that there is a distance of 1.0 –
1.5cm between it and the heel of your hand.
•
N
ow fasten the cu tightly around your wrist using the
hook-and-loop fastener. Make sure that it is tight but
that it does not cut into your wrist.
Adopting the correct posture
•
T
o carry out a blood pressure measurement, make sure
you are sitting upright and comfortably. Lean back and
place your arm on a surface. Do not cross your legs.
Place your feet next to each other flat on the floor.
•
A
lways make sure that the device is at heart level dur-
ing the measurement. Otherwise significant measure-
ment deviations can occur due to
physiological causes. To do so,
place your elbow on a table to sup-
port your arm. In order to make the
measurement even more comforta-
ble for you, you can place your
lower arm on a suitable object (e.g. the storage box).
•
R
elax your arm and the palm of your hand.
•
T
o avoid distorting the measurement, you should re-
main as still as possible during the measurement and
not speak.
1 2 3
1cm

12
Selecting the user
You have 2 memories, each with 60 memory spaces, to
enable the separate storage of measurements for 2 dif-
ferent people.
To select the corresponding user memory, press the M1
memory button (for user ) or M2 (for user ) on the
switched-o device. Confirm your selection by pressing
the START/STOP button .
Performing the blood pressure measurement
As described above, attach the cu and adopt the pos-
ture in which you want to perform the measurement.
• Press the START/STOP button to
start the blood pressure monitor. All
displays will illuminate briefly.
The blood pressure monitor will begin
the measurement automatically after 5
seconds.
The cu automatically inflates. The
measurement itself is taken during the inflation phase.
As soon as a pulse is found, the pulse symbol is dis-
played.
You can cancel the measurement at any time by
pressing the START/STOP button .
• The systolic pressure, diastolic pres-
sure and pulse rate measurements
are displayed.
• appears if the measurement could
not be performed properly. Observe
the chapter „9. What if there are prob-
lems?“ in these instructions for use and repeat the
measurement.
• Press the START/STOP button to switch
o the blood pressure monitor. The measure-
ment is then stored in the selected user memory.
If Bluetooth®data transfer is activated, data is trans-
ferred after pressing the START/STOP button .
The Bluetooth®symbol flashes on the dis-
play. The blood pressure monitor now attempts
to connect to the app for approx. 30 seconds.
The Bluetooth®symbol stops flashing as soon as a
connection is established. All measurement data is au-
tomatically transferred to the app. Once the data has
been successfully transferred, the device switches o.
• If a connection to the app cannot be established after
30seconds, the Bluetooth®symbol goes out and the
1 2
3
4
5
6
7
8
9
10
11

13
blood pressure monitor switches off automatically after
5 seconds.
• If you forget to turn o the device, it will switch o au-
tomatically. In this case too, the value is stored in the
selected or most recently used user memory.
Evaluating the results
General information about blood pressure
• Blood pressure is the force with which the bloodstream
presses against the arterial walls. Arterial blood pressure
constantly changes in the course of a cardiac cycle.
•
B
lood pressure is always stated in the form of two val-
ues:
– The highest pressure in the cycle is called systolic
blood pressure. This arises when the heart muscle
contracts and blood is pumped into the blood ves-
sels.
– The lowest is diastolic blood pressure, which is
when the heart muscle has completely stretched
back out and the heart fills with blood.
•
F
luctuations in blood pressure are normal. Even dur-
ing repeat measurements, considerable dierences
between the measured values may occur. One-o or
irregular measurements therefore do not provide reli-
able information about the actual blood pressure. Reli-
able assessment is only possible when you perform the
measurement regularly under comparable conditions.
Risk indicator
The World Health Organization (WHO) has defined the in-
ternationally recognised classification for the evaluation of
measured blood pressure values listed in the table below:
Measured blood
pressure value range Classification
Colour of
the risk
indicator
Systole
(in mmHg)
Diastole
(in mmHg)
≥ 180 ≥ 110 High blood pressure
stage 3 (severe) Red
160 – 179 100 – 109 High blood pressure
stage 2 (moderate) Orange
140 – 159 90 – 99 High blood pressure
stage 1 (mild) Yellow
130 – 139 85 – 89 High normal Green
120 – 129 80 – 84 Normal Green
< 120 < 80 Optimal Green
Source: WHO, 1999 (World Health Organization)
The risk indicator (the arrow in the display and the as-
sociated scale on the device) shows which category the
recorded blood pressure values fall into. If the measured
values are in two dierent classifications (e.g. systole in
the high normal category and diastole in the normal cate-
gory), the risk indicator then always shows you the higher
category – “high normal” in the example described.

14
Please be aware that these standard values can only serve
as a general guideline, as the individual blood pressure
varies in dierent people and dierent age groups, etc.
Furthermore, it must be noted that measurements taken
yourself while at home are generally lower than those that
are taken by the doctor. For this reason, it is important
that you regularly consult your doctor for advice. Only
they are able to give you your personal target values for
controlled blood pressure – in particular if you receive
medicinal therapy.
Cardiac arrhythmia
This device can identify any cardiac rhythm disturbances
as part of the analysis of your recorded pulse signal dur-
ing blood pressure measurement. In this case, after the
measurement, the device will indicate any irregularities in
your pulse by displaying the symbol in the display.
This can be an indicator for arrhythmia. Arrhythmia is an
illness in which the heart rhythm is abnormal because of
flaws in the bioelectrical system that regulates the heart-
beat. The symptoms (skipped or premature heart beats,
pulse being slow or too fast) can be caused by factors
such as heart disease, age, physical disposition, excess
alcohol and tobacco, stress or lack of sleep. If the
symbol appears on the display after the measurement,
the measurement must be repeated as the measurement
accuracy may be impaired. To assess your blood pres-
sure, only use the results that have been recorded without
corresponding irregularities in your pulse. If the sym-
bol appears frequently, please consult your doctor. Only
they can establish the existence of an arrhythmia during a
checkup, using their means of diagnosis.
Saving, displaying and deleting measured values
User memory
The results of every successful measurement are
stored together with the date and time. The oldest
measurement is overwritten in the event of more than
60 measurements.
• To select the corresponding user memory, press
the M1 memory button (for user ) or M2 (for user
) on the switched-o device. Confirm your selec-
tion by pressing the START/STOP button .
•
If
Bluetooth®
is activated (the symbol flashes on
the display), the blood pressure monitor attempts to
connect to the app. The buttons are deactivated and
the
symbol ceases to flash as soon as a connec-
tion is established and the data is transferred.
If you press the memory button M1 or M2
in the meantime, the transfer is cancelled.
The symbol is no longer shown.

15
Average values
AA
is displayed.
The average value of all saved measured
values in this user memory is displayed.
• Press the memory button M1.
AMAM
is displayed.
The average value of the morning meas-
urements for the last 7 days is displayed
(morning: 5.00 a.m. – 9.00 a.m.).
• Press the memory button M1.
PMPM
is displayed.
The average value of the evening meas-
urements for the last 7 days is displayed
(evening: 6.00 p.m. – 8.00 p.m.).
Individual measured values
• If you press the memory button M1
again, the last individual measurement
is displayed (in this example, measure-
ment 03).
• If you press the memory button M1 once more, you
can view your individual measured values.
•
T
o switch the device o again, press the START/
STOP button .
You can exit the menu at any time by pressing the
START/STOP button .
Delete the measured values
• To erase a user's memory, first select the user mem-
ory to be erased by pressing the M1 or M2 memory
button on the o device and confirm your selection
by pressing the
START/STOP button .
• The average value of all measurements appears on
the display; in parallel,
AA
lights up.
• Press and hold down both memory buttons M1 and
M2 simultaneously for 5 seconds.
[L 00[L 00 appears on the display. All the val-
ues in the selected user memory have
now been deleted.

16
Transfer via Bluetooth®
It is also possible to transfer the measured values saved
on the device to your smartphone via Bluetooth®.
You will need the “beurer HealthManager” app for this.
This is available in the Apple App Store and from Google
Play.
System requirements for the app
“beurer HealthManager”:
• iOS ≥ 10.0, AndroidTM ≥ 5.0
• Bluetooth®≥ 4.0
List of compatible devices:
Proceed as follows to transfer values:
If Bluetooth®is activated in the settings menu, the data is
transferred automatically after the measurement.
The symbol appears in the top left of the display (see
chapter „6. Initial use“, section “Bluetooth®”).
When connecting for the first time, a randomly-gen-
erated six-digit PIN code is displayed on device, and
at the same time an input field appears on the smart-
phone in which you must enter this six-digit PIN code.
After successfully entering the code, the device will
be connected to your smartphone.
Step 1: BC 54
Activate Bluetooth®on your device (see
chapter „6. Initial use“, section
“Bluetooth®”).
Step 2: “beurer HealthManager” app
In the “beurer HealthManager” app, add
the BC 54 under “Settings/My devices”.
Step 3: BC 54
Take a measurement.

17
Step 4: BC 54:
Data transfer immediately
following measurements.
•
I
f Bluetooth®data
transfer has been ac-
tivated, data is trans-
ferred after having
confirmed the user
memory and pressing
the START/STOP but-
ton .
Step 4: BC 54:
Data transfer at a later
point:
• Go to memory mode
(chapter „7. Use“,sec-
tion „Saving, displaying
and deleting measured
values“). Select the
desired user memory.
The Bluetooth
®
transfer
starts automatically.
The “beurer HealthManager” app must be active to
allow data transfer.
If your smartphone has a protective cover, remove this
to ensure that there is no interference during the transfer.
Begin the data transfer in the “beurer HealthManager”
app.
We would explicitly draw attention to the fact that the
software to hand is not a medical product in accordance
with EU Directive 93/42/EEC.
The values displayed are purely for visualisation purposes
and must not be used as a basis for therapeutic treat-
ments. The software is not part of a diagnostic-medical
system.
8. Cleaning and maintenance
• Clean the device and cu carefully using a slightly
damp cloth only.
• Do not use any cleaning agents or solvents.
• Under no circumstances hold the device and cu under
water, as this can cause liquid to enter and damage the
device and cu.
• If you store the device and cu, do not place heavy
objects on the device and cu. Remove the batteries.
9. What if there are problems?
Error
message
Possible
cause
Solution
Unable to re-
cord a pulse.
Please wait one minute
and repeat the measu-
rement.
Ensure that you do not
speak or move during
the measurement.
You have mo-
ved or spoken
during the
measurement.

18
Error
message
Possible
cause
Solution
The cu was
not attached
correctly.
Please observe the notes
in chapter "7. Usage"
under the section "Atta-
ching the cu".
During a new measure-
ment, check whether the
cu can now be inflated
properly.
4
An error oc-
curred during
measurement.
Please wait one minute
and repeat the measu-
rement.
Ensure that you do not
speak or move during
the measurement.
4
The inflation
pressure is
higher than
300 mmHg or
the measured
blood pressure
is outside the
measuring
range.
4
The batteries
are almost
empty.
Insert new batteries into
the device.
Error
message
Possible
cause
Solution
7
The data could
not be sent via
Bluetooth
®
.
Proceed as described in
chapter „7. Usage“ under
the section
„Transfer via Blue-
tooth
®
“ into the manual
memory mode and try to
restart the data transfer.
8
A device error
has occurred.
Please repeat the mea-
surement after a pause
of one minute.
If the problems persist despite the proposed corrective
actions, please contact customer service.
10. Disposal
Repairing and disposing of the device
• Do not repair or adjust the device yourself. Proper op-
eration can no longer be guaranteed in this case.
• Do not open the device. Failure to comply will result in
voiding of the warranty.
• Repairs must only be carried out by Customer Services
or authorised suppliers. Before making a claim, please
check the batteries first and replace them if necessary.

19
• For environmental reasons, do not dispose of the de-
vice in the household waste at the end of its
useful life. Dispose of the unit at a suitable local
collection or recycling point. Dispose of the de-
vice in accordance with EC Directive – WEEE
(Waste Electrical and Electronic Equipment). If you
have any questions, please contact the local authorities
responsible for waste disposal.
Disposing of the batteries
• Batteries must not be disposed of with household
waste. They may contain toxic heavy metals and are
subject to special waste treatment.
•
T
he codes below are printed on
batteries containing harmful substances:
Pb = Battery contains lead,
Cd = Battery contains cadmium,
Hg = Battery contains mercury.
11. Technical specifications
Model no. BC54
Measurement
method
Oscillometric, non-invasive blood
pressure measurement on the wrist
Measurement range Cuff pressure 0-299 mmHg,
Systolic 60-230 mmHg,
Diastolic 40-130 mmHg,
Pulse 40-199 beats/minute
Display accuracy Systolic ±3 mmHg,
Diastolic ±3 mmHg,
Pulse ±5 % of the value shown
Measurement
inaccuracy
Max. permissible standard deviation
according to clinical testing:
Systolic 8 mmHg /
Diastolic 8 mmHg
Memory 2 x 60 memory spaces
Dimensions L 80.5 mm x W 69.5 mm x H 25 mm
Weight Approximately 116 g
(without batteries, with cuff)
Cuff size 135 to 215 mm
Permissible operat-
ing conditions
+5 °C to +40 °C, 15-90 % relative
humidity (non-condensing),
700-1060 hPa ambient pressure
Permissible storage
and transport
conditions
-20 °C to +60 °C,
≤ 93% relative humidity
(non-condensing)
Power supply 2 x 1.5V AAA batteries
Battery life For approx. 150 measurements, de-
pending on levels of blood pressure
and pump pressure
Software version A01

20
Data transfer 2402 MHz – 2480 MHz frequency
band
Transmission power max. 7 dBm
The blood pressure monitor uses Blue-
tooth
®
low energy technology
Compatible with Bluetooth
® ≥
4.0
smartphones/tablets
The serial number is located on the device or in the bat-
tery compartment.
Technical information is subject to change without notifi-
cation to allow for updates.
• This device is in line with European Standard
EN 60601-1-2 (In accordance with CISPR 11,
IEC 61000-4-2, IEC 61000-4-3 and IEC 61000-4-8)
and is subject to particular precautions with regard to
electromagnetic compatibility (EMC). Please note that
portable and mobile HF communication systems may
interfere with this unit.
• This device corresponds to the EU Medical Devices
Directive 93/42/EEC, the German Medical Devices Act
(Medizinproduktgesetz) and the standards EN 1060-1
(non-invasive sphygmomanometers, Part 1: General
requirements), EN 1060-3 (non-invasive sphygmoma-
nometers, Part3: Supplementary requirements for elec-
tro-mechanical blood pressure measuring systems)
and IEC 80601-2-30 (Medical electrical equipment –
Part 2-30: Particular requirements for the basic safety
and essential performance of automated non-invasive
sphygmomanometers).
• The accuracy of this blood pressure monitor has been
carefully checked. Calibration is not necessary.
• The device has been developed with regard to a long
useful life. The expected service life is 5 years.
• If using the device for commercial medical purposes,
it must be regularly tested for accuracy by appropriate
means. Precise instructions for checking accuracy may
be requested from the service address.
• We hereby confirm that this product complies with the
European RED Directive 2014/53/EU. The CE Declara-
tion of Conformity for this product can be found under:
www.beurer.com/web/we-landingpages/de/cedecla-
rationofconformity.php
12. Warranty / Service
Beurer GmbH, Söflinger Straße 218, 89077 Ulm, Ger-
many (hereinafter referred to as “Beurer”) provides a war-
ranty for this product, subject to the requirements below
and to the extent described as follows.
The warranty conditions below shall not affect the
seller’s statutory warranty obligations which ensue
from the sales agreement with the buyer.
The warranty shall apply without prejudice to any
mandatory statutory provisions on liability.
Other manuals for BC 54
2
Table of contents
Other Beurer Blood Pressure Monitor manuals

Beurer
Beurer BM 47 User manual

Beurer
Beurer BC 40 User manual

Beurer
Beurer BM 75 User manual

Beurer
Beurer BM 65 User manual

Beurer
Beurer BM 28 User manual

Beurer
Beurer BM 55 User manual

Beurer
Beurer BM 54 User manual

Beurer
Beurer BC 58 User manual

Beurer
Beurer BM 26 User manual

Beurer
Beurer BC 57 User manual

Beurer
Beurer BGL60 User manual

Beurer
Beurer BC 30 User manual

Beurer
Beurer BM 77 User manual

Beurer
Beurer BC 58 User manual

Beurer
Beurer BC 42 User manual

Beurer
Beurer BM19 User manual

Beurer
Beurer BM 26 User manual

Beurer
Beurer 800W Series User manual

Beurer
Beurer BM 27 User manual

Beurer
Beurer BM19 User manual