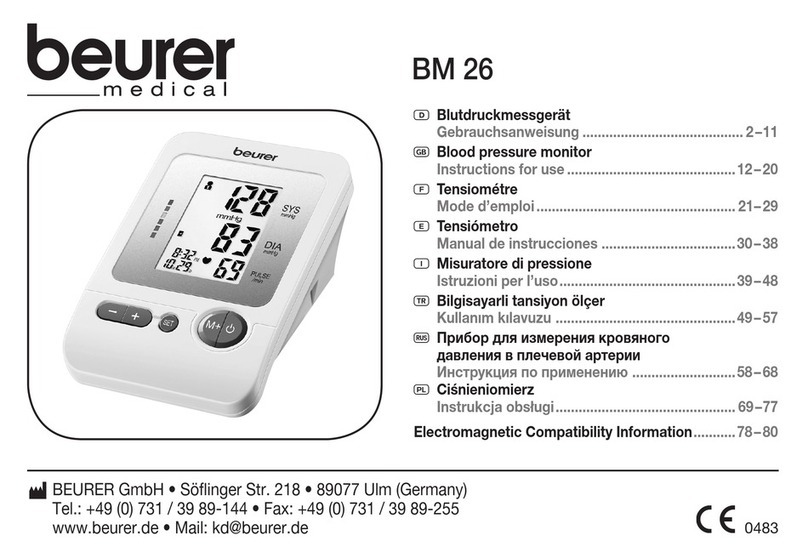
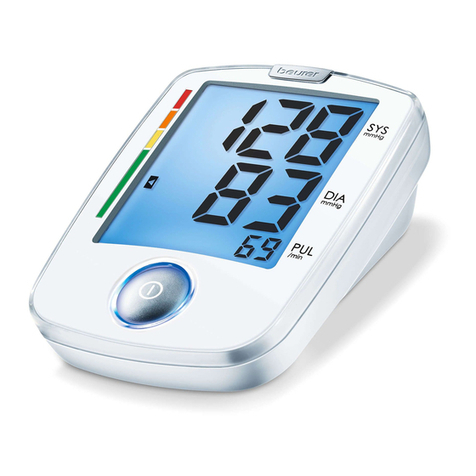
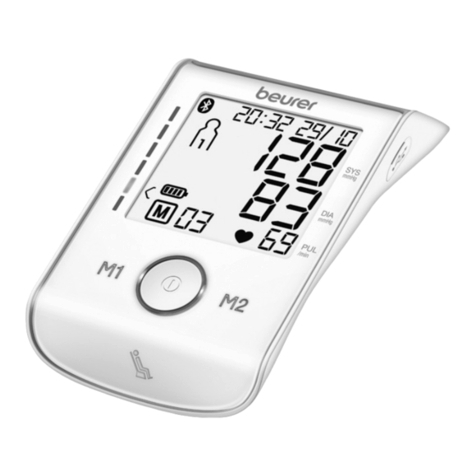
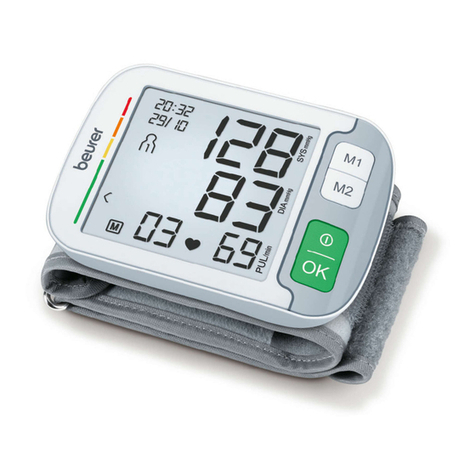
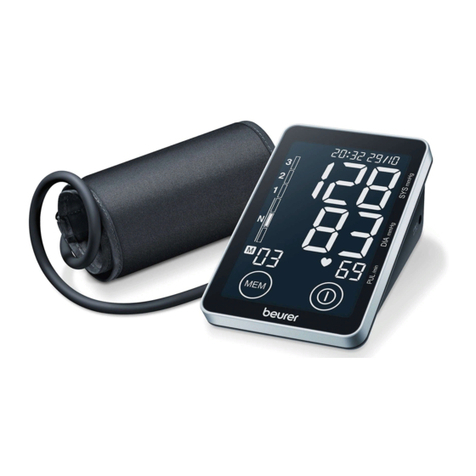
Beurer BM 28 User manual

ENGLISH Blood pressure monitor
Instructions for use............... 3
ESPANOL
Tensiómetro
Manual de instrucciones .... 21
FRANÇAIS Tensiomètre
Mode d’emploi..................... 42
BM 28
Distributed by/Distribuido por/
Distribué par :
Beurer North America LP
1 Oakwood Boulevard,
Suite 255
Hollywood, FL 33020, USA
www.beurer.com
Questions or Comments? Call our US-based
customer service toll free at 1-800-536-0366.
¿Preguntas o comentarios? Llame a nuestro servicio
al cliente en Estados Unidos gratis al teléfono
1-800-536-0366.
Questions ou commentaires? Appelez gratuitement
notre service clientèle situé aux États-Unis au
1-800-536-0366.
For Canada only/Solo para Canadá/
Pour le Canada seulement:
Manufacturer/Fabricante/
Fabricant :
Beurer GmbH
Söflinger Str. 218
89077 Ulm Germany

READ THIS MANUAL COMPLETELY AND CAREFULLY BEFORE USING THIS PRODUCT
Keep this manual in a safe location for future reference
LEA TODO ESTE MANUAL CON ATENCIÓN ANTES DE USAR ESTE PRODUCTO
Conserve este manual en un lugar seguro para consultarlo en el futuro
LISEZ CE MODE D’EMPLOI COMPLÈTEMENT ET ATTENTIVEMENT AVANT
D’UTILISER CE PRODUIT
Conservez ce manuel en lieu sûr pour y faire référence ultérieurement

3
SAVE THESE INSTRUCTIONS FOR FUTURE
REFERENCE
If the instruction manual is damaged or if you no
longer have the instruction manual in your
possession, please contact customer service. See
warranty for service contact.
Dear Valued Customer,
Thank you for choosing one of our products. Our name
stands for high-quality, thoroughly tested
products for application in the areas of heating, weight
management, blood pressure, body temperature, pulse,
gentle therapy, massage, and beauty.
Register your product today to receive further benefits:
•
added protection for your purchase
•
health and wellness tips
•
new product information
•
continual outstanding customer service and support.
Visit www.registerbeurer.com or contact customer service at
1-800-536-0366.
Please read these instructions for use carefully and keep
them for later use.
Make them accessible to other users and observe the
information they contain.
With kind regards,
Your Beurer team
ENGLISH
1. Important safety notes .................................................. 4
2. Getting to know your instrument................................... 8
3. Important Information.................................................... 8
4. Package Contents ......................................................... 8
5. Parts and Controls ........................................................ 9
6. Preparing for Measurement......................................... 10
7. Measuring blood pressure .......................................... 11
8. Evaluating results ........................................................ 13
9. Displaying and Deleting Measurements...................... 14
10. Care and Maintenance ................................................ 15
11. Troubleshooting Guide ................................................ 15
12. Specifications.............................................................. 16
13. Power Supply Unit....................................................... 17
14. FCC Compliance Information...................................... 17
15. Warranty ...................................................................... 18
Contents

4
1. Important safety notes
Signs and symbols
Whenever used, the following signs identify safety and
property damage messages and designate a level of hazard
or seriousness.
READ THIS ENTIRE MANUAL, THE SAFETY
SECTION AND ALL INSTRUCTIONS AND WARNINGS
COMPLETELY AND CAREFULLY BEFORE USING THIS
PRODUCT. FOLLOW ALL SAFETY INSTRUCTIONS AND
WARNINGS TO AVOID HAZARDOUS SITUATIONS AND
TO MAKE CORRECT USE OF THIS PRODUCT.
WARNING WARNING indicates a hazardous
situation which, if not avoided,
could result in death or serious
injury.
CAUTION CAUTION indicates a hazardous
situation which, if not avoided, may
result in minor or moderate injury.
NOTICE NOTICE addresses practices not
related to personal injury, such as
product and/or property damage.
WARNING – To reduce the risk of fire,
electric shock, or serious personal injury:
•
For consistency, always measure your blood pressure
at the same time each day.
•
Do not take a measurement within 30 minutes of eating,
drinking, smoking or exercising.
•
Before each measurement, relax for about five minutes.
•
When performing multiple measurements on
an individual, wait five minutes between each
measurement.
•
Repeat the measurement if you are unsure of the
results.
•
Measurements are for your information only – they are
no substitute for a medical examination. Discuss the
measurements with your doctor and never base any
medical decisions on them (e.g. medicines and their
administration).
•
Using the blood pressure monitor outside your home
environment or whilst on the move (e.g. whilst travelling
in a car, ambulance or helicopter, or whilst undertaking
physical activity such as playing sport) can influence
the measurement accuracy and cause incorrect
measurements.
•
Do not use the blood pressure monitor on newborns or
patients with pre-eclampsia. Consult your doctor before
using the blood pressure monitor during pregnancy.

5
•
Cardiovascular diseases may lead to incorrect
measurements or have a detrimental effect on
measurement accuracy. The same also applies to very
low blood pressure, diabetes, circulatory disorders and
arrhythmias as well as chills or shaking.
•
This device is not intended for use by people
(including children) with restricted physical, sensory or
mental skills or a lack of experience and/or a lack of
knowledge, unless they are supervised by a person who
is responsible for their safety or are instructed by such
a person in how to use the device. Supervise children
around the device to ensure they do not play with it.
•
The blood pressure monitor must not be used in
connection with a high-frequency surgical unit.
•
Only use the device on people who have the specified
upper arm measurement for the device.
•
Please note that when inflating, the functions of the
limb in question may be impaired.
•
During the blood pressure measurement, the blood
circulation must not be stopped for an unnecessarily
long time. If the device malfunctions remove the cuff
from the arm.
•
Avoid any mechanical restriction, compression or
bending of the cuff line.
•
Do not allow sustained pressure in the cuff or frequent
measurements. The resulting restriction of the blood
flow may cause injury.
•
Make sure that the cuff is not placed on an arm in which
the arteries or veins are undergoing medical treatment,
e.g. intravascular access or intravascular or therapy, or
an arteriovenous (AV) shunt.
•
Do not use the cuff on people who have undergone a
mastectomy.
•
Do not place the cuff over wounds as this may cause
further injury.
•
Place the cuff on your upper arm only. Do not place the
cuff on other parts of the body.
•
As soon as the batteries are empty the blood pressure
monitor loses the date and time.
•
To conserve the batteries, the blood pressure monitor
switches off automatically if you do not press any
buttons for 30 seconds.
•
The device is only intended for the purpose described
in these instructions for use. The manufacturer is not
liable for damage resulting from improper or careless
use.

6
CAUTION
•
The device should not be used when your arm has been
wounded/injuried or when a catheter has been inserted.
Such use may result in injury.
•
Remove any kind of upper arm jewelry or the like before
taking a measurement. This could cause bruises.
•
Do not place the arm cuff over heavy clothing (e.g. a
jacket or sweater sleeve) as the blood pressure monitor
will not be able to take a proper measurement and there
is an elevated danger of acquiring hematoma or skin
marks during the course of the measurement.
•
In case the cuff does not stop inflating, interrupt the
measurement by pressing the start/stop button and
open the cuff at once.
•
Do not disassemble the unit, it may result in injuries.
•
When applying the arm cuff, make sure there are no
wrinkles in the cuff. This could cause bruises.
•
Do not exert any kind of pressure on the hose during
measurement, e.g. laying your arms or any other object
on the hose. This could cause incorrect measurements.
•
Blood pressure measurements can lead to temporary
marks on the skin at the site of the cuff placement.
This is especially the case in high repetition rates, in
hypertonic patients and in patients with weak pulses.
In rare cases a mark may persist for a couple of days.
Please contact your physician about these specific
risks of cuff pressure in your specific case.
•
For hygienic reasons the cuff is intended only for the
use by one person.
•
Prolonged overinflation (cuff pressure exceeds 300
mmHg or maintained above 15mmHg for longer than 3
minutes) of the bladder may cause ecchymoma of your
arm.
Notice
•
The blood pressure monitor is made up of precision
electronic components. Accuracy of readings and the
instrument’s service life depend on careful handling.
Protect the unit against hard knocks (e.g. dropping the
unit), moisture, water, dirt, dust, chemicals, extreme hot
or cold temperatures, major temperature fluctuations,
direct exposure to sunlight and heat sources which
are too close (e.g. stoves, heating radiators). This
may damage the unit. The device must be stored
in the specified ambient conditions. Please see
section “10. Care and Maintenance” and section “12.
Specifications” for details.
•
Do not use any aggressive solvents, cleaning agents,
detergents or any other strong chemicals to clean the
device.
•
Never immerse and or spill water or any other liquid
onto the monitor or any components, otherwise liquid
will enter it and cause damage.

7
•
Do not wash the unit in a washing machine, dish
washer or tumble dryer.
•
Observe the local regulations for material disposal.
Dispose of the device, components and optional
accessories according to applicable local regulations.
Unlawful disposal may cause environmental pollution.
•
Never attempt to repair, open and/or disassemble the
unit (including arm cuff and optional accessory) or
adjust it yourself. This may damage the unit and impair
the functions. If you need to have the unit repaired,
please contact our customer service. Please see
warranty for service contact. Before submitting any
complaint, first check the batteries and replace them if
necessary.
•
Changes or modifications to the device will nullify the
user warranty.
•
Do not drop or insert any object into any opening or
hose. This may damage the unit.
•
Do not press the buttons with excessive force or with
pointed objects.
Battery Handling Safety Precautions
•
Use only the size and type of batteries specified.
•
Be sure to follow the correct polarity when installing the
batteries. Reversed batteries may cause damage to the
device.
•
Do not mix different types of batteries together (e.g.
Alkaline and Carbon-zinc or rechargeable batteries) or
old batteries with fresh ones. Always replace batteries
as a simultaneous set.
•
If the batteries in the device are depleted or the device
will not be used for a long period of time, remove the
batteries to prevent damage or injury from possible
battery leakage.
•
Do not try to recharge batteries not intended to be
recharged; they can overheat and rupture (follow
battery manufacturer’s directions.)
•
Do not dispose of batteries in fire, batteries may
explode or leak.
•
Clean the battery contacts and also those of the device
prior to battery installation.
•
Remove discharged batteries from the product and
dispose/recycle in compliance with all applicable laws.
•
Keep batteries away from children and pets. Batteries
may be harmful if swallowed. Should a child or
pet swallow a battery, seek medical assistance
immediately.
•
Batteries can contain toxins that are harmful to the
environment. Always dispose of batteries in accordance
with applicable local regulations.

2. Getting to know your instrument
This blood pressure monitor performs non-invasive
measurement and monitoring of adult arterial blood
pressure. You can use it to measure your blood pressure
quickly and easily, store the results, and display stored
readings and their average. This device also features an
irregular heartbeat indicator, with values classified and
graphically evaluated according to industry guidelines.
This blood pressure monitor also has a "resting indicator"
that shows whether you, and consequently your circulatory
system, are sufficiently at rest when the blood pressure
measurement is being taken, which helps ensure a more
precise indicator of your resting blood pressure.
3. Important Information
Signs and symbols
Whenever used, the following signs identify safety and
property damage messages and designate a level of hazard
or seriousness.
Caution
Note
Note on important information
Follow the instructions for use
Type BF applied part (cuff only)
Direct current
Storage/Transport
Permissible storage and transport
temperature and humidity
Operating Permissible operating temperature and
humidity
IP21 Protected against solid foreign objects
12.5 mm in diameter and larger, and
against vertically falling drops of water
S
N
Serial number
4. Package Contents
•
1 x Blood Pressure Monitor BM 28
•
1 x Upper Arm Cuff 8.7 in – 16.5 in (22 – 42 cm)
•
1 x Storage bag
•
4 x 1.5 V LR6 AA batteries
•
1 x Instruction Manual
8

5. Parts and Controls
1. Arm Cuff
2. Air Tube
3. Air Tube Connector
4. LCD Display
5. Air Tube Port
6. Risk Classification Scale
7. AC Adapter Port (AC Power Adapter Not Included)
8. -/+ Buttons
9. START/STOP button
10. Memory button M
11. SET Button
Information on the display:
1. Time and date
2. Systolic pressure
3. Diastolic pressure
4. Pulse Rate
5. Irregular Heartbeat
/Pulse Rate Icon
6. Deflation Icon
7. Memory Space
Number/Average ( ) /
Morning Reading( ) /
Evening Reading ( )
8. Low Battery Icon
9. Alarm Indicator
10. Risk Classification Indicator
11. User Number
12. Cuff Tightness Indicator
13. Resting Indicator
1
2
1
2
91011
8
6
5
4
2
13
7
1
2
1
5678
2
3
4
9
11
10
13
12
9

6. Preparing for Measurement
Inserting/changing batteries:
1. Remove the Battery Compartment
Cover from the rear of the device.
2. Insert four "AA" alkaline batteries
(included) according to the polarity
markings inside the compartment.
NOTE: Do not use rechargeable
batteries.
3. Reattach the Battery Compartment
Cover.
All LCD Display elements will briefly appear and "24h" will
flash. Set the date and time as described below. Any saved
measurements will be retained.
If the low battery indicator is permanently displayed,
you can no longer perform any measurements and must
replace the batteries. Once the batteries have been
removed from the device, the time must be set again.
Setting the hour format, date, and time:
If date and time are not set, stored measurements will not
have a valid timestamp associated with them.
NOTE: Press and hold the +or -Buttons to advance values
rapidly.
1. If "24h" is not flashing in the LCD Display, press and hold
the SET Button for five seconds.
2. Select an hour format (12 or 24 hour display) with the +/-
Buttons and press the SET Button to confirm.
3. The year flashes on the LCD Display. Set the year with
the +/- Buttons and press the SET Button to confirm.
4. The month flashes on the LCD Display. Set the month
with the +/- Buttons and press the SET Button to
confirm.
5. The day flashes on the LCD Display. Set the day with the
+/- Buttons and press the SET Button to confirm.
NOTE: If the hour format is set to 12h, the day/month
display sequence is reversed.
6. The hour flashes on the LCD Display. Set the hour with
the +/- Buttons and press the SET Button to confirm.
7. The minutes flash on the LCD Display. Set the minutes
with the +/- Buttons and press the SET Button to confirm
and exit.
Setting an Alarm:
You can set two separate alarm times to remind yourself to
take a measurement.
1. Press and hold both the +/- Buttons for five seconds.
2. Alarm 1 will appear in the LCD Display and "on" or
"off" will flash. Press the +or -Button to switch between
on and off; to confirm press the SET Button.
10

3. If alarm 1 is deactivated („off“), you automatically
switch to setting alarm 2 .
4. If alarm 1 was set to "on," the alarm time hour will
flash at the top of the LCD Display; use the + and -
Buttons to set the desired alarm hour and press SET to
confirm. The alarm minutes will flash; use the +and -
Buttons to set the desired alarm minutes value.
5. After Alarm 1 is set, the Alarm 2 will display
"on" or "off". Set Alarm 2 in the same manner as
described above
AC Adapter Operation:
You can also operate this device with an AC Power Adapter
(not included). You MUST remove the batteries before
powering this unit with an AC Adapter. Only use an AC
Power Adapter with specifications according to section
“Power supply unit”.
1. Insert the round power plug from the AC Power Adapter
into the AC Adapter Jack on the right hand side of the
blood pressure monitor. Plug the AC Power Adapter into
a standard electrical outlet.
2. When finished using the device, unplug the AC Power
Adapter from the electrical outlet and disconnect it from
the blood pressure monitor. When you unplug the AC
Power Adapter, date and time settings will be lost but
saved measurements will remain.
7. Measuring blood pressure
The blood pressure monitor needs to be at room
temperature when measuring. Measurements can be
performed on either arm.
Positioning the Cuff:
1. Place the cuff round your bare
left upper arm 1 - 1½ in (2-3
cm) above the bend of the
elbow and above the artery,
with the Air Tube in line with the
center of the palm. Ensure
blood circulation is not
restricted by tight clothing or
other objects.
2. Fasten the cuff, making sure it is
not too tight around your arm.
You should be able to fit two
fingers under the cuff after it is
in place.
3. Make sure the index mark ( ) is
between the MIN and MAX
markings.
4. Insert the Air Tube Connector into
the Air Tube Port.
11

CAUTION: Only use genuine Beurer cuffs with this device.
The included cuff is suitable for an arm circumference of 8.7
- 16.5 inches (22 to 42 cm). For arm circumferences outside
this range, contact customer service.
Blood pressure can vary between the right and left arm,
which may mean that the measured blood pressure values
are different. Always perform the measurement on the same
arm. If the values between the two arms are significantly
different, please consult your doctor to determine which
arm should be used for the measurement.
Correct Posture:
•
Rest for at least five minutes before each measurement.
•
Perform the measurement either sitting or lying down.
Always make sure that the cuff is level with your heart.
•
To perform a measurement, sit comfortably with your
arms and back supported. Do not cross your legs and
place your feet flat on the floor.
•
Keep still during the measurement and do not talk.
Performing a Measurement:
1. With the cuff attached properly and in a correct posture,
press the START/STOP Button . All LCD Display
elements will briefly display and measurement will
begin after about three seconds. If one of the alarms
are activated, that alarm icon will display. To cancel a
measurement at any time, press the START/STOP Button
.
2. The cuff automatically inflates. The cuff’s air pressure is
slowly released. If you already recognise a tendency for
high blood pressure, you should reinflate the cuff and
increase the cuff’s pressure again. As soon as a pulse is
found, the pulse symbol will be displayed.
3. The Cuff Tightness Indicator will display throughout
the measurement process as long as the cuff is tightened
properly. Otherwise, the icon will appear along with
"" and the measurement will stop.
4. As a measurement concludes, air pressure in the Cuff will
release. The pulse rate, systolic pressure, and diastolic
pressure will display. If an irregular heartbeat is detected,
the Irregular Heartbeat Indicator will also display.
5. " _" (where the blank space is a number 1-6) will appear
if the measurement was not performed properly. Refer
to the "Troubleshooting Guide" section for details about
specific error message numbers and then repeat the
measurement.
12

6. To select a desired user memory, press the SET Button
and then press the +/- Buttons until the desired user
memory icon appears in the LCD Display. Confirm by
pressing the START/STOP Button or just wait a
few seconds. Each user memory can store 30 sets of
measurements. If you do not select a user memory, the
measurement will be stored in the most recently-used
user memory.
7. Press the START/STOP Button to shut off the blood
pressure monitor. The measurement is now stored in
the selected user memory. The device will also shut off
automatically after about one minute.
8. Wait at least five minutes before taking another
measurement.
8. Evaluating results
Irregular Heartbeat:
This device can detect irregular heartbeat patterns
during measurement and will indicate them by displaying
the Irregular Heartbeat Icon when a measurement
concludes.
This could be an indicator for arrhythmia, a condition where
the heart rhythm is abnormal. These symptoms (omitted or
premature heartbeats, slow or excessively fast heart rate)
may be caused, among other things, by heart disease, age,
physical predisposition, excessive use of stimulants, stress,
or lack of sleep. Only your doctor can determine if you do
have arrhythmia.
Repeat the measurement if the Irregular Heartbeat Icon
displays after a measurement. Rest for at least five minutes
between measurements and do not talk or move during
measurement. If the icon appears often, contact your
doctor, since self-diagnosis and treatment based solely on
the test results may be dangerous. It is vital to follow your
doctor‘s instructions.
Risk Classification
In accordance with industry guidelines, measurements can
be classified and assessed by the table below. However,
these standard values are only a general guideline, since
individual blood pressure varies in different people and
different age groups, etc.
Hypertension
Category Systole
(in mmHg) Diastole
(in mmHg) Action
Grade 3: Severe
hypertension ≥180 ≥110 Seek medical
advice
Grade 2:
Moderate
hypertension 160–179 100–109 Seek medical
advice
13

Hypertension
Category Systole
(in mmHg) Diastole
(in mmHg) Action
Grade 1: Mild
hypertension 140–159 90–99
Have your doctor
check your
blood pressure
regularly
High normal 130– 139 85–89
Have your doctor
check your
blood pressure
regularly
Normal 120– 129 80–84 Continue
self-monitoring
Optimal <120 < 80 Continue
self-monitoring
It is important to consult your doctor regularly for advice.
Your doctor will tell you your individual values for normal
blood pressure as well as the value above which your blood
pressure is classified as dangerous.
The classification on the display and the scale on the unit
show which category the recorded blood pressure values
fall into. If the systolic and diastolic values fall into two
different categories, the WHO Classification Indicator on the
device always shows the higher category.
Resting Indicator:
The most common error made when measuring blood
pressure is taking the measurement when not at rest, which
means that the systolic and the diastolic blood pressures
are distorted. While measuring the blood pressure, this
device can determine if you are properly at rest. As long as
you are properly at rest, the
1
2
symbol is displayed and the
measurement can be recorded as a reliable resting blood
pressure value. Otherwise, the
1
2
symbol will display,
which indicates you were not sufficiently rested. If this is
the case, relax for at least five minutes and then repeat the
measurement. In some cases, nervousness or inner anxiety
may be the cause and cannot be cured by brief periods
of rest. Existing cardiac arrhythmias may also prevent a
stable blood pressure measurement. An unstable resting
blood pressure can have various causes, such as physical
or mental strain or distraction, speaking, or experiencing
cardiac arrhythmias during the measurement.
9. Displaying and Deleting
Measurements
User Memory:
Every successful measurement is stored along with its
date and time. If there are more than 30 measurements in
a particular user memory bank, the oldest measurement is
deleted. This device features four separate memory banks.
14

Press the Memory Button Mand select a user memory (1-4)
by pressing the MButton again.
Average Values:
•
Press the + Button; " " flashes on the display.
The average of all saved measurements in the
selected user memory is displayed.
•
Press the + Button again. " " flashes on the
display. The average value of the morning
measurements for the last seven days is
displayed (morning: 5:00 AM – 9:00 AM).
•
Press the + Button a third time. " " flashes
on the display. The average value of the
evening measurements for the last seven
days is displayed (evening: 6:00 PM – 10:00
PM).
Individual Measured Values:
•
Press the Memory Button again and the last
individual measurement is displayed.
•
To shut the device off, press the START/
STOP Button .
You can exit the menu at any time by pressing the START/
STOP Button .
Clearing Memory:
•
To clear one of the user memories, you must
first select it.
•
Start individual measurement access as
described above and select a user memory.
•
Press and hold both the Memory and SET
Buttons for five seconds. All values in the
selected user memory will be deleted.
10. Care and Maintenance
•
Clean the device and cuff with a slightly moistened cloth.
•
Do not use detergents or solvents.
•
Never immerse the device in water or other liquids.
•
When storing the device, make sure no heavy objects are
placed on top of it. Remove the batteries. Ensure the Air
Tube does not have any sharp kinks.
11. Troubleshooting Guide
In case of errors, " _" will appear in the LCD Display, where
"_" is a number 1-6. Error messages may appear if:
•
Pulse rate could not be measured ( )
•
Systolic or diastolic pressure could not be measured ( )
•
The cuff is fastened too tightly or loosely ( )
8:30 10/29
15

•
A measurement error occurred (
4
)
•
Air pressure is higher than 300 mmHg (
4
)
•
A system error occurred (
4
). If this error reoccurs,
contact Customer Service.
•
Batteries are almost depleted .
In such cases, repeat the measurement. Do not move or
speak. If necessary, replace the batteries.
12. Specifications
Type BM 28
Measurement
method Oscillometric, non-invasive blood
pressure measurement on the upper
arm
Measurement
range Cuff pressure 0-300 mmHg,
Systolic 50-280 mmHg,
Diastolic 30-200 mmHg,
Pulse 40-199 beats per minute
Display accuracy Pressure ±3 mmHg,
Pulse ±5%
Dimensions 5.3 in L x 4 in W x 2.4 in H
(134 mm L x 103 mm W x 60 mm H)
Weight 13 oz (367 g) with cuff, no batteries
Cuff size
8.7 - 16.5 in (22 - 42 cm)
Operating Range 50° F - 104° F (10° C - 40° C), 10 - 85%
relative humidity (non-condensing)
Storage Range -4° F - 131° F (-20° C - 55° C), 10 -
90% relative humidity
Power supply 4 x 1.5V AA batteries
Battery life Approx. 300 measurements
The serial number is located on the device or in the battery
compartment. These specifications are subject
to change without notice for purpose of improvement.
•
This unit is in line with European Standard EN 60601-1-2
(In accordance with CISPR 11, IEC 61000-3-2,
IEC 61000-3-3, IEC 61000-4-2, IEC 61000-4-3,
IEC 61000-4-4, IEC 61000-4-5, IEC 61000-4-6,
IEC 61000-4-8 and IEC 61000-4-11) and is subject to
particular precautions with regard to electromagnetic
compatibility (EMC). Please note that portable and mobile
HF communication systems may interfere with this unit.
•
This device is in line with the EU Medical Devices
Directive 93/42/EEC, the “Medizinproduktegesetz”
(German Medical Devices Act) and the standards EN
ISO 81060-1 (non-invasive sphygmomanometers, Part
1: Requirements and test methods), EN 1060-3 (non-
invasive sphygmomanometers, Part 3: Supplementary
16

requirements for electro-mechanical blood pressure
measuring systems) and IEC 80601-2-30 (Medical
electrical equipment – Part 2–30: Particular requirements
for the safety and essential performance of automated
noninvasive blood pressure monitors).
•
The accuracy of this blood pressure monitor has been
carefully checked and developed with regard to a long
useful life. If using the device for commercial medical
purposes, it must be regularly tested for accuracy by
appropriate means.
13. Power Supply Unit
Input 100– 240V, 50–60 Hz
Output
6V DC, 600 mA, only in connection with
this Beurer blood pressure monitor.
Protection This device is double insulated and
protected against short circuit and
overload by a primary fuse.
Make sure to take the batteries out of
the compartment before using the mains
part.
Polarity of the the DC voltage connection
Double insulated/equipment class 2
Enclosures and
Protective
Covers
Equipment enclosed to protect against
contact with live parts, and with parts
which can become live (finger, pin, hook
test).
The operator shall not contact the patient
and the output plug of AC mains part
simultaneously.
14. FCC Compliance Information
Upper Arm Blood Pressure Monitor BM 28
Responsible Party – U.S. Contact Information
Beurer North America LP
1 Oakwood Boulevard, Suite 255
Hollywood, FL 33020
United States
1-800-536-0366
info@beurer.com
FCC Compliance Statement
This device complies with Part 15 of the FCC Rules.
Operation is subject to the following two conditions:
(1) this device may not cause harmful interference, and
(2) this device must accept any interference received,
including interference that may cause undesired
operation.
17

Changes or modifications not expressly approved by the
party responsible for compliance could void the user’s
authority to operate the equipment.
NOTE: This equipment has been tested and found to
comply with the limits for a Class B digital device, pursuant
to part 15 of the FCC Rules. These limits are designed to
provide reasonable protection against harmful interference
in a residential installation. This equipment generates, uses
and can radiate radio frequency energy and, if not installed
and used in accordance with the instructions, may cause
harmful interference to radio communications. However,
there is no guarantee that interference will not occur in a
particular installation. If this equipment does cause harmful
interference to radio or television reception, which can be
determined by turning the equipment off and on, the user is
encouraged to try to correct the interference by one or more
of the following measures:
— Reorient or relocate the receiving antenna.
— Increase the separation between the equipment and
receiver.
— Connect the equipment into an outlet on a circuit
different from that to which the receiver is connected.
— Consult the dealer or an experienced radio/TV technician
for help.
15. Warranty
Limited Lifetime Warranty For Original Purchaser
Your Beurer Upper Arm Blood Pressure Monitor, model
BM 28, is warranted to be free from defects in materials
and workmanship for the life of the product under normal
conditions of intended use and service. This warranty
extends only to the original retail purchaser and does not
extend to retailers or subsequent owners.
We will, at our option, repair or replace the Beurer Upper
Arm Blood Pressure Monitor, model BM 28, without
additional charge, for any part or parts covered by these
written warranties. No refunds will be given. Repair or
replacement is our only responsibility and your only
remedy under this written warranty. If replacement parts
for defective materials are not available, Beurer reserves
the right to make product substitutions in lieu of repair or
replacement.
For warranty service contact our customer service
department at 1-800-536-0366 or at info@beurer.com
to provide a description of the problem. If the problem
is deemed to be within the scope of the limited lifetime
warranty, you will be asked to mail the product at your costs
in its original package with proof of purchase, your name,
address and phone number. If the problem is not deemed to
be within the scope of the limited lifetime warranty, we will
18

provide a quotation for repair respectively replacement and
return shipping fee.
This warranty does not cover damage caused by misuse
or abuse; accident; the attachment of unauthorized
accessory; alteration to the product; improper installation;
misapplication; lack of reasonable care with respect to the
product; unauthorized repairs or modifications; improper
use of electrical/power supply; old worn batteries; normal
wear; loss of power; dropped product; malfunction or
damage of an operating part as a result of failure to comply
with instructions for use or to provide manufacturer’s
recommended maintenance; transit damage; theft; neglect;
vandalism; or environmental conditions; loss of use during
the period the product is at a repair facility or otherwise
awaiting parts or repair; or any other conditions whatsoever
that are beyond the control of Beurer. This warranty is void
if the product is ever used in a commercial or business
environment. The maximum liability of Beurer under this
warranty is limited to the purchase price actually paid by
the customer for the product covered by the warranty, as
confirmed by proof of purchase, regardless of the amount
of any other direct or indirect damage suffered by the
customer.
This warranty is effective only if the product is purchased
and operated in the country in which the product is
purchased. A product that requires modifications or
adaptation to enable it to operate in any other country
than the country for which it was designed, manufactured,
approved and/or authorized, or repair of products damaged
by these modifications is not covered under this warranty.
THE WARRANTY PROVIDED HEREIN SHALL BE THE
SOLE AND EXCLUSIVE WARRANTY. ANY IMPLIED
WARRANTIES, OBLIGATIONS, OR LIABILITES,
INCLUDING BUT NOT LIMITED TO THE IMPLIED
WARRANTY OF MERCHANTABILITY AND FITNESS FOR
A PARTICULAR PURPOSE, ARE LIMITED IN DURATION
TO THE DURATION OF THIS APPLICABLE WRITTEN
WARRANTY. Some states do not allow limitations on how
long an implied warranty lasts, so the above limitations may
not apply to you.
IN NO EVENT SHALL BEURER BE LIABLE FOR ANY
SPECIAL, INCIDENTAL, INDIRECT OR CONSEQUENTIAL
DAMAGES FOR BREACH OF THIS OR ANY OTHER
WARRANTY, EXPRESS, IMPLIED OR ANY OTHER
THEORY OF LIABILITY, WHATSOEVER. Some states do
not allow the exclusion or limitation of special, incidental,
or consequential damages, so the above limitation may not
apply to you.
Beurer does not authorize anyone, including, but not limited
to, retailers, the subsequent consumer purchaser of the
19

product from a retailer or remote purchaser, to obligate
Beurer in any way beyond the terms set forth herein.
This warranty does not extend to the purchase of opened,
used, repaired, repackaged and/or resealed products,
including but not limited to sale of such products on Internet
auction sites and/or products by surplus or bulk resellers.
Any and all warranties or guarantees shall immediately
cease and terminate in connection with any products or
parts thereof which are repaired, replaced, altered, or
modified, without the prior explicitly written consent of
Beurer.
This warranty gives you specific legal rights, and you may
also have other rights which may vary from state to state.
For more information regarding our product line in the USA,
please visit: www.beurer.com
For Canada only:
Manufacturer:
Beurer GmbH
Söflinger Str. 218
89077 Ulm Germany
Distributed by:
Beurer North America LP
1 Oakwood Boulevard, Suite 255
Hollywood, FL 33020, USA
www.beurer.com
Questions or comments? Call our US-based customer
service toll free at 1-800-536-0366.
Made in China
Subject to errors and changes
20
Other manuals for BM 28
5
Table of contents
Languages:
Other Beurer Blood Pressure Monitor manuals