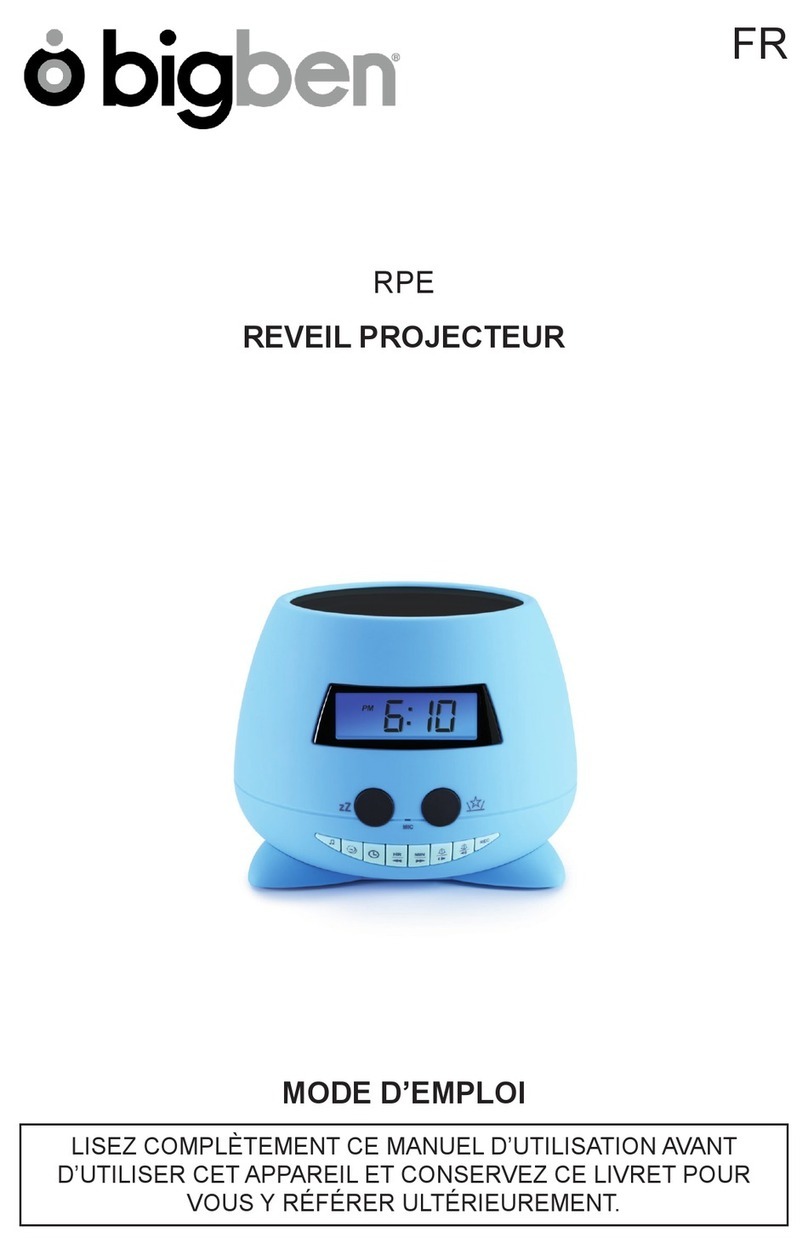
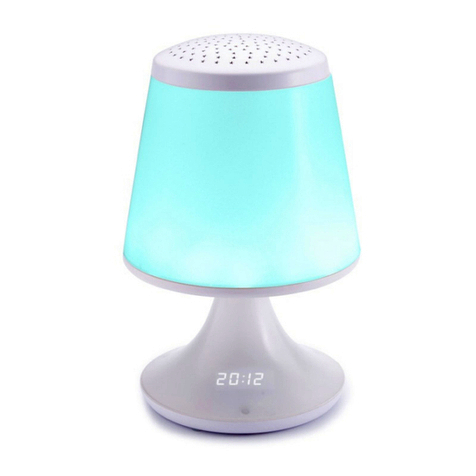
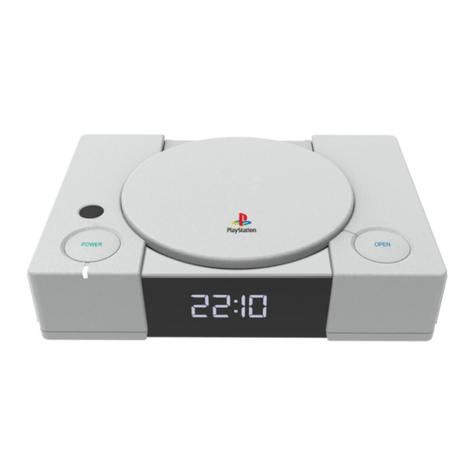
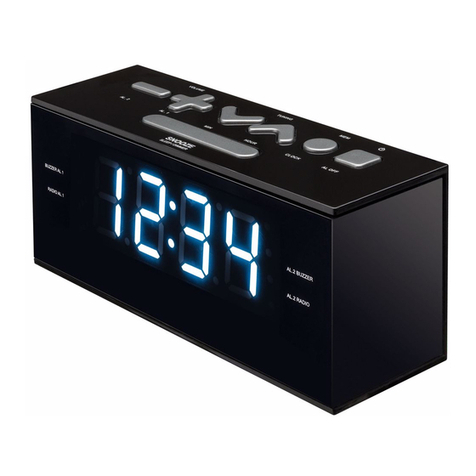
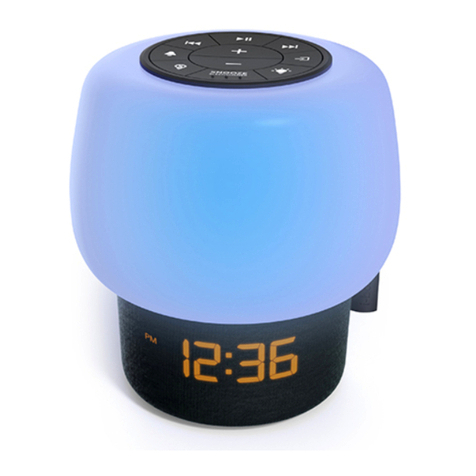
Bigben AKSO User manual

RÉVEIL COACH DU SOMMEIL
RÉVEIL / LAMPE / MUSIQUE / USB / ENTRÉE AUX
AKSO
MODE D’EMPLOI
LISEZ COMPLÈTEMENT CE MANUEL D’UTILISATION AVANT
D’UTILISER CET APPAREIL ET CONSERVEZ CE LIVRET POUR
VOUS Y RÉFÉRER ULTÉRIEUREMENT
FR

- FR 1 -
Pour commencer
• Enlevez l’appareil du carton d’emballage.
• Enlevez tous les matériaux d’emballage du produit.
• Placez les matériaux d’emballage dans le carton puis rangez-le ou jetez-le dans un endroit approprié.
Avertissements et précautions de sécurité
Lisez et comprenez toutes les instructions avant d’utiliser ce produit. Si un dommage est causé par un
non-respect des instructions, la garantie ne couvrira pas un tel dommage.
Sécurité
Avertissement
• Ne retirez jamais le boîtier de cet appareil.
•1HOXEUL¿H]MDPDLVDXFXQFRPSRVDQWGHFHWDSSDUHLO
• Ne placez jamais cet appareil sur un autre équipement électrique.
•9HLOOH]jFHTXHO¶DSSDUHLOQHVRLWSDVH[SRVpjODOXPLqUHGLUHFWHGXVROHLOjXQHÀDPPHQXHQL
à une source de chaleur.
• Ne regardez jamais directement le faisceau laser à l’intérieur de cet appareil.
•9HLOOH]jWRXMRXUVSRXYRLUDFFpGHUIDFLOHPHQWDXFkEOHG¶DOLPHQWDWLRQjOD¿FKHRXjO¶DGDSWDWHXU
pour débrancher l’appareil de l’alimentation.
•9HLOOH]jFHTX¶LOQ¶\DLWDXFXQREMHWjPRLQVGHFPDXWRXUGHO¶DSSDUHLOD¿QGHSHUPHWWUHXQH
YHQWLODWLRQVXI¿VDQWH
• Veillez à ce que les ouvertures de ventilation ne soient jamais obstruées par des objets, par
exemple un journal, une nappe, des rideaux, etc.
•$XFXQH VRXUFH GH ÀDPPH QXH SDU H[HPSOH XQH ERXJLH DOOXPpH QH GRLW rWUH SODFpH VXU FHW
appareil.
• Veillez au respect de l’environnement lors de la mise au rebut des piles.
•/DSSDUHLOGRLWrWUHXWLOLVpGDQVGHVFOLPDWVWHPSpUpV
1) Lisez ces instructions.
2) Conservez ces instructions.
3) Prenez en compte tous les avertissements.
4) Respectez toutes les instructions.
5) N’utilisez pas cet appareil à proximité d’un point d’eau.
6) Nettoyez l’appareil exclusivement avec un chiffon sec.
7) 1¶REVWUXH] DXFXQ GHV RUL¿FHV GH YHQWLODWLRQ GX SURGXLW ,QVWDOOH] O¶DSSDUHLO HQ UHVSHFWDQW OHV
instructions du fabricant.
Pour commencer 1
Avertissements et précautions de sécurité 1
Entretien du produit 2
Respect de l’environnement 2
Contenu de l’emballage 3
Description des pièces 3
Utilisation 4
Recharger 4
Régler l’horloge 5
&RQWU{OHGHOLQWHQVLWpOXPLQHXVHSRXUO¶DI¿FKDJH
de l’heure) 5
Bouton couleur RVB 5
Eclairage (5 niveaux de luminosité) 5
Réglage de l’alarme 5
Annuler/Désactiver la fonction d'alarme :6
Répétition de l'alarme (Snooze) 6
Minuteur du mode sommeil 6
Fonctionnement USB 6
FLASH(musique) 6
REC :6
Enregistrement (MICRO) 7
ENTRÉE AUX 7
Mode d’économie d’énergie 7
6SpFL¿FDWLRQVGHEDVH:7
Remarques:8
8
Table des matières

- FR 2 -
8) Ne placez pas l’appareil près d’une source de chaleur, par exemple un radiateur, une grille de
GLVWULEXWLRQG¶DLUFKDXGXQUpFKDXGFXLVLQLqUHHWWRXWDXWUHDSSDUHLO\FRPSULVOHVDPSOL¿FDWHXUV
produisant de la chaleur.
9) 'LVSRVH]OHFkEOHGHPDQLqUHjFHTX¶LOQHSXLVVHSDVrWUHSLpWLQpRXpFUDVpQRWDPPHQWDXQLYHDX
GHOD¿FKHGHODSULVHGHFRXUDQWHWGXFRQQHFWHXUGHEUDQFKHPHQWVXUO¶DSSDUHLO
10) 8WLOLVH]XQLTXHPHQWOHVSLqFHVGHUHFKDQJHDFFHVVRLUHVVSpFL¿pVSDUOHIDEULFDQW
11) 8WLOLVH] XQLTXHPHQW XQ FKDULRW XQ VRFOH XQ WUpSLHG XQ VXSSRUW RX XQH WDEOH VSpFL¿p SDU OH
fabricant ou vendu avec l’appareil. Lorsque vous utilisez un chariot, soyez prudent(e) lorsque vous
déplacez le chariot avec l’appareil pour éviter toute blessure due à un basculement.
12) Débranchez l’appareil durant les orages et avant toute période d’inutilisation prolongée.
13) 7RXWH UpSDUDWLRQ GRLW rWUH FRQ¿pH j XQ UpSDUDWHXU TXDOL¿p )DLWHV V\VWpPDWLTXHPHQW UpYLVHU
le produit s’il a été endommagé de quelque manière que ce soit, par exemple si son câble
G¶DOLPHQWDWLRQRXVD¿FKHHVWHQGRPPDJpVLXQOLTXLGHV¶HVWGpYHUVpVXUO¶DSSDUHLOVLGHVREMHWV
sont tombés dessus, si l’appareil a été exposé à la pluie ou à l’humidité, s’il ne fonctionne plus
correctement ou s’il est tombé.
14) /¶DSSDUHLOQHGRLWSDVrWUHH[SRVpjGHVpJRXWWHPHQWVRXGHVpFODERXVVXUHV
15) Ne placez aucune source de danger sur l’appareil (par exemple, un objet rempli de liquide ou une
bougie allumée).
16) 6L OD ¿FKH GX FkEOH G¶DOLPHQWDWLRQ RX DGDSWDWHXU &$&& RX XQ FRXSOHXU GDSSDUHLO VHUW GH
dispositif de coupure de l’alimentation, celui-ci doit toujours rester directement accessible.
17) Assurez-vous qu’il y a assez d’espace libre autour de l’appareil pour la ventilation.
18) /HVSLOHVRXEORFGHSLOHVRXEDWWHULHQHGRLYHQWSDVrWUHH[SRVpHVjXQHFKDOHXUH[FHVVLYH
comme la lumière du soleil, le feu, etc.
19) La plaque signalétique se trouve sous l'appareil.
Entretien du produit
1) Débranchez toujours l’appareil avant de le nettoyer et quand vous ne l’utilisez pas.
2) N’écoutez pas la musique à un niveau sonore excessif, car cela pourrait provoquer une perte
d’acuité auditive ou endommager l’appareil.
3) N’utilisez pas cet appareil dans un environnement humide ou mouillé.
4) Débranchez toujours l’appareil de la prise secteur avant de le nettoyer. Nettoyez le produit avec un
chiffon doux, humide et sans ouate. N’utilisez pas de produit nettoyant agressif ou abrasif.
Respect de l’environnement
Votre produit est conçu et fabriqué avec des matériaux et composants de haute
TXDOLWpTXLSHXYHQWrWUHUHF\FOpVHWUpXWLOLVpV
Votre produit contient des piles relevant de la Directive Européenne 2006/66/CE qui
QHSHXYHQWrWUHMHWpHVDYHFOHVRUGXUHVPpQDJqUHV9HXLOOH]YRXVLQIRUPHUVXUOHV
réglementations locales concernant la collecte séparée des piles car une mise au
UHEXWFRUUHFWHSHUPHWG¶HPSrFKHUOHVFRQVpTXHQFHVQpJDWLYHVVXUO¶HQYLURQQHPHQW
et sur la santé humaine.
Lorsque le symbole d’une poubelle barrée sur roues se trouve sur un produit, cela
VLJQL¿HTXHOHSURGXLWHVWFRXYHUWSDUOD'LUHFWLYH(XURSpHQQH&(9HXLOOH]
vous informer du système local de collecte séparée pour les produits électriques
et électroniques. Veuillez agir selon les règles locales et ne jetez pas vos anciens
produits avec les ordures ménagères. En assurant l’élimination de ce produit, vous
aidez également à prévenir les conséquences potentiellement négatives pour
l’environnement et la santé humaine.

- FR 3 -
/HV\PEROHGHOpFODLUjSRLQWHGHÀqFKHLQVFULWDXVHLQGXQWULDQJOHpTXLODWpUDOFRQVWLWXHXQHPLVHHQ
garde destinée à alerter l'utilisateur quant à la présence de tensions électriques secteur à l'intérieur du
produit, qui peuvent engendrer un risque d'électrocution.
Alimentation par piles :
Assurez-vous que les piles sont correctement insérées pour éviter tout dommage sur l'appareil.
Enlevez toujours les piles de l'appareil si celui-ci ne sera pas utilisé durant une longue période, car
cela pourrait causer une fuite des piles et par conséquent, des dommages sur l'appareil.
/HV SLOHV XWLOLVpHV GRLYHQW LPSpUDWLYHPHQW rWUH GH PrPH W\SH 1XWLOLVH] MDPDLV GLIIpUHQWV W\SHV GH
piles ensemble.
Ne jetez pas les piles dans un feu, et ne les exposez pas au soleil ou à une source de chaleur.
Si le liquide contenu dans les piles entre en contact avec les yeux ou la peau, lavez la zone
immédiatement et soigneusement à l'eau fraîche et consultez un médecin.
ATTENTION :
5LVTXHG¶H[SORVLRQHQFDVG¶LQVHUWLRQLQFRUUHFWHGHVSLOHV/HVSLOHVGRLYHQWWRXMRXUVrWUHUHPSODFpHV
SDUGHVSLOHVGXPrPHW\SHRXGXQW\SHpTXLYDOHQW
La plaque signalétique se trouve sous l'appareil.
Contenu de l’emballage
9pUL¿H]HWLGHQWL¿H]OHFRQWHQXGHO¶HPEDOODJH
• Unité principale
• 1 x notice d’utilisation
• 1 x câble entrée AUX 3,5 mm
• 1 x câble de recharge micro USB
• 1 x feuille d’autocollants pour les yeux du coach du sommeil AKSO
Description des pièces

- FR 4 -
1) Répétition de l'alarme (Snooze) 10) Lecteur USB
2) $I¿FKDJH/&' 11) Prise de charge (entrée DC 5 V/1,5 A)
3) MICRO (sur le dessous) 12) Voyant de recharge
4) Veille / Lecture & Pause (ON/ OFF) 13) Entrée AUX
5) Variateur de lumière / lumière douce 14) HR (heure)/ bouton bas
6) Couleur lumineuse 15) MIN (minutes) / bouton haut
7) Eclairage (5 niveaux de luminosité) 16) Alarme 1 / Volume -
8) Réglage minuterie / Mode sommeil 17) Alarme 2 / Volume +
9) Mode (entrée AUX / USB / FLASH(Musique)/
REC
18) REC (enregistrement)
Utilisation
**Avant la première utilisation, l’unité doit être entièrement rechargée
pendant au moins 10 heures.**
•L’utilisateur peut choisir sa paire d’yeux préférés parmi les autocollants fournis et les coller
sur le visage du coach de sommeil AKSO.
• Maintenez la touche HQIRQFpH SHQGDQW VHFRQGHV SRXU DOOXPHU O¶XQLWp /¶pFUDQ DI¿FKH OD
dernière fonction utilisée. Appuyez sur MODE pour sélectionner les fonctions.
• Maintenez la touche enfoncée pendant 3 secondes pour éteindre l’unité. L’unité passe en mode
YHLOOH/¶pFUDQDI¿FKHO¶KHXUH/¶XWLOLVDWHXUSHXWUpJOHUO¶KHXUHO¶DODUPHO¶DODUPH
• Appuyez sur la touche pour démarrer la lecture de la musique. Réappuyez sur le bouton
pour mettre la lecture en pause.
Recharger
• Branchez le câble de charge micro USB dans le coach de sommeil AKSO.
• La LED rouge à côté du bouton de charge s’allume pendant la recharge et elle s’éteint une fois la
recharge complète terminée.
• Débranchez le câble de recharge USB quand la recharge est terminée.

- FR 5 -
Régler l’horloge
• En mode veille, maintenez le bouton enfoncé pour entrer en mode heure.
• Appuyez sur le bouton / pour régler l’heure et les minutes.
•/KHXUHHVWDI¿FKpHGDQVOHIRUPDWK
• Appuyez sur la touche SRXUFRQ¿UPHUO¶KHXUH
&RQWU{OHGHOLQWHQVLWpOXPLQHXVHSRXUO¶DI¿FKDJHGHO¶KHXUH
• Appuyez sur le bouton pour régler la luminosité de l’écran LCD.
Il y a 3 niveaux : Haut (brillant) ÆBas (faible lumière) ÆEteint (OFF).
• Maintenez la touche enfoncée pour faire changer les couleurs de la lumière l’une après l’autre.
Appuyez à nouveau longuement sur la touche pour désactiver la fonction.
Bouton couleur RVB
• Appuyez sur le bouton pour sélectionner la couleur souhaitée. Vous avez le choix parmi 7
couleurs.
(FODLUDJHQLYHDX[GHOXPLQRVLWp
• 5 niveaux de luminosité sont disponibles. Appuyez sur le bouton pour choisir un niveau.
Réglage de l’alarme
• En mode veille, maintenez le bouton HQIRQFpSHQGDQWV/DI¿FKDJH/&'FOLJQRWH
• Appuyez sur le bouton / pour sélectionner l’heure (heure/minutes), puis appuyez sur le
bouton SRXUFRQ¿UPHUO¶KHXUH
• Ensuite, pour régler la musique, appuyez sur / pour choisir l’une des options ci-dessous.
•Son de l’alarme : 1) BB - Sonnerie
2) Musique USB
3) FLASH : Appuyez sur (pour passer en mode FLASH. Appuyez sur
/ pour sélectionner 6 pistes (01,02,03,04,05,06)
4) REC (enregistrer son/musique)
• Appuyez sur la touche SRXUFRQ¿UPHUOHUpJODJHGHODPXVLTXH
• Ensuite, ajustez le volume sonore de l’alarme. Appuyez sur le bouton / pour choisir le
volume sonore qui vous convient.
• Appuyez sur la touche SRXUFRQ¿UPHUOHUpJODJHGHO¶DODUPH
• Le voyant est actif sur l’écran.
• Lorsque l’alarme sonne, le voyant est également allumé.
• Appuyez sur n’importe quelle touche pour éteindre l’alarme 1 ou 2.
•/DODUPHVHGpFOHQFKHjQRXYHDXjODPrPHKHXUHOHOHQGHPDLQ
• L'appareil dispose d’une alarme double. Répétez les étapes ci-dessus pour régler et sélectionner
le type d'alarme.
•Fonction crescendo : 30 minutes avant le déclenchement de l’alarme, l’éclairage passe du blanc
au jaune.
Cette fonction ne s’active que pendant les 30 minutes précédant l’heure à laquelle l’alarme est
réglée.

- FR 6 -
Annuler/Désactiver la fonction d'alarme :
• En mode veille, appuyez sur ou pour annuler / désactiver la fonction d’alarme.
5pSpWLWLRQGHODODUPH6QRR]H
/RUVTXHO¶DODUPHVRQQHYRXVSRXYH]DSSX\HUVXUODWrWHGH©$.62ªSRXUpWHLQGUHO¶DODUPH8QERXWRQ
snooze est situé sous l’appareil (à côté du bouton micro). Le voyant de l’alarme se met à clignoter.
• L’alarme sonnera à nouveau toutes les 9 minutes.
• Appuyez sur n’importe quelle touche pour éteindre l’alarme et le voyant de l’alarme cesse de clignoter.
Minuteur du mode sommeil
• En mode 86%)/$6+0XVLTXH5(&HQWUpH$8;, la musique et l’éclairage s’éteignent une fois
que la durée sélectionnée est écoulée. Appuyez sur le bouton pour activer le mode sommeil.
• Par défaut, un compte à rebours de 60 minutes se lance. L’utilisateur dispose d’autres options de
minuterie : 60, 50, 40, 30, 20, 10 et désactivé (off).
• Pour désactiver le mode sommeil, appuyez sur le bouton SRXUVpOHFWLRQQHU©2IIª
• Si la minuterie de mode sommeil est sélectionnée, le volume sonore et l’éclairage vont diminuer
progressivement.
•Fonction decrescendo :
Lorsque l’utilisateur sélectionne la minuterie de mode sommeil 60/ 50/ 40/ 30/ 20/ 10 minutes avant
de s’endormir. L’éclairage passe du blanc brillant au bleu foncé. L’éclairage diminue progressivement
et se maintient à 10% de luminosité.
Fonctionnement USB
•%UDQFKH]OD¿FKH86%GDQVODSULVH86%$SSX\H]VXU02'(SRXUVpOHFWLRQQHUODIRQFWLRQUSB.
• Appuyez sur la touche pour allumer l'appareil.
• Appuyez sur la touche / pour sélectionner la piste à écouter.
• Réglez le volume à l’aide de la touche / .
• Appuyez sur la touche pour éteindre l'appareil.
)/$6+PXVLTXH
• Appuyez sur la touche pour allumer l'appareil.
• Appuyez sur la touche MODE pour sélectionner la fonction )ODVKPXVLTXH.
• Appuyez sur la touche / pour sélectionner la piste à écouter.
3 x mélodie 01/ 02/ 03
3 x son naturel 04 / 05/ 06
• Réglez le volume à l’aide de la touche / .
• Appuyez sur la touche pour éteindre l'appareil.
REC :
• Appuyez sur la touche pour allumer l'appareil.
• Appuyez sur MODE pour sélectionner la fonction REC.
• L’appareil ne peut garder en mémoire qu’un seul enregistrement à la fois.
• Réglez le volume à l’aide de la touche / .
• Appuyez sur la touche pour éteindre l'appareil.

- FR 7 -
(QUHJLVWUHPHQW0,&52
• Appuyez sur la touche pour allumer l'appareil.
• Appuyez sur MODE pour sélectionner la fonction REC.
• Appuyez ensuite sur le bouton REC et démarrez l’enregistrement. Pour une meilleure qualité
sonore, parlez/chantez directement dans le micro situé sous l’appareil.
• Appuyez à nouveau sur REC pour terminer l’enregistrement.
•/D FKDQVRQ HQUHJLVWUpH HVW VDXYHJDUGpH HQ WDQW TXH GHUQLHU ¿FKLHU GDQV OD PpPRLUH LQWHUQH
(Veuillez noter : l’enregistrement peut durer 1 minute au maximum.)
• Cet appareil ne peut garder en mémoire qu’une seule chanson à la fois. Chaque nouvel
HQUHJLVWUHPHQWpFUDVHUDOH¿FKLHUSUpFpGHQW
ENTRÉE AUX
• Appuyez sur la touche pour allumer l'appareil.
• Appuyez sur MODE pour sélectionner la fonction AUX.
• Branchez l’une des extrémités du câble audio 3,5 mm (fourni) dans la prise Aux-In et l’autre extrémité
dans une source externe pour écouter de la musique via le haut-parleur de l’appareil.
• Réglez le volume à l’aide de la touche / .
• Appuyez sur la touche pour éteindre l'appareil.
Mode d’économie d’énergie
• Pour économiser de l’énergie, appuyez longuement sur les 2 boutons MODE et HR pendant
3 secondes. L’écran clignote 1 fois, retirez votre main de l’appareil. Toutes les fonctions sont
immédiatement désactivées. L’appareil passe en mode d’économie d’énergie.
• Maintenez le bouton d’alimentation enfoncé pendant 3 secondes pour réactiver les fonctions.
AVERTISSEMENT : Risque d’altération de l’ouïe
• Réglez le lecteur sur un faible niveau sonore avant de brancher le casque d’écoute à la source
sonore.
•$¿QG¶pYLWHUGHVGRPPDJHVDXGLWLIVpYHQWXHOVQHSDVpFRXWHUjXQQLYHDXVRQRUHpOHYpSHQGDQW
une longue durée. Un volume élevé peur engendrer une altération durable de l’ouïe.
6SpFL¿FDWLRQVGHEDVH
Puissance de sortie : 2 W
Batterie lithium : 2000 mAh
Recharge : 5V/1,5A
LED RVB
+DXWSDUOHXU : ȍ:
7HPSVGHFKDUJHPHQW : KHXUHV
$XWRQRPLH : 9ROXPHj
HQYLURQKHXUHV
9ROXPHj
HQYLURQKHXUHV
1HGRUPH]SDVDYHFO¶DSSDUHLO
/HSURGXLWGRLWrWUHjXQGLVWDQFHPLQLPXPGHFPGXFRUSVKXPDLQORUVGHVRQIRQFWLRQQHPHQW

- FR 8 -
Remarques:
• Ne pas éliminer les appareils électriques et électroniques dans les déchets ménagers.
a) Les apporter à un point de collecte.
b) &HUWDLQHVSLqFHVFRQWHQXHVGDQVFHVDSSDUHLOVSHXYHQWrWUHGDQJHUHXVHVSRXUODVDQWp
et pour l'environnement.
•$¿Q G¶pFRQRPLVHU O¶pQHUJLH ORUVTXH O¶DSSDUHLO Q¶pPHW DXFXQH VRUWLH VRQRUH SHQGDQW XQ FHUWDLQ
WHPSV LO VH PHWWUD DXWRPDWLTXHPHQW HQ PRGH GH YHLOOH ,O SHXW DORUV rWUH UHPLV HQ PDUFKH HQ
utilisant à nouveau le bouton d’alimentation
•$¿QGpFRQRPLVHU GH OpQHUJLHORUVTXH ODSSDUHLO QpPHWDXFXQ VRQ SHQGDQW PLQXWHVLOSDVVH
DXWRPDWLTXHPHQWHQPRGHYHLOOH,OSHXWDORUVrWUHUHPLVHQPDUFKHHQXWLOLVDQWjQRXYHDXOHERXWRQ
d’alimentation
• Vous pouvez trouver les informations sur la plaque située à l'arrière de l'unité.
DECLARATION DE CONFORMITE SIMPLIFIEE
Par la présente Bigben Interactive déclare que l’équipement radioélectrique du type A.6O
est conforme à la directive 2014/53/UE.
Le texte complet de la déclaration UE de conformité est disponible à l’adresse internet suivante:
www.bigben.fr/support
Fabriqué par BIGBEN INTERACTIVE SA
396, Rue de la Voyette
CRT2 - FRETIN
CS 90414
59814 LESQUIN Cedex - France
www.bigben.eu
Fabriqué en Chine

SLEEP TRAINER
ALARM CLOCK/ LIGHT/ MUSIC / USB / AUX IN
AKSO
OPERATING INSTRUCTIONS
PLEASE READ THIS USER MANUAL CAREFULLY BEFORE
OPERATING THIS UNIT AND RETAIN FOR
FUTURE REFERENCE
EN

- EN 1 -
Getting Started
• Remove the appliance from the box.
• Remove any packaging from the product.
• Place the packaging inside the box and either or dispose of safely.
Safety and Notice
Read and understand all instructions before you use this product. If damage is caused by failure to
follow the instructions, the warranty does not apply.
Safety
Warning
• Never remove the casing of this apparatus.
• Never lubricate any part of this apparatus.
• Never place this apparatus on other electrical equipment.
• Keep this apparatus away from direct sunlight, naked Fames or heat.
• Never look into the laser beam inside this apparatus.
• Ensure that you always have easy access to the power cord, plug or adaptor to disconnect this
apparatus from the power
•0LQLPXPGLVWDQFHVFPDURXQGWKHDSSDUDWXVIRUVXI¿FLHQWYHQWLODWLRQV
• The ventilation should not be impeded by covering the ventilation openings with items, such as
newspapers, table-cloths, curtains, etc.
•1RQDNHGÀDPHVRXUFHVVXFKDVOLJKWHGFDQGOHVVKRXOGEHSODFHGRQWKHDSSDUDWXV
• Attention should be drawn to environmental aspects of battery disposal
• The use of apparatus in moderate climates.
1) Read these instructions
2) Keep these instructions
3) Heed all warnings
4) Follow all instructions.
5) Do not use this apparatus near water.
6) Clean only with dry cloth.
7) Do not block any ventilation openings. Install in accordance with the manufacturer’s instructions.
8) Do not install near any heat sources such as radiators, heat registers, stoves, or other apparatus
LQFOXGLQJDPSOL¿HUVWKDWSURGXFHKHDW
9) Protect the power cord from being walked on or pinched, particularly at plugs, convenience
receptacles, and the Point where they exit from the apparatus.
Getting Started 1
Safety and Notice 1
Care for your product 2
Care of the environment 2
What’s in the box 3
Description of Part 3
Operation 4
Charging 4
Setting the Clock 5
Dimmer Control (for Clock display) / Smooth 5
Colour RGB button 5
Light (5 Brightness Levels) 5
Setting the Alarm 5
Cancelling/Disabling the Alarm Function:5
Snooze 6
Sleep Mode Timer 6
USB Operation 6
FLASH(music) 6
REC:6
Recording (MIC) 7
AUX IN 7
Energy –Saving mode 7
%DVLF6SHFL¿FDWLRQV:7
Remarks:8
Contents

- EN 2 -
10) 2QO\XVHDWWDFKPHQWVDFFHVVRULHVVSHFL¿HGE\WKHPDQXIDFWXUHU
11) 8VHRQO\ZLWKWKHFDUWVWDQGWULSRGEUDFNHWRUWDEOHVSHFL¿HGE\WKHPDQXIDFWXUHURUVROGZLWK
the apparatus. When a cart is used, use caution when moving the cart/apparatus combination to
avoid injury from tip-over.
12) Unplug this apparatus during lightning storms or when unused for long periods of time.
13) 5HIHUDOOVHUYLFLQJWRTXDOL¿HGVHUYLFHSHUVRQQHO6HUYLFLQJLVUHTXLUHGZKHQWKHDSSDUDWXVKDV
been damaged in anyway, such as power-supply cord or plug is damaged, liquid has been spilled
or objects have fallen into the apparatus, apparatus has been exposed to rain or moisture, does
not operate normally, or has been dropped.
14) Apparatus shall not be exposed to dripping or splashing.
15) 'RQRWSODFHDQ\VRXUFHVRIGDQJHURQWKHDSSDUDWXVHJOLTXLG¿OOHGREMHFWVOLJKWHGFDQGOHV
16) Where the MAINS plug (or AC/DC adaptor) or an appliance coupler is used as the disconnect
device, the disconnect device shall remain readily operable.
17) Make sure there is enough free space around the product for ventilation.
18) Batteries (battery pack or batteries installed) shall not be exposed to excessive heat such as
VXQVKLQH¿UHRUWKHOLNH
19) The rating label is placed on the bottom side of apparatus.
Care for your product
1) Always unplug the appliance when not in use and before cleaning.
2) Do not play music at excessive volume levels as damage to hearing and or the equipment may
occur.
3) Do not use this unit in wet or damp conditions.
4) Always disconnect the unit from the mains power supply before cleaning. Clean the appliance with
a soft, damp, lint free cloth. Do not use abrasives or harsh cleaners.
Care of the environment
Your product is designed and manufactured with high quality materials and
components, which can be recycled and reused.
Your product contains batteries covered by the European Directive 2006/66/EC,
which cannot be disposed with normal household waste. Please inform yourself about
the local rules on separate collection of batteries because correct disposal helps to
prevent negative consequences for the environmental and human health.
When this crossed-out wheeled bin symbol is attached to a product it means that the
product is covered by the European Directive 2002/96/EC. Please inform yourself
about the local separate collection system for electrical and electronic products.
Please act according to your local rules and do not dispose of your old products with
your normal household waste. Correct disposal of your old product helps to prevent
potential negative consequences for the environment and human health.

- EN 3 -
The lightning symbol inside an equilateral triangle warns the user of the presence inside the product of
uninsulated hazardous electric voltages powerful enough to represent an electrocution risk.
Battery power:
Be sure that the batteries are inserted correctly to avoid damage to the appliance. Always remove the
batteries when appliance will not be used for a long period of time, as this will cause leakage to the
batteries and subsequently damage to your set.
Use batteries of the same type. Never use different types of batteries together.
'RQRWWKURZWKHEDWWHU\LQWRWKH¿UHRUH[SRVHGWRVXQVKLQHRUWKHOLNH
If the liquid contained in the batteries comes in contact with eyes or skin, wash the area immediately
and carefully with clear water and consult a doctor
Caution:
Danger of explosion if battery is incorrectly replaced. Replace only with the same or equivalent type.
Location of label is at the bottom of product.
What’s in the box
Check and identify the contents of your package:
• Main unit
• 1 x user manual
• 1 x aux in 3.5mm cable
• 1 x Micro USB charging cable
• 1 x sticker sheet for AKSO Sleep Trainer’s eye
Description of Part

- EN 4 -
1) Snooze 10) USB Player
2) LCD Display 11) Charging Jack (DC In 5V/1.5A)
3) MIC (at the bottom) 12) Charging Indicator Light
4) Standby / Play & Pause (ON/ OFF) 13) Aux In
5) Dimmer / Smooth Light 14) HR (Hour)/ Skip Down Button
6) Light Colour 15) MIN (Minutes) / Skip Up button
7) Light (5 Brightness Levels ) 16) Alarm 1 / Volume -
8) Timer Set / Sleep Mode 17) Alarm 2 / Volume +
9) Mode (AUX In / USB / FLASH(Music)/REC 18) REC (Recording)
Operation
**For initial use, the unit should be fully charged for at least 10 hours.**
•The end user may choose their favourite pair of eyes from the included sticker sheet and
stick it on the AKSO Sleep Trainer’s face.
• Long Press for 3 seconds to turn on the unit. The display screen will show the function of what
user stopped last time. Press MODE to select the functions.
• Long press for 3 seconds again to turn off the unit. Unit will go to standby mode. Display screen
will show the clock time. User can set the time, alarm 1 , alarm 2.
• Press the button to start music playback. Press the button again to pause music
Charging
• Plug the Micro USB charging cable into the AKSO Sleep Trainer.
• The red LED indicator light beside the charging jack button will turn ON when charging and turn OFF
when fully charged.
• Unplug the USB charging cable when fully charged.

- EN 5 -
Setting the Clock
• In standby mode, long press the button to enter the time mode.
• Press the / button to set the hour and minute.
• The clock will display in 24-hour format.
• Press the EXWWRQWRFRQ¿UPWKHWLPH
'LPPHU&RQWUROIRU&ORFNGLVSOD\6PRRWK
• Press the button to control the brightness of the LCD display.
There are 3 levels: High (Bright) ÆLow (Dim light) ÆOFF.
• When long pressing, the light colours will change in sequence. Long press the button again to turn
off the function.
Colour RGB button
• Press the button to select the desired light colour. You may select from 7 colours.
/LJKW%ULJKWQHVV/HYHOV
• Users may select from 5 brightness levels. Press the button to choose the level.
Setting the Alarm
• In standby mode, press & hold the EXWWRQIRUVHFRQGV7KH/&'GLVSOD\ZLOOÀDVK
• Press the / button to select the time (Hour/Minutes), then press the EXWWRQWRFRQ¿UP
the time.
• As a next step, to set the music, press / to choose your preferred option below.
•Alarm output sound: 1) BB – Buzzer
2) USB Music
3) FLASH: Press ( to enter FLASH mode. Press / to select
6 music( 01,02,03,04,05,06)
4) REC (recording sound/music)
• Press the EXWWRQWRFRQ¿UPWKHPXVLFVHWWLQJ
• Next, set the alarm sound output level setting. Press the / button to choose your preferred
sound output level.
• Press the EXWWRQWRFRQ¿UPWKHDODUPVHWWLQJ
• The indicator light is “ON” on the display.
• When the alarm rings, the light is also “ON” ,
• Press any key to turn off Alarm 1 or 2.
• The alarm clock will resume the function at the same time the next day.
• The unit features a dual alarm. Repeat the above steps to set & select the alarm output.
•Crescendo function: 30 minutes before alarm time set to wake up, light will turn from white to yellow.
This function is only for 30 minutes before alarm time.
Cancelling/Disabling the Alarm Function:
• In standby mode, press or to cancel / disable the alarm function.

- EN 6 -
Snooze
When the alarm rings, you may press the “AKSO” head to stop the alarm from ringing. There is a
VQRR]HEXWWRQXQGHUWKHEDVHQH[WWRWKHPLFEXWWRQ7KHDODUPLQGLFDWRUOLJKWZLOOÀDVK
• The alarm will ring again every 9 minutes.
• Press any key on the base panel to switch off the alarm ring & the alarm indicator light will stop
ÀDVKLQJ
Sleep Mode Timer
•In86%)/$6+0XVLF5(&$8;,1 mode, songs and light will turn off after the selected time has
elapsed. Press the button to activate sleep mode.
• By default, a 60-minute countdown will start. The user has other sleep timer options: 60, 50, 40, 30,
20, 10 & off.
• To cancel the Sleep mode, press the button to select “Off”.
• If the sleep mode timer is selected, both sound volumes will be reduced and the light will dim
gradually.
•Decrescendo function:
When user selects Sleep Mode timer 60/ 50/ 40/ 30/ 20/ 10 minutes before fall asleep. Light will turn
from bright white to dark blue. Light will dim gradually & remain 10% brightness.
USB Operation
• Insert the USB plug into the USB jack. Press MODE to select the USB function.
• Press the button to turn on the unit.
• Press the / button to skip up / skip down & choose the song to play.
• Adjust the volume / button.
• Press the button to turn off the unit.
)/$6+PXVLF
• Press the button to turn on the unit.
• Press the MODE button to select )ODVKPXVLF function.
• Press the / button to skip up / skip down & choose the song to play.
3 x melody 01/ 02/ 03
3 x nature sound 04 / 05/ 06
• Adjust the volume / button.
• Press the button to turn off the unit.
REC:
• Press the button to turn on the unit.
• Press the MODE to select the REC function.
• The unit can only hold one recording at a time.
• Adjust the volume / button.
• Press the button to turn off the unit.

- EN 7 -
5HFRUGLQJ0,&
• Press the button to turn on the unit.
• Press the MODE to select the REC function.
• Then, press the REC button and start to record. For better song quality, speak/sing directly into the
mic at the bottom of the unit.
•3UHVV5(&DJDLQWR¿QLVKWKHUHFRUGLQJ
•7KHUHFRUGHGVRQJLVVDYHGDVWKHODVW¿OHLQWKHLQWHUQDOPHPRU\3OHDVHQRWH\RXPD\UHFRUGIRU
a maximum of 1 minute.)
•7KLVXQLWFDQRQO\VDYHVRQJDWDWLPH(DFKQHZUHFRUGLQJZLOORYHUZULWHWKHSUHYLRXV¿OH
AUX IN
• Press the button to turn on the unit.
• Press the MODE to select the AUX function.
• Plug one end of the 3.5mm audio cable (included) into the Aux-In socket, and the other end into an
external source with a line to play music through the unit’s speaker.
• Adjust the volume / button.
• Press the button to turn off the unit.
Energy –Saving mode
• For energy saving, long press 2 buttons MODE & HR together for 3 seconds. The display
VFUHHQZLOOEHÀDVKHGWLPHDQGWDNHRIIWKHKDQG$OOIXQFWLRQVZLOOEH2IILPPHGLDWHO\8QLWZLOO
enter energy- saving mode.
• Long press POWER ON for 3 seconds to resume the functions
WARNING! Risk of hearing impairment
• Set a low volume on the playback device before connecting the headphones to the sound source.
• Avoid excessive volume, particularly over extended periods or frequent use. Excessive volume can
result in permanent hearing impairment.
%DVLF6SHFL¿FDWLRQV
Output power: 2 W
Lithium battery: 2000 mAh
Charging: 5V/1.5A
RGB LEDs
6SHDNHU : ȍ:
+RXUV&KDUJLQJ7LPH :
3OD\LQJ7LPH : 9ROXPH
DURXQGKRXUV
9ROXPH
DURXQGKRXUV
'RQ¶WVOHHSZLWKWKHSURGXFW
7KHSURGXFWPXVWEHDWDPLQLPXPGLVWDQFHRIFPIURPKXPDQERG\ZKHQZRUNLQJ

- EN 8 -
Remarks:
• Don’t discard the electrical and electronic appliances in the regular waste disposal.
a) Take them to a collection point.
b) Some components in these appliances may be hazardous to health and the environment.
• In order to save energy when the unit has no sound output for a while, the unit will be switched to
stand-by automatically. It can be switched ON by using the POWER selector again.
• In order to save energy when the unit in USB / Aux-In mode has no sound output for 15 minutes, the unit
will be switched to stand-by automatically. It can be switched ON by using the POWER selector again.
•<RXFDQ¿QGWKHLQIRUPDWLRQRQWKHSODWHORFDWHGDWWKHEDFNRIWKHXQLW
DECLARATION OF CONFORMITY
The undersigned, Bigben Interactive declares that the radio equipment of the AKSO type complies with
the 2014/53/EU directive.
The complete text is available at https://www.bigben-interactive.co.uk/support/
Manufactured by BIGBEN INTERACTIVE SA
396, Rue de la Voyette
CRT2 - FRETIN
CS 90414
59814 LESQUIN Cedex - France
www.bigben.eu
Made in China

ENTRENADOR DE SUEÑO
DESPERTADOR / LUZ / MÚSICA / USB / ENTRADA
AUX
AKSO
INSTRUCCIONES DE FUNCIONAMIENTO
LE ROGAMOS QUE LEA ÍNTEGRAMENTE EL MANUAL DE
USUARIO ANTES DE UTILIZAR EL EQUIPO Y QUE CONSERVE
ESTE FOLLETO PARA PODER CONSULTARLO EN EL FUTURO.
ES

- ES 1 -
Primeros pasos
• Saque el aparato del embalaje.
• Retire todo el material de embalaje del producto.
• Coloque el material de embalaje dentro de la caja y deséchelo todo de forma segura.
Medidas de seguridad y advertencias
Lea y entienda las instrucciones antes de usar este producto. Si el producto resultara dañado por
incumplimiento de las instrucciones, la garantía quedaría anulada.
Seguridad
Advertencia
• No abra nunca la carcasa de este aparato.
• No lubrique nunca ninguna de las piezas de este aparato.
• No coloque nunca este aparato sobre otros equipos eléctricos.
• Mantenga este aparato alejado de la luz directa del sol o de fuentes de calor.
• No mire nunca directamente al rayo láser ubicado dentro del aparato.
• Compruebe que el cable, el enchufe o el adaptador para desconectar este aparato de la toma de
corriente son fácilmente accesibles.
•'HMHXQDGLVWDQFLDPtQLPDGHFPDOUHGHGRUGHODSDUDWRSDUDTXHKD\DVX¿FLHQWHYHQWLODFLyQ
•/D YHQWLODFLyQ QR GHEH REVWDFXOL]DUVH FXEULHQGR ORV RUL¿FLRV GH YHQWLODFLyQ FRQ REMHWRV FRPR
SHULyGLFRVPDQWHOHVFRUWLQDVHWF
• No deben colocarse sobre el aparato llamas abiertas, como velas encendidas.
• Deberán tenerse en cuenta los aspectos medioambientales al eliminar las pilas.
• Use el aparato en climas moderados.
1) Lea estas instrucciones.
2) Conserve estas instrucciones.
3) 3UHVWHDWHQFLyQDWRGDVODVDGYHUWHQFLDV
4) Siga todas las instrucciones.
5) No use este aparato cerca del agua.
6) Limpie el aparato solo con un paño seco.
7) 1R EORTXHH ODV UDQXUDV GH YHQWLODFLyQ ,QVWDOH HO DSDUDWR GH DFXHUGR D ODV LQVWUXFFLRQHV GHO
fabricante.
8) No instale el aparato cerca de fuentes de calor, tales como radiadores, calentadores, cocinas o
FXDOTXLHURWURDSDUDWRLQFOXVRDPSOL¿FDGRUHVTXHSURGX]FDFDORU
Primeros pasos 1
Medidas de seguridad y advertencias 1
Cuidado del producto 2
Cuidado del medioambiente 2
Contenido del embalaje 3
'HVFULSFLyQGHODVSLH]DV
Funcionamiento 4
Cargar 5
&RQ¿JXUDFLyQGHOUHORM
&RQWURO GHO DWHQXDGRU SDUD OD YLVXDOL]DFLyQ GHO
reloj) / Luz suave 5
%RWyQGHFRORU5*%
Luz (5 niveles de brillo) 5
Ajuste de la alarma 5
&DQFHODUGHVDFWLYDUODIXQFLyQGHODDODUPD:6
5HSHWLFLyQGHODDODUPD6QRR]H
Temporizador del modo de sueño 6
Funcionamiento del USB 6
FLASH (música) 6
REC:7
*UDEDFLyQ0,&
AUX IN 7
Modo de ahorro de energía 7
(VSHFL¿FDFLRQHVEiVLFDV:7
Nota:8
8
Contenido
Table of contents
Languages:
Other Bigben Alarm Clock manuals

