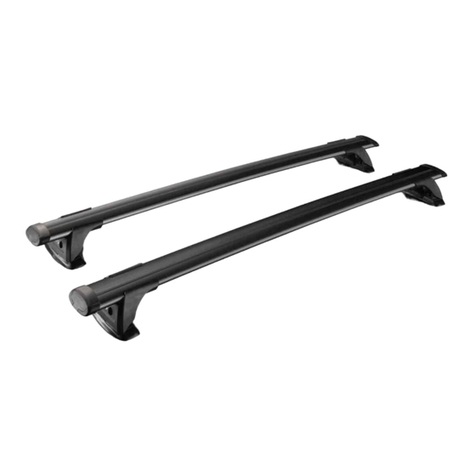
STEEL ROOF BASKET
18-20 JEEP WRANGLER JL 4 & 2 DOOR WITH HARD TOP
Page 2 of 6 10/26/18 (RA)
8mm x 25mm Button Head Bolts, (8) 8mm x 24mm Flat Washers, (4) 8mm Lock Washers and (4) 8mm
Hex Nuts, (Figure 1). Do not tighten hardware at this time.
2. Move to the other end of the Front/Rear Panel. Select the remaining Side Panel and repeat Step 1 to
attach the Panels, (Figure 1).
3. Next, select the remaining Front/Rear Panel. Repeat Step 1 to attach the Panel to each Side Panel,
(Figure 1).
4. Select (1) Cross Rail. Locate the (3) mounts on each Side Panel. Attach the Cross Rail to the mounts
using (4) 8mm x 25mm Button Head Bolts, (4) 8mm Lock Washers and (4) 8mm x 24mm Flat washers,
(Figure 2). Leave hardware loose.
5. Repeat Step 4 to attach the remaining (2) Cross Rails to the mounts on the Side Panels.
6. After assembling the Roof Basket, level and fully tighten the Side Panels to the Front/Rear Panel
hardware only at this time. Make sure the Roof Basket is squared before tightening.
7. Select the Face Plate, (Optional). Attach the Face Plate to the Front Panel using (8) 6mm Button Head
Combo Bolts, (8) 6mm Flat Washers and (8) 6mm Hex Nuts, (Figure 3). Fully tighten hardware.
8. Select the Front Crossbar. Align the (2) holes on the Front Crossbar to the long slots, (between the Face
Plate and Cross Rail), on the Side Panels. Use (2) 8mm x 50mm Hex Bolts, (4) 8mm x 24mm Flat
Washers, (2) 8mm Lock Washers and (2) 8mm Hex Nuts to attach the Crossbar to the Side Panel,
(Figure 4). Leave hardware loose. NOTE: Attach the Crossbar closer to the rear of the slot.
9. LED Light Installation, (LED Light not included):
a. Select the driver side Light Bracket. Attach the Bracket to the Front Panel with (1) 8mm x 25mm
Button Head Bolt, (2) 8mm x 24mm Flat Washers and (1) 8mm Nylon Lock Nut, (Figure 5).
b. Repeat Step 9a to install passenger side Light Bracket.
c. Attach the LED Light to the Brackets using (2) 8mm x 16mm Button Head Bolts, (2) 8mm Lock
Washers and (2) 8mm x 16mm Flat Washers, (Figure 5).
d. Follow the light manufacturer’s instructions to properly attach and wire the LED light.
e. Level and adjust the LED Light to the Brackets and fully tighten hardware.
10. Open the rear window on the vehicle. With assistance, loosen the (4) factory bolts, 2 per side, on the
rear window hinges, (Figure 6). NOTE: Assistance is highly recommended to avoid possible injury
and/or damage to vehicle. Starting on the passenger side of the rear window, completely remove the (2)
factory bolts, (Figure 6). Select (1) Rear Window Bracket. From above, slide the Bracket over the plastic
cover on the rear window hinge, (Figure 7). Reuse (2) factory bolts to secure Bracket in place. Repeat
this Step to install (1) Rear Window Bracket on the driver/left side.
11. Select (1) Rear Roof Basket Bracket, (Figure 8). Attach the Bracket to the front facing side of the Rear
Window Bracket using (2) 8mm x 25mm Hex Bolts, (4) 8mm x 24mm Flat Washers and (2) 8mm Nylon
Lock Nuts, (Figures 8 & 9). Snug but do not tighten hardware. Repeat this Step for Rear Roof Basket
Bracket installation on the driver/left side.
12. Open the driver/left side door. On models with 4 doors open the driver/left rear side door. Locate the rain
gutter along the top of the door. Attach (1) Rubber Trim to the bottom of (1) Clamping Bracket, (Figure
10). Next, select (1) Mounting Bracket. Apply (1) Foam Strip to the bottom of the Mounting Bracket to
protect the roof from damage. Slide the Mounting Bracket over the welded bolt on the Clamping Bracket,
(Figure 10). Secure the Mounting Bracket to the welded bolt with (1) 8mm x 24mm Flat Washer and (1)
8mm Nylon Lock Nut, (Figure 10). Leave hardware loose.
13. Wrap the Brackets around the rain gutter, (Figures 10—13). Make sure the Mounting Bracket fits snug
inside the rain gutter. IMPORTANT: On models with 4 doors, position the Brackets approximately 3”
towards the front from the end of the rear door. For models with 2 doors, position the Brackets behind
the rear door, (at the start of the rear Hard Top Piece).Use (2) 8mm x 25mm Combo Bolts to secure the
Clamping Bracket to the Mounting Bracket, (Figures 10—13). Do not tighten hardware.
14. Repeat Steps 12 & 13 for passenger/right side installation of the front Brackets.
15. With assistance, place the assembled Roof Basket on top of the Brackets. Attach the Rear Brackets to
the Roof Basket with (4) 8mm x 25mm Hex Bolts, (8) 8mm x 24mm Flat Washers and (4) 8mm Nylon
Lock Nuts, (Figures 14 & 15). Leave hardware loose at this time.
16. Attach the Front Mounting Brackets to the mounting tabs on the Front Cross Bar using (4) 8mm x 25mm
Hex Bolts, (8) 8mm x 24mm Flat Washers and (4) 8mm Nylon Lock Nuts, (Figures 16 & 17). Do not
