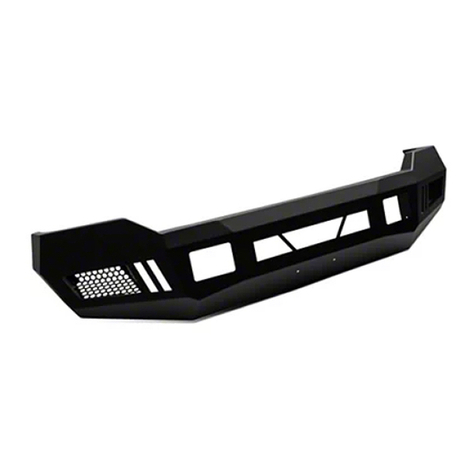
ARMOUR BULL BAR WITH LED LIGHT
for 2020 Chevy Silverado/GMC Sierra 2500/3500 (W/ ParkingSensor)
Page 3 of 6 12/12/19
PROCEDURE:
REMOVE CONTENTS FROM BOX AND VERIFY ALL PARTS ARE PRESENT. READ INSTRUCTIONS
CAREFULLY. CUTTING MAY BE REQUIRED. INSTALLATION MAY INTERFERE WITH FRONT
MOUNTED SENSORS. NOTE: It may be necessary to remove/relocate front license plate and license
plate bracket. It is not required, but strongly recommended. If local/state law requires a front
license plate, license plate relocation kit is available.
1. Starting at the driver side, remove the factory tow hook if equipped, (Figures 1 & 2). NOTE: This Bull Bar
is not compatible with the factory tow hooks and they will not be reinstalled. IMPORTANT: On some
models, with and without tow hooks, the pocket in the plastic bumper may need to be cut out to clear the
Brackets, (Figure 1). Use a sharp knife or hacksaw blade and carefully cut out the pockets required. Only
cut enough to clear the Brackets.
2. Select the driver side Mounting Bracket. Insert the Bracket through the opening in the bumper, (Figure 3).
Trim the plastic as required to clear the Brackets, (Figure 7).
3. Line up the holes in the Bracket with the holes in the end of the frame channel for the tow hook, (Figure
3). Select (1) 10mm Double Bolt Plate, (Figure 4). Insert the Bolt Plate into the end of the frame, through
the (2) holes in the side of the frame and out through the Bracket, (Figures 5). Secure the Bracket to the
Bolt Plate with (2) 10mm Flat Washers and (2) 10mm Nylon Lock Nuts. Do not fully tighten hardware.
4. Repeat Step 3 to install the 12mm Double Bolt Plate, into the remaining hole in the other side of the frame
channel and Bracket, (Figures 6).
5. Repeat Steps 3 —5to install the passenger side Frame Bracket and Bull Bar Bracket.
6. Relocation of front license plate is not required, but strongly recommended.
a. Attach the License Plate Bracket to the Bull Bar with (2) 6mm Button Head Bolts, (4) 6mm Flat
Washers, (2) 6mm Lock Washers and (2) 6mm Hex Nuts, (Figure 8). Use (2) 6mm Combination
Bolts to attach the front license plate to the Bracket, (Figure 8).
7. Mesh and LED Light installation, (LED light sold separately). Select the driver/left side Light Bar
Bracket. Attach the Bracket to the back of the mounting plate on the Bull Bar with (1) 8mm x 20mm Hex
Bolt, (2) 8mm Flat Washers, (1) 8mm Lock Washer and (1) 8mm Hex Nut, (Figure 9). Repeat this step to
attach the passenger/right side Light Bar Bracket to the back of the Bull Bar. Do not tighten hardware.
LED Light Installation
a. Use (2) 8mm x 16mm Hex Bolts, (2) 8mm Lock Washers and (2) 8mm Flat Washers to attach
the Light Bar Brackets to the Bull Bar, (Figure 10).
b. Follow the light manufacturer’s instructions to attach the Bull Bar.
c. Follow light manufacturer’s instructions to properly wire the Bull Bar.
Mesh installation
a. Use (2) 8mm x 16mm Hex Bolts, (4) 8mm Flat Washers, (2) 8mm Lock Washers and (2) 8mm
Hex Nuts to attach the Mesh to the inside surface of the Light Bar Brackets, (Figure 11).
b. Level and adjust the Brackets to the Mesh Panel and fully tighten hardware.
8. Determine if the vehicle is equipped with parking sensors
Models without sensors
a. Select (2) Sensor Plugs. Insert Rubber Plugs into back of sensor mounts, (Figure 12).
Models with Sensors:
a. Unplug and remove sensors from factory bumper.
b. Remove the silicone seal from the end of the sensor. Slide the included larger Sensor Seal over
front of sensor, (Figure 13).
c. Insert sensor with Seal into sensor mount, (Figure 14). NOTE: It may be easier to attach the
included Wiring Extension to the sensor before installing.
d. Place Foam Washer over end of sensor. Push Sensor Retaining Clip into sensor mount and
lock into mounting holes, (Figure 14).
e. Repeat previous Steps to install remaining sensor.
9. With assistance, hold the assembled Bull Bar up to the Mounting Brackets. Line up the (2) lower holes in
the Uprights with the (2) holes in the Mounting Brackets. Attach the assembled Bull Bar to the Brackets
with (4) 10mm Hex Bolts, (4) 10mm Lock Washers and (4) 10mm x 30mm Large Flat Washers, (Figure
15). Do not tighten hardware at this time.


