manuals.online logo
Brands
  1. Home
  2. •
  3. Brands
  4. •
  5. Body Solid
  6. •
  7. Fitness Equipment
  8. •
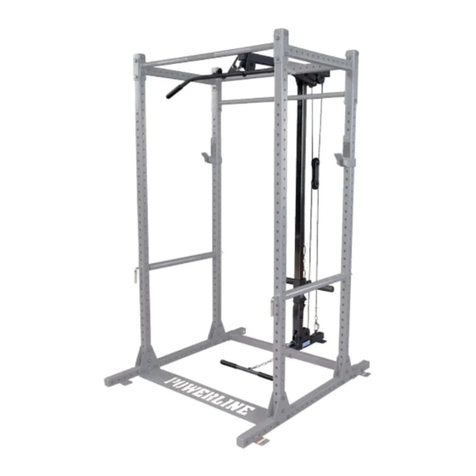
  9. Body Solid POWERLINE PLT200 User manual

Body Solid POWERLINE PLT200 User manual

Other Body Solid Fitness Equipment manuals

Body Solid EMX1500.4 Quick start guide

Body Solid

Body Solid EMX1500.4 Quick start guide

Body Solid S2ABB User manual

Body Solid

Body Solid S2ABB User manual

Body Solid G5S User manual

Body Solid

Body Solid G5S User manual

Body Solid GIOT User manual

Body Solid

Body Solid GIOT User manual

Body Solid Pro Club Line SR-FPU Quick start guide

Body Solid

Body Solid Pro Club Line SR-FPU Quick start guide

Body Solid GPR370.1 User manual

Body Solid

Body Solid GPR370.1 User manual

Body Solid DPEC.3 User manual

Body Solid

Body Solid DPEC.3 User manual

Body Solid GOWT User manual

Body Solid

Body Solid GOWT User manual

Body Solid FLP User manual

Body Solid

Body Solid FLP User manual

Body Solid S2ACD Quick start guide

Body Solid

Body Solid S2ACD Quick start guide

Body Solid POWERLINE PFI150 User manual

Body Solid

Body Solid POWERLINE PFI150 User manual

Body Solid smr1000 User manual

Body Solid

Body Solid smr1000 User manual

Body Solid EXM3000 User manual

Body Solid

Body Solid EXM3000 User manual

Body Solid Powerline PPB-32X User manual

Body Solid

Body Solid Powerline PPB-32X User manual

Body Solid FLP Quick start guide

Body Solid

Body Solid FLP Quick start guide

Body Solid DABB.2 User manual

Body Solid

Body Solid DABB.2 User manual

Body Solid GFR500 Quick start guide

Body Solid

Body Solid GFR500 Quick start guide

Body Solid DLEC.3 User manual

Body Solid

Body Solid DLEC.3 User manual

Body Solid GAB300 User manual

Body Solid

Body Solid GAB300 User manual

Body Solid S2LAT User manual

Body Solid

Body Solid S2LAT User manual

Body Solid GCC0150S User manual

Body Solid

Body Solid GCC0150S User manual

Body Solid GCCA User manual

Body Solid

Body Solid GCCA User manual

Body Solid GPR400 User manual

Body Solid

Body Solid GPR400 User manual

Body Solid GCEC-340 Installation guide

Body Solid

Body Solid GCEC-340 Installation guide

Popular Fitness Equipment manuals by other brands

Revitive Arthritis-Knee user manual

Revitive

Revitive Arthritis-Knee user manual

Domyos BM100 operating instructions

Domyos

Domyos BM100 operating instructions

Movement EDGE PUXADA ALTA Assembly manual

Movement

Movement EDGE PUXADA ALTA Assembly manual

Lifeline LLUWB-BLK owner's manual

Lifeline

Lifeline LLUWB-BLK owner's manual

Precor CW-816 Assembly guide

Precor

Precor CW-816 Assembly guide

Balanced Body Precision Rotator Discs manual

Balanced Body

Balanced Body Precision Rotator Discs manual

G-FITNESS AIR ROWER user manual

G-FITNESS

G-FITNESS AIR ROWER user manual

CAPITAL SPORTS Dominate Edition 10028796 manual

CAPITAL SPORTS

CAPITAL SPORTS Dominate Edition 10028796 manual

Martin System TT4FK user guide

Martin System

Martin System TT4FK user guide

CIRCLE FITNESS E7 owner's manual

CIRCLE FITNESS

CIRCLE FITNESS E7 owner's manual

G-FITNESS TZ-6017 user manual

G-FITNESS

G-FITNESS TZ-6017 user manual

Accelerated Care Plus OMNISTIM FX2 CYCLE/WALK user manual

Accelerated Care Plus

Accelerated Care Plus OMNISTIM FX2 CYCLE/WALK user manual

pedalo 20230165 manual

pedalo

pedalo 20230165 manual

Saebo SaeboStim Pro Instructions for use

Saebo

Saebo SaeboStim Pro Instructions for use

Performance HyperVibe User instructions

Performance

Performance HyperVibe User instructions

Scalamobil S27 Operator's manual

Scalamobil

Scalamobil S27 Operator's manual

Precor Experience Series Service manual

Precor

Precor Experience Series Service manual

FYTTER RedMIUM BENCH BE-T6R manual

FYTTER

FYTTER RedMIUM BENCH BE-T6R manual

manuals.online logo
manuals.online logoBrands
  • About & Mission
  • Contact us
  • Privacy Policy
  • Terms and Conditions

Copyright 2025 Manuals.Online. All Rights Reserved.

Ver. PLT200-20231009
Owner’s Manual
WWW.BODYSOLID.COM
PLT200
SMITH MACHINE LAT ATTACHMENT
2

#DWRULE-4

#DWRULE-4
3
PLT200
TABLE OF CONTENTS
• SAFETY INSTRUCTIONS.......................................................
• PREPARATION.........................................................................
• PART/HARDWARE LIST........................................................
• HARDWARE ILLUSTRATION...............................................
• ASSEMBLY INSTRUCTIONS................................................
• EXPLODED VIEW...................................................................
• CONTACT PAGE.....................................................................
PAGE 4
PAGE 5
PAGE 6
PAGE 7
PAGE 12
PAGE 22
PAGE 24
4
PLT200
SAFETY INSTRUCTIONS
When using exercise equipment,
you should always take basic
precautions including the
following:
• ReadallinstructionsbeforeusingthePLT200.These
instructionsarewrittentoensureyoursafetyandto
protecttheunit.
• Donotremoveanysafetylabelsfromthe
machine.
• Donotallowchildrenonorneartheequipment.
• Usetheequipmentonlyforitsintendedpurpose
asdescribedinthisguide.Donotuseaccessory
attachmentsthatarenotrecommendedbythe
manufacturer.Suchattachmentsmightcauseserious
injuries.
• Wearproperexcerciseclothingandshoesforyour
workout,nolooseclothing.
• Keephands,limbs,looseclothing,andlonghairwell
outofthewayofallmovingparts
• Usecarewhengettingonorofftheunit.
• Donooverexertyourselforworktoexhaustion.
• Ifyoufeelanypainorabnormalsymptoms,stopyour
workoutimmediatelyandconsultyourphysician.
• Neveroperateunitwhenithasbeendroppedor
damaged.Returntheequipmenttoaservicecenter
forexaminationandrepair.
• Neverdroporinsertobjectsintoanyopeninginthe
equipment.
• Alwayschecktheunitanditscablesbeforeeachuse.
Makesurethatallfastenersandcablesaresecure
andingoodworkingcondition.
• Donotusetheequipmentoutdoorsornearwater.
Personal Safety During Assembly
• Beforebeginningassembly,pleasetakethetimeto
readtheinstructionsthoroughly.
• Readeachstepintheassemblyinstructionsand
followthestepsinsequence.Donotskipahead.If
youskipahead,youmaylearnlaterthatyouhave
todisassemblecomponentsandthatyoumayhave
damagedtheequipment
• AssembleandoperatethePLT200onasolid,level
surface.Locatetheunitafewfeetfromthewallsor
furnituretoprovideeasyaccess.
ThePLT200isdesignedforyourenjoyment.Byfol-
lowingtheseprecautionsandusingcommonsense,
youwillhavemanysafeandpleasurablehoursof
healthfulexercisewithyourPowerlineSmithMachine
LatAttachment.
Afterassembly,youshouldcheckallfunctionsto
ensurecorrectoperation.Ifyouexperienceproblems,
rstrechecktheassemblyinstructionstolocateany
possibleerrorsmadeduringassembly.Ifyouare
unabletocorrecttheproblem,callthedealerfrom
whomyoupurchasedthemachineorcall1-800-556-
3113forthedealernearestyou.
Obtaining Service
PleaseusethisOwner’sManualtomakesurethat
allpartshavebeenincludedinyourshipment.When
orderingparts,youmustusethepartnumberand
descriptionfromthisOwner’sManual.Useonly
PowerlinebyBodySolidreplacementpartswhen
servicingthismachine.Failuretodosowillvoidyour
warrantyandcouldresultinpersonalinjury.
Forinformationaboutproductoperationor
service,checkouttheofcialPowerlinewebsite
atwww.bodysolid.comorcontactanauthorized
PowerlinedealeroraPowerlinefactory-authorized
servicecompanyorcontactBody-Solidcustomer
serviceatoneofthefollowing:
TollFree:1-800-556-3113
Phone: 1-708-427-3555
Fax: 1-708-427-3556
Email: [email protected]
Orwriteto:Body-Solid,Inc.
 ServiceDepartment
 1900S.DesPlainesAve.
 ForestPark,IL60130USA
Retain this Owner’s Manual for
furture reference. Part numbers
are required when ordering parts.
PLT200
PREPARATION
Required tools
Thebasictoolsthatyoumustobtainbeforeassembling
thePLT200includebutarenotlimitto:
 •StandardWrenchSet
 •MetricWrenchSet
 •AdjustableWrench
 •Standard/MetricAllenKeySet
Installation Requirements
 Followtheseinstallationrequirementswhenassembling
thePLT200:
 SetupthePLT200onasolid,atsurface.Asmooth,at
surfaceunderthemachinehelpskeepitlevel.
 Provideamplespacearoundthemachine.Openspace
aroundthemachineallowsforeasieraccess.
 Foraestheticpurposes,insertallboltsinthesame
directionunlessspecied(intextorillustrations)todo
otherwise.
 Leaveroomforadjustments.Tightenfastenerssuchas
bolts,nuts,andscrewssotheunitisstable,butleave
roomforadjustments.Donotfullytightenfastenersuntil
instructedintheassemblystepstodoso.
 Filloutandmailthewarrantycard.
Ordering Replacement Parts
Ifyouneedtoorderreplacementpartspleasebe
 preparedtoprovidethefollowinginformation
 whencontactingussothatwecanassistyoubetter.
 1.ModelNumber
 2.PlaceofPurchase
 3.SerialNumber(S/N)
 4.Part#andDescription 
Assembly Tips
Readall“Notes”oneachpagebeforebeginningeachstep.
WhileyoumaybeabletoassemblethePLT200usingthe
illustrationsonly,importantsafetynotesandothertipsmaybe
includedinthetext.
Somepiecesmayhaveextraholesthatyouwillnotuse.Use
onlythoseholesindicatedintheinstructionsandillustrations.
NOTE: Withsomanyassembledparts,proper
 alignmentandadjustmentiscritical.While
 tighteningthenutsandbolts,besuretoleave
 roomforadjustments.
NOTE: Thebottlesthataremarked“Poison”isyour
 touchuppaint.Keepawayfromchildren.
CAUTION:Obtainassistance!Ifyoufeellikeyoucan’t
 assemblethePLT200byyourselfthendo
 notattempttodosoasthiscouldresultin
 injury.ReviewtheInstallationRequirements
 beforeproceedingwiththefollowingsteps.
5

YOUR S/N # CAN
BE FOUND HERE
PLT200
PART LIST
6
Part #
A
B
C
D
E
F
G
H
J
K
1
2
3
4
5
6
7
8
10
12
13
14
15
16
17
18
19
20
21
QTY
1
1
1
1
2
1
2
2
1
1
4
2
5
3
1
1
2
1
18
4
2
2
4
4
1
2
2
1
1
DESCRIPTION
BASE FRAME
CENTER UPRIGHT
U FRAME
STEEL BRACKET C-C 100mm
CHROME GUIDE ROD
TOP FRAME
WEIGHT RISER
PULLEY BRACKET
LAT BAR
CURL BAR
HEX HEAD BOLT, M10x75mm
HEX HEAD BOLT, M10x70mm
HEX HEAD BOLT, M10x65mm
HEX HEAD BOLT, M10x50mm
HEX HEAD BOLT, M10x20mm
SOCKET HEAD CAP SCREW, M10x45mm
HEX HEAD BOLT, M8x65mm
SET SCREW, M4x8mm
M10 WASHER
M8 WASHER
M12 HEX NUT
CURL BAR GRIP
PLASTIC ROUND END CAP
SNAP LINK
STEEL CHAIN, 235mm
LAT BAR GRIP
RUBBER DONUT
WEIGHT STACK SELECTOR PIN
WEIGHT STACK SELECTOR ROD
PLT200
PART LIST
7
Part #
22
23
24
25
26
27
28
29
31
32
QTY
1
10
1
8
1
1
14
2
1
1
DESCRIPTION
TOP PLATE
METAL BUSHING, ø18x ø10.5x13.5mm
CABLE, 3210mm
PULLEY, ø96mm
TOP BOLT
CABLE END LOCK
M10 NYLON LOCK NUT
M8 NYLON LOCK NUT
M10 LOCK WASHER
CABLE, 3210mm
PLT200
HARDWARE ILLUSTRATION
8
Part #3 M10x65mm HEX HEAD BOLT QTY. 5
Part #2 M10x70mm HEX HEAD BOLT QTY. 2
Part #1 M10x75mm HEX HEAD BOLT QTY. 4
Part #4 M10x50mm HEX HEAD BOLT QTY. 3





 





 





































 





 































PLT200
HARDWARE ILLUSTRATION
9
Part #7 M8x65mm HEX DEAD BOLT QTY. 2
Part #6 M10X45mm SOCKET HEAD CAP SCREW QTY. 1
Part #5 M10x20mm HEX HEAD BOLT QTY. 1
Part #8 M4x8mm SET SCREW QTY. 1
UNLESS OTHERWISE SPECIFIED:
CHECKED
SIZE
APPLICATION
TITLE:
PROPRIETARY AND CONFIDENTIAL
INTERPRET GEOMETRIC
TOLERANCING PER:
Q.A.
FINISH
DWG. NO.
DATE
USED ON
A
DIMENSIONS ARE IN INCHES
TOLERANCES:
FRACTIONAL
ANGULAR: MACH
BEND
TWO PLACE DECIMAL
THREE PLACE DECIMAL
NEXT ASSY
MATERIAL
NAME
REV
DO NOT SCALE DRAWING
SCALE: 1:1
SOCKET HEAD CAP SCREW_AM
ENG APPR.
THE INFORMATION CONTAINED IN THIS
DRAWING IS THE SOLE PROPERTY OF
<INSERT COMPANY NAME HERE>. ANY
REPRODUCTION IN PART OR AS A WHOLE
WITHOUT THE WRITTEN PERMISSION OF
<INSERT COMPANY NAME HERE> IS
PROHIBITED.
COMMENTS:
DRAWN
MFG APPR.
SHEET 1 OF 1
2 1
A
B
A
B
12
<COMPANY NAME>





 





 
































PLT200
HARDWARE ILLUSTRATION
10
Part #12 M8 WASHER QTY. 4
Part #10 M10 WASHER QTY. 18
Part #13 M12 HEX NUT QTY. 2





 





 




































 





 































PLT200
HARDWARE ILLUSTRATION
11
Part #31 M10 LOCK WASHER QTY. 1
Part #29 M8 NYLON LOCK NUT QTY. 2
Part #28 M10 NYLON LOCK NUT QTY. 14





 





 




































 





 































PLT200
STEP 1
BE CAREFUL TO ASSEMBLE ALL COMPONENTS IN THE SEQUENCE
THAT THEY ARE PRESENTED.
NOTE:
Finger tighten all hardware in this step. DO NOT wrench tighten until the last step.
some components may be pre-assembled. Nylon lock nuts will not fully screw onto
bolts, must wrench tighten.
1A. Attach U FRAME (C), REAR UPRIGHTS (L) & WEIGHT HORNS (P) of PSM200
together using:
4 - (#1) M10x75mm Hex Head Bolt (Hardware is from PSM200)
8 - (#10) M10 Flat Washer (Hardware is from PSM200)
4 - (#28) M10 Nylon Lock Nut (Hardware is from PSM200)
1B. Attach CENTER UPRIGHT (B) to the BASE FRAME (A) using:
2 - (#2) M10x70mm Hex Head Bolt
4 - (#10) M10 Flat Washer
2 - (#28) M10 Nylon Lock Nut
1C. Attach U FRAME (C) to the CENTER UPRIGHT (B) using:
2 - (#1) M10x75mm Hex Head Bolt
4 - (#10) M10 Flat Washer
2 - (#28) M10 Nylon Lock Nut
1 - (D) Steel Bracket
12
PLT200
STEP 1
13
Above shows step 1 assembled
and completed
PLT200
STEP 2
NOTE:
Finger tighten all hardware in this step. DO NOT wrench tighten until the last step.
some components may be pre-assembled. Nylon lock nuts will not fully screw onto
bolts, must wrench tighten.
NOTE: There are two options for weight installation.
2A. Attach Guide Rods (E) to Base Frame (A).
2 - (#7) M8x65mm Hex Head Bolt
4 - (#12) M8 Flat Washer
2 - (#29) M8 Nylon Lock Nut
NOTE:MakesureGuideRodswithsideholesfacedown.
2B. Attach Selector Rod (#21) to Top Plate (#22) using:
1 - (#6) M10x45mm Socket Head Cap Screw
1 - (#31) M10 Lock Washer
Option#1
2C. Install Weight Risers (G) and slide to the bottom of the Guide Rods (E).
2D. Install Rubber Dounts (#19) and slide on top of Weight Risers (G).
2E. Install Top Plate (#22) onto the guide Rod (E).
Option#2
2C. Install Rubber Dounts (#19) and slide to the bottom of the Guide Rods (E).
2D. Install 15pcs of weight plate (#35).
2E. Install Top Plate (#22) onto the guide Rods (E)
NOTE:Makesurethegroovesoftheweightplatesarefaceddown
 duringinstallation
14
PLT200
STEP 2
15
Note: Guide Rod
with holes on the
side face down
Above shows Step 2 (Option #1) assembled and
completed.
Above shows Step 2 (Option #2) assembled and
completed.
Note: Guide Rod
with holes on the
side face down
PLT200
STEP 3
BE CAREFUL TO ASSEMBLE ALL COMPONENTS IN THE SEQUENCE THAT
THEY ARE PRESENTED.
NOTE:
Wrench tighten all hardware at the end of Step 3B. some components may be
pre-assembled. Nylon lock nuts will not fully screw onto bolts, must wrench tighten.
3A. Put Top Frame (F) onto Guide Rods (E)
3B. Attach Top Frame (F) of PLT200 to Top Frame (L) of PSM200 using :
2 - (#1) M10x75mm Hex Head Bolt
4 - (#10) M10 Flat Washer
2 - (#28) M10 Nylon Lock Nut
16
PLT200
STEP 3
17
Above shows step 3 assembled
and completed
PLT200
STEP 4
BE CAREFUL TO ASSEMBLE ALL COMPONENTS IN THE SEQUENCE THAT
THEY ARE PRESENTED.
NOTE:
Wrench tighten all hardware at the end of Step 4G. some components may be
pre-assembled. Nylon lock nuts will not fully screw onto bolts, must wrench tighten.
4A. Put the key ring of the Weight Selector Pin (#20) onto the threaded end of
the Top Bolt (#26).
4B. Install Top Bolt (#26), Two M12 Hex Nuts (#13) onto the Top Plate (#22)
4C. Route Top Cable (#24) and install ve Pulleys (#25) as show in Step 4
drawing using:
4 - (#3) M10x65mm Hex Head Bolt
1 - (#4) M10x50mm Hex Head Bolt
2 - (#10) M10 Flat washer
8 - (#23) Metal Bushing
5 - (#28) M10 Nylon Lock Uut
2 - (H) Pulley Bracket
NOTE: Cable (#24) must go over Top Frame (F). DO Not put Cable (#24) through
Top Frame (F)
4D. Install Top Cable (#24) by rst assembling the small ball end into the Top
Bolt (#26) and attach the Cable End Lock (#27) over the ball end of the cable.
Secure it by tightening M4x8mm Set Screw (#8).
4E. Install M10x20mm Hex Head bolt (#5) through the slot hole of the Top Bolt (#26).
4F. Route Low Cable (#32) and install three Pulleys (#25) as show in Step 4
drawing using:
1 - (#3) M10x65mm Hex Head Bolt
2 - (#4) M10x50mm Hex Head Bolt
4 - (#10) M10 Flat washer
2 - (#23) Metal Bushing
3 - (#28) M10 Nylon Lock Uut
2 - (H) Pulley Bracket
4G. Attach Low Cable (#32) with Snap Link (#16) to Center Upright (B).
18
PLT200
STEP 4
19
Above shows step 4 assembled
and completed