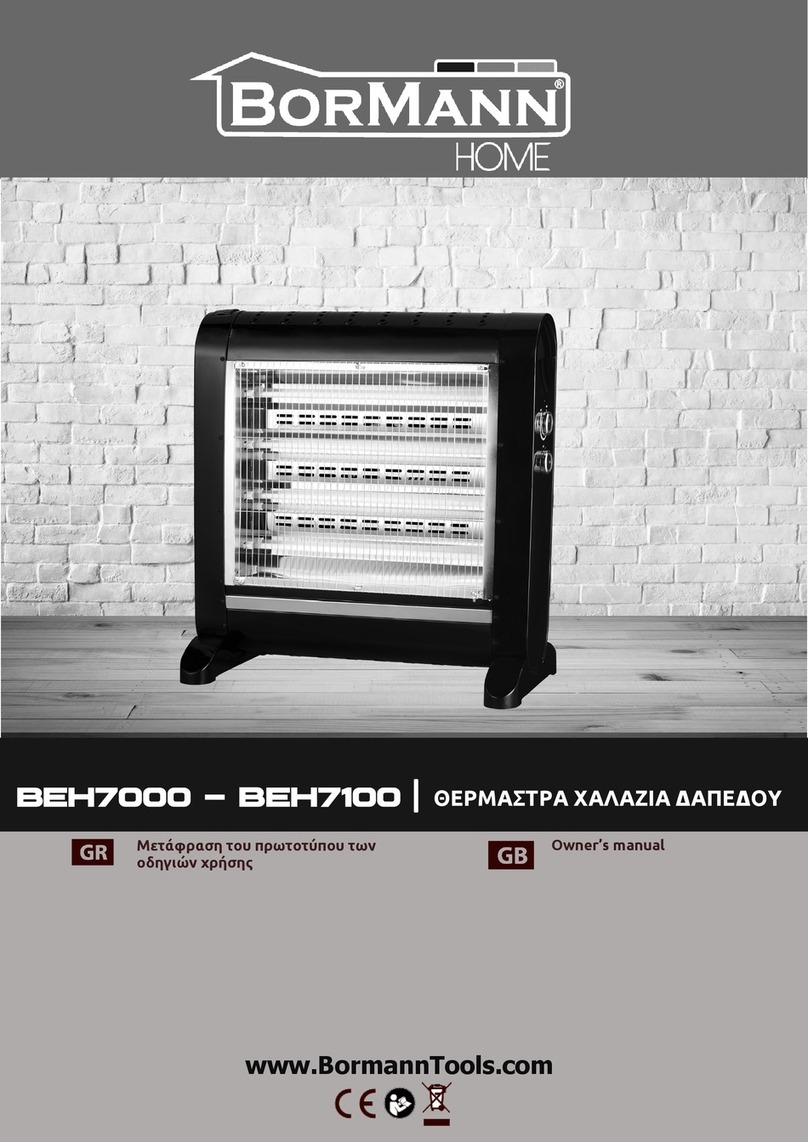
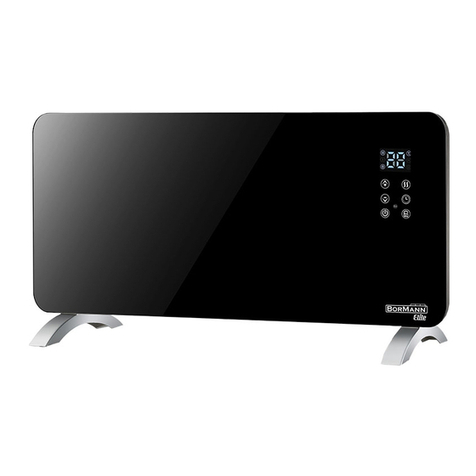
BorMann Elite BEH7300 User manual

WWW.BORMANNTOOLS.COM
GB
GR
BEH7300 - BEH7200 - BEH6100
030386030393030409

EN
WWW.BORMANNTOOLS.COM
2
1
2
3
4
5
POWER
AUTO
FUNCTION
SLEEP
MODE ENERGY
SAVING
MODE
TEMPERATURE
WEEKLY SCHEDULE
PROGRAM
TIME / TIMER
OPEN WINDOW
INDICATION
HEATING LEVEL
CLOCK
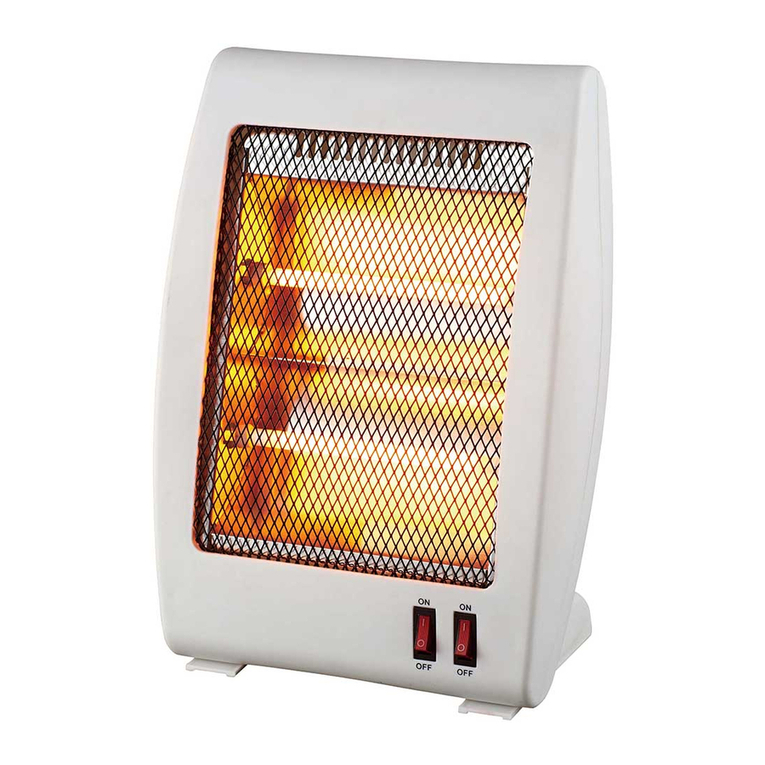
Components
1. Top Heang Power Switch
2. Other Sides Power Switch
3. Caster
4. Protecve Grill
5. Quartz Tube
BEH7300

EN
WWW.BORMANNTOOLS.COM
3
● Remove the packing and make sure that the appliance is intact. In case of doubt do not use the appliance and contact a qualied technician to have the
unit checked. Do not leave packaging materials like bags and staples within reach of children.
● Before switching on the appliance check if the electrical voltage and frequency of the circuit correspond to those indicated on the appliance.
● The appliance has to be connected to a circuit according to the rules in force concerning the civil plant. The plant has to be related to the nominal power of
the appliance and has to be provided with an earth-wire.
● Use the appliance only for the menoned purpose, namely as a heater for domesc use.
● Do not use it for any other purpose as it could get dangerous.
● The distributor is not responsible for any eventual damages caused by improper or faulty use.
● The use of every electrical appliance calls for the awareness of some basic rules, such as:
● Never touch the appliance with wet or damp hands or feet.
● Never expose the appliance to atmospheric condions (rain, sun, etc.).
● The appliance must be always placed on a at and stable surface
● Switch the appliance o and unplug it before cleaning.
● When the appliance is not in use, switch it o and unplug it.
● Do not use this heater in the immediate surroundings of a bath, a shower or a swimming pool.
● Do not put the cable on the appliance when it is sll warm.
● The heater must be insta1led and kept vercally.
● Do not switch on the heater near furniture, curtains, shelves, etc.
● Do not use the appliance near liquids or inammable maers.
● Do not locate the heater immediately below a socket outlet.
● Do not use this heater with a programmer, mer or any other device that switches the heater on automacally, since a re risk exists if heater is covered or
posioned incorrectly
● Do not cover the appliance when it is running to avoid overheang risks.
In case the power cord is damaged, do not try to x it yourself. Show it to a qualied technician.
● Children, old people and disabled people are not oen aware of the dangers, which can derive from improper use of the appliance. The appliance should
never be used without an adult supervision.
● Do not connect the appliance to extension cords or mulple outlets.
● Do not damage and do not link the power cord.
Carefully turn the Main Body upside-down on a scratch free and stable surface. Be careful to prevent damage to the cosmec nish or your oor surfacing.
Connect the castors onto the posts on the wheel plates and press on unl the click into posion. This can take some force.
Secure the wheel plate to the boom of the heater by using the wing nuts. Return the appliance to upright posion.
WARNING: Operate the appliance in normal upright posion only with wheel assemblies aached to the boom. Any other posion could create a hazardous
situaon.
Always choose a safe locaon for the heater, keeping in mind the safety precauons outlined. Ensure all packaging has been removed from the unit before use.
Please follow the instrucons below.
WARNING: In order to avoid overheang or re, do not cover the heater.
WARNING: Keep all objects at least 1 meter from the front, sides and rear of the appliance.
WARNING: Do not use this heater with a programmer, separate mer, remote control system or any other device that switches the heater on automacally,
since a re risk exists if the heater is covered or posioned incorrectly.
WARNING: Never leave the heater unaended when in use. Ensure that the heater in on a at, stable, heat-resistant surface. Once the heater is in a safe op-
erang posion and all switches are o, insert the power plug into the mains outlet and switch on.
CAUTION: Ensure the power cord is not ghtly stretched because if pulled out by force it may parally pull the plug from the socket. A parally inseted plug
will overheat the plug and socket and could result in re.
The control switch posions are: “I” = Low Heat “II” = High Heat
Check that the heat control switch is set to OFF posion before plugging the heater into the mains supply. For greater economy, use the Hight Heat seng
inially and then switch to the Low Heat seng.
* The manufacturer reserves the right to make minor changes to product design
and technical specicaons without prior noce unless these changes signicantly
aect the performance and safety of the products. The parts described / illustrated
in the pages of the manual that you hold in your hands may also concern other
models of the manufacturer’s product line with similar features and may not be
included in the product you just acquired.
* Please note that our equipment has not been designed for use in commercial,
trade or industrial applicaons. Our warranty will be voided if the machine is used
in commercial, trade or industrial businesses or for equivalent purposes.
* To ensure the safety and reliability of the product and the warranty validity, all
repair, inspecon, repair or replacement work, including maintenance and special
adjustments, must only be carried out by technicians of the authorized service
department of the manufacturer.
Technical Data
Model: BEH7200 BEH7300
Voltage/Frequency: 220-240V/50-60Hz 220-240V/50-60Hz 220-240V/50-60Hz
1100w/2200w 1100w/2200w 1100w/2200w
type:
Four tubes quartz
heang element
Four tubes quartz
heang element
Four tubes quartz
heang element
Tip-over switch Tip-over switch
LCD display, mer
funcon, remote
control, p-over
switch
Outdoor use Outdoor use

EN
WWW.BORMANNTOOLS.COM
4
1. Rotate thermostat knob clockwise unl you reach the maximum posion.
2. When the room reached a temperature that is comfortable for you, slowly turn the knob anclockwise unl the heater just turns o (you will hear a click).
3. The heater will now cycle on and o to maintain the comfort level you have set.
4. Take note of this seng posion for future use.
NOTE: Two elements will always be on when the thermostat has acvated.
Safety Devices
Tilt Switch - this will automacally turn the appliance o if the appliance is not in the correct operang posion.
CAUTION: The appliance generates heat during use. Precauons must be taken to prevent the risk of burns, scalds, res or other damage to persons.
Care and Cleaning
The heater requires regular cleaning to ensure trouble free operaon:
• Unplug the heater from the mains supply before cleaning
• Ensure that the heater has been allowed to cool down completely before cleaning
• The common cause of overheang is deposits of dust or u in the appliance. Ensure these deposits are removed regurarly by unpluging the appliance and
vacuum cleaning the air vents and grills.
• Use a damp cloth (not wet) to wipe the exterior of the heater to remove dust and dirt
• Never use soluons such petrol, thinners or polishing agents
• Ensure the heater is dry before plugging back into the mains supply
• Do not aempt to dismantle the heater
• There are no user serviceable parts. For service or repair, contact an authorised electrical service technician.
(BEH7300)
This heater have 4 mode: normal mode, automatic mode, sleep mode, power saving mode.
: To connect to power, the heater will have a short beep, all light on display will be on for 1 second, then automatic off. And the power indicator
lights up, the heater enters the standby condition.Then if user press “SETTING”, the heater will enter the reservation condition, user can set the heater to
power on after 1 to 15 hours by press “+” and “-”.
: In standby mode, press “ON/OFF” to start up, the heater will starts working with 2200W, all heating indicator light up.
: In power on mode, press “ON/OFF” again to shut down, the heater will enter to standby mode.(except when the heater enter to “open
window”-mode)
: press “mode”,user can free switch any mode in below 4 modes.
Normal mode:
In normal mode, the heater will start “product temperature sensing” status and “open window temperature sensing” status, their descripon as below:
“product temperature sensing” descripon:
When the heater is working with full power (four tubes all light up), if the sensor detects the ambient temperature is higher than 38oC, two tubes on heater
will go out and other two tubes will keep light up. When the sensor detects the ambient temperature is below 38oC, the heater will resumes working with full
power (four tubes all light up).
“open window temperature sensing”descripon:
When the heater is working with full power (four tubes all light up), if sensor detects the ambient temperature connuous decline 5oC within 300 seconds,
two tubes on heater will go out and other two tubes will keep light up, the open window indicaon“ ”lights up, user can close open window indicaon by any
buon, then the heater resume heang with full power (four tubes all light up).
Turning on power switch,the heater enter standby mode, power indicaon “ ”light up, press “ON/OFF” again, the heater will starts working with all power
that 2200W, and heang indicaon“ ”all light up. If you press “-”, the heater will starts working with half power that 1100W, and half heang indicaon light
up, like this“ ”.Then if press “+” again, the heater will works with all power, user can press “+”and “-” to adjust the heater working condion according to their
own needs.
In power on mode, user can press “SETTING”to set ming, when me light icker, user press “+” and “-” to adjust ming 1 hour to 15 hours, and every adjust-
able space is 1 hour. Aer you set ming,and wait 5 seconds or directly press“SETTING”, the heater enter to work countdown,me indicaon“ ”light up. User
can press “SETTING” again, ming will be re-set.Aer countdown nish, the heater stops working and returns to standby condion.
Mode Adjust set tem
perature Timing Weekly
Normal mode All power output (4 tubes light up) to
half power output (2 tubes light up)
Cannot set temperature
(Fixed at 38oC)
Set from 1 hour to 15 hours Not Applicable
Automacally by thermostat
Half / full power (2/4 tubes)
15oC-32oC Cannot set Not Applicable
Sleep mode All power output
(4 tubes light up)
Cannot set temperature
(Fixed at 28oC)
Set from 1 hour to 15 hours Not Applicable
Automacally by thermostat or mer
Half / full power (2/4 tubes)
15oC-32oCCannot set YES

EN
WWW.BORMANNTOOLS.COM
5
In automac mode, the heater will start“open window temperature sensing”status, its descripon as below:
“open window temperature sensing” descripon:
When the heater is working with full power (four tubes all light up), if sensor detects the ambient temperature connuous decline 5oC within 300 seconds,
two tubes on heater will go out and other two tubes will keep light up, the open window indicaon“ ”lights up, user can close open window indicaon by any
buon, then the heater resume heang with full power (four tubes all light up).
User can press “MODEL” to enter automac mode, the automac indicaon“ ”light up, the heater starts working with all power that 2200W.
User can press “+”and “-” to free adjust set temperature 15oC to 32oC,display icker and show the set temperature. Waing 5 seconds later or directly press“-
SETTING”, the set temperature is conrmed and exit adjustable condion. The heater starts working and heang. (Note:when the set temperature higher than
ambient temperature(the ambient temperature you can see on display when the heater starts up ), the heater will starts working with full power (four tubes all
light up). When the set temperature below ambient temperature, two tubes on heater will go out and other two tubes will keep light up)
Sleep Mode:
In sleep mode, the heater will start“product temperature sensing” status and “open window temperature sensing” status, their descripon as below:
“product temperature sensing” descripon:
The xed ambient temperature of product sensing is 28oC, When the sensor detects the ambient temperature is higher than 28oC, two tubes on heater will go
out and other two tubes will keep light up. When the sensor detects the ambient temperature is below 28oC, the heater will resumes working with full power
(four tubes all light up).
“open window temperature sensing” descripon:
When the heater under working status, if sensor detects the ambient temperature connuous decline 5oC within 300 seconds, two tubes on heater will go out
and other two tubes will keep light up, the open window indicaon“ ”lights up, user can close open window indicaon by any buon, then the heater resume
heang with full power (four tubes all light up).
User can press “MODEL” to enter sleep mode, the sleep indicaon light up, the heater starts working with full power that 2200W. ???Yes
User can press “SETTING” to set ming, when me light icker, user press “+” and “-” to adjust ming 1 hour to 15 hours, and every adjustable space is 1 hour.
Aer you set ming, and wait 5 seconds or directly press “SETTING”, mer will works, me indicaon light up, and display show the countdown condion. User
can press “SETTING” again, ming will be re-set. Aer countdown nish, the heater stops working and returns to standby condion.
In power saving mode, user can set weekly ming and temperature according to their own needs. the operaon as below:
User can press “MODE” to enter power saving mode, the power saving indicaon light up.
User can press “+” and “-” to free adjust set temperature 15oC to 32oC,display icker and show the set temperature. Waing 5 seconds later or directly press
“SETTING”, the set temperature is conrmed and exit adjustable condion. The heater starts working and heang. (Note: when the set temperature higher than
ambient temperature (the ambient temperature you can see on display when the heater starts up ), the heater will starts working with full power (four tubes
all light up). When the set temperature below ambient temperature, two tubes on heater will go out and other two tubes will keep light up).
In power saving mode, the power saving indicaon light up.
User can press “SETTING” to set the me to the current me. User press “+” or “-” to adjust current date from Monday to Sunday. ( If today is Monday, user
can set date to “Mon” ,and the indicator lights up.) Then press “SETTING” again,the date is conrmed and enter me seng condion.
User can set hour by press “+” ( 24 hours a day, every adjustment increase one hour and repeat this cycle ), and set minute by press “-” (60 minutes an
hour,every adjustment increase one minute and repeat this cycle). If current me is 12:00, user need adjust me to 12:00.
Aer me calibraon, user can press “SETTING” again to set the start date of weekly ming, user can press “+” and “-” to set start date from Monday to Sun-
day, then press “SETTING” again to conrm the start date that you set. Besides, “ON” will be showed on display, then user can set start me.
When “ON” is displayed, user can set hour by pressing “+” (24 hours a day, every adjustment increase one hour and repeat this cycle ), and set minute by
press “-” (60 minutes an hour,every adjustment increase one minute and repeat this cycle), then press “SETTING” again to conrm the start me that you set.
Besides, “OFF” will be showed on display, then user can set stopped me.
When “OFF”is displayed, user can set hour by pressing “+” (24 hours a day, every adjustment increase one hour and repeat this cycle), and set minute by press
“-” (60 minutes an hour,every adjustment increase one minute and repeat this cycle), then press “SETTING”again to conrm the stopped me that you set.
Besides, the heater re-enter ming seng condion to set next ming.
If user need ming in other day, user can completely re-operates (2-1) (can press “+”and“-”to set date), (2-2), (2-3), (2-4).
When user completes seng, press and hold the “seng” for 2 seconds, the heater will exit weekly seng condion, and mer starts. Display show the
current me, and clock light up.
When me show on display reaches start me that user set before, the heater will works under temperature that set before. When me show on display
reaches stopped me that user set before, the heater will stops working.

EN
WWW.BORMANNTOOLS.COM
6
Stage mes of press
“SETTING” The heater Condion Display Press “+” Press “-”
Time
First Adjust the date to
the current date The date light icker Date forward Date backward
Second Adjust the me to
the current me The me light icker
every pressing
increase one hour and
repeat this cycle
every pressing increase
one minute and repeat
this cycle
Third Set start date The date light icker Date forward Date backward
Fourth Set start me The me light ick-
er, “ON”light up
every pressing
increase one hour and
repeat this cycle
every pressing increase
one minute and repeat
this cycle
Fih Set stopped me The me light ick-
er, “OFF”light up
every pressing
increase one hour and
repeat this cycle
every pressing increase
one minute and repeat
this cycle
If user need ming in other day, user can completely re-operates “third”(can press “+”and“-”to set date),
“fourth”, “Fih”.
Complete
Hold this press
for 2 seconds
1.The heater exit weekly ming seng condion, and mer starts.
2.Display show the current me, and clock “ ”light up.
When the heater enter power saving mode, the power saving indicaon light up, and the heater will be working with full power (four tubes all light up).
When user is seng weekly ming (when heater is in seng condion), the heater is working with full power (four tubes all light up), when user nishes seng
and exit seng condion, the heater will be working with half power (only two tubes light up). Before reaches the appointment starng me, the heater works
with half power (only two tubes light up). Unl the heater reaches the appointment starng me, four tubes will be all light up, the heater will be working with
full power. When the heater reaches the appointment nishing me, two tubes on heater will go out and other two tubes will keep light up. Unl enter the next
stage seng me, the other two tubes will resume light up. If no other seng me later, all tubes will go o, the heater is power o.
Note: When the heater is working in weekly seng me, if heater meets open window funcon, two tubes on heater will go out and other two tubes will keep
light up. Then user can press any buon to make heater resume works in weekly seng me condion.
EN * The manufacturer reserves the right to make minor changes to product design and technical specicaons without prior noce unless these changes signicantly aect the performance and safety of
the products. The parts described / illustrated in the pages of the manual that you hold in your hands may also concern other models of the manufacturer's product line with similar features and may not be
included in the product you just acquired.
* Please note that our equipment has not been designed for use in commercial, trade or industrial applicaons. Our warranty will be voided if the machine is used in commercial, trade or industrial businesses
or for equivalent purposes.
* To ensure the safety and reliability of the product and the warranty validity, all repair, inspecon, repair or replacement work, including maintenance and special adjustments, must only be carried out by
technicians of the authorized service department of the manufacturer.

GR
WWW.BORMANNTOOLS.COM
7
1
2
3
4
5
1. Διακόπτης ενεργοποίησης / απενεργοποίησης
της άνω επιφάνειας θέρμανσης
2. Διακόπτης ενεργοποίησης / απενεργοποίησης
όλων των επιφανειών θέρμανσης
3. Τροχός
4. Πλέγμα προστασίας
5. Λαμπτήρας χαλαζία
BEH7300

GR
WWW.BORMANNTOOLS.COM
8
• Αφαιρέστε την αρχική συσκευασία και βεβαιωθείτε ότι η συσκευή είναι ανέπαφη. Σε περίπτωση αμφιβολίας, μην χρησιμοποιείτε τη συσκευή. Στην πε-
ρίπτωση αυτή επικοινωνήστε με έναν εξειδικευμένο τεχνικό για τον έλεγχο της συσκευής. Κρατήστε τα υλικά συσκευασίας, όπως είναι οι σακούλες και τα
δίχαλα του συρραπτικού σε απόσταση ασφαλείας από τα παιδιά.
• Πριν ενεργοποιήσετε τη συσκευή ελέγξτε αν η ηλεκτρική τάση και η συχνότητα της παροχής ηλεκτρικού ρεύματος αντιστοιχούν σε εκείνες που αναγράφο-
νται στη συσκευή.
• Η συσκευή πρέπει να συνδεθεί σε ένα κύκλωμα σύμφωνα με τους ισχύοντες κανονισμούς σχετικά με την αστική μονάδα. Η εγκατάσταση πρέπει να σχετί-
ζεται με την ονομαστική ισχύ της συσκευής και πρέπει να είναι εφοδιασμένη με ένα καλώδιο γείωσης.
• Χρησιμοποιείτε τη συσκευή μόνο για τον προαναφερθέντα σκοπό, δηλαδή ως θερμαντήρας για οικιακή χρήση.
• Μην τη χρησιμοποιείτε για κανέναν άλλο σκοπό, καθώς αυτό θα μπορούσε να είναι επικίνδυνο.
• Ο προμηθευτής / κατασκευαστής δεν είναι υπεύθυνος για τυχόν ζημιές που προκλήθηκαν από ακατάλληλη ή εσφαλμένη χρήση.
• Η χρήση κάθε ηλεκτρικής συσκευής απαιτεί συνειδητοποίηση ορισμένων βασικών συμβουλών ασφαλείας, όπως:
• Μην αγγίζετε ποτέ τη συσκευή με υγρά ή υγρά χέρια ή πόδια.
• Ποτέ μην εκθέτετε τη συσκευή σε καιρικές συνθήκες (βροχή, ήλιο, κλπ.).
• Η συσκευή πρέπει πάντα να τοποθετείται σε επίπεδη και σταθερή επιφάνεια
• Απενεργοποιήστε τη συσκευή και αποσυνδέστε την πριν από τον καθαρισμό της.
• Όταν η συσκευή δεν χρησιμοποιείται, απενεργοποιήστε την και αποσυνδέστε την.
• Μη χρησιμοποιείτε αυτόν τον θερμαντήρα στο άμεσο περιβάλλον του μπάνιου, του ντους ή της πισίνας.
• Μην τοποθετείτε το καλώδιο στη συσκευή όταν είναι ακόμα ζεστή.
• Ο θερμαντήρας πρέπει να εγκατασταθεί και να διατηρηθεί κάθετα.
• Μην ανάβετε το θερμαντήρα όταν βρίσκεται κοντά σε έπιπλα, κουρτίνες, ράφια κλπ.
• Μη χρησιμοποιείτε τη συσκευή κοντά σε υγρά ή εύφλεκτα υλικά.
• Μην τοποθετείτε τον θερμαντήρα αμέσως κάτω από την πρίζα.
• Μην χρησιμοποιείτε αυτόν τον θερμαντήρα με προγραμματιστή, χρονοδιακόπτη ή οποιαδήποτε άλλη συσκευή που ενεργοποιεί αυτόματα τον θερμαντήρα,
καθώς υπάρχει κίνδυνος πυρκαγιάς εάν ο θερμαντήρας είναι καλυμμένος ή τοποθετηθεί λανθασμένα.
• Μην καλύπτετε τη συσκευή όταν λειτουργεί, για να αποφύγετε τους κινδύνους υπερθέρμανσης.
• Σε περίπτωση βλάβης του καλωδίου τροφοδοσίας, μην προσπαθήσετε να το επιδιορθώσετε μόνοι σας. Παραδώστε την συσκευή σε έναν εξειδικευμένο
τεχνικό.
• Τα παιδιά, οι ηλικιωμένοι και τα άτομα με ειδικές ανάγκες δεν γνωρίζουν συχνά τους κινδύνους που μπορεί να προκύψουν από την ακατάλληλη χρήση της
συσκευής. Η συσκευή δεν πρέπει ποτέ να χρησιμοποιηθεί χωρίς επίβλεψη ενηλίκου.
• Μην συνδέετε τη συσκευή σε προεκτάσεις ή πολύμπριζα.
• Μην προκαλείτε βλάβη στο καλώδιο τροφοδοσίας και μην το συνδέετε σε προεκτάσεις.
• Προτού καθαρίσετε τη συσκευή ή πραγματοποιήσετε οποιαδήποτε συντήρηση, απενεργοποιήστε και αποσυνδέστε τη συσκευή.
• Εάν η συσκευή δεν λειτουργεί, απενεργοποιήστε την χωρίς να την αποσυναρμολογήσετε. Αν απαιτείται επισκευή, επικοινωνήστε με έναν εξειδικευμένο
τεχνικό.
*Ο κατασκευαστής διατηρεί το δικαίωμα να πραγματοποιήσει δευτερεύουσες
αλλαγές στο σχεδιασμό του προϊόντος και στα τεχνικά χαρακτηριστικά χωρίς
προηγούμενη ειδοποίηση, εκτός εάν οι αλλαγές αυτές επηρεάζουν σημαντικά
την απόδοση και λειτουργία ασφάλειας των προϊόντων. Τα εξαρτήματα που
περιγράφονται / απεικονίζονται στις σελίδες του εγχειριδίου που κρατάτε στα
χέρια σας ενδέχεται να αφορούν και σε άλλα μοντέλα της σειράς προϊόντων
του κατασκευαστή, με παρόμοια χαρακτηριστικά, και ενδέχεται να μην
περιλαμβάνονται στο προϊόν που μόλις αποκτήσατε.
* Λάβετε υπόψη ότι ο εξοπλισμός μας δεν έχει σχεδιαστεί για χρήση σε εμπορικές,
επαγγελματικές ή βιομηχανικές εφαρμογές. Η εγγύησή μας θα ακυρωθεί αν το
προϊόν χρησιμοποιείται σε εμπορικές, επαγγελματικές ή βιομηχανικές επιχειρήσεις
ή για ανάλογους σκοπούς.
* Για να διασφαλιστεί η ασφάλεια και η αξιοπιστία του προϊόντος καθώς και η ισχύς
της εγγύησης όλες οι εργασίες επιδιόρθωσης, ελέγχου, επισκευής ή αντικατάστασης
συμπεριλαμβανομένης της συντήρησης και των ειδικών ρυθμίσεων, πρέπει να
εκτελούνται μόνο από τεχνικούς του εξουσιοδοτημένου τμήματος Service του
κατασκευαστή.
BEH7200 BEH7300
220-240V/50-60Hz 220-240V/50-60Hz 220-240V/50-60Hz
1100w/2200w 1100w/2200w 1100w/2200w
Στοιχείο θέρμανσης
χαλαζία τεσσάρων
λαμπτήρων
Στοιχείο θέρμανσης
χαλαζία τεσσάρων
λαμπτήρων
Στοιχείο θέρμανσης
χαλαζία τεσσάρων
λαμπτήρων
Διακόπτης
προστασίας
ανατροπής
Διακόπτης
προστασίας
ανατροπής
Οθόνη LCD,
λειτουργία
χρονοδιακόπτη,
τηλεχειριστήριο,
διακόπτης
προστασίας
ανατροπής
Γυρίστε προσεκτικά την συσκευή ανάποδα, τοποθετήστε την σε μια σταθερή και μαλακή επιφάνεια. Να είστε ιδιαίτερα προσεκτικοί ώστε να μην προκαλέσετε
φορά στην εξωτερική επίστρωση της συσκευής ή στην επιφάνεια του δαπέδου σας.
Συνδέστε τους τροχούς στις βάσεις των τροχών και πιέστε τους μέχρι να ασφαλίσουν στην θέση τους. Ασκήστε αρκετή δύναμη, προσεκτικά.
Ασφαλίστε την βάση των τροχών στο κάτω μέρος του θερμαντήρα χρησιμοποιώντας τις πεταλούδες σύσφιξης. Επιστρέψτε τη συσκευή σε όρθια θέση.
: Για λόγους ασφαλείας, λειτουργήστε τη συσκευή σε κανονική όρθια θέση και μόνο εφόσον έχετε τοποθετήσει πρώτα τους τροχούς στο
κάτω μέρος.
Να επιλέγετε πάντα μια ασφαλή τοποθεσία για τη θερμάστρα, έχοντας κατά νου τις προφυλάξεις ασφαλείας που περιγράφονται. Βεβαιωθείτε ότι όλες οι
συσκευασίες έχουν αφαιρεθεί από τη μονάδα πριν από τη χρήση. Ακολουθήστε τις παρακάτω οδηγίες.
: Για να αποφύγετε την υπερθέρμανση ή την πυρκαγιά, μην καλύπτετε τη θερμάστρα.
: Κρατήστε όλα τα αντικείμενα τουλάχιστον 1 μέτρο μακριά από το μπροστινό μέρος, τα πλαϊνά και το πίσω μέρος της συσκευής.
: Μην χρησιμοποιείτε αυτήν τη θερμάστρα με προγραμματιστή, εξωτερικό χρονοδιακόπτη, σύστημα τηλεχειρισμού ή οποιαδήποτε άλλη
συσκευή που ενεργοποιεί αυτόματα τη θερμάστρα, καθώς υπάρχει κίνδυνος πυρκαγιάς εάν ο θερμαντήρας είναι καλυμμένος ή τοποθετημένος λανθασμένα.
Για χρήση σε
εξωτερικούς χώρους
Για χρήση σε
εξωτερικούς χώρους

GR
WWW.BORMANNTOOLS.COM
9
: Μην αφήνετε ποτέ το θερμαντήρα χωρίς επίβλεψη κατά τη χρήση. Βεβαιωθείτε ότι ο θερμαντήρας βρίσκεται σε επίπεδη, σταθερή, ανθε-
κτική στη θερμότητα επιφάνεια. Όταν ο θερμαντήρας βρίσκεται σε ασφαλή θέση λειτουργίας και όλοι οι διακόπτες είναι απενεργοποιημένοι, συνδέστε το
φις στην πρίζα και ενεργοποιήστε το.
: Βεβαιωθείτε ότι το καλώδιο τροφοδοσίας δεν είναι τεντωμένο, επειδή εάν τραβηχτεί βίαια μπορεί να τραβήξει μερικώς το βύσμα από την πρίζα.
Ένα μερικώς συνδεδεμένο βύσμα θα υπερθερμανθεί και μπορεί να αναφλεγεί.
Οι θέσεις του διακόπτη ελέγχου είναι: “I” = Χαμηλή θερμότητα “II” = Υψηλή θερμότητα
Βεβαιωθείτε ότι ο διακόπτης ελέγχου θερμότητας είναι ρυθμισμένος στη θέση OFF πριν συνδέσετε το θερμαντήρα στην παροχή ρεύματος. Για μεγαλύτερη
οικονομία, χρησιμοποιήστε αρχικά τη ρύθμιση High Heat και μετά μεταβείτε στη ρύθμιση Low Heat.
1. Περιστρέψτε το κουμπί του θερμοστάτη δεξιόστροφα μέχρι να τεθεί στη μέγιστη θέση.
2. Όταν το δωμάτιο φτάσει σε μια ιδανική θερμοκρασία ,γυρίστε αργά το κουμπί αριστερόστροφα έως ότου απενεργοποιηθεί η συσκευή (θα ακούσετε ένα
κλικ).
3. Ο θερμαντήρας θα ενεργοποιείται και θα απενεργοποιείται διατηρώντας κατ’αυτόν τον τρόπο την θερμοκρασία στα προρυθμισμένα επίπεδα.
4. Σημειώστε αυτήν τη θέση ρύθμισης για μελλοντική χρήση.
: Δύο στοιχεία θα είναι πάντα αναμμένα όταν ο θερμοστάτης έχει ενεργοποιηθεί.
Διακόπτης προστασίας ανατροπής - το σύστημα αυτό θα απενεργοποιήσει αυτόματα τη συσκευή εάν η συσκευή δεν βρίσκεται στη σωστή θέση λειτουργίας.
: Η συσκευή παράγει θερμότητα κατά τη χρήση. Πρέπει να λαμβάνονται προφυλάξεις για την πρόληψη του κινδύνου, εγκαυμάτων, πυρκαγιάς ή
άλλων τραυματισμών προς άλλα άτομα.
• Ο θερμαντήρας απαιτεί τακτικό καθαρισμό για να εξασφαλίσει τη λειτουργία χωρίς προβλήματα:
• Αποσυνδέστε το θερμαντήρα από την παροχή ρεύματος πριν από τον καθαρισμό της.
• Βεβαιωθείτε ότι ο θερμαντήρας έχει κρυώσει εντελώς πριν τον καθαρισμό του.
• Η συνήθης αιτία υπερθέρμανσης είναι η εναπόθεση σκόνης ή χνουδιού στη συσκευή. Βεβαιωθείτε ότι αυτές οι εναποθέσεις καθαρίζονται τακτικά αποσυν-
δέοντας τη συσκευή και καθαρίζοντας με μια ηλεκτρική σκούπα τον αεραγωγό και τις γρίλιες.
• Χρησιμοποιήστε ένα νοτισμένο και όχι βρεγμένο πανί για να σκουπίσετε το εξωτερικό του θερμαντήρα για να αφαιρέσετε τη σκόνη και τη βρωμιά
• Ποτέ μην χρησιμοποιείτε διαλύματα όπως βενζίνη, διαλύτες ή στιλβωτικά.
• Βεβαιωθείτε ότι ο θερμαντήρας είναι στεγνός πριν τον συνδέσετε ξανά με την παροχή ρεύματος
• Μην επιχειρήσετε να αποσυναρμολογήσετε τη θερμάστρα.
• Δεν υπάρχουν ανταλλακτικά που μπορούν να επισκευαστούν από τον χρήστη. Για σέρβις ή επισκευή, επικοινωνήστε με το εξουσιοδοτημένο τμήμα σέρβις.

GR
WWW.BORMANNTOOLS.COM
10
Οδηγίες λειτουργίας (BEH7300)

GR
WWW.BORMANNTOOLS.COM
11

GR
WWW.BORMANNTOOLS.COM
12

GR
WWW.BORMANNTOOLS.COM
13

GR
WWW.BORMANNTOOLS.COM
14
EL *Ο κατασκευαστής διατηρεί το δικαίωμα να πραγματοποιήσει δευτερεύουσες αλλαγές στο σχεδιασμό του προϊόντος και στα τεχνικά χαρακτηριστικά χωρίς προηγούμενη ειδοποίηση, εκτός εάν οι αλλαγές
αυτές επηρεάζουν σημαντικά την απόδοση και λειτουργία ασφάλειας των προϊόντων. Τα εξαρτήματα που περιγράφονται / απεικονίζονται στις σελίδες του εγχειριδίου που κρατάτε στα χέρια σας ενδέχεται
να αφορούν και σε άλλα μοντέλα της σειράς προϊόντων του κατασκευαστή, με παρόμοια χαρακτηριστικά, και ενδέχεται να μην περιλαμβάνονται στο προϊόν που μόλις αποκτήσατε.
* Λάβετε υπόψη ότι ο εξοπλισμός μας δεν έχει σχεδιαστεί για χρήση σε εμπορικές, επαγγελματικές ή βιομηχανικές εφαρμογές. Η εγγύησή μας θα ακυρωθεί αν το προϊόν χρησιμοποιείται σε εμπορικές,
επαγγελματικές ή βιομηχανικές επιχειρήσεις ή για ανάλογους σκοπούς.
* Για να διασφαλιστεί η ασφάλεια και η αξιοπιστία του προϊόντος καθώς και η ισχύς της εγγύησης όλες οι εργασίες επιδιόρθωσης, ελέγχου, επισκευής ή αντικατάστασης συμπεριλαμβανομένης της
συντήρησης και των ειδικών ρυθμίσεων, πρέπει να εκτελούνται μόνο από τεχνικούς του εξουσιοδοτημένου τμήματος Service του κατασκευαστή.

Other manuals for Elite BEH7300
1
This manual suits for next models
5
Table of contents
Languages:
Other BorMann Heater manuals

BorMann
BorMann Elite BEH7300 User manual

BorMann
BorMann Elite BEH9005 User manual

BorMann
BorMann BEH2000 User manual

BorMann
BorMann HOME BEH1000 User manual

BorMann
BorMann BEH7000 User manual

BorMann
BorMann HOME BEH4500 User manual

BorMann
BorMann HOME BEH4000 User manual

BorMann
BorMann Elite BEH5050 User manual

BorMann
BorMann HOME BEH5000 User manual

BorMann
BorMann BEH3000 User manual