manuals.online logo
Brands
  1. Home
  2. •
  3. Brands
  4. •
  5. Bristan
  6. •
  7. Plumbing Product
  8. •
  9. Bristan Java J BID C User manual

Bristan Java J BID C User manual

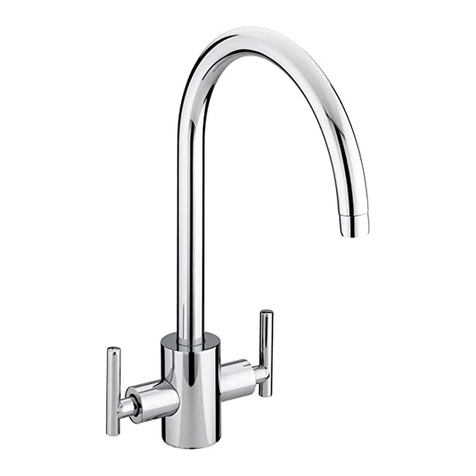
Java Bidet Mixer
Fitting Instructions
& Contents List
(With pop-up waste)
Please keep these instructions for future reference and request of
replacement part
(FI J BID) (REV D1)
AFTERCARE INSTRUCTIONS
GUARANTEE
Your fitting has a high quality finish and should be treated with care to preserve the
visible surfaces.
All surface finishes will wear if not cleaned correctly, the only safe way to clean your
mixer is to wipe with a soft damp cloth. Stains can be removed using washing up
liquid. All bath cleaning powders and liquids will damage the surface of your fitting,
even the non-scratch cleaners.
All products are manufactured to the highest standards and a 5 year guarantee
covers any defect in manufacture.
In the interests of continuous product development we reserve the right to alter
specification as necessary
Installer please fill in code here
Bristan Group Limited
Birch Coppice Business Park
Dordon
Tamworth
Staffordshire
B78 1SG
UK
A Masco Company
Website: www.bristan.com
Telephone:+44 (0) 844 701 6274
Facsimile: +44 (0) 844 701 6275
NOTE: Never use abrasive detergents or
disinfectants or those containing alcohol, hydrochloric acid or phosphoric
acid.
NOTE: The 5-year guarantee on the cartridge is invalidated if damaged by any
waterborne debris.
All products must have access for servicing or replacement during the life of
the product.
PRODUCT IDENTIFICATION CODE LASER ETCHED ON PRODUCT
. (Where applicable)
PRODUCT CODE:
TELEPHONE HELPLINE! +44 (0)844 701 6273
Bristan recommend E-Cloth for cleaning all of our
bathroom & kitchen products. Using just water, E-cloth
gives a smear free, deep clean by breaking up and holding
dirt, which normal cloths leave behind. Order through
your Bristan stockist. (ORDER CODE: ECLOTH)
8
7
9
10
12
11
13
2
3
4
6
5
1
d
e
f
c
15
ba
14
WATER PRESSURE
This mixer is suitable for use at all supply pressures. However for optimum use both
the hot and cold supplies should be reasonably balanced.
If the fitting is installed at low pressure (tank fed), then the minimum distance from the
outlet of the nozzle to the underside of the cold tank should be 2.0 metres to ensure
adequate shower performance.
This mixer should be installed in compliance with the Water Regulations. Where the
supplies are unbalanced, i.e hot water from the cylinder tank/cold from the mains,
approved check valves must be fitted in the supply pipes. For further details contact
your Local Water Authority.
PLEASE NOTE:
0844 701 6273
In the unlikely event you find a part missing, please contact our Customer Service
helpline on for immediate dispatch of part
INSTALLATION
1. Identify all components and check for completeness, particularly before
commencing installation.
2. Fit the mixer body (1) to the bidet using the ‘C’ plate fixing kit. The plinth (3)
and O-ring (15) go between the fitting and the bidet, and the ‘C’ shaped
rubber (4) and metal washers (5) on the underside of the bidet. Secure
Into position using the threaded rods (8) and nuts (6).
3. Fit the tail pipes (7) to the fitting and connect the hot and cold supplies.
4. Fit the pop-up waste, using washers (11) below & (12) above the bidet
& connect it to the mixer. It is recommended that a silicon sealant be applied to
both sealing faces of washers (11 and 12). The waste can be set by adjusting the
waste rod (9)/ operating rod (2) connecting bracket and the screw in the base of
the plug (14).
5. Fully open the mixer in the mid position, letting the water flow for a few minutes
to check all joints and connections for leaks.
6. See back page for aftercare instructions.
N.B. Please write the name and product code of your fitting in the spaces
provided overleaf. This will ensure a speedier service if you should need to
phone the helpline.
MAINTENANCE
If the fitting begins to drip:
Note: That there are locating pins on the bottom of the cartridge that fit in
Holes inside the tap, to ensure it is fitted the right way round.
1. Turn off the water supply
2. Remove indice cap(a), loosen grub screw (b) with 2.5mm hexagonal key and
pull off head (c), unscrew shroud (d) retaining nut (e).
3. Remove cartridge (f).
4. Clean or replace cartridge, clean and grease seal and refit.
5. Replace cartridge and head, then turn on the water supply.
6. Contact our helpline if problem persists.
CONTENTS
1. Mixer Body
2. Pop-up Operating Rod
3. Plinth
4. C-shaped Rubber Washer
5. C-shaped Metal Washer
6. Nut (x2)
7. Copper Tail Pipes (x2)
8. Threaded Rod (x2)
9. Waste Rod
10. Waste Body
11. Washer
12. Washer
13. Waste Flange
14. Plug

Other Bristan Plumbing Product manuals
Bristan PM2 SHCDIV C Wiring diagram

Bristan

Bristan PM2 SHCDIV C Wiring diagram

Bristan W-BASIN01-C Wiring diagram

Bristan

Bristan W-BASIN01-C Wiring diagram

Bristan HY POWSHX W Mounting instructions

Bristan

Bristan HY POWSHX W Mounting instructions

Bristan Cinnamon Wiring diagram

Bristan

Bristan Cinnamon Wiring diagram

Bristan CAP2 SHUAR C Mounting instructions

Bristan

Bristan CAP2 SHUAR C Mounting instructions

Bristan CR SHXDIVFF C Wiring diagram

Bristan

Bristan CR SHXDIVFF C Wiring diagram

Bristan K 1/2 C Wiring diagram

Bristan

Bristan K 1/2 C Wiring diagram

Bristan CRAZE CRZ2 SHXDIVCTFF C Wiring diagram

Bristan

Bristan CRAZE CRZ2 SHXDIVCTFF C Wiring diagram

Bristan W BTH12 C User manual

Bristan

Bristan W BTH12 C User manual

Bristan Jute JU BASNW C User manual

Bristan

Bristan Jute JU BASNW C User manual

Bristan VAL2 BRDSM C CD Wiring diagram

Bristan

Bristan VAL2 BRDSM C CD Wiring diagram

Bristan GLR 1/2 C User manual

Bristan

Bristan GLR 1/2 C User manual

Bristan Z2 DUS 1/2 C Wiring diagram

Bristan

Bristan Z2 DUS 1/2 C Wiring diagram

Bristan Moloko User manual

Bristan

Bristan Moloko User manual

Bristan SQR KIT01 BLK D2 Wiring diagram

Bristan

Bristan SQR KIT01 BLK D2 Wiring diagram

Bristan PIV BSM C User manual

Bristan

Bristan PIV BSM C User manual

Bristan SOQ2 SHUAR C Mounting instructions

Bristan

Bristan SOQ2 SHUAR C Mounting instructions

Bristan GLE385 W Mounting instructions

Bristan

Bristan GLE385 W Mounting instructions

Bristan CR SHXDIVFF C Wiring diagram

Bristan

Bristan CR SHXDIVFF C Wiring diagram

Bristan W BASIN12 C User manual

Bristan

Bristan W BASIN12 C User manual

Bristan W BATH05 C Wiring diagram

Bristan

Bristan W BATH05 C Wiring diagram

Bristan Jute JU PBSM C User manual

Bristan

Bristan Jute JU PBSM C User manual

Bristan Blitz Tap Series Wiring diagram

Bristan

Bristan Blitz Tap Series Wiring diagram

Bristan Wine Easyfit Wiring diagram

Bristan

Bristan Wine Easyfit Wiring diagram

Popular Plumbing Product manuals by other brands

Hans Grohe Raindance S Showerpipe 240 1jet EcoSmart... Instructions for use/assembly instructions

Hans Grohe

Hans Grohe Raindance S Showerpipe 240 1jet EcoSmart... Instructions for use/assembly instructions

Hans Grohe Montreux 97991 Series Service

Hans Grohe

Hans Grohe Montreux 97991 Series Service

Moen TS340 Series Specifications

Moen

Moen TS340 Series Specifications

SFA SANICUBIC 1 manual

SFA

SFA SANICUBIC 1 manual

Hans Grohe Showerpipe Croma 100 Reno Instructions for use/assembly instructions

Hans Grohe

Hans Grohe Showerpipe Croma 100 Reno Instructions for use/assembly instructions

aquabrass Time 51N85 installation guide

aquabrass

aquabrass Time 51N85 installation guide

American Standard Exposed Yoke Wall-Mount Utility Faucet... repair parts

American Standard

American Standard Exposed Yoke Wall-Mount Utility Faucet... repair parts

Franke F5 Series Installation and operating instructions

Franke

Franke F5 Series Installation and operating instructions

Axor Starck 240 1 jet 12672 9 Series Instructions for use/assembly instructions

Axor

Axor Starck 240 1 jet 12672 9 Series Instructions for use/assembly instructions

Hans Grohe Metris S 31436000 Instructions for use/assembly instructions

Hans Grohe

Hans Grohe Metris S 31436000 Instructions for use/assembly instructions

San-Ei K87310J-BW installation instructions

San-Ei

San-Ei K87310J-BW installation instructions

Sanela SLU 45M2 Instructions for use

Sanela

Sanela SLU 45M2 Instructions for use

BELLOSTA THEO 0905 installation instructions

BELLOSTA

BELLOSTA THEO 0905 installation instructions

Toto DLE424SMAE installation manual

Toto

Toto DLE424SMAE installation manual

Elson EPS LEAD FREE installation instructions

Elson

Elson EPS LEAD FREE installation instructions

American Standard Williamsburg 2804.22 Specification sheet

American Standard

American Standard Williamsburg 2804.22 Specification sheet

Moen Show House SAVVY TS3910 Series Specifications

Moen

Moen Show House SAVVY TS3910 Series Specifications

Signature Hardware ROTUNDA Installation

Signature Hardware

Signature Hardware ROTUNDA Installation

manuals.online logo
manuals.online logoBrands
  • About & Mission
  • Contact us
  • Privacy Policy
  • Terms and Conditions

Copyright 2025 Manuals.Online. All Rights Reserved.