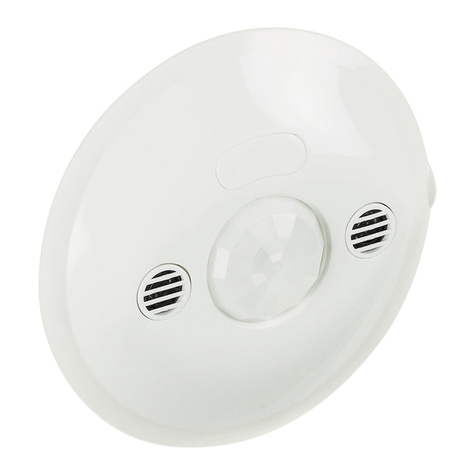
Bticino Living Now BMS04001 User manual

1
www.bticino.com
K4659
ST-00000220-
6
7
1
2
3
4
5
1 m
2,5 m
≥ 2,5 m
24/04/2019
EN
1. Brightness sensor
2. Two-way IR transmitter (under the lens)
3. Movement sensor and PIR sensor (under the lens)
4. LEARN LED
5. LEARN button
6. Configurator socket
7. BUS clamp
Front view
Rear view
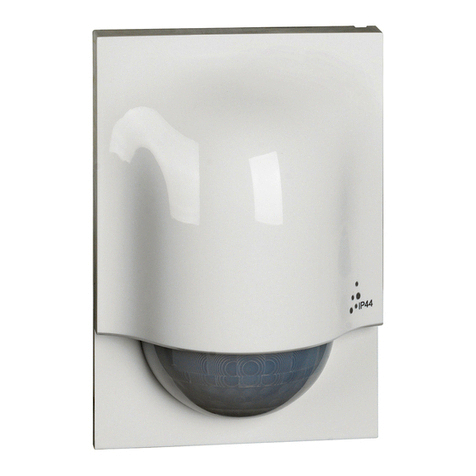
Green Switch: passive IR (PIR) flush-mounted 2-module movement sensor, suitable for
the detection of presence in transit areas. Operating mode (automatic or manual), time
delay (5 s to 59 min), and brightness threshold (20 to 1275 LUX).
Positioning the detector
Description
Voltage: 27 Vdc
Maximum current draw: 15 mA
Connection between sensor and actuator: SCS BUS connector
Sensor type: PIR movement detector with 180° detection
angle and brightness sensor.
Flush mounted box depth: 40 mm
Weight: 60 g
Impact resistance: IK04
Penetration of solids and liquids: IP20
Time delay: 5 sec – 59min. 59 sec
Brightness: 20 – 1275 lux
Operating temperature: (-5) – (+45) °C
Storage temperature: (-20) – (+70) °C
Technical data
Size: 2 flush mounted modules.
Dimensional data
Installation
Legend
Position the sensor so
that it is not affected by
the artificial light already
present in the room.
PIR flush mounting motion sensor

2
ST-00000220- 24/04/2019
K4659
EN
Settings
Sensor parameters Default value Adjustable parameters Configuration remote control
BMSO4001 BMSO4003
Time delay 15 mn 3,5,10,15,20 mn −
30s - 255 h 59 mn 59s −
Sensitivity PIR (very high) Low, medium, high, very high
Brightness threshold 300 lux 20, 100, 300, 500, 1000 lux −
0 - 1275 lux −
Operating
mode
Auto Not active ON/OFF
Walkthrough ON ON/OFF
Eco Not active ON/OFF
Detection
mode
Initial PIR Cannot be modified −
Holding PIR Cannot be modified −
Retrigger PIR PIR/OFF −
Alarm Not active ON/OFF −
Advanced
mode
Calibration − 0 - 99995 lux −
Adjustment Not active ON/OFF −
Contribution of light Automatic Automatic - 1275 lux −
Time delay
The period of time after which the load is switched off if no movement is detected.
The time restarts whenever the sensor detects a movement.
Sensitivity
Adjustment of the sensitivity of the detection technology used.
Brightness threshold
Lighting level below which the sensor activates the load and above which it
switches it off.
Operating mode:
Auto
The load is automatically switched on:
- upon detection of a movement if the level of natural light is insufficient.
The load is automatically switched off:
- if no movement is detected at the end of the set time delay + standby time.
- or if the level of natural light is insufficient (adjustment on).
Each new detection causes automatic switching on if the light is insufficient.
Walkthrough
If a movement is detected for a time of less than 20 s, the sensor will decrease
the set time delay to 3 minutes. If the set delay time set is already less than three
minutes, it will remain as such.
Eco
The load is switched on manually while switching off is automatic:
- if no movement is detected at the end of the set delay time.
After switching off the load, if any movement is detected within 30 s, the load is
automatically switched back on (retrigger function on). At the end of this time
interval, the load must be switched back on manually.
Detection mode
Set of technologies used for detection.
Initial: set of technologies used for the first detection.
Holding: set of technologies used after the first detection.
Retrigger: set of technologies used for the Retrigger function.
After switching off, any new detection within 30 seconds will cause the load to switch
back on automatically. After 30 seconds, the load must be switched back on manually.
Available only in Eco mode.
Alarm: before switching off the load the sensor emits an audible warning signal.
Intervals: 1 minute, 30 seconds, and 10 seconds.
Advanced mode:
Calibration
To calibrate the sensor, it is necessary to measure the lighting level present using
a lux meter and send the value to the sensor using a configuration remote control
(BMSO4001).
Calibration procedure:
Step 1: with only artificial light.
Switch the load on at maximum intensity and close the shutters (if you cannot do
this then wait for sunset).
Measure the level of lighting and send it to the sensor via the remote control.
Step 2: with only natural light.
Turn off the load and open the shutters.
Adjustment
This function allows the sensor to switch off the load 10 minutes (plus a safety
threshold to avoid inappropriate switching off) after the lighting level exceedsthe
brightness threshold, even though movement has been detected.
Contribution of light: amount of supplementary light supplied by switching on the
load.
When the contribution of light parameter is set to “auto” the sensor automatically
calculates the contribution of light.
PIR flush mounting motion sensor

3
ST-00000220- 24/04/2019
K4659
EN
The device can be configured using the MyHOME_Up app with firmware versions after 2.1 and with app versions after 2.2 (for the use see the relevant documentation).
As an alternative, it is also possible to use the MyHOME_Suite configuration software (version after 03.03.73), or physical configurators connected to the appropriate sockets.
2. MyHOME system
When installed in a Lighting Management system, the device can be configured in the following ways:
- Plug & Go: automatic procedure for pairing devices connected to the inputs and outputs.The procedure is activated on powering the device. It is only available for Room Controllers or,
in the case of other devices, paired with the Room Controllers.
- Push & Learn: procedure for pairing different connected devices or changing the assignments defined automatically in the Plug & Go procedure. For more details, please refer to the
specific document.
- Software Configuration: using the Virtual Configurator software; for more details, please refer to the specific manual.
1. Lighting Management System
Modification of the parameters using the configuration remote controls
Configuration
Volume coverage
8 m (PIR)
5 m (PIR)
3 m
(PIR)
≈ 6 m
(PIR)
1,2 m
m
6
4 5 8
Small movements Large movements
For further configurations use the remote control item BMS04001 – BMS04003,
see www.legrandoc.com
ON/OFF Auto function (factory setting)
The sensor parameters are defined by 6 configurator sockets and the functions depend on the operating mode:
Local: A = 1 – 9
Light point: PL = 1 – 9
Mode: M = 0 – 4
Sensitivity of the PIR movement sensor: S = 0 – 3
Control timer: T = 0 – 9
Sensitivity of the lights sensor: D = 0 – 5
Warning: the addresses A = 0 and PL = 0 do not exist
3. Physical configuration
• BMSO4001: advanced configuration remote control
• BMSO4003: simplified configuration remote control
When the sensor receives an IR command from a configuration remote control, it
beeps to confirm that the modification has been acquired.
For more information on the parameters please refer to the technical info sheet of the
remote control BMSO4001.
Return to factory settings:
1st press: Briefly press LEARN, the LED will blink slowly.
2nd press: Press and hold LEARN for 10 seconds until the LED flashes quickly.
PIR flush mounting motion sensor

4
ST-00000220- 24/04/2019
K4659
EN
Available functions Configurator mode
The sensor controls the light unit, the address of which defined in A and PL. When a movement is detected, and if the measured brightness is below
the configured value, the system switches on the specified light unit and keeps it on until the expiry of the period configured using the configurator on
T (automatic mode).The Sensitivity of the PIR movement detector is configured using the configurator on S. For appropriate operation, the sensitivity
of the light sensor must be configured using the configurator on D. If a user manually switches off the lights, a control action can be used to disable the
movement detector until a movement is detected, for a period set byT.
0
In this mode, the sensor only works based on the light conditions, and the movement sensor is disabled.When the brightness falls below the threshold
configured, the system switches on the light unit, switching it off again when the brightness exceeds the set threshold (automatic mode). Configure A
= 1 -9 and PL = 1 - 9, configurators GEN, AMB and GR cannot be connected. In this mode, configurators S andT are not connected.
1
In this mode the sensor does not manage the lights directly, but sends movement and brightness signals to the scenario programmer MH200N. In
this case, the sensor address is entered in A and PL and must be unique inside the system. Therefore it is not possible to connect configurators GEN,
AMB, and GR. In this mode the S andT configurators are not connected because these parameters are directly managed by the scenario programmer.
2
In this mode the system directly manages a light unit, ensuring a consistent brightness level inside the room (this mode is only effective if the sensor
manages the dimmer). The system switches the lights on when a movement is detected and keeps them on based on the presence of people and the
lighting threshold configured (automatic mode). When a movement is detected, and if the measured brightness is below the configured threshold,
the sensor switches the specified light unit on and keeps it on until the expiry of the period configured using the configurator on T. During operation,
the sensor keeps a constant brightness level, depending on the configurator on D. For example, when the brightness of the natural light increases,
the sensor reduces the brightness of the light unit controlled. For appropriate operation, the brightness sensitivity threshold of the sensor must be
configured using the D configurator.The threshold value can be modified using a brightness control.The new value is then configured as the new sensor
threshold, until the next activation
3
In this mode, the sensor only operates on the basis of the brightness conditions, and directly manages a light unit to ensure a constant brightness level
inside the room (this mode is only effective if the sensor manages the dimmer). The movement sensor is disabled. The lights are manually switched
on, and automatically switched off by the sensor, based on the configured brightness threshold (eco mode). Therefore, when the lights are off, the
sensor does not switch them on; but it waits for the user to switch them on manually. During operation, the sensor keeps a constant brightness level,
depending on the configurator on D. For example, when the brightness of the natural light increases, the sensor reduces the brightness of the light unit
controlled. When the lights are off, if the level of natural light decreases, the sensor does not switch them on, but it waits for the user to switch them on
manually. For appropriate operation, the brightness sensitivity threshold of the sensor must be configured using the D configurator. The threshold value
can be modified using a brightness control. The new value is then configured as the new sensor threshold, until the next activation.
4
Configurator on T Lights timer in minutes
No configurator 15
10,5
21
32
45
510
615
720
830
940
Configurator on S Sensitivity
No configurator Low
1Medium
2High
3Very high
1) Duration of the lights timer depending on the configurator on T:
2) Sensitivity of the PIR and US movement detector depending on the configurator
on S:
When using the configurators it is not possible to distinguish between the sensitivity of
the detection technologies, both of which will have the value set by the configurator S.
Warning: To manage scenarios using the sensor signals, via the MH200N scenario programmer, the sensor must be configured in Mode 2.
Configurator on D Sensitivity in lux
No configurator 300
120
2100
3300
4500
51000
3) Sensitivity of the lights sensor depending on the configurator on D:
PIR flush mounting motion sensor

5
ST-00000220- 24/04/2019
K4659
Maintenance Wiring diagrams
Keep the lenses clean.
Clean the surface with a cloth.
Do not use: acetone, detergents for removing tar, or trichloroethylene.
Maintenance using the following products: - Hexane (En 60669-1)
- Methylated spirit
- Soapy water
- Diluted ammonia
- Bleach, diluted 10%
- Glass detergents
BUS
EN
PIR flush mounting motion sensor
This manual suits for next models
3
Table of contents
Other Bticino Accessories manuals

Bticino
Bticino 92/12 User manual

Bticino
Bticino BMSA2202 User manual

Bticino
Bticino 393017D User manual

Bticino
Bticino 4141PC User manual

Bticino
Bticino 393014D User manual

Bticino
Bticino KG4141AC User manual

Bticino
Bticino K8003 User manual

Bticino
Bticino 393015D User manual

Bticino
Bticino 3585C User manual
Popular Accessories manuals by other brands

Bryant
Bryant SYSTMBBSAM01 Installation and start-up instructions

MONDOLUX
MONDOLUX AGLO-EU-PLUG installation manual

OZTENT
OZTENT Foxwing 270 Awning Installation & user manual

G3
G3 CABRIO 30 AR user manual

Carefree
Carefree LATITUDE Service manual

Design
Design SCENTED INTERIORS ARC 2 User manual installation