manuals.online logo
Brands
  1. Home
  2. •
  3. Brands
  4. •
  5. Bticino
  6. •
  7. Touch Panel
  8. •
  9. Bticino MyHOME 3488 User manual

Bticino MyHOME 3488 User manual

www.homesystems-legrandgroup.com
LE10294AB-02PC-18W08
3488
0 672 59
• Altezza consigliata salvo diversa normativa vigente.
• Recommended height, unless different regulations are specified.
• Hauteur conseillée sauf autre norme en vigueur.
• Empfohlene Höhe falls die gesetzlichen Vorschriften
nichts anderes vorschreiben.
• Altura recomendada salvo normativa vigente
diferente.
• Aanbevolen hoogte behoudens andere normen in voege.
• Altura aconselhada a não ser se a norma em vigor for
diferente.
• Συνιστώμενο ύψος εκτός άλλου κανονισμού.
•  ,   
 .
• Zalecana wysokość z zastrzeżeniem innych
obowiązujących przepisów.
• Yürürlüktek standarttan değşk olan harç tavsye
edlen yükseklk.
•推荐高度,除非另有适行的规定。
160 – 165 cm
90 – 130 cm
25 mm
147 mm
196 mm
- Situazione con scatola incassata tra 0 e 4 mm
- Situation with flush-mounted box between 0 and 4 mm
- Situation avec boîtier à encastrer entre 0 et 4 mm
- Ansicht einer UP-Dose zwischen 0 und 4 mm
- Situación con caja de empotrar entre 0 y 4 mm
- Situatie met ingebouwde doos tussen 0 en 4 mm
- Situação com caixa embutida entre 0 e 4 mm
- Κατάσταση με εντοιχισμένο κουτί από 0 έως 4 mm
-      0  4 
- Sytuacja z puszką podtynkową od 0 do 4 mm
- 0 la 4 mm arası ankastre kutu le durum
- 嵌盒0至4 mm的情况
10 20 30
0 – 4 mm Patent
Pending
0 – 4 mm
CLACK
1
2
A0 – 4 mm
3487
• Installazione da incasso con accessorio 3487
• Flush-mounting installation with accessory 3487
• Installation encastrée avec accessoire 3487
• UP-Installation mit Zubehör 3487
• Instalación empotrada con accesorio 3487
• Inbouwinstallatie met accessoire 3487
• Instalação a encaixar com o acessório 3487
• Eντοιχισμένη εγκατάσταση με παρελκόμενο 3487
•     3487
• Instalacja podtynkowa za pomocą akcesoria 3487
• 3487 aksesuarı le gömme kurulum
• 配件3487嵌入安装
2
3
x4 4
5
6
B
- Situazione con scatola incassata tra 4 e 9 mm oppure tra 9 e 14 mm
- Situation with flush-mounted box between 4 and 9 mm or between 9 and 14 mm
- Situation avec boîtier à encastrer entre 4 et 9 mm ou entre 9 et 14 mm
- Ansicht einer UP-Dose zwischen 4 und 9 mm oder zwischen 9 und 14 mm
- Situación con caja de empotrar entre 4 y 9 mm o entre 9 y 14 mm
- Situatie met ingebouwde doos tussen 4 en 9 mm of tussen 9 en 14 mm
- Situação com caixa embutida entre 4 e 9 mm ou entre 9 e 14 mm
- Κατάσταση με εντοιχισμένο κουτί από 4 και 9 mm ή από 9 και 14 mm
-      4  9    9  14 
- Sytuacja z puszką podtynkową od 4 do 9 mm lub od 9 do 14 mm
- 4 la 9 mm arası veya 9 la 14 mm arası ankastre kutu le durum
- 嵌盒4至9 mm或9至14 mm的情况
CLACK
1
x 8
CLACK
10 20 30
4 – 14 mm
Patent
Pending
4 – 14 mm
3487
3
4 – 9 mm 9 – 14 mm
2
4 – 9 mm 9 – 14 mm
4 – 9 mm 9 – 14 mm
x 8
0–4 mm
CLACK
3
4
5
x4
4
8
6
7
• Installazione con scatole da incasso aventi interassi di Ø
60 mm o Ø 83,5 mm
• Installation with ush-mounted boxes with Ø 60 mm or Ø
83.5 mm centre distance
• Installation avec boîtes encastrées avec entraxe de Ø
60 mm ou Ø 83,5 mm
• Installation mit UP-Dose mit einem Zwischenabstand von
Ø 60 mm oder Ø 83,5 mm
• Instalación con cajas de empotrar con distancia entre
ejes de Ø 60 mm o Ø 83,5 mm
• Installatie met inbouwdozen met een tussenafstand van
Ø 60 mm of Ø 83,5 mm
• Instalação com caixas de embutir tendo distâncias
entre eixos de Ø 60 mm. ou Ø 83,5 mm.
• Εγκατάσταση με εντοιχισμένο κουτί με αξονικές
αποστάσεις από Ø 60 mm ή Ø 83,5 mm
•    , 
  Ø 60   Ø 83,5 
• Instalacja z puszkami podtynkowymi o średnicach Ø 60
mm lub Ø 83,5 mm
• Ml mesafes Ø 60 mm veya Ø 83.5 mm olan kutu
montajlı kurulum
• 安装轴距Ø 60 mm 或 Ø 83.5 mm 的嵌盒
23
4
1
83,5 mm
60 mm
83,5 mm 60 mm
• Installazione a parete
• Wall-mounting installation
• Installation murale
• Wandinstallation
• Instalación mural
• Installatie aan de muur
• Instalação na parede
• Επιτοίχια εγκατάσταση
•  
• Instalacja naścienna
• Duvara kurulum
• 墙面安装
5
• Installazione con scatola da incasso 506E
• Installation with ush-mounted box 506E
• Installation avec boîte encastrée 506E
• Installation mit UP-Dose 506E
• Instalación con caja de empotrar 506E
• Installatie met inbouwdoos 506E
• Instalação com a caixa de embutir 506E.
• Εγκατάσταση με εντοιχισμένο κουτί 506E
•     506
• Instalacja z puszką podtynkową 506E
• 506E kutu montajlı kurulum
• 安装嵌盒506E
• Attenzione: evitare di ssare la staa su superci non piane o irregolari e di eettuare un eccessivo serraggio delle viti, al ne di evitare deformazioni della staa che potrebbero
compromettere la corretta installazione del dispositivo. Il dispositivo deve scorrere nelle apposite guide della staa con una leggera pressione e senza sforzo eccessivo.
• Caution: avoid fastening the bracket on uneven or irregular surfaces and excessive screw tightening, in order to prevent any bracket distortion that may compromise the correct
installation of the device. The device must slide in the appropriate bracket rails with a slight pressure and without straining.
• Attention : éviter de xer la bride sur des surfaces non plates ou irrégulières ainsi que d’eectuer un serrage excessif des vis pour prévenir les déformations de la bride susceptibles de
compromettre la bonne installation du dispositif. Le dispositif doit coulisser sur les guides de la bride prévus à cet eet en exerçant une légère pression sans eort excessif.
• Achtung: den Bügel nicht an unebene Flächen befestigen und die Schrauben nicht übermäßig festziehen, um den Bügel nicht zu verformen und die Installation der Vorrichtung zu
beeinträchtigen. Die Vorrichtung muss in den Führungen des Bügels mit einem leichten Druck mühelos gleiten können.
• Atención: evite jar el soporte en supercies no planas o irregulares y no apriete excesivamente los tornillos para evitar deformaciones del soporte que podrían comprometer la
instalación correcta del dispositivo. El dispositivo ha de deslizarse por las guías correspondientes del soporte con una ligera presión sin esfuerzos excesivos.
• Opgelet: de beugel niet bevestigen aan niet-vlakke of onregelmatige oppervlakken, de schroeven niet te veel aandraaien om de vervorming van de beugel te voorkomen, waardoor de
inrichting niet langer correct kan worden geïnstalleerd. Het apparaat moet met een lichte druk over speciale geleider van de beugel kunnen schuiven, zonder dat daar veel kracht voor nodig is.
• Atenção: evitar xar a braçadeira em superfícies não planas ou irregulares, evitado também apertar excessivamente os parafusos, para impedir deformações do suporte, que
poderiam comprometer a correta instalação do dispositivo. O dispositivo deve deslizar nas expressas guias do suporte com uma leve pressão e sem esforço excessivo.
• Προσοχή: αποφύγετε την στήριξη σε ανώμαλες επιφάνειες ή ακανόνιστες και την πραγματοποίηση υπερβολικής σύσφιγξης των βιδών, ώστε να αποφευχθεί η παραμόρφωση του βραχίονα που θα
μπορούσε να θέσει σ κίνδυνο τη σωστή εγκατάσταση της συσκευής. Η συσκευή θα πρέπει να ολισθαίνει μέσα στους ειδικούς οδηγούς με ελαφρά πίεση και χωρίς υπερβολική προσπάθεια.
• :             ,   
,      .        
     .
• Ostrzeżenie: nie należy mocować wspornika na nierównych powierzchniach i zbyt mocno dokręcać śrub, aby nie dopuścić do jego deformacji, która mogłyby narazić na szwank
prawidłową instalację urządzenia. Urządzenie należy wsunąć w otwory we wsporniku z lekkim naciskiem i bez nadmiernego wysiłku
• Dkkat: aygıtın düzgün kurulumunu etklemesn ve köşebentn deforma olmasını önlemek amacı le köşebent pürüzlü veya düzensz yüzeyler üzernde sabtlemeyn ve vdaları
aşırı sıkıştırmayın. Aygıt aşırı efor sarfetmeden haff br tme le uygun köşebent kılavuzları üzernde kaymalıdır.
• 注意:请勿将支架固定在不平或不规则的表面上,请勿过度拧紧螺丝,以免支架变形,进而影响设备的正确安装。设备应轻压滑动嵌入支架的导轨,不要过分用力。
1
2
5
6
3
4
6
2
3
5
67
4
1
ON
OFF
1
2
BUS
AV
BTICINO SpA
Viale Borri, 231
21100 VARESE
ITALY
Made in Italy
BUS
MH
13
8
14
9
10
11
12
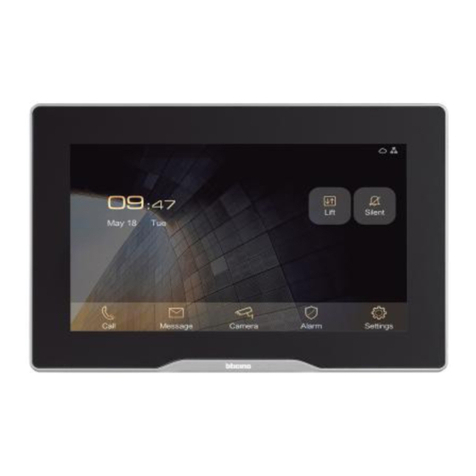
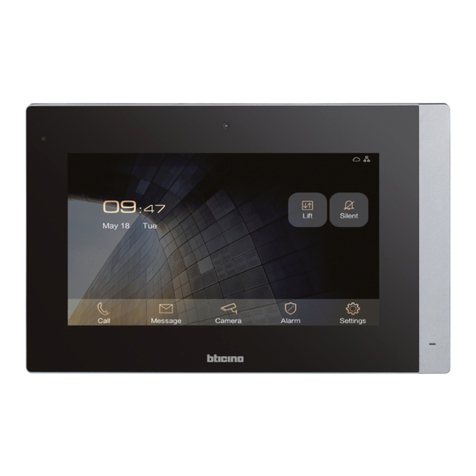
1. Display 7”(Touch screen)
2. Stato Wi-Fi:
Led lampeggiante = Wi-Fi attivo ma non connesso ad una rete
3. Stato Esclusione suoneria:
Led acceso = suoneria chiamata disattivata
4. Tasto videocitofonico:
- apertura serratura (pressione lunga)
- attivazione/disattivazione fonica (pressione breve durante una chiamata)
5. Microfono
6. Sensore di prossimità
7. Led RGB Multifunzione:
LED blu fisso= la funzione segnala lo stato“porta aperta”( sole se l’impianto è
predisposto mediante apposito attuatore)
Led rosso fisso = allarme antifurto in corso
Led rosso lampeggiante= assenza connessione internet
Led verde fisso = il dispositivo è in comunicazione con l’APP
Led verde lampeggiante = chiamata in arrivo, call home e chiamata intercom
Led bianco fisso = presenza messaggi (segreteria, disponibilità aggiornamento o altri
messaggi di sistema)
Led bianco lampeggiante= aggiornamento in corso (download o installazione)
8. Microinterruttore OFF/ON di terminazione di tratta
9. Morsetti (1 - 2) per alimentazione
10.Morsetti per il collegamento al BUS AV
11.Morsetti ( ) per il collegamento di un pulsante esterno di chiamata al piano
12.Morsetti per il collegamento al BUS MH
13.Collegamento ethernet
14.Presa mini USB (di servizio)
Nota: nel momento in cui l’app Door Entry è connessa con l’impianto (es. chiamata in
corso, videocontrollo di una telecamera ecc.), non si possono eseguire altre operazioni
dal display.
1. 7”(Touch Screen) display
2. Wi-Fi Status:
LED flashing = Wi-Fi is active but not connected to a network
3. Bell exclusion status:
LED on = call ringtone disabled
4. Video door entry key:
- door lock release (long pressure)
- audio enabling/disabling (short pressure during a call)
5. Microphone
6. Proximity sensor
7. RGB Multifunction LED:
Blue LED steady = the function indicates the“door open”status (only for systems
preset with appropriate actuator).
Red LED steady = burglar alarm in progress
Red LED flashing = no internet connection
Green LED steady = the device is communicating with the APP
Greeen LED flashing = incoming call, call home and intercom call
White LED steady = notification of messages (answering machine, update availability
or other system messages)
White LED flashing = update in progress (download or installation)
8. Line termination OFF/ON micro-switch
9. Power supply clamps (1 - 2)
10.Clamps for connection to the AV BUS
11.Clamps ( ) for the connection of an external call to the floor pushbutton
12. Clamps for connection to the MH BUS
13.Ethernet connection
14.(Service) USB mini socket
Note: it is not possible to perform other operations from the display when the Door
Entry App is connected to the system (e.g. call in progress, camera CCTV, etc.).
1. Écran 7”(tactile)
2. État Wi-Fi:
Voyant clignotant = Wi-Fi activé mais non connecté à un réseau.
3. État Exclusion sonnerie :
Voyant allumé = sonnerie appel désactivée
4. Touche vidéophonique
- ouverture serrure (pression prolongée)
- activation/désactivation de phonique (pression brève pendant un appel)
5. Micro
6. Capteur de proximité
7. Voyant RGB multifonction:
Voyant bleu fixe = la fonction signale l’état“porte ouverte”(uniquement si
l’installation est prévue à cet effet avec actionneur).
Voyant rouge fixe = alarme antivol en cours
Voyant rouge clignotant = absence de connexion Internet
Voyant vert fix = le dispositif est en communication avec l’APP
Voyant vert clignotant = arrivée d’un appel, call home et appel intercom
Voyant blanc fixe = présence de messages (répondeur, disponibilité mise à jour ou
autres messages de système)
Voyant blanc clignotant = mise à jour en cours (téléchargement ou installation)
8. Microinterrupteur OFF/ON de fin de ligne
9. Bornes (1 – 2) d’alimentation
10.Bornes de branchement au BUS AV.
11.Bornes ( ) de branchement d’un bouton externe d’appel à l’étage.
12.Bornes de branchement au BUS MH.
13.Connexion Ethernet
14.Prise mini USB (de service)
Note: Quand l’appli Door Entry est connectée à l’installation (ex. appel en cours, contrôle
vidéo d’une caméra, etc.), aucune autre opération ne peut être eectuée depuis l’écran.
1. Display 7”(Touchscreen)
2. Wi-Fi-Status:
Blinkende Led = Wi-Fi aktiv aber nicht mit einem Netz verbunden
3. Ausschluss-Status des Läutwerks:
Led leuchtet = Anrufklingel deaktiviert
4. Taste Gegensprechanlage:
- Schloss öffnen (langer Druck)
- Audio aktivieren/deaktivieren (kurzer Druck während eines Gesprächs)
5. Mikrophon
6. Näherungssensor
7. Multifunktionale RGB Led:
Blaue LED fest leuchtend = Die Funktion meldet den Zustand„offene Tür“ (nur wenn
Anlage für einen entsprechenden Aktor vorbereitet ist)
Rote Led leuchtet fest = Diebstahlalarm im Gang
Rote Led blinkt = kein Internetanschluss
Grüne Led leuchtet fest = Kommunikation zwischen Gerät und APP ist hergestellt
Grüne Led blinkt = eintreffen eines Anrufs, call home und Intercom-Anruf
Weiße Led leuchtet fest = Nachrichten vorhanden (Anrufbeantworter, Aktualisierung
möglich oder Benachrichtigungen vom System)
Weiße Led blinkt = Aktualisierung im Gang (Download oder Installation)
8. Mikroschalter OFF/ON am Ende der Strecke
9. Klemmen (1 -2) für Stromversorgung
10.Klemmen zum Anschluss an BUS AV
11.Klemmen ( ) zum Anschluss an eine externe Etagenruftaste
12.Klemmen zum Anschluss an BUS MH
13.Ethernet Anschluss
14.Mini-USB-Steckbuchse (Service)
Anmerkung: wenn die App Door Entry an das System angeschlossen ist (z. B. laufende
Gespräche, Videokamerasteuerung usw.), kann vom Display aus keine andere Bedienung
durchgeführt werden.
7
2
3
5
67
4
1
1. Pantalla 7”(pantalla táctil)
2. Estado Wi-Fi:
Led parpadeante = Wi-Fi activado pero no conectado a una red
3. Estado Exclusión timbre:
Led encendido = timbre llamada desactivado
4. Tecla de videoportero:
- apertura cerradura (presión prolongada)
- activación/desactivación del sonido (presión breve durante una llamada)
5. Micrófono
6. Sensor de proximidad
7. LED RGB multifunción:
LED azul fijo = la función indica el estado“puerta abierta”(solamente con el sistema
predispuesto mediante el actuador correspondiente)
Led rojo fijo = alarma antirrobo en curso
Led rojo parpadeante = ausencia de conexión Internet
Led verde fijo = el dispositivo comunica con la APP
LED verde parpadeante = llamada entrante, call home y llamada intercom
Led blanco fijo = presencia mensajes (contestador, disponibilidad actualización u
otros mensajes de sistema)
Led blanco parpadeante = actualizando (descarga o instalaación)
8. Microinterruptor OFF/ON final de tramo
9. Bornes (1 - 2) para alimentación
10.Bornes para la conexión al BUS AV
11.Bornes ( ) para la conexión de un pulsador externo de llamada a la planta
12.Bornes para la conexión al BUS MH
13.Conexión Ethernet
14.Toma mini USB (de servicio)
Nota: con la app Door Entry conectada al sistema (ej.: llamando, videocontrol de una
cámara, etc.), no se pueden efectuar otras operaciones en la pantalla.
1. Display 7”(touchscreen)
2. Status WiFi:
Led knippert = WiFi geactiveerd maar niet met een netwerk verbonden
3. Status uitsluiting beltoon:
Led brandt = Beltoon oproep gedeactiveerd
4. Toets beeldhuistelefoon:
- opening slot (lang indrukken)
- activering/deactivering geluid (kort indrukken tijdens een gesprek)
5. Microfoon
6. Naderingssensor
7. Multifunctionelel RGB-led:
Blauwe LED aan = de functie signaleert de status “deur geopend”(uitsluitend als de
installatie met de specifieke actuator voorbereid is)
Rode led aan = inbraakalarm geactiveer
Rode led knippert = geen internetverbinding
Groene led aan = apparaat communiceert met de APP
Groen knippert = inkomende oproep, call home en oproep via intercom
Witte led aan = berichten aanwezig (antwoordapparaat, update beschikbaar of andere
systeemberichten)
Witte led knippert = update gestart (download of installatie)
8. Microschakelaar OFF/ON voor de afsluiting van het traject
9. Aansluitklemmen (1 - 2) voor voeding
10.Aansluitklemmen voor de verbinding met de BUS AV
11.Aansluitklemmen ( ) voor de verbinding van een externe knop op de verdieping
12.Aansluitklemmen voor de verbinding met de BUS MH
13.Ethernet-aansluiting
14.Mini-UBS-aansluiting
Opmerking: wanneer de app Door Entry met de installatie verbonden is (bijv. lopend gesprek,
beeldcontrole van een camera, enz.) kunnen geen andere handelingen op het display worden verricht.
1. Ecrã 7”(Touch screen)
2. Estado de Wi-Fi:
LED intermitente = Wi-Fi ativo, mas não conectado a uma rede
3. Estado de exclusão da campainha:
Led aceso = campainha de chamada desactivada
4. Tecla de de intercomunicação vídeo:
- abertura da fechadura (pressão prolongada)
- ativação/desativação fónica (pressão curta durante uma chamada)
5. Microfone
6. Sensor de proximidade
7. Led RGB Multifunção:
LED azul fixo = A função sinaliza a condição“porta aberta”(somente se a instalação
estiver configurada por meio de expresso atuador).
LED vermelho fixo = alarme antifurto em andamento
Led vermelho intermitente = sem conexão à internet
Led verde fixo = O dispositivo está em comunicação com o aplicativo (APP)
Led verde intermitente = Chamada em chegada, call home e chamada vídeo-
intercomunicadora)
Led branco fixo = presença de mensagens (atendedor de chamadas, disponibilidade
de atualização ou outras mensagens do sistema)
Led branco intermitente = atualização em andamento (baixando ou instalando)
8. Micro-interruptor OFF/ON de terminação do segmento
9. Bornes (1-2) para alimentação
10. Bornes para a conexão ao BUS AV
11. Bornes ( ) para a conexão de um botão externo de chamada no piso
12. Bornes para a conexão ao BUS MH
13. Conexão Ethernet
14. Tomada mini USB (de serviço)
Nota: quando o aplicativo Door Entry está conectado ao sistema (por exemplo, chamada
em andamento, controlo-vídeo de uma câmara, etc.), não será possível efetuar outras
operações por meio do visor.
1. Display 7”(Touch screen)
2. Κατάσταση Wi-Fi:
Λυχνία LED διακοπτόενου φωτισού = ενεργή σύνδεση Wi-Fi, αλλά συνδεδεένη σε
ένα δίκτυο
3. Κατάσταση Αποκλεισού ήχων:
LED ενεργοποιηένο = ήχοι κλήση απενεργοποιηένοι
4. Πλήκτρο θυροτηλεφώνου:
- Άνοιγα κλειδαριά (παρατεταένη πίεση)
- φωνητική ενεργοποίηση/απενεργοποίηση (σύντοη πίεση κατά την κλήση)§
5. Μικρόφωνο
6. Αισθητήρα εγγύτητα
7. Πολυλειτουργικό Led RGB:
LED πλε σταθερό= η λειτουργία σηατοδοτεί την κατάσταση“ανοικτή θύρα”(όνο αν το
σύστηα διατίθεται έσω ενό ειδικού ενεργοποιητή)
Κόκκινο σταθερό Led = αντικλεπτικό συναγερό σε εξέλιξη
Led κόκκινο διακοπτόενου φωτισού = απουσία σύνδεση ίντερνετ
Led πράσινο σταθερό = το σύστηα είναι σε επικοινωνία ε την APP
Πράσινο Led που αναβοσβήνει = εισερχόενη κλήση, call home και κλήση intercom
Σταθερό Led λευκό = παρουσία ηνυάτων (τηλεφωνητή, διαθεσιότητα ενηέρωση ή άλλων
Led λευκό διακοπτόενου φωτισού= ενηέρωση σε εξέλιξη (download ή εγκατάσταση)
8. Μικροδιακόπτη OFF/ON τερατισού περιοχή
9. Τερατικά (1-2) για ισχύ
10.Τερατικά για τη σύνδεση ε το BUS AV
11.Τερατικά ( ) για τη σύνδεση ενό εξωτερικού πλήκτρου κλήση στον όροφο
12.Τερατικά για τη σύνδεση ε το BUS MH
13.Σύνδεση Ethernet
14.Μίνι βύσα USB (λειτουργία)
Σηείωση: Την στιγή κατά την οποία η εφαρογή Door Entry είναι συνδεδεένη ε το
σύστηα (πχ. κλήση σε εξέλιξη, θυροτηλέφωνο ια τηλεκάερα κλπ.), δεν γίνεται να
εκτελεστούν άλλε διαδικασίε από το display.
ON
OFF
1
2
BUS
AV
BTICINO SpA
Viale Borri, 231
21100 VARESE
ITALY
Made in Italy
BUS
MH
13
8
14
9
10
11
12
8
2
3
5
67
4
1
1.  7”()
2.  Wi-Fi:
  = Wi-Fi ,     
3.   :
  =   
4.  :
-   ( )
- /   (    )
5. 
6.  
7.  RGB :
    =    
« » (    
  )
      =   

   =  -
      =    
 
   =  , call home   
      =  
(,      )
   =   (  )
8.  /  
9.  (1 - 2)  
10.     AV
11. ( )       
12.     MH
13. Ethernet
14. mini USB ()
:   Door Entry    (,
 ,    ..),     
  .
1. Wyświetlacz 7”(ekran dotykowy)
2. Stan Wi-Fi:
Dioda Led migająca = aktywny Wi-Fi, ale nie podłączony do sieci
3. Stan wyłączenia dźwięku:
Dioda Led włączona = Dzwonek wywołania wyłączony
4. Klawisz wideodomofonu:
- otwieranie zamka (długie naciśnięcie)
- aktywacja / dezaktywacja (krótkie naciśnięcie w trakcie rozmowy)
5. Mikrofon
6. Czujnik zbliżeniowy
7. Wielofunkcyjne LED RGB:
Stała niebieska dioda LED = funkcja wskazuje stan„otwartych drzwi”(tylko jeśli
system jest przygotowany za pomocą specjalnego siłownika)
Czerwona dioda LED stała = alarm antywłamaniowy w toku
Czerwona dioda LED miga = brak połączenia z Internetem
Zielona dioda LED stała= urządzenie komunikuje się z aplikacją
Zielona dioda LED miga = połączenie przychodzące, call home i połączenie interkom
Biała dioda LED stała = obecność wiadomości (automatyczna sekretarka, dostępność
aktualizacji lub inne komunikaty systemowe)
Biała dioda LED miga = aktualizacja w toku (pobieranie lub instalacja)
8. Mikrowyłącznik OFF/ON zakończenia odcinka.
9. Zaciski (1 - 2) do zasilacza
10. Zaciski do podłączenia do magistrali AV
11. Zaciski ( ) do podłączenia zewnętrznego przycisku wywołania na piętrze.
12. Zaciski do podłączenia do magistrali MH
13.Podłączenie do sieci Ethernet
14.Gniazdo mini USB (obsługi)
Uwaga: Gdy aplikacja Door Entry jest podłączona do systemu (np. połączenie w toku,
kamera wideo itp.), nie można wykonywać innych operacji na wyświetlaczu.
1. 7“(Dokunmatk Ekran) ekran
2. W-F Durumu:
LED yanıp sönüyor = W-F etkn, ancak br ağa bağlı değl
3. Zl ses harç tutma durumu:
LED açık = çağrı zl ses devre dışı
4. Görüntülü kapı telefonu tuşu:
- kapı kldnn açılması (uzun basma)
- sesl açma/kapatma (çağrı sırasında kısa basma)
5. Mkrofonu
6. Yakınlık sensörü
7. Çok İşlevl RGB (KYM) LED:
Sabt mav led = İşlev“açık kapı”durumunu gösterr (yalnızca uygun aktüatörle
önceden ayarlanmış sstemler çn)
Kırmızı LED sabt = hırsız alarmı devam edyor
Kırmızı LED yanıp sönüyor = nternet bağlantısı yok
Yeşl sabt LED = chaz APP le letşm kuruyor
Yeşl LED yanıp sönüyor = gelen çağrı, call home ve nterkom çağrı
Beyaz LED sabt = mesaj bldrm (telesekretere, güncelleme durumu veya dğer
sstem mesajları)
Beyaz LED yanıp sönüyor = güncelleme devam edyor (ndrme veya yükleme)
8. Kısım btş OFF/ON mkro anahtarı
9. Besleme kaynağı termnaller (1 - 2)
10.AV BUS’a bağlantı çn termnaller
11.Kata harc br çağrı butonu bağlamak çn termnaller ( )
12.BUS MH’a bağlantısı çn termnaller
13.Ethernet Bağlantısı
14.(Servs) USB mn soket
Not: app Door Entry ssteme bağlandığında ekrandan başka şlemler gerçekleştrmek
mümkün değldr (örneğn, çağrı devam edyor, tele kamera vdeo kontrolü vb.)
1. 7”显示屏(触摸屏)
2. Wi-Fi状态:
Led闪烁 = Wi-Fi有效但未连接到网络
3. 解除铃音状态:
Led亮起 = 禁用呼叫铃音
4. 大门视频对讲机按键:
- 打开门锁(长按)
- 启用/禁用声音(在呼叫中短按)
麦克风
5. 接近传感器
6. 多功能RBG LED:
Led蓝色固定亮起 = 这个功能表示“门开着”的状态(仅在系统设备配有专门的
执行器情况)
Led红色固定亮起 = 防盗报警进行中
Led红色闪烁 = 没有互联网连接
Led绿色固定亮起 = 设备正与APP程序通信
Led绿色闪烁 = 来电(呼叫)和室内分机呼叫
7. Led白色固定亮起 = 有信息(电话秘书、可用更新或其它系统信息)
Led白色闪烁 = 更新进行中(下载或安装)
8. 线程末端OFF/ON微开关
9. 电源接线插槽(1-2)
10.连接到BUS AV的接线插槽
11.连接呼叫楼层外部按键的接线插槽( )
12.连接到BUS MH的接线插槽
13.连接乙太网
14.迷你USB(服务)插口
备注:在Door Entry程序连接系统设备时(如:正在呼叫、摄像头视频监控等),
不能在显示屏上进行其它操作。
ON
OFF
1
2
BUS
AV
BTICINO SpA
Viale Borri, 231
21100 VARESE
ITALY
Made in Italy
BUS
MH
13
8
14
9
10
11
12
9
• Per qualsiasi altra informazione sull’installazione ed il funzionamento del dispositivo
fai riferimento al relativo Manuale Utente ed al relativo Manuale Installatore, tutti
disponibili sul sito: www.homesystems-legrandgroup.com
• For any other information on its installation and operation, refer to the User Manual and to
the Installer Manual, both available at: www.homesystems-legrandgroup.com
• Pour toute information sur l’installation et sur le fonctionnement du dispositif, faire
référence au Manuel Utilisateur et au Manuel Installateurs correspondants, tous deux
disponibles sur le site: www.homesystems-legrandgroup.com
• Weitere Informationen zur Installation und zum Betrieb der Vorrichtung sind im Benutzer-
und im Installationshandbuch enthalten. Beide stehen in folgender Webseite zur
Verfügung: www.homesystems-legrandgroup.com
• Para obtener información sobre la instalación y el funcionamiento del dispositivo
consulte el Manual del Usuario correspondiente y el Manual del Instalador relativo;
todos ellos están en la web: www.homesystems-legrandgroup.com
• Voor overige informatie over de installatie en de werking van het apparaat, raadpleeg
de gebruikers- en installatiehandleiding, welke u kunt vinden op de website: www.
homesystems-legrandgroup.com
• Para qualquer outra informação inerente à instalação e o funcionamento do dispositivo,
rogamos-lhe consultar o respetivo Manual do Utilizador e o respetivo Manual do
Instalador, todos disponíveis no sítio: www.homesystems-legrandgroup.com
• Για οποιαδήποτε πληροφορία σχετικά με την εγκατάσταση και τη λειτουργία της συσκευής,
ανατρέξτε στο Εγχειρίδιο Χρήσης του αντίστοιχου και το σχετικό Εγχειρίδιο Εγκατάστασης,
όλα διαθέσιμα στην ιστοσελίδα: www.homesystems-legrandgroup.com
•          
      , 
 : www.homesystems-legrandgroup.com
• Wszystkie inne informacje na temat instalacji i funkcjonowania urządzenia znajdują się w
odnośnej Instrukcji Użytkownika i odnośnej Instrukcji Instalatora, wszystkie dostępne na
stronie: www.homesystems-legrandgroup.com
• Kurulumu ve çalışması le lgl dğer blgler çn, www.homesystems-legrandgroup.com
adresndek Kullanıcı Kılavuzu’na ve Kurulumu yapan kş Kılavuzu’na başvurun.
• 有关安装和设备运行的其它信息,请参照相关的用户手册和安装手册,可登
录:www.homesystems-legrandgroup.com
F411U2F411U2
3488
0 672 59
BUS
MH
BUS
AV 1 – 2
MyHOMEServer1
System Speed Link
SCS2-1
Modem router Wi-Fi
346841
1 – 2
Montante
Riser
Montant
Steigleitung
Montante
Stijgleiding
Montante
Ορθοστάτης
Стояк
Pion
Yükseltici
安装支架
346020
PRI
1 2
346020
PRI: 220- 240V~
175-165mA
50/60Hz
1-2: 27Vdc
600mA
110 –240 Vac
PRI
SCS
E49
110 –240 Vac
ONOFF
• Schema d’esempio
• Example diagram
• Exemple de schéma
• Beispielschema
• Esquema de ejemplo
• Voorbeeldschema
• Esquema de exemplo
• Διάγραμμα παραδείγματος
•  
• Schemat przykładowy
• Örnek dyagram
• 示例图
• Per scaricare l’App Door Entry for HOMETOUCH utilizza il seguente QR code
• Use the following QR code to download the Door Entry App for HOMETOUCH
• Pour télécharger l’appli Door Entry pour HOMETOUCH, utiliser le code QR suivant
• Um die App Door Entry für HOMETOUCH herunter zu laden, verwenden Sie folgenden QR-Code
• Para descargar la App Door Entry for HOMETOUCH, use el siguiente QR code
• Gebruik de volgende QR-code om de app Door Entry te downloaden voor HOMETOUCH
• Para baixar o App Door Entry para HOMETOUCH usar o seguinte código QR
• Για να κατεβάσετε την εφαρμογή App Door Entry για το HOMETOUCH χρησιμοποιήστε τον
ακόλουθο QR code
•    Door Entry for HOMETOUCH  
  QR
• Aby pobrać aplikację Door Entry dla HOMETOUCH, użyj następującego kodu QR.
• App Door Entry for HOMETOUCH’ı ndrmek çn aşağıdak QR kodunu kullanın
• 下载HOMETOUCH 的Door Entry程序可扫描以下二维码
www.homesystems-legrandgroup.com
10
• Per un corretto accoppiamento magnetico tra PI ed apparecchio acustico ti consigliamo di posizionarti frontalmente al dispositivo ad una distanza di 25 – 35 cm.
Ti ricordiamo che la presenza di metallo e rumore di fondo generato da apparecchiature elettriche/elettroniche (es. computer), può compromettere la qualità e le performance
del dispositivo di accoppiamento.
• To ensure correct magnetic coupling between the IU and the acoustic device, we recommend a position in front of the device, at a distance of 25 – 35 cm.
It is reminded that the presence of metal and background noise generated by electric/electronic devices (e.g. computer) may compromise the performance and the quality of the coupling device.
• Pour garantir un bon accouplement magnétique entre PI et appareil acoustique, il est recommandé de se placer face au dispositif à une distance de 25 – 35 cm.
Il est rappelé que la présence de métal et de bruit de fond généré par des appareillages électriques/électroniques (ex. ordinateurs) peut compromettre la qualité et les
performances du dispositif d’accouplement.
• Zur richtigen magnetischen Kopplung zwischen TS und akustisches Gerät, empfehlen wir, sich vor das Gerät in einem Abstand von 25 – 35 cm zu stellen.
Bitte beachten Sie, das Metallgegenstände und Grundgeräusche elektrischer/elektronischer Geräte (z.B. PC) die Qualität und Leistung der Kopplungsvorrichtung beeinträchtigen können.
• Para un correcto acoplamiento magnético entre la UI y el aparato acústico, le aconsejamos situarse en frente del dispositivo a una distancia aproximada de 25 – 35 cm.
Recuerde que la presencia de metal y ruido de fondo generado por aparatos eléctricos/electrónicos (por ejemplo un PC) puede comprometer la calidad y la eciencia del
dispositivo de acoplamiento.
• Voor een correcte magnetische koppeling tussen de binnenpost en het akoestische apparaat raden we aan om op circa 25 – 35 cm voor het apparaat te gaan staan.
Onthoud dat de aanwezigheid van metaal en achtergrondgeluid veroorzaakt door elektrische/elektronische apparatuur (bijv. computer) de kwaliteit en de prestaties van het
koppelapparaat kunnen beïnvloeden.
• Para um correto acoplamento magnético entre a Unidade Interna e o aparelho acústico sugerimos-lhe posicionar-se frontalmente ao dispositivo numa distância de 25 – 35 cm.
Lembramos-lhe que a presença de metal e ruído de fundo, gerado por equipamentos elétricos/eletrônicos (por exemplo: computador), pode afetar a qualidade e o desempenho
do dispositivo de acoplamento.
• Για τη σωστή μαγνητική σύζευξη μεταξύ του PI και της ακουστικής συσκευής σας προτείνουμε την εμπρόσθια θέση στο σύστημα σε μια απόσταση 25 – 35 cm.
Παρακαλώ σημειώστε ότι η παρουσία του μετάλλου και του θορύβου που παράγεται από ηλεκτρικές/ηλεκτρονικές συσκευές (π.χ.. Υπολογιστών), μπορούν να επηρεάσουν την ποιότητα
και την απόδοση της διάταξης ζεύξης.
•                 25 – 35 .
 ,      ,  /  ( ),   
   .
• W celu prawidłowego sprzężenia magnetycznego pomiędzy aparatem wewnętrznym (AW) i aparatem akustycznym, należy się ustawić naprzeciw urządzenia w odległości 25-30 cm.
Należy pamiętać, że obecność metalu i hałas generowany przez sprzęt elektryczny/elektroniczny (np. komputer) może mieć wpływ na jakość i wydajność urządzenia sprzęgającego.
• DÜ ve ştme chazı arasında doğru br manyetk kuplaj çn, chazın ön kısmına doğru 25 - 35 cm’lk br mesafede bulunmanızı önerrz.
Metal nesnelern varlığı ve elektrkl /elektronk ekpmanın (örneğn blgsayarlar) oluşturduğu arka plan gürültüler, kuplaj chazının kaltesn ve performansını olumsuz
etkleyebleceğn hatırlatırız.
• 有关PI与音响正确的磁耦合,建议站在设备面前25 – 35厘米的距离。
谨记有金属或电气/电子设备产生的背景噪音可能影响品质和耦合装置的性能。
• Commuta l’apparecchio acustico in posizione T
• Switch the acoustic device to the T position
• Commuter l’appareil acoustique sur la position T
• Umschalten des akustischen Geräts auf Position T
• Conmuta el aparato acústico a la posición T
• Schakelt het akoestische apparaat in positie T om
• Comuta o aparelho acústico em posição T
• Ματαγάγει την ακουστική συσκευή σε θέση του Τ
•      T
• Przełącza aparat akustyczny w położenie T
• İştme chazını T konumuna getrr.
• 将音响切换到位置T
• Utilizzo teleloop
• Inductive loop use
• Utilisation teleloop
• Gebrauch des Teleloops
• Uso del teleloop
• Gebruik teleloop
• Utilização teleloop
• Χρήση Teleloop
•  teleloop
• Zastosowanie teleloop
(pętli indukcyjnej)
• Teleloop kullanımı
• 使用Teleloop
25-35 cm
4
0
cm
• Disinstallazione con scatola 3487
• Disassembling with 3487 box
• Désinstallation avec boîtier 3487
• Deinistallation mit Dose 3487
• Desinstalación con caja 3487
• De-installatie met inbouwdoos 3487
• Desinstalação com caixa 3487
• Απεγκατάσταση με κουτί 3487
•    3487
• Demontaż z puszką 3487
• 3487 kutusu le kaldırma
• 拆除嵌盒3487
1
1
22
1
• Disinstallazione con staffa
• Disassembling with bracket
• Désinstallation avec bride
• Deinistallation mit Bügel
• Desinstalación con soporte
• De-installatie met beugel
• Desinstalação com suporte
• Απεγκατάσταση με βραχίονα
•   
• Demontaż ze wspornikiem
• Braket le kaldırma
• 拆除支架
11
• Avvertenze e diritti del consumatore
Leggere attentamente prima dell’uso e conservare per un riferimento futuro
Divieto di toccare le unità con le mani bagnate
Divieto di utilizzo di pulitori liquidi o aerosol
Divieto di occludere le aperture di ventilazione
Diveto di modicare i dispositivi
Divieto di rimuovere parti di protezione dai dispositivi
Divieto di eseguire il lavoro di installazione da parte di operatore non qualicato
Divieto di installare le unità in prossimità di liquidi e polveri
Divieto di installare le unità in prossimità di fonti di calore
Divieto di installare le unità in prossimità di gas nocivi, polveri metalliche o simili
Divieto di ssaggio delle unità su superci non adatte
Rischio caduta dei dispositivi a causa di cedimento della supercie su cui sono
installati o installazione inappropriata
Togliere l’alimentazione prima di ogni intervento sull’impianto
Attenzione: le operazioni di installazione, congurazione, messa in servizio e ma-
nutenzione devono essere eettuate esclusivamente da personale qualicato.
Assicurarsi che l’installazione a parete sia eettuata correttamente
Eettuare la posa dei cavi rispettando le normative vigenti
Collegare i cavi di alimentazione secondo le indicazioni
Per eventuali espansioni di impianto utilizzare solo gli articoli indicati nelle
speciche tecniche
L’azionamento da remoto può causare danni a persone o cose.
Warnings and consumer rights
Read carefully before use and keep for future reference
Touching the units with wet hands is forbidden
Using liquid cleaners or aerosols is forbidden
Blocking the ventilation openings is forbidden
Modifying the devices is forbidden
Removing protective parts from the devices is forbidden
It is forbidden for unqualied operators to carry out the installation work
Installing the units near liquids and powders is forbidden
Installing the units near heat sources is forbidden
Installing the units near harmful gases, metal dusts or similar is forbidden
Fastening the units on unsuitable surfaces is forbidden
Risk of devices falling because the surface on which they are installed collaps-
es or inappropriate installation
Switch the power supply OFF before any work on the system
Caution: Installation, conguration, starting-up and maintenance must be
performed exclusively by qualied personnel.
Check that the wall installation has been carried out correctly
Lay out the wires respecting the standards in force
Connect the power supply wires as indicated
Use only the items indicated in the technical specications for any system
expansions.
Remote operation may cause damage to people or property.
• Avertissements et droits du consommateur
Lire attentivement avant toute utilisation et installation de nos produits et
conserver pour toute consultation en cas de besoin.
Interdiction de toucher les unités avec les mains mouillées.
Interdiction d’utiliser des produits de nettoyage liquides ou des aérosols.
Interdiction de boucher les ouvertures de ventilation.
Interdiction de modier les dispositifs.
Interdiction des retirer les parties de protection des dispositifs.
Interdiction de coner l’installation à un opérateur non qualié.
Interdiction d’installer les unités à proximité de liquides et poudres/poussières.
Interdiction d’installer les unités à proximité de sources de chaleur.
Interdiction d’installer les unités à proximité de gaz nocifs, de poudres métal-
liques ou autres matières semblables.
Interdiction de xer les unités sur des surfaces non appropriées.
Risque de chute des dispositifs en cas de rupture de la surface sur laquelle ils
sont installés ou mauvaise installation.
Couper l’alimentation avant toute intervention sur l’installation.
Attention: les opérations d’installation, de conguration, de mise en service et
d’entretien doivent être conées à un personnel qualié.
S’assurer que l’installation murale est correctement eectuée.
Eectuer la pose des câbles dans le respect des normes en vigueur.
Brancher les câbles d’alimentation dans le respect des indications fournies.
Pour les éventuelles extensions de l’installation, utiliser uniquement les ar-
ticles indiqués dans les caractéristiques techniques.
L’actionnement à distance peut causer des dommages corporels ou matériels.
• Hinweise und Rechte der Verbraucher
Vor Gebrauch, die Hinweise aufmerksam durchlesen und sorgfältig aufbe-
wahren, um sie auch in Zukunft nachschlagen zu können.
Verbot, die Einheiten mit nassen Händen zu berühren
Verbot, Flüssigreiniger oder Aerosol zu benutzen
Verbot, die Belüftungsschlitze abzudecken
Verbot, die Vorrichtungen zu ändern
Verbot, die Schutzbleche von den Vorrichtungen abzunehmen
Verbot, die Installationsarbeiten von nicht qualiziertem Personal vornehmen
zu lassen
Verbot, die Einheit in der Nähe von Flüssigkeiten und Staub zu installieren
Verbot, die Einheit in der Nähe von Wärmequellen zu installieren
Verbot, die Einheit in der Nähe von giftigem Gas, Metallstaub o. ä. zu installieren
Verbot, die Einheit an ungeeignete Flächen zu befestigen
Risiko des Herabfallens der Vorrichtungen durch Nachlassen der Auageä-
che oder wegen falscher Installation
Die Stromversorgung abtrennen, bevor an der Anlage gearbeitet wird.
Achtung: die Installation, Konguration, Inbetriebnahme und Wartung dürfen
nur von qualizierten Fachleuten vorgenommen werden.
Sicherstellen, dass die Wandmontage richtig vorgenommen wird
Die Kabeln gemäß geltenden Normen verlegen
Die Stromkabeln gemäß Anweisungen anschließen
Bei eventuellen Anlagenerweiterungen ausschließlich die Artikel verwenden,
die in den technischen Spezikationen angegeben sind.
Die Betätigung von fern kann Personen- oder Sachschäden verursachen.
• Advertencias y derechos del consumidor
Lea detenidamente antes del uso y conserve la documentación para consultas
futuras
Se prohíbe tocar las unidades con las manos mojadas
Se prohíbe el uso de limpiadores líquidos o aerosoles
Se prohíbe tapar las aperturas de ventilación
Se prohíbe modicar los dispositivos
Se prohíbe desmontar las partes de protección de los dispositivos
Se prohíbe efectuar las operaciones de instalación por parte de operadores
no cualicados
Se prohíbe instalar las unidades cerca de líquidos y polvo
Se prohíbe instalar las unidades cerca de fuentes de calor
Se prohíbe instalar las unidades cerca de gases nocivos, polvo metálico o pro-
ductos similares
Se prohíbe jar las unidades en supercies no aptas
Riesgo de caída de los dispositivos por hundimiento de la supercie de mon-
taje o instalación inadecuada
Corte la alimentación antes de intervenir en el sistema
Atención: Las operaciones de instalación, conguración, puesta en servicio y
mantenimiento han de ser efectuadas exclusivamente por personal cualicado.
Asegúrese de que la instalación se haya efectuado correctamente
La colocación de los cables ha de cumplir las normativas vigentes
Conecte los cables de alimentación según las indicaciones
Para posibles expansiones del sistema, use solamente los artículos indicados
en las especicaciones técnicas.
El accionamiento a distancia puede causar daños a personas o cosas.
• Waarschuwingen en rechten van de consument
Vóór het gebruik doorlezen en voor naslag bewaren
Het is verboden het apparaat met natte handen aan te raken
Het is verboden vloeibare reinigers of verstuivers te gebruiken
Het is verboden de ventilatie-openingen af te sluiten
Het is verboden het apparaat te wijzigen
Het is verboden om beschermende onderdelen van het apparaat te verwijderen
Het is verboden het apparaat door onervaren personeel te laten installeren
Het is verboden de apparaten te installeren in de buurt van vloeistoen en stof
Het is verboden de apparaten te installeren in de buurt van warmtebronnen
Het is verboden de apparaten te installeren in de buurt van schadelijke gas-
sen, metaalstof of soortgelijke materialen
Het is verboden de units te bevestigen aan ongeschikte oppervlakken
Gevaar voor vallen van de apparaten als het oppervlak waarop ze geïnstal-
leerd zijn instort of wegens een verkeerde installatie
Verwijder de spanning alvorens werkzaamheden aan de installatie te verrichten
Opgelet: laat de installatie, de conguratie, de inbedrijfstelling en het onderhoud
uitsluitend verrichten door gekwaliceerd personeel.
Controleer of de installatie aan de muur correct is verricht
Breng de kabels aan volgens de toepasselijke normen
Sluit de voedingskabels aan volgens de aanwijzingen
Gebruik uitsluitend de artikelen die in de technische specicaties zijn gegeven
voor de eventuele uitbreiding van de installatie.
De aansturing op afstand kan persoonlijk letsel of materiële schade veroorzaken.
12
• Advertências e direitos do consumidor
Ler atentamente antes do uso e guardar para qualquer futura referência
Proibição de tocar as unidades com as mãos molhadas
Proibição da utilização de produtos de limpeza líquidos ou aerossóis
Proibição de obstruir as aberturas de ventilação
Proibição de alterar os dispositivos
Proibição de remover peças de proteção dos dispositivos
Proibição de realizar trabalhos de instalação por parte de operadores não qualicados
Proibição de instalar as unidades em proximidade de líquidos e pós
Proibição de instalar as unidades em proximidade de fontes de calor
Proibição de instalar as unidades em proximidade de gases nocivos, pós me-
tálicos ou similares
Proibição de xação das unidades sobre superfícies não adequadas
Risco de queda dos dispositivos, devido a desabamento da superfície em que
estão instalados ou instalação inadequada
Tirar a alimentação elétrica antes de qualquer intervenção sobre a instalação
Atenção: as operações de instalação, conguração, colocação em serviço e manu-
tenção devem ser realizadas exclusivamente por pessoal qualicado.
Certicar-se de que a instalação de parede seja realizada corretamente
Proceder à colocação dos cabos atendo-se escrupulosamente às normas vigentes
Conectar os cabos de alimentação de acordo com as prescrições
Face a eventuais extensões de instalações utilizar exclusivamente os artigos
listados nas especicações técnicas.
O acionamento à distância pode causar danos às pessoas ou aos bens.
• Προειδοποιήσει και δικαιώατα των καταναλωτών
ιαβάστε προσεκτικά τι οδηγίε πριν από τη χρήση και φυλάξτε τι για ελ-
λοντική αναφορά σα
Μην αγγίζετε τη συσκευή ε βρεγένα χέρια.
Απαγόρευση τη χρήση των υγρών καθαριστικών ή σπρέι
Μη φράζετε τι οπέ εξαερισού
Απαγόρευση των τροποποιήσεων των συσκευών
Απαγορεύεται να αφαιρέσετε τα προστατευτικά τήατα από τι συσκευέ
Απαγόρευση εκτέλεση των εργασιών εγκατάσταση από η έπειρο χειριστή
Απαγόρευση τη εγκατάσταση των ονάδων κοντά σε υγρά και σκόνε
Απαγόρευση τη εγκατάσταση των ονάδων κοντά σε πηγέ θερότητα
Απαγόρευση τη εγκατάσταση κοντά σε επιβλαβή αέρια, εταλλική σκόνη
ή τα παρόοια υλικά
Απαγόρευση σύνδεση εταξύ των ονάδων σε η κατάλληλε επιφάνειε
Κίνδυνων πτώση των συσκευών λόγω δυνητική υποχώρηση τη επιφάνει-
α στην οποία έχουν εγκατασταθεί ή λόγω ακατάλληλη εγκατάσταση
ιακοπή ρεύατο πριν από οποιαδήποτε παρέβαση στο σύστηα
Προσοχή: η εγκατάσταση, διαόρφωση, λειτουργία και συντήρηση πρέπει να
εκτελείται αποκλειστικά από εξειδικευένο προσωπικό.
Βεβαιωθείτε ότι η επιτοίχια εγκατάσταση έχει γίνει σωστά
Πραγατοποιήστε την τοποθέτηση των καλωδίων ε συόρφωση στου κανονισού
Συνδέστε τα καλώδια τροφοδοσία, κατά τι υποδείξει
Για τυχόν επεκτάσει εγκαταστάσεων χρησιοποιείστε όνο τα αντικείενα
που περιλαβάνονται στι τεχνικέ προδιαγραφέ.
Η ενεργοποίηση από απόσταση πορεί να προκαλέσει υλικέ ζηιέ και τραυ-
ατισού.
•    
       

     
      
   
    
     
    
       
     
     ,  -
   
     
     , 
  ,   
    -   
:  , ,     -
     .
     
       
    
     ,   -
 .
       .
• Ostrzeżenia i prawa konsumenta
Przed rozpoczęciem użytkowania należy przeczytać dokładnie instrukcje i za-
chować ją dla przyszłych konsultacji
Zakaz dotykania jednostek mokrymi rękoma
Zakaz użytkowania płynnych środków czyszczących lub aerozolu
Zakaz zatykania otworów wentylacyjnych
Zakaz modykowania urządzeń
Zakaz usuwania elementów ochronnych urządzenia
Zakaz wykonywania prac instalacyjnych przez niewykwalikowanego operatora
Zakaz instalacji jednostek w pobliżu cieczy lub pyłów
Zakaz instalacji jednostek w pobliżu źródeł ciepła
Zakaz instalacji jednostek w pobliżu szkodliwych gazów, pyłów metalicznych
u tym podobnych
Zakaz mocowania jednostek na nieodpowiednich powierzchniach
Ryzyko upadku urządzeń z powodu niewytrzymania powierzchni, na której
zostały zainstalowane, lub z powodu nieodpowiedniej instalacji
Przed jakąkolwiek interwencją na urządzeniu należy odciąć zasilanie
Uwaga: instalacja, konguracja, uruchomienie i konserwacja muszą być wykony-
wane wyłącznie przez wykwalikowany personel.
Upewnić się, iż instalacja na ścianie została wykonana poprawnie
Podczas układania kabli należy przestrzegać obowiązujące rozporządzenia
Podłączyć kable zasilania zgodnie z instrukcjami
Dla ewentualnego rozbudowania linii należy używać wyłącznie artykuły wy-
mienione w specykacji technicznej.
Zdalna obsługa może spowodować obrażenia ludzi lub mienia.
• Uyarılar ve tüketc hakları
Kullanmadan önce dkkatlce okuyun ve lerde yararlanmak üzere saklayın.
Islak ellerle üntelere dokunmak yasaktır.
Sıvı temzleycler ve aerosol kullanmak yasaktır.
Hava delklern tıkamak yasaktır.
Aygıtlarda değşklk yapmak yasaktır.
Aygıtların koruyucu aksamlarını yerlernden çıkartmak yasaktır.
Vasıı olmayan operatörler tarafından kurulum çalışmasının yapılması yasaktır.
Sıvı ve tozların yakınında üntelern kurulması yasaktır.
Isı kaynaklarının yakınında üntelern kurulması yasaktır.
Zararlı gazlar, metal tozlar veya benzerler yakınında üntelern kurulması yasaktır.
Uygun olmayan yüzeyler üzernde üntelern sabtlenmes yasaktır.
Kurulu oldukları yüzeyn çökmes veya uygun olmayan kurulumdan dolayı
aygıtların düşme rsk.
Tess üzernde her hang br şlem yapmadan önce beslemesn kesn.
Dkkat: Montaj, konfgürasyon, çalıştırma ve bakım sadece ntelkl personel tara-
fından yapılmalıdır.
Duvara kurulumun düzgünce yapıldığını kontrol edn.
Kabloları döşerken yürürlüktek yönetmelklere uyun.
Besleme kablolarını şaret edlen şeklde bağlayın.
Olası tess genleşmelernde sadece teknk şartnamede şaret edlen parçaları kullanın
Uzaktan çalıştırılması cana ve mala zarar vereblr.
• 须知和消费者的权利
请在使用前认真阅读并妥善保存以备将来参考
请勿用湿手触摸设备
禁止使用液体或气溶胶清洁剂
请勿阻塞通风口
禁止修改设备
禁止拆除设备的保护装置
禁止非专业人员从事安装工作
请勿将设备安装在靠近液体和灰尘的地方
请勿将设备安装在靠近热源的地方
请勿将设备安装在靠近有害气体、金属粉尘或类似粉尘的地方
请勿将设备安装在不适合的表面上
安装表面脱落或安装不当可能导致设备掉落
在对系统设备进行任何操作之前请断开电源
注意:安装、配置、调试和维修工作应由专业人员进行。
确保墙面上的安装正确进行
请按照适行的规定布线
请按照说明连接电源线
扩展系统设备时只能使用符合技术规格的产品
远程操控可能对人员或物品造成损害。
Il fabbricante, BTicino S.p.A.,
dichiara che il tipo di apparecchiatura radio Home Touch 7” art. 3488 art. 0 672 59 è
conforme alla direttiva 2014/53/UE.
Il testo completo della dichiarazione di conformità UE è disponibile al seguente indirizzo
Internet:
www.bticino.it/red
Hereby, BTicino S.p.A.,
declares that the radio equipment type Home Touch 7” art. 3488 art. 0 672 59 is in
compliance with Directive 2014/53/EU.
The full text of the EU declaration of conformity is available at the following internet
address:
www.bticino.it/red

This manual suits for next models

1

Other Bticino Touch Panel manuals

Bticino H/L 4684 User manual

Bticino

Bticino H/L 4684 User manual

Bticino 373002 User manual

Bticino

Bticino 373002 User manual

Bticino CLASSE 300X13E User manual

Bticino

Bticino CLASSE 300X13E User manual

Bticino HC 4690 Instruction Manual

Bticino

Bticino HC 4690 Instruction Manual

Bticino 373001 User manual

Bticino

Bticino 373001 User manual

Bticino HC 4690 User manual

Bticino

Bticino HC 4690 User manual

Bticino H/L 4684 User manual

Bticino

Bticino H/L 4684 User manual

Bticino 374005 Operating manual

Bticino

Bticino 374005 Operating manual

Bticino 373005 User manual

Bticino

Bticino 373005 User manual

Popular Touch Panel manuals by other brands

AMX Modero NXD-700Vi Operation/reference guide

AMX

AMX Modero NXD-700Vi Operation/reference guide

Lippert Components Auto Leveling Control quick reference

Lippert Components

Lippert Components Auto Leveling Control quick reference

AXIOMTEK MPC170-831-DC user manual

AXIOMTEK

AXIOMTEK MPC170-831-DC user manual

AMX modero NXT-CV17 Dimension Guide

AMX

AMX modero NXT-CV17 Dimension Guide

Qian QPM-T17-01 user manual

Qian

Qian QPM-T17-01 user manual

VIPA TP 605MQ manual

VIPA

VIPA TP 605MQ manual

AMX NXD-700i Operation/reference guide

AMX

AMX NXD-700i Operation/reference guide

Aaeon AMB-2000HT-E Series user manual

Aaeon

Aaeon AMB-2000HT-E Series user manual

Avalue Technology ARC-1235 Quick reference guide

Avalue Technology

Avalue Technology ARC-1235 Quick reference guide

Iddero HC -KNX Series user guide

Iddero

Iddero HC -KNX Series user guide

VIPA TP 605CQ CAN-2 manual

VIPA

VIPA TP 605CQ CAN-2 manual

IAdea XDS-1073 quick start guide

IAdea

IAdea XDS-1073 quick start guide

Winmate R17IW3S-SPM1 quick start guide

Winmate

Winmate R17IW3S-SPM1 quick start guide

GVS CHTF-3.5/20.1.2 Series user manual

GVS

GVS CHTF-3.5/20.1.2 Series user manual

Phoenix Contact UM EN OPC 7015 user manual

Phoenix Contact

Phoenix Contact UM EN OPC 7015 user manual

AMX MXT-700 Operation/reference guide

AMX

AMX MXT-700 Operation/reference guide

Becker TrafficAssist Pro Z 301 operating instructions

Becker

Becker TrafficAssist Pro Z 301 operating instructions

i3 i3TOUCH Premium user manual

i3

i3 i3TOUCH Premium user manual

manuals.online logo
manuals.online logoBrands
  • About & Mission
  • Contact us
  • Privacy Policy
  • Terms and Conditions

Copyright 2025 Manuals.Online. All Rights Reserved.